Sewerage in a private house is a pipe distribution, consisting of two parts: internal and external. Therefore, when sewer installation is carried out, the process itself is divided into two stages: the assembly of the internal sewer system and the external one. Everything is done separately, taking into account the calculations of the diameter of the pipes and the choice of material from which they are made. The times when the sewerage of a private house was assembled from cast-iron or asbestos pipes have gone into oblivion. They served their purpose by handing over the reins of government to plastic pipes. Therefore, first of all, it is necessary to correctly approach the choice of sewer pipes.
Types of sewer pipes
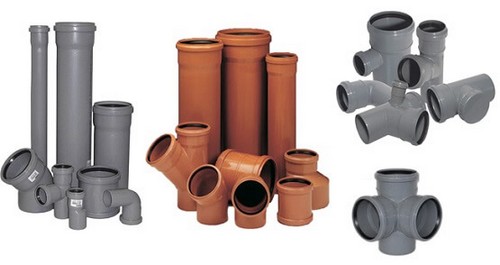
Today, two types of polymer pipes are used to assemble sewers in private homes: PVC and polypropylene. The former are used for the external system, the latter for the internal.
Sewer pipes
Polypropylene sewer pipes are gray in color and have a range of standard diameters from 20 mm to 400 mm. At the same time, their connection is bell-shaped using a rubber cuff, which ensures the tightness of the joint. To facilitate the installation of the sewer system, manufacturers offer various fittings: elbows, bends, crosses, tees, adapters, plugs and other profile products of different diameters.
As for PVC sewer pipes, everything is the same here as regards connections and fittings. But they have an orange or red color, so it will be impossible to confuse. Plus, a diameter that starts at 50mm and ends at 1200mm. For external sewerage of a private house, diameters of 110-200 mm are most often used.
Internal sewerage of a private house
Installation of the internal sewerage of a private house is more difficult than the external one. The thing is that inside the house there are a large number of water consumers: taps, faucets, showers, washing and washing machines, toilets. And they are all located in different rooms. Therefore, the piping has a complex scheme, which is assembled into a single system and brought out, connecting to the external part of the sewer. If the house is built on several floors, then each of them has its own system, and all floors are connected by one vertical riser, which is assembled from a pipe with a diameter of 110 mm.
Usually the riser is installed in the place where the sewerage will be taken out of the house. Here it is important to observe one important rule - the smaller the distance, the more efficiently the system works. Therefore, the riser is installed against the wall of the building, which will be closest to the sewer well or septic tank.
As for the piping of the internal sewer system, you have to take into account the volume of water that must pass through it.
- A pipe with a diameter of 25-32 mm can be removed from the sink.
- From kitchen sink 32-40 mm.
- From a shower or bath 32-50 mm.
- From a washing machine or dishwasher 40-50 mm.
- From the toilet bowl 110 mm.
And the more connections are made in one system, the larger the diameter of the pipe must combine them. For example, if a sink and a dishwasher in the kitchen are connected to one network, then a pipe with a diameter of 40 mm is installed under each of them. But they are connected when they are taken out of the kitchen into a pipe with a diameter of 50 mm, which, for example, will be further combined with a sink and a bathroom, which in the final result will give a combined pipe with a diameter of 110 mm.
Therefore, it is very important to first draw a piping diagram with the exact installation of plumbing fixtures, and only then calculate the dimensions of the piping with an accurate determination of the diameters of the purchased products.
 Scheme of wiring the sewerage of one floor of a private house
Installation process rules
There are certain rules for the installation of sewer pipes, which are installed in the internal wiring.
- The socket of the sewer pipe, which is connected to the very first and last consumer, must be located at least 80 cm from the floor level. That is, this consumer is the farthest from the riser. If there are not so many fittings along the water path, then you can lower the installation level to 30 cm.
- The toilet must be connected to the riser with a pipe of the same diameter as the riser itself. And its length should not exceed 1 m.
- Each plumbing fixture must be equipped with a water seal (siphon).
- The slope of sewer pipes should be 2-3 mm per meter of piping length.
- Fastening to the supporting structures of the building is carried out using special clamps, of which there should be two for each element. Clamps are usually installed at socket connections.
 Internal sewerage in a private house
The plastic pipe is easily cut, so it can be cut to the required length with a hacksaw or a grinder. All connections, as mentioned above, are bell-shaped. Therefore, it will not be difficult to assemble the sewer with your own hands. The main thing is to follow the installation scheme of the sewerage system exactly.
Attention! Where to start installing the sewer: from a riser or from a plumbing fixture, everyone decides for himself.
If a private house has a basement in its design, then the entire wiring of the first floor can be done there. It is convenient in terms of installation and maintenance. Secondly, the pipeline will not be visible, which will increase the space of the premises and the aesthetics of their appearance. Laying sewer pipes in the walls is not recommended. For them, boxes of their various finishing materials are usually constructed with a frame device.
 Installation of sewerage in the basement of the house
External sewerage of a private house
It is easier internal in terms of its installation. But in addition to pipes, the sewer system includes a septic tank or a well, as well as several manholes. The installation of the sewerage system (external) begins with earthworks. With the help of shovels, a pit is dug under a septic tank or a well, and there may be several pits if the septic tank is built in the form of several overflow wells. Further, a trench is dug from it to the house. The main requirement for it is straightness without a large number of bends and turns, plus adhere to the slope towards the well.
By the way, about the slope of the pipeline for the outdoor system. It all depends on the diameter of the pipe used. For example, for pipes with a diameter of 110 mm, the slope should be 20 mm per linear meter of the assembled pipeline. For a pipe of 160 mm - 8 mm slope, for 200 mm - 7 mm.
 The slope of the installation of sewer pipes
As for the minimum number of taps, this is an important component on which the efficiency of the entire system depends. The thing is that any even the most insignificant turn from the straightness of the pipeline is a place where a blockage can form. And if the angle of inclination is chosen incorrectly, then it is guaranteed to form in this place.
Installation rules
If a standard septic tank is installed, made of plastic or metal, then there should be no problems with its installation. The bottom of the pit is leveled horizontally, sprinkled with sand 15-20 cm thick, and compacted. After that, it is necessary to lower the septic tank into it.
Attention! The inlet pipe of the septic tank must be oriented exactly along the sewer pipe. It is optimal if they are located on the same axis. Deviations are possible, but small.
 Installed septic tank
If a well or a septic tank is equipped from different materials, that is, an unfinished option, then the complexity of installing a sewer in a private house increases dramatically. For example, a well made of reinforced concrete rings. It is necessary to dig a pit, fill it with a sand or crushed stone pillow 15-20 cm thick, tamp it down, pour a concrete layer with a thickness of at least 7 cm, and, if possible, lay a reinforcing frame made of metal mesh or reinforcement in it.
Then you need to wait a few days for the concrete base to dry out. And after that, use a crane to collect the reinforced concrete rings themselves. And before that, the rings are additionally waterproofed from the outside. All this is difficult and costly. Therefore, the easiest option is to install a ready-made septic tank, at worst a sealed or leaky container.
 Connection of two sewer pipes
Now with regard to the installation of sewer pipes. With their bias, everything is clear. But there is one important process - their thermal insulation. More recently, sewer pipes were laid below the freezing level of the soil. Why a huge amount of earthwork was carried out, because in many regions this figure is more than 1.5 m. Today, this method of sewer insulation can not be used. The use of thermal insulation materials of various types solves this problem.
Of course, many are faced with the question of which pipe insulation to choose. Today, the ideal option is heat-insulating cylinders (shells), which are made from almost all types of heaters: mineral wool, various kinds of foamed polymers, and so on. The shell is simply put on the pipe and fastened with clamps or tape. By the way, internal sewage pipes located in an unheated basement also need to be insulated with this material.
 Thermal insulation of the sewer pipe
If the external sewer system is very long, then manholes must be installed in it. One well per 50 m length of a straight pipeline. Be sure to install a well near the outlets or connections (for example, when a branch from an outdoor pool or summer kitchen is connected to the main branch). Their purpose is to control sewer flows and, if necessary, repair and clean the system through them.
You can buy ready-made wells, such manufacturers of sewer pipes offer today. And you can make them with your own hands from the same pipes of only large diameter, for example, from 400 or 500 mm. They are installed in trenches in a vertical position and connected to the ends of the connected pipes.
Attention! Where to start installing sewer pipes: from a septic tank or from a house, everyone decides for himself.
Mounting diagram
- The bottom of the excavated trench is leveled taking into account the slope of the sewer system. Greater precision is not required here.
- A sand bed is made with a thickness of 15-20 cm. It is this that will have to be strictly aligned to the slope of the pipe laying.
- After that, the installation of pipes is carried out. And at this stage, the angle of inclination of the system is checked using a long level.
- Connecting a pipe to a septic tank and a pipe from the inside of the sewerage system of a private house.
- As for insulation, the cylinders are put on before the connection is made. That is, at first the pipe is set strictly along the slope, then a heater is put on it, and after that it is laid in a trench.
- The trenches are backfilled with soil.
 Installation of sloped pipes
Do-it-yourself installation of sewer pipes is not such a difficult process if you know how and in what sequence to perform the necessary installation work.
1 Do-it-yourself installation of sewer pipes - the vertical part of the system
The sewerage network inside a residential building is designed to drain from household appliances (dishwashers, washing machines, dryers) and sanitary and technical wastewater devices, which are delivered to treatment local or central networks. Such an intra-house system is being built in accordance with the Sanitary Norms and Rules of 1985 2.04.01 according to a previously developed project. It takes into account how household and sanitary appliances are located in residential premises.
Experts conditionally subdivide the intra-house sewerage network into two types:
- horizontal part;
- vertical part.
A vertical section is understood as the main riser (in a private house, in most cases, it is one), to which horizontal pipeline elements are supplied, draining drains from plumbing installations. In multi-storey residential buildings, there may be several such risers (usually one for each high-rise entrance). For private housing construction, the cross section of the main riser is chosen at least 110 mm.

In principle, it is possible to mount a vertical section of a smaller diameter, but on condition that none of the horizontal pipes will have a larger section than it. The rules for the installation of sewer pipes require, in addition, the installation of ventilation on the riser. This is done by bringing the upper end of the vertical pipe to the roof or to the attic and partially covering it in order to protect the pipeline from natural precipitation and debris. Please note - the output of the vertical part of the system in the attic should be 4 or more meters away from the nearest window in the house.
2 How to install sewer pipes - the horizontal part of the network
More problems for inexperienced installers cause horizontal sewer pipes. Despite their name, they are not laid strictly horizontally, but at a certain slope. If this is not provided for at the design stage of the system, one can not even dream of the effective functioning of the sewage system.
The slope allows water to flow through the pipes under the influence of natural forces of gravity. Professionals have calculated that the ideal flow rate of a liquid is its indicator in the range from 0.7 to 1 m / s. And it is achieved when the slope towards the vertical section of the pipeline is 2-3 cm per linear meter of the network. If the pipe has a diameter of more than 50 mm, the slope must be provided at the rate of 20 mm per linear meter, if less - 30 mm.

An increase in the recommended slope leads to the fact that fluid flows begin to drain at a high speed. This will absolutely cause the formation of deposits on the elements of the pipeline. And those devices that are located farthest from the main vertical riser will have to be raised very high. Reducing the slope will also not do anything good - inside the pipes, large particles will accumulate at a rapid pace due to a decrease in flow rate.
Another important tip for those who do not yet know how to properly install sewer pipes: at the end of any pipe laid horizontally in a dwelling, a water seal should be installed. Equip it by performing a special bend of a tubular product or using a sanitary device (siphon). This shutter is necessary so that unpleasant "aromas" from sewage do not penetrate into the dwelling from the sewer.

In cases where it is not planned to connect household units and plumbing equipment to the new sewage system immediately after the system is put into operation, special ones should be worn on the pipe outlets. Subsequently, such plugs are easily dismantled, and the necessary communications can be connected to the opening holes.
3 Pipes for building an intra-house sewer network - which ones to choose?
Now sewer products made of polymeric materials and cast iron are presented on the building materials market. Cast iron pipes have been in operation for 100 years, they perfectly absorb sounds, but their installation requires both special equipment and considerable experience.
Plastic structures serve up to 50 years, they are easy to install, durable and wear-resistant, they are easy to repair if necessary (replace part of the pipeline). Due to these performance characteristics, polymer pipes are used today everywhere. At the same time, experts recommend mounting cast iron products. But in practice, the situation is exactly the opposite.

The feedstock for the manufacture of polymer structures for sewer networks can be:
- PVC - polyvinyl chloride;
- PP - polypropylene;
- PE - polyethylene.
The last of these materials is used less and less, since its technical parameters are significantly inferior to those that describe PVC and especially PP products.

The main disadvantage of polymer pipes is usually attributed to their high noise. To increase the level of sound insulation of polymer networks, mineral wool or other material that can effectively absorb excess sounds is usually laid on top of tubular products. Also, the pipeline can be closed with plastic panels or drywall sheets.
4 Do-it-yourself installation of sewer pipes - important features of the process
Self-arrangement of a home sewer system is recommended to be carried out using polymer products. Any person can cope with this task. The polymer pipe has a chamfered cut at one end, and a sealing ring and a coupling at the other. It is enough to insert the end of another pipe into the coupling until it stops, and then pull it back by about 15 mm. The two parts of the pipeline are already connected!
In this case, the sealing ring provides high-quality sealing of the network, and the system is protected from deformations caused by the expansion (linear) of pipes during their use by a damper gap located in the junction zone of two parts of the pipeline. If products with a socket method are used, their assembly is also not very difficult: one pipe product is inserted into the socket of the other (again, all the way), and then this place is sealed with a ring made of rubber.

Sewerage assembly using cast iron pipes is possible only at the installation site of specific sections of the network. But plastic products can be collected in a convenient place (for example, in an open area), and only then brought into the house, where further installation activities are carried out. Sewer pipes are fastened to the wall using clamps with rubber inserts. This type of fastener should tightly wrap around the pipe (in other words, correspond to its diameter). Clamps can be:
- plastic;
- metal.

Metal clamps are designed for high-strength and rigid fastening of sewer pipes to the wall, and plastic clamps are suitable for both rigid and movable connection options. At the same time, plastic fasteners have a lower cost.
Sewerage in a house or apartment is perhaps the most important communication system necessary for a comfortable existence. It serves to drain wastewater from the apartment. Therefore, if your house is being renovated, before “constructing”, you should think about the drainage system.
In this article, we will describe the entire process of installing a sewer with our own hands. All instructions, tips and tricks are already collected here, so you don't have to look for any additional information.
Plastic sewer pipes
In 99% of cases, sewer systems are installed from plastic pipes. They are made from different materials polypropylene, polyethylene, polyvinyl chloride, etc.), but in general their properties are clear. Pipes for sewerage are much thinner than water pipes, because. there is no high pressure in the sewer system.
The advantages of plastic pipes for sewer installation are their lightness, durability, corrosion resistance and ease of assembly.
When choosing materials for the sewer system, it is important to consider the required diameter. Below is table, with the minimum allowable pipe diameter for a particular plumbing fixture.
Before going to the store or to the construction market, calculate the required number of certain pipes, as well as the so-called fittings (connecting parts).
By the way, study our material in order to understand exactly whether you need it. The author of the article describes in detail what it is and what convenience it adds.
If your sewer system involves "turns", then try to avoid right angles of 90 degrees. It is better to use two 45 degree fittings. This will avoid frequent blockages.
To save money and space in the bathroom, builders recommend using a common pipe of optimal diameter ( see table), for all plumbing fixtures except the toilet. Those. washbasin, bathtub, washing machine can be connected to a common pipe leading to the main riser. The toilet should be connected separately - directly to the riser.
Preparatory work
Preparatory work for the installation of sewerage in an apartment or house is perhaps the most important part. After all, neglecting a clear planning of actions or the availability of certain tools, it will drag on for a long time, although the installation of a sewer with competent actions is carried out in a few hours.
First, you need to decide where and what plumbing fixtures will be installed. Make a rough diagram on a piece of paper, determine what additional fittings or pipes you will need for the normal functioning of the devices. If you plan to install another device in the near future requiring a sewer drain, provide a drain for it with a temporary plug, because then changing the whole system will be very inconvenient.

Calculate the dimensions and cut the pipes, taking into account the dimensions of the fittings.
You can cut plastic sewer pipes using a regular metal saw. Outline it in a circle at the incision site. You need to cut strictly at an angle of 90 degrees. The cut ends of the PVC pipe must be carefully cleaned with a knife or sandpaper.
It is important to take into account that the sewer must be installed at a slope, because almost any sewer system works with the help of "earth gravity". You need to fix the slope of the sewer with the brackets that are sold along with the pipes.
Installation of sewerage from plastic pipes

Sewer installation is carried out according to a simple scheme (see instructions)
Now that all the preparatory work is done, you can start assembling the system. Do-it-yourself sewer installation in a private house can take several days (depending on the size of the house and the number of plumbing fixtures), and in a small apartment the whole job will take 1-2 hours.
If a particularly heavy load is not expected on the sewer (in an apartment or in a house with the usual set of plumbing fixtures), then you will not need any special tools or skills. You can do everything with your own hands without any problems and efforts.
During the assembly of the pipe system, experts advise moving " from the riser» to plumbing fixtures.

The connection of sewer pipes with a fitting (connecting part) occurs with the help of a hermetic rubber band in the fitting. It is important to insert all elements evenly and until they stop. It is also necessary that the gum and all sewer elements are clean, in which case the sealing will be reliable and durable, and this is very important when designing, because. in case of leaks, the damage will be significant. Among other things, a loose connection leads to an unpleasant smell from the sewer in the bathroom.
Video with a visual image of how to properly cut and connect sewer pipes:
For greater reliability of the connection, home craftsmen lubricate the end of the pipe to be connected with glycerin grease or soapy water.
When the system is assembled, connect all plumbing fixtures in turn, while not forgetting the siphons (for the sink and for the bath). Then we proceed to the next step.
Testing the sewer
After the installation of the sewer system with your own hands in an apartment or house is completed, it is very important to test it for leaks.
To do this, it is enough to turn on all plumbing fixtures in an apartment or house at the same time. Also, “experienced” masters recommend pre-filling a bucket of water and pouring it sharply into the sink, washbasin and bath.
These actions will help determine how reliably your sewer will cope in critical situations. During the test, examine all connections. If there are no leaks, great, your job is done well! If there are still leaks, then you need to fix the “problem” places again.
If the connection is still "leaking"
There are situations when the connection is not reliable. In this case, during installation, you need to use a special adhesive-sealant. Apply sealant to the joints, re-insert the pipe into the fitting (without removing the sealing gum) and let the glue dry. Then repeat the test again.
The sewer system in a private house is created in order to bring wastewater outside the premises. In accordance with this, the implementation and design of this system must be done in such a way that unpleasant odors do not enter the house, and traffic jams do not form in the pipeline.
If you carefully consider the process of installing a sewer system, you can understand that it is really possible to do it yourself. Quality workmanship will work perfectly for many years. In most cases, modern sewer systems are equipped with plastic. This allows you to forget about rust and corrosion.
But this does not mean the complete absence of shortcomings, since traffic jams from sewage often form in the sewerage system. This is due to the fact that mistakes were made during the installation of pipes, and leads to blockages and unpleasant odors entering the house. For the same reason, the sewer system can make noise and take excess water from the siphons.
In wooden houses made of rounded logs or timber, pipes can be laid directly in the log house, for this it is necessary to make cuts of the desired size in the walls.
Diameters and slopes of the sewer system
Waste fluids in private homes usually move by gravity. For this method to work properly, several rules must be followed, including a certain slope from the pipe to the device when laying, and then to the collector or tank located outside.
As a percentage, the slope can be defined in a value from two to fifteen units. This suggests that the difference between the end of the pipe, located at the beginning, and its final value should be from two to fifteen cm. Special attention must be paid to the width of each type of pipe so that waste fluids containing various solids flow, without blocking the drain. When choosing the most suitable size, first of all, pay attention to their type and the number of sanitary equipment connected to the system.
- Bidet or washbasin - 3.2 - 4.0.
- Bathroom or sink - at least 5.
- The situation in which a riser is installed or several sanitary devices are connected - 7.0 - 8.5.
- Drain pipe, riser or toilet - at least 10.
If you change the direction of pipe laying when installing the sewer system, then for this you need to choose an angle of more than 90 degrees. Pipes that connect plumbing fixtures to risers are connected at an angle of less than 45 degrees. If you are installing a sewer system located indoors without heating or outside, then it is imperative to protect the pipes from temperature fluctuations and cold.
The most suitable temperature for sewer pipes is between 5 and 45 degrees Celsius. Otherwise, use a heat-insulating material such as fiberglass wool.
Laying ventilation of the sewer system
The ventilation pipe, at the end of which the deflector is located, is an indispensable element of the sewer system, without which it cannot be installed. Through this pipe, the internal sewage system is connected to the open space. The embedding of the ventilation system is carried out for the reason that it excludes the possibility of unwanted leakage of drains and pressure surges.
From the name it is clear that this system provides sewer ventilation. This allows you to remove the vacuum and not waste excess water flowing beyond the highly located siphons. Even drains that cover all sections of the sewer pipe are not a problem. Ventilation must be installed in each sewer riser. Sometimes situations arise in which ventilation cannot be removed above the roof. In this case, a common wide ventilation pipe is used, with which the connection is made.

Approximate ventilation scheme of the sewer system
There is another alternative. Sometimes the ventilation pipe is installed on a riser located as far as possible. At the same time, the ends of other risers are equipped with aeration valves. This method is suitable for working with a small number of risers, a maximum of 4-5. Aeration valves do not have full versatility, therefore they cannot completely replace ventilation pipes, since air is transferred through them only in one direction, namely to the sewerage system. As a result, excess gas accumulates, which must be removed into the atmosphere.
The importance of a strong connection
Appliances that belong to the sanitary type, such as showers, bathtubs, washbasins, must be provided with a general class connection to the sewer riser. The toilet is connected separately, while the level of connection with the riser must not be lower than other connections. In this case, valuable advice regarding quick couplings of pipes can come in handy. In a situation where you decide to install a sewer system, they are best suited, as they suggest the ability to change a damaged element quickly and without much effort.
The connection of sanitary appliances with a riser should have the greatest length: for toilets one meter and three meters for everything else. If the maximum length exceeds the above values, you need to install an additional ventilation pipe, which should be brought above the level of the roof of the house, or use an aeration valve. There is another way, which is to connect with pipes of greater width.
This case is described in special regulatory instructions. In a situation where you do not pay attention to the above rules, the water that is in the siphon of the device may leave. It is worth taking care of this if you hear gurgling sounds. The siphon will be empty and will allow unpleasant odors coming from the sewer system to pass through.
Materials used for sewer installation
In our time, when arranging household sewers, plastic pipes have become very popular.
The reason for this is the impossibility of rust formation and a small mass. The installation of steel pipes from cast iron is still carried out, but recently much less frequently.
Connections between the sewer system and plumbing fixtures
The process of waste disposal by gravity can be complicated by plumbing fixtures located in low-level rooms. In this case, the layout features do not provide the necessary conditions required for the correct slope of the pipes. However, there is a way out of this situation.
In the construction markets, you can find special equipment with which wastewater is pumped. It is connected to the toilet at the same time as a device that grinds paper and sewage. This equipment can also be installed on other plumbing fixtures such as bathtubs and washbasins.
The device works automatically. The sewer system can be divided into the one that is located inside the premises and the rest, located on the territory of the site. In this case, you can draw a border, on the site of which you need to install the main revision. If we consider the sewer system installed in the vast majority of private houses, we can distinguish some of its parts:
- Deflectors installed at the end of the ventilation pipe.
- Ladder, which is mounted in the floor.
- Sewer riser, with the help of which the connection of sewer pipes that drain wastewater from plumbing fixtures is carried out.
- Drainage pipes, also called sewer horizontals, but they are laid, despite the name, at a slight slope.
- Socket-type connections, which are almost always used to connect sewer couplings and pipes.
- Sewage connection, which is a pipe that connects toilet bowls, washbasins, bathtubs with a drain pipe.
The process of installing an external sewer
Many homeowners who have already installed indoor sewerage are faced with the problem of installing outdoor sewerage, as this process is much more complicated and expensive. Initially, it is necessary to dig a special trench of such a depth that it is possible to carry out the discharge of wastewater without any special obstacles. Sewage should quickly go into the central sewer system or into a septic tank.

Septic tank in a pit prepared for installation
Do not forget about the climatic features of our latitude. The pit must be of such depth that the sewer does not freeze in winter, otherwise it may fail. Sewer pipes are laid inside the trench in such a way that they fit snugly against the base along its entire length. Then, using a plumb line, you need to check if the installation of the pipe corresponds to the slope. It should be kept such that it equals approximately 2-4 centimeters for every meter of pipe.
Next, the sewer pipes are connected and sealed. Before applying the sealant to the surface, it is worth cleaning the joint and treating it with a special lubricant. You can install sewer pipes without digging a trench. This is done with the help of special punches. Once again, it is worth noting that before laying the sewerage system, you need to find out the approximate depth of soil freezing.
At the exit from the premises, the pipes must be laid below the freezing level of the ground. If you do not have such information, then you should not save on thermal insulation, otherwise you can earn yourself a lot of headaches.
Do-it-yourself installation of sewer pipes
The first part of the work is to dismantle the old sewer pipes (if any). To do this is quite simple. First you need to turn off the water supply, disconnect the hose that supplies water to the toilet bowl (use an adjustable wrench for this).
After the toilet is dismantled, the bolts holding it on the surface are unscrewed, the bathroom is vacated, all objects that interfere with the work are removed. The old sewage system is dismantled, metal pipes can be broken with a hammer. Pipes directly adjacent to the riser are removed.
When installing sewer pipes, one of the most important tasks is the correct installation of the toilet bowl. Usually this element is connected to the sewer with a 110 mm plastic pipe. After that, you can install the transition to 50 mm pipes. It is better to make this transition smooth, do not immediately install an adapter 110-50 mm.
It would be better to install a kind of "bridge" with a diameter of 100 mm, and then move on to a pipe with a diameter of 50 mm. Do not forget about the strong fixation of all joints and the slope towards the drain.
The use of rectangular adapters is undesirable. If there is such a need, it is better to use 2 45-degree angles. In the process of arranging sewerage in a private house, welding is usually not required, and the assembly process itself is quite simple: pipes are inserted through the gaskets one into the other, which gives good tightness.
For maximum results, silicone sealant should be used, which provides a stronger connection to the structure. In this case, it will definitely remain intact at the first start-up of water.
The standard materials for the construction of the sewer system are considered to be cast iron or asbestos concrete, which is explained by their strength. Despite a number of advantages, working with such materials is quite difficult. A modern solution is a plastic sewer, the basic installation rules of which are simple and understandable. In addition, it must be said that plastic sewage is a durable and practical structure.
The package of such a sewer system includes such basic elements as pipes, storage tanks and wells made of polymeric materials. For the production of these elements are most often used:
- polyvinyl chloride;
- polypropylene;
- polyethylene.
Why are plastic pipes better?
Modern plastic products for sewerage have the following advantages:
- they are light in weight, which makes them easier to transport, unload and install. Previously, special equipment had to be used to install cast iron products, but now sewers can be easily laid on their own;
- durability is also important. Plastic is not afraid of corrosion, so it can last at least half a century without problems;
- the tightness of the sewer system will be ensured if plastic pipes and containers are installed correctly;
- good resistance to various influences. Material such as plastic perfectly tolerates low temperatures and the action of ultraviolet rays. All this is explained by the fact that plastic has an insignificant coefficient of linear expansion under conditions of temperature difference;
- products can self-clean, as their inner surface is smooth. Because of this feature, you can choose any diameter of the sewer riser, as it ensures rapid drainage of wastewater, and the growth of deposits is also prevented;
- plastic pipes are easy to install, since suitable fittings and adapters are available for all sizes. Due to this feature, it is possible to create a sewer system of any complexity. The length of the product can be adjusted directly at the installation site.
When planning to make a plastic sewer, you need to learn how to distinguish pipes intended for indoor use from pipes for outdoor use. It should be noted that the structures for the second option are more durable and resistant to various influences.
Typically, pipes for outdoor sewage of country houses are painted orange-brown, but pipes for internal wiring can be light gray.
Use of plastic containers for sewer systems
An autonomous sewer system is built not only from pipes, but also from a septic tank, storage tanks and wells. Now plastic models are very popular.
 laying sewer pipes in the walls in a hidden way
 Previously, for the construction of a septic tank, it was necessary to dig a hole, line it with bricks. Concrete the bottom, make the ceiling, but now everything is much easier, because in the case of the plastic version there is no need to perform these processes.
With the use of ready-made plastic containers, the preparation of cesspools and other structures is greatly facilitated. The only thing that needs to be done is to correctly determine the volume of the product for collecting sewage. When a container of a suitable shape has already been purchased, you can proceed to earthworks and preparing a pit for installation.
When calculating the capacity of a storage plastic tank, you need to take into account the norm, namely 0.2 cubic meters. m. for each person living in the house per day.
In addition, there is no need to carry out such hard work as compacting the clay layer, pouring the concrete bottom, finishing the pit with bricks, and isolating the walls from moisture.
Since it is planned to use sealed plastic barrels for sewage, you can be calm about ensuring the purity of the soil on your territory. As a result, the risk of dirty drains entering the ground is prevented.
The use of ready-made plastic containers for autonomous sewerage is due to several advantages, namely:
- since the production uses a material that is resistant to aggressive environments, any household chemicals can be used in the house;
- There is a wide variety of shapes and sizes of containers. For example, a small storage tank with a capacity of up to two cubic meters is suitable for a summer residence. For the improvement of country cottages, containers from several sections with a volume of 1-2 cubic meters are most suitable. If necessary, you can buy cylindrical products that can be installed horizontally or vertically, as well as square and rectangular options;
- septic tanks made of plastic tanks are expensive, but such costs are justified. For comparison, you can calculate the cost of materials for self-construction and add the cost of installation work to this amount. As a result, it turns out that plastic drives will be a very profitable solution. Also, when choosing a design, the long term of its operation is taken into account.
 connecting plastic sewer pipes to the riser
 The principle of installing plastic containers
- The depth of the sewerage device must be determined at the design stage. When installing extension necks, the depth of the pit is not limited. If necessary, they can be assembled from several components that are hermetically fastened together.
- Plastic pipes are connected to the storage tank using rubber couplings. As a rule, for these works it is not required to use special equipment, which is important when doing the work yourself.
- If you buy a finished product, you will need to independently make holes in it for connecting pipes.
If the manufacture of the container is ordered directly from the manufacturer, then it becomes possible to immediately make the technological holes provided for in the project and order a spare part if the sewer tee suddenly bursts.
Plastic wells
Wells are an important element for creating a plastic sewer. They can be of different types, while all these products have a common structure. Most often, a cylindrical shaft is used, which has several holes for bringing in and removing pipes. It is mandatory to provide for the presence of an overlap with a hatch.
 selection of sewer pipes
 Installation of wells in the sewer system is a mandatory requirement, which is indicated in the relevant regulatory document SNiP. So, wells can be:
- revision, through which control over the operation of the system is carried out;
- rotary, which are installed at the turn of the sewer pipeline;
- differential, installed where the slope of the pipeline changes or its diameter changes;
- linear, which are mounted on a linear section of pipe laying.
Linear wells must be installed in a certain sequence, which depends on the diameter of the pipeline being laid. For example, if the diameter of the pipes is 15 cm, then the distance between such wells will be on average 20 meters. For practicality and convenience, it is recommended to install plastic wells that perform several functions at once.
 sound insulation and insulation of sewer pipes
 If earlier concrete wells were mainly mounted, now plastic is used for their implementation. This is due to many advantages, namely:
- First of all, it is worth noting the insignificant weight of plastic rings for the construction of local sewage. If it was necessary to use construction equipment to install concrete structures, then in the case of plastic, you can handle it yourself;
- plastic wells are sealed structures, which cannot be said about structures built from concrete rings. As a result, the leakage of dirty water into the ground is excluded.
How to install a plastic sewer?
It is much easier to mount a plastic sewer with your own hands than to assemble it from cast-iron pipes. Also in this case, it is easier to make repairs if the toilet is leaking at the junction with the sewer. In the process of work, you must adhere to the basic rules:
- with fewer turns and joints, the sewer system will be more reliable;
- the sockets of the pipeline must be directed in the direction opposite to the direction of the passage of wastewater;
- it is impossible to shorten pipes by cutting pipe fittings;
- do not install parts with chips, cracks or other defects that violate the integrity of the product;
- if it becomes necessary to make a tie-in into a plastic sewer, then the whole pipe must be divided into two, while in order to bring in a new source, it is required to install a fitting between them.
To install a plastic sewer, you do not need to have any professional skills and special equipment. It is enough to have basic knowledge in the field of planning and construction of the sewer system. Since these works are simple and accessible, they can be done by hand. To get a satisfactory result, it is recommended to follow the rules for assembling plastic pipes and other structures.


