Often, land plots involve only the construction of only vital buildings. The small area of the site, the use of every piece of land for planting or thought out simply does not leave room for additional buildings. In this case, there is only one way out for lovers of bath procedures: the construction of a mini-bath. What is a mini-bath for a summer residence, how to build it and what is needed to build it - let's figure it out.
Read in the article
Mini-bath for a summer residence. Advantages and disadvantages
The main advantage of a mini-bath is the area of the site occupied during its construction. The second, no less important parameter is the cost of building a mini-bath in the country.

There are ready-made projects of frame mini-baths on the net, in addition, it is possible to create such a project by order in construction organizations. But sometimes, in a do-it-yourself mini-bath project, projects of frame and combined baths are simply combined.
We offer you to watch a video of building a frame mini-bath quickly and inexpensively:
Important! When purchasing lumber, pay attention to its quality. Lumber for construction must be well dried and free of geometry defects.
A summer bath from boards is a variant of a frame bath, for which it is used for sheathing. Like a frame one, a do-it-yourself bath from boards is built quickly and easily. The construction technology is similar to a conventional frame bath, with one exception: instead of OSB panels, a board is used for exterior cladding. The budget savings are quite significant, especially if you use an unedged board for sheathing. At the same time, such a structure is less durable than with the use of composites and has greater heat losses than assembled using panels.

When building a bath, attention should be paid to heat and vapor barrier. The better materials are used in construction, the longer the steam room will last.
Laying the board on the wall must be overlapped. This laying order will make the wall more dense and reduce heat loss during use.
Before you build a bath from the boards with your own hands, you should take care of the selection of lumber. For lining the inside of the bath, it is better to use coniferous wood (pine or larch), while for the outer lining it is better to use aspen. It is quite low, which will allow the bath to keep warm longer. Particular attention should be paid to vapor barrier. Dampness is the worst enemy of wood.

Usually mini-ovens for small volumes are metal structures designed to generate steam. As an example, consider the stove for the bath Varvara "Mini".

Sauna stove Varvara Kamenka mini
This is a wood-burning stove with overall dimensions of 48x66 cm and a height of 88 cm. The steel structure of the firebox itself is covered on top with a casing, inside of which there are convection channels. The air, heated in the area of the firebox, exits through the holes in the casing into the heater, thereby quickly heating the stones. As a result, the stove heats up very quickly, warming up a small room in a very short time.
In addition, there are also simpler designs of stoves in which the heating of the heater is carried out directly by the action of heat from the combustion of fuel. Using in the steam room, you need to provide a place for storing fuel, or a shed near the bath.
With small volumes of a steam room, in some cases it is advisable to use electric sauna stoves and electric heaters.

On a note! Installing a heat exchanger on the chimney will allow you to quickly warm the air in the steam room. But this option is possible with the appropriate dimensions of the bath.
Mini-pools for a bath
Additional installation in the bath will expand the functionality of the bath and add comfort. It is worth noting that it is better to initially foresee the laying of a pool in the bath project, since mini-pools for a bath require summing up water supply systems, draining water, and heating.

For this reason, embedding a pool in a finished bath is a rather troublesome and costly business. There are several types of pools designed for installation in a bath:
- Stationary. In this case, the pool is initially laid in the bath project, a foundation pit breaks out under it, the walls of the pool are concreted and covered with a decorative coating. This type of pool is mainly used for full-sized bath buildings.
- Font. A metal or plastic structure designed to be installed in a pre-prepared box. To put it into operation, you only need to connect the font to the water supply system.
- Portable pools. Metal structures with plastic trim. As well as the font, they are installed in a prepared bed, after which they are connected to the water supply system.
Pools can be equipped with water heating systems, hydromassage equipment, but in this case, the help of qualified specialists is required to connect them.
Mini-sauna for a summer residence
From the bath is distinguished by the type of steam and temperature. In order to make a sauna out of a steam room, it is enough to install an electric steam generator, an electric heater or a wood-fired sauna inside the steam room. When using a steam room for a sauna, interior decoration from one type of wood is recommended: pine, linden or alder. A mini-sauna in the country should be as closed as possible, almost sealed. Particular attention should be paid to its thermal insulation. This is necessary to maintain a high temperature inside the sauna for a long time, with minimal energy consumption.

portable sauna
How to build a small bath for a summer residence with your own hands
Before erecting, it is worth familiarizing yourself with the projects of already built baths and choosing the most optimal option. Projects of mini-baths for giving with their own hands (both frame and timber) are quite widespread, and it is not difficult to find them. Before you build a small bath with your own hands, you need to decide on the type of bath, the material for its construction and location.
 Do-it-yourself foundation on screw piles. This technology is used to speed up the construction of not too heavy buildings, other architectural structures. In the article you will find step-by-step instructions for the construction of the structure and useful advice from experts.
 The main requirement during construction is accuracy. Everything must be done calmly and without haste. This will allow you to build a bath in a short time without excesses in work.
Useful advice! When purchasing materials for construction, focus on the medium and high price range. Purchase soft materials for roofing, insulation and a vapor barrier according to a pre-calculated estimate, + 10% on the stock of material.

An important point in the construction of a bath is not to forget about. For a steam room of a small volume, a channel in the wall is sufficient; for larger rooms, a fan will be required. This is necessary in order for our small bathhouse in the country to be a place of comfortable rest, and not a peddler of miasma.
Article
Many owners of land plots prefer to have their own bathhouse on their country plots. Dimensions, the internal layout of the bath is a purely individual matter, especially since on several acres, when every square meter is expensive, it is unlikely that anyone will build a massive structure.
If it is meant inexpensively, and even with your own hands, then the choice of options for building a bath is not so big. What kind of bath is more expedient to build in the country, what to take into account and provide for - this is described in the article.
When it comes to the construction of any building on a summer cottage, in various instructions, recommendations and advice, a very important issue is most often overlooked - the specifics of the operation of the facility. In other words, whether the cottage is a place of permanent (year-round) residence, or the owners come to the site only during the season. In the first case, we should talk about a full-fledged country house. And he, and all other structures (including the bath), must be built capitally. Expensive or cheap is another question.
Firstly, it is hardly worth counting on the fact that it will be possible to come to the dacha to take a steam bath in the winter. The main reason is drifts on the roads. If you can still drive up to the massif itself, then getting along the lanes to your own dacha is quite problematic.
Secondly, it is necessary to take into account how long it will take to melt the bathhouse. For the bulk of summer residents, it is needed on the site only when the owners work or rest on it. And going out of town for the whole day just to take a steam bath for an hour is a dubious pleasure.

Thirdly, the idea of building a bath comes, as a rule, 2-3 years after the development of the site, when everything has already been planned and equipped, including plantings. Or if it is not available at the acquired dacha. It is unlikely that anyone will want to deploy large-scale construction on the inhabited territory.
Therefore, before you figure out “how to build” and “inexpensive”, you should find out what materials and technologies can be considered optimal for a summer bath in the country. This information will be much more useful than the "step by step instructions", moreover, it is not a fact that the reader will choose this option.
Wood
A log or timber (in any modification) is the best solution. The cost of materials cannot be called high, a “heavy” foundation will not be needed, in terms of “environmental cleanliness” and the effectiveness of procedures - no complaints. But there is one "but".
Bath (in the country or another place) - a specific structure. One of the main requirements for it is maximum thermal insulation. Building a quality log house with your own hands, no matter what the various instructions say, is a rather complicated matter. How to make connections of blanks “in a paw”, “in a clasp” or in another way, is simple and understandable only on paper. But in practice, rarely anyone will be able to build a good bathhouse from a log or timber. Here, cheap - only materials, but the services of a professional are expensive.
Cellular concrete
Such construction is considered budgetary. But is everything so simple? Gas silicate intensively absorbs moisture. The stone itself is inexpensive, but finishing the bath (primarily waterproofing) will cost a lot. It's the same with foam concrete. In addition, the blocks are "planted" on the mortar, so you need a concrete mixer with all the accompanying "charms" - heaps of sand, gravel, bags of cement and dirt in the country.
Is it worth it to organize a full-scale construction, if most of the garden plots are just small light houses? In any case, it is also quite difficult to call such a bath cheap if we are talking about the summer version.
A brick bath should not be considered - this definitely will not work either “with your own hands” (a complex matter that requires professionalism) and “inexpensive”. The most acceptable solution for a summer residence is a bathhouse built using frame technology. Here we will deal with the features of its construction.

Frame bath in the country
Dimensions
Given the fact that there is not too much free space in the country, you will have to be content with a small building. There is another reason that limits the size of the bath. By definition, it is a fire hazardous object, therefore it is being built at a distance from residential buildings (both its own country house and neighboring ones), as well as fences and roads - at least 15 m. But this is in theory. In practice, you just need to clarify what are the restrictions in relation to your summer cottage. Perhaps local conditions are more “soft”.
But it’s definitely not necessary to talk about a massive structure with several rooms. For a summer residence, the optimal dimensions of the bath will be 3.5 x 3.5 or 3 x 4 m. It is quite enough to divide the building into 3 rooms (dressing room, steam room and washing room), and it will come out really inexpensive.
Foundation
For a small bath in the country, the best solution is a pile-grillage base. Firstly, you can install screw supports with your own hands. It will take only one assistant so that the pile does not go sideways during installation. Secondly, it is easy to build up such supports with additional “knees”. Therefore, groundwater, freezing depth are not the determining criteria when choosing the type of foundation. The pile foundation is suitable for almost any terrain. The main thing is to correctly calculate the installation depth of the supports. Thirdly, there is no need for any earthworks, which is important for a well-equipped summer cottage.

There are other inexpensive options - installing a bath on sleepers, stones, and the like - but this is hardly a good solution. The probability of heaving of the soil cannot be discounted, so such a bath will have to be constantly reconstructed.
Is it possible to do without grillage?
For a bath, no. And that's why. If the wind is blowing under the building, then the floors will be constantly cold. This means that it is necessary to think about their maximum insulation, and this will lead to an increase in the cost of construction.
frame
Since we are talking about a small-sized bathhouse, it is not difficult to assemble the “skeleton” by installing a beam in the corners. The best option, in which it will not be difficult to make strapping, sheathing and carry out all other finishing activities with your own hands.

The main stages of the construction of the bath
Territory marking and foundation
What to consider:
- Piles are screwed into the ground at the corners, as well as at the junction points of the inner walls to the outer ones. Depending on their length, additional supports are placed, with an interval of about 2 m. If the soil is soft, you can drive in pipes, pouring concrete mortar into them for strength. It remains only to align them on top in a horizontal plane and weld the heads.
- The root system of most weeds develops at a depth of up to 150 mm. Therefore, it will be necessary to excavate the soil in the outlined rectangle (square) in order to prevent the germination of weeds under the bath. The layer thickness is about 30 cm. Why, it will become clear later.
- To prevent the appearance of groundwater in this area, the soil should be compacted and poured with oily clay, which is also rammed. The result is a primary layer of waterproofing.
- Next - p / e film, thickened (the cheapest insulating material).
- Above - backfill of expanded clay (10 cm is enough). It will provide additional warming of the “bottom” of the bath, so the effect of cold coming from the ground will be practically leveled.
- Experienced builders recommend making a cement screed. But this is already, given that it is not a residential building that is being built, but a bathhouse - at the discretion of the owner.

Bath frame assembly
Its elements must be attached to something. Therefore, the binding of piles is preliminarily done. For the base frame, it is better to purchase used sleepers. This is already prepared (impregnated) material, which can be bought either at the railway station or at a specialized enterprise, from the so-called substandard.
Another option is to purchase a beam. The blanks have the correct geometry, it is not difficult to fasten them together with your own hands (brackets, plates, corners). It remains only to impregnate with special means (antiseptic + flame retardant) and dry. In practice, it is enough to do the treatment with engine oil (used), in some cases, and coat it with liquid tar.
Installing vertical poles from the same timber is also not a problem. The binding is done with slats.
Structural sheathing
 The most inexpensive options are board or multilayer plywood (FC or FSF). Such sheets are cheap, and given the fact that they are characterized by high moisture resistance, they are quite suitable for a bath.
Everything else concerns the internal arrangement. Here everyone has their own decision.
- For a country bath, the best option for a roof is a flat (single-pitched). It hardly makes sense to engage in the construction of a truss system, if any site already has a utility room for storing garden tools. A flat roof is the cheapest option.
- For a country bath, it is advisable to choose a small heater. Such (to the question of "inexpensive"). And there will be no problems with fuel.
- When choosing a bar, you should focus on larch. Given the specifics of the structure, especially excess moisture, it is better suited than other breeds. When wet, this tree only gains strength, which is required in terms of the durability of the structure.
- It is rather difficult to insulate a frame bath, as there will definitely be gaps. Therefore, since all the decoration is done by hand, it is advisable to focus on a heater with a reflective surface. For example, "Penofol" (also inexpensive). Given the small dimensions of the country bath, a thickness of 10 - 12 mm is quite enough. Pay attention - the material is laid with foil inside the room!
Perhaps the information given is enough to understand which version of the bath for giving is better.
Many specialized firms position ready-made house designs as an inexpensive summer cottage, which are delivered to the site and installed on a pre-prepared foundation. The starting price is about 105,000 rubles (2.5 x 4). Seems to be inexpensive. But this does not take into account several points.
Firstly, will heavy equipment be able to drive through country lanes?
Secondly, will the outreach of the crane boom be sufficient to install the bath in the place chosen for it?
Thirdly, such houses have only a rough finish. Consequently, the issues of insulation, purchase and installation of the stove, laying communications and a number of others will have to be addressed separately. And this is an additional cost.
Therefore, it is unlikely that such an option belongs to the category of "inexpensive". It is easier to build a frame house under the bathhouse in the country with your own hands.
Sometimes you really want to leave the hustle and bustle of the city, and go to the country. Silence, walks, doing what you love - what could be better! If comfort is provided at the dacha, I want to come again and again. One of the comfortable living conditions in the country is a bath.
Construction can, of course, be entrusted to professional builders. However, it is quite possible to build and equip a bathhouse in a summer cottage on your own. This saves you from additional expenses and allows you to finish and improve in full accordance with your desires and preferences. Therefore, this task is not easy, but it is quite within the power of a novice builder. A bathhouse built with your own hands will delight the owners even more. So, how to build a bath yourself?

Firstly, as with any construction, you first need to decide on the project and the materials from which the bath will be built. The choice of the main material for construction depends on the geographical location and operating conditions, as well as on their own capabilities.
Baths are made of brick, aerated concrete and other stone materials, some prefer frame baths, however, many novice builders prefer to build a bath from wood. This lightweight and durable material does not require a serious and expensive foundation, but it has excellent characteristics. With proper care, the operation of the bath will not cause much trouble.
And of course, preference should be given to timber - a bath made of this material will retain all the advantages of a wooden structure and eliminate the problems and additional costs that may arise during the construction of log walls. Building walls from a beam is similar to working with a constructor - it can have different geometric dimensions and cross-sections (rectangle, square, semicircular), and also, in the case of a profiled beam, there are grooves for fastening. Building from timber is easy and convenient - what could be better for a novice builder!
How to choose a place to build a bath.
One of the most important points is the choice of the location of the future building. The place must satisfy both existing legislation and usability. Here are some basic tips to help you choose:
- if there is a reservoir nearby, you should not place the bathhouse too close to it, as the building will be threatened by flooding;
- it is necessary to decide how the bath will be located relative to the house: a separate building or will be attached to it, since each option has its positive and negative sides;
- it is believed that it is better to build a bath in the backyard, in relative seclusion;
- it is necessary to provide mandatory ventilation during construction, as well as to provide for the disposal of wastewater;
- it is highly discouraged to determine the location next to the road passing nearby;
- when placing a building, it is necessary to take into account the cardinal points and the direction of the wind: the best place is the southern part of the site, protected from the wind so that it does not interfere with vacationers, it is better to have windows facing west;
- it is desirable that the bathhouse be at some distance from other buildings, and if it is an extension to the house, it is imperative that fire safety rules be followed during construction, as, indeed, when erecting a separate building;
- when determining the location of the bath and its size, it is necessary to observe the distances established by the rules from the boundaries of the site so that the neighbors do not experience discomfort in the future and do not make claims to the owner;
- it is recommended to observe the distance to the water intake (well or well) - no more than 20 meters.

At the beginning of construction, it is highly desirable to make a project, which should, among other things, determine the optimal building area.

It is believed that the estimated area for 1 person should be approximately 5 sq.m. Thus, if the expected number of visitors to the bath is 4 people, its total area should not be less than 20 sq.m.

The minimum composition of the premises is as follows: a steam room, a washing room, a rest room and a dressing room. It is important to determine the most convenient location of these rooms relative to each other, as well as their geometric dimensions.

First you need to complete several diagrams and drawings:
- the general plan of the building;
- drawings of each room separately;
- a diagram of the foundation device;
- scheme of the roof device;
- plan for fastening and laying out the timber;
- a plan for the installation of the floor and ceiling of the bath;
- a diagram of the installation of the furnace, taking into account its design features.

All the necessary drawings can be done independently, as well as found in many open sources. As a rule, log baths have similar designs and you can easily choose the most suitable one. If you wish and have the necessary budget, you can entrust the design to a professional architect or builder.

The choice of building materials.
Below is a list of materials that will be needed to build a bath from a bar:
a) beam 150x150 mm, although it is possible to use a beam with a section of 100 mm or 200 mm;

b) a floor board (an edged board 150x50 mm 4 meters long is excellent);

c) hardwood boards for ceiling installation (usually lining is used with a width of 100 mm and a thickness of 20 mm or more);

d) material for wall decoration (as a rule, the same lining is used);

e) material for vapor barrier (an excellent option would be to use a vapor barrier film);

f) waterproofing (it is desirable to use penofol, although plastic film is suitable);

g) ceiling insulation (a good option is mineral wool materials);

h) sheet asbestos for insulation of wooden structures from temperature effects, including for walls near the furnace and elements located near the chimney;

i) cement, sand and gravel for the foundation (recommendation - cement should be purchased before construction begins);

j) roofing material for the roof, which can be selected based on personal preferences and, most importantly, that it fits organically into the surrounding roofs of other buildings;


l) insulation for interventional space (it is better to use jute, although moss or tow are perfect).

The best time to start construction is spring, because after the completion of the main construction work, it is necessary for the timber to dry and shrink. This requires at least 6 months.
Do-it-yourself bath - step by step instructions.
Step I - preparation of the territory for construction.
Before starting construction, it is necessary to clear the site - remove shrubs, stumps, remove debris and everything that will interfere with the work on the foundation.


Step II - building the foundation.
It is best to build a bath from a bar on a columnar foundation, which is inexpensive and great for building small wooden and frame buildings.

When constructing it, you first need to dig the estimated number of holes for the installation of supports. Their number is calculated as follows - the supports must be installed in the corners of the building and at the intersections of the walls, as well as with a certain step along their perimeter.

The step is selected taking into account the type of soil and the estimated total weight of the structure. The depth of the pits should be 1-1.5 meters, although it may vary depending on the depth of soil freezing in a given area. To perform this type of foundation, in addition to the materials listed above, asbestos-cement pipes and fittings will be required.

At the bottom of the pit, it is necessary to fill in a mixture of sand and gravel with a thickness of 10-15 cm. Then install an asbestos-cement pipe of the required length into it, strictly vertically, and fix it. Several reinforcement bars should be placed inside the pipe.

After that, pour concrete mortar into the pipe and into the free space between the walls of the pit and the pipe.


After pouring the solution, you need to wait a few days, and then lay a wall half a brick thick between the pillars.

Step III - erecting walls and arranging the roof.
The traditional material for the construction of the walls of the bath is a beam measuring 150x150 mm. Before laying the first crown, it is imperative to put waterproofing on the foundation. The lower part of the crown must be treated with an antiseptic. Most often, the beam is laid out in the “paw” way.


The first crown must be carefully aligned according to geometric parameters - all angles must be exactly 90 degrees. After the first crown has been erected, the laying of the beams for the set of walls begins. When laying out the walls, you need to make openings for future doors and windows and be sure to insulate each row with the selected heat-insulating material.

To connect the crowns, dowels are used - metal or wooden pins.
After the walls are removed, the roof is installed. Depending on the chosen shape of the roof, it is necessary to fix the rafters, which are attached to the upper crown with brackets.

When constructing a shed sloping roof, the rafters are fixed either with two external or one external and one internal supports. When erecting a gable roof, it is necessary to securely support the rafters from below on the wall, and connect them together from above to form a roofing ridge.

Lathing boards are attached to the fixed rafters, then hydro- and vapor barriers and insulation are laid on them.

The installation of the selected roofing material completes the installation of the roof.

Step IV - interior finishing work.
Interior decoration should begin with a communications device - sewerage, plumbing, electricity. Sewerage should be taken care of even when designing and building a foundation.

It is necessary to dig a drainage well next to the future bathhouse, which includes a sewer pipe buried in the ground with a slope to remove wastewater from the washing department.

After the installation of the sewerage system, a finishing floor is made, which is made of wood or concrete. The concrete floor is more durable, most often it is faced with tiles or porcelain stoneware.
If a wooden floor is chosen for interior decoration, it is usually made leaky. To do this, the floor boards are nailed to the installed lags with a small gap, or a small drain hole closed by a grate is equipped in the floor.

In this case, the floor must be done with a slight slope towards the drain. Then the water that has fallen into the drain will be discharged through the sewer pipe into the drainage well.

After the sewerage installation, it is necessary to carry out insulation, hydro- and vapor barrier of the walls and ceiling with the help of appropriate materials, conduct electricity and plumbing.

After installing windows and doors, then finish the room with the help of, for example, lining.

After finishing the finish, you need to install the necessary electrical appliances.

Step V - installation of the oven and shelves.
There are a lot of options for placing shelves, you just need to follow the recommended dimensions and that they must be made of hardwood. The installation principle is simple - a stable frame is mounted, usually from a bar, and boards are attached to it.
The installation of the furnace must be carried out in full compliance with fire safety requirements. Wooden structures must be isolated from the high temperatures of the operating furnace and chimney. In the case of a large furnace weight, it must be installed on a specially equipped foundation. This is determined on a case-by-case basis depending on the furnace chosen.

The stove is selected depending on the preferences of the owner. It can be a traditional wood-burning stove, a metal wood-burning or electric stove, sometimes it is advisable to choose a gas stove for a bath.
Step VI - Choosing Accessories
There are many accessories for the bath.

The main ones are:
- brooms (oak, birch and others);
- containers (buckets, basins);
- a wooden bucket for adding water;
- wooden gratings on the floor and much more.

Additional individuality can be added by the interior decoration of the premises, which remains at the discretion of the owner - here, depending on the desires and financial capabilities, you can give free rein to your imagination.

It must be added that all of the listed accessories can be made independently. Bath is a great place to spend time in a pleasant, friendly company or with family. It will be much more pleasant to realize that all this is done by hand, including useful and necessary devices: for example, hangers, lamps or ventilation grilles.
Enjoy Your Bath!
Video about the construction of the bath yourself.
Not everyone has the desire and ability to invest a lot of money in the construction of a bath. And in most of our country, warming up at times is simply necessary. The only way out is to build a bath inexpensively, with your own hands. There is a sufficient amount of building materials and technologies that can be called budget.
If we talk about the construction of full-fledged, albeit small, but free-standing baths, then the frame and monolithic are considered the most budgetary technologies. Cheap baths are often made on a wooden frame, sheathed with plywood, OSB, boards - whoever has what. Inside, between the two skins, a heater is laid.
One of the options for the frame structure - with board sheathing
In monolithic construction, arbolite is the most popular for the construction of baths - a mixture of cement with sawdust. Sawdust can be generally free or cost very little. Little cement is required in wood concrete, so this type of construction is unlikely to hit hard. A removable formwork is placed along the perimeter of the building, the mixture is loaded into it, and it is rammed. The next batch is being mixed. It's that simple. Flammability is considered a disadvantage of this material, but wooden and frame baths are also combustible. So this is not an argument.
 Sawdust concrete or wood concrete is a warm, natural material that consists of sawdust, sand, cement and water.
 Polystyrene concrete (granulated polystyrene mixed with cement and water) is not much more expensive, but not everyone likes the use of “chemistry” - foam plastic - in the construction of a bath. However, in itself, this material allows you to get a cheap and light building, which, with the right finish, will only please the owners.
All three technologies give a combination of low price and good thermal performance, that is, heating such buildings requires little fuel, which in baths is the main indicator of efficiency.

There are regions where timber is still the cheapest material. In them, perhaps, it will be cheaper to put a chopped bath. From round timber or from a bar - this is already optional. The advantage of this solution is a natural material (although it must be impregnated with chemistry in order to maintain its appearance and protect it from diseases and insects). But chopped baths have their drawbacks - you can start steaming no earlier than a year after the walls are erected and the roof is installed. We must wait until the main shrinkage has passed and only then begin the insulation and finishing work. The second disadvantage is that it is necessary to regularly update the protective coating, otherwise the building will become gray and unsightly. But the wooden baths themselves are very good with a special atmosphere.
Inexpensive foundations
Inexpensive walling technology is far from everything. Sometimes the construction of the foundation takes almost half of the funds required for the construction of the building as a whole. The technologies listed above are good because you can make lightweight foundations for them. Somewhere it is enough columnar, somewhere pile or pile-grillage. Any of the walls listed above can coexist quite normally with them, leveling their shortcomings (possible uneven shrinkage of different support points).

The foundations listed above may not be implemented on all soils. Sometimes a shallow or normal strip foundation may be required, and on especially heaving or unstable soils, a monolithic slab may be required. On such grounds, building blocks can be added to the wall construction technologies listed above - foam concrete, cinder block, expanded clay concrete. All of them have their own characteristics (basically, thorough protection from high humidity is required), but the construction technology is also inexpensive, although the foundations are required to be more solid.
Compact or temporary
If in the country you want to build a mini-bath, a very small booth, then you need to take a closer look at the construction technology or. If there is a desire, even an ordinary construction trailer, a barn or a change house can be turned into a more or less normal steam room. It is only important to insulate well and put the right stove. Everything else is not so important.
Cheap frame bath in stages - photo report
The initial data are as follows: a bath in terms of no more than 4 * 5 meters, a small budget - no more than $ 200-300 per month. From the initial data - clay heaving soil, 4 meters from the fence - a cliff. Bringing it all together, it was decided to build a frame bath on a columnar foundation.

The bath itself turned out to be 5 * 3 m, plus a terrace 1 meter wide along the long side. Under the bath, it was decided to make pillars from asbestos-cement pipes 34 cm in diameter, under a terrace of 15 cm. In the center of the plan, 4 additional pillars are marked - this is the foundation for a brick oven.

We dig in below the freezing depth - for this region it is 140 cm. By the way, we cut pipes by 20 cm more - the total length is 160 cm, so that the bath is 20 cm above the ground.


Inside each column, a frame of reinforcement 12 mm in diameter is installed. 4 rods are connected, the release from the post is 10-15 cm, so that you can safely weld then the strapping.

Concrete was ordered ready, brand M250. A formwork was put up along the perimeter between the pillars and a boat was immediately poured, which will close the gap between the bath floor and the ground.
A week later, the concrete gained enough strength, work continued. A harness was welded from a corner 70 * 70 mm with a wall thickness of 6 mm (the corner was on the farm). To connect the pillars and metal, we weld the reinforcement outlets to the shelves of the corner.

It must be said right away that in terms of bearing capacity, this foundation is redundant. On it you can build a two-story heavy building, and not a light one-story frame. But, since they did it “for themselves”, and there is also a clay cliff nearby, it was decided to play it safe.
It was decided to make warm floors in the washing and rest room - sometimes you just need to wash yourself, without soaring, and doing it on a warm floor is much more pleasant.

Therefore, a heater (polystyrene foam) was laid on the draft floor, waterproofing, a reinforcing mesh were laid on top, pipes were tied to it, and all this economy was filled with concrete. Under the stove, of course, the warm floor was not poured.

A week later, when the concrete gained enough strength (they didn’t cover it, but watered it regularly), work began on the construction of the frame. For the racks, a beam of 150 * 150 mm was used, spacers - a board of 50 * 150 mm (again, a solid margin of safety, but this is from the desire to build a good bath).

The bathhouse was built mainly alone, therefore a consistent installation method was chosen - the racks are placed first in the corners, then - in those places where door-windows will be installed or piers will adjoin. If, as a result, somewhere there are gaps greater than 1 meter, additional racks are placed. But in this case, since all the racks were made of a very powerful beam, they did not install intermediate ones, and the structure was given rigidity by slopes.
Further, so that when laying the floor it would not drip on the head, they began to manufacture the roof of the bath. It is made the most budgetary - single-sided, with a minimum rise - 15 °. To ensure this slope, the timber for the racks was pre-made in different lengths.
A board of the upper trim is nailed to the racks at the same level, ceiling beams are attached to it. Rafters with the required slope are attached to the same racks. From above, a continuous crate is stuffed under the roofing material.
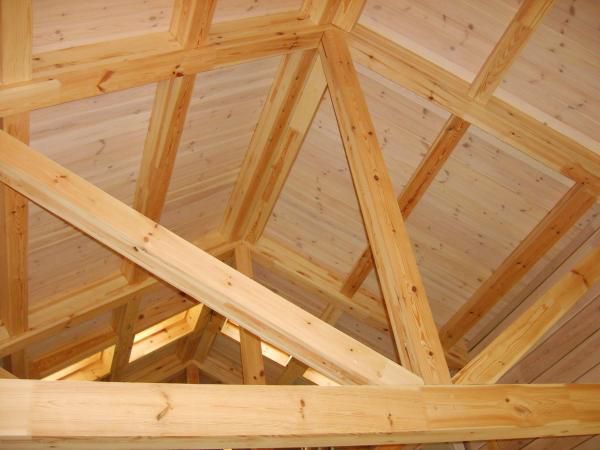
 Shed roof truss system is very easy to manufacture
 After the roof was ready, the OSB walls were sheathed, and then the floor was laid on the rest of the bath.

The next step is laying the oven. This is a long process - it took a whole month. The stove is stacked with a closed heater. In the zone of formation of the chimney, a cast-iron box is built into which stones are placed. A door leads to the heater, which opens into the steam room.
The stove also has a built-in register that heats water for underfloor heating (outlets on the side of the stove). It is not always necessary to heat the floor, because there are two modes of operation - summer without floor heating, and winter, with the “turning on” of the register heating. Transfer from one mode to another - with the help of a valve.

This is followed by finishing work, and they will be different in different cases. The only thing that will be more or less common is insulation. Mineral wool was used to insulate the walls and ceiling. The thickness of the layer on the walls in "cold rooms" is 100 mm, in the steam room and on the ceiling - 150 mm. The steam room on top of the insulation is also sheathed with foil on kraft paper.

After the insulation, a vapor barrier is attached. In the rest room, the walls are sheathed with OSB, cork is glued on top. In the shower room, tiles are glued on the OSB, the “dry” part is upholstered with clapboard (horizontally).
 Washroom - dry area and shower room
 In the steam room, first, a crate for lining with a clapboard is stuffed, then a wide clapboard. The steam room turned out to be quite small, and the stove also takes up a lot of space. Two are accommodated comfortably, three are already more difficult, but also quite convenient. To regulate the number of seats in the steam room, the shelves were made retractable.

The entire construction process took two years, the work was carried out mainly "in one hand". Assistants were only at the stage of pouring the foundation, and then at the stage of installing the frame - to set up the racks (they should be 100% vertical).

Video example of the construction of a bath from a monolithic wood concrete
Inexpensive do-it-yourself bath 3 * 6 - step by step photos
The log for the future bath was prepared and sanded in advance, covered from the rains, it dried for about 5 months. The building will consist of two halves: a steam room and a sink made of logs, and a rest room on a wooden frame. It turns out two rooms 3 * 3 m. Construction began with a markup: in terms of 6 * 3.

The soil is sandy, so we make it shallow. We dig a trench 60 cm deep, expose the formwork. The width of the tape is taken with a good margin - 35 cm.


We make doors - from a frame, on which OSB is stuffed on one side, and lining on the other. About how to do

In this form, we leave to winter - the log house should “sit down”. In the spring, we insulate the frame part of the building, we cover the insulation with a vapor barrier membrane.

Let's start finishing the ceiling. It was decided to make a budget filing of the ceiling - to fill short boards between the rafters. They can be bought quite cheaply. We process, cut the desired length. We fill the supporting bars on the rafters, to which we knock the boards cut to size from below.


Outside, the yuan was sheathed with siding - both the frame part and the log cabin. It turned out to be far from ideal. And between the siding and the wall there is a ventilation gap, so there are no problems with removing moisture.
 Do-it-yourself budget bath - another inexpensive solution - siding
 Started on interior trim. We stuff the crate, lining on it.
 Inside the rest room sheathed clapboard
 We turn to the finishing of the steam room. First, cover everything with foil. The room itself will consist of a steam room zone, separated by a glass door, and a “washing” zone. In the washing wall, we will sheathe it with moisture-resistant drywall, on which we will then glue the tiles, and in the steam room - with clapboard.


 We sheathe the steam room area with clapboard and
 We cut an opening in the wall for the installation of the furnace. She will be heated from the rest room, and her “body” will be in the steam room. We lay a brick base under the oven, install it. We cover the fuel outlet with fireclay bricks.


We tile the sink.


Everything about the main work, the decor and all sorts of things remained - buckets, ladles, thermometers and the rest of the “stuffing.
Since ancient times, the bath has been a place where you can relax and unwind. These ancient buildings bypass even outdoor recreation in popularity.
How to build a bath yourself?
Building a bath with your own hands is a difficult task and its implementation will require a certain amount of knowledge, which you will soon learn about.

To build a bath with your own hands, you will need to familiarize yourself with the action plan:
- Design a bath
- Understand the stages of construction;
- Acquire building materials;
- Connect communications;
- Equip the bath from the inside.
After familiarizing yourself with the stages of construction, you need to decide on the place where the bath will be located, since a lot also depends on the location.

The best option would be if:
- the bath will be located on a hill, this will greatly simplify the installation of a water drain;
- next to the bath there will be a river or a reservoir;
- the window in the bath will be located opposite the house, which will allow you to observe its firebox.


For a garden house, the distance will be no more than 3 meters, and for buildings such as a bathhouse, this distance should not exceed 1 meter.


The design and drawings of the bath are best ordered from local designers, it will cost about 5,000 rubles. You can also search for ready-made sketches and photos of a bath on the Internet that best suit your preferences.

Bath made of brick, stone or blocks
Brick, stone or blocks can be used directly as materials for a brick bath.

To build a bath, it is necessary to dig a pit and fill it with 20 cm of sand, then it must be filled with water for compaction.

The second step will be laying rubble on top of sand 10 cm thick, which then needs to be covered with sand again.

The last step is to install a system for drainage and drainage of the building.

Bath from a bar
The first layer for the base of the bath will be laying sand at 20 cm, crushed stone is applied in the second layer, and concrete pouring is laid in the third layer. The key step will be the reinforcement of the building.

Metal rods must be inserted into the layers for a more durable structure, and as additional stability, metal plates must be laid in the middle, which are connected with wire.

Note!

The next stage of work is the blind area, which is needed so that the foundation of the bath is not washed with water.

It is best to make a blind area from clay, it is much stronger than concrete, and also does not form cold seams in the process. A layer of rubble must be poured over the blind area.

Next, you need to install a drain in the bath. First you need to dig a hole and bring its gutter to the edge of the foundation of the building, cover the walls of the hole with wooden boards with reinforced wire, and then pour everything with concrete.

Frame bath
The foundation for such a structure of the bath is made according to a simplified technology, which is the advantage of the frame bath. It is necessary to make a foundation of asbestos-cement pillars, which, after installation, are poured with a concrete mixture.

The next step is to mark the walls. Then you need to start connecting the boards using nails. From the boards, the upper and lower trim is assembled. The walls for such a bath are made in a lattice structure.
Note!


The materials that are needed for the walls are bars, insulation, and materials for the outside, such as OSB boards or a block house, and inside you can use the clapboard.

Materials for insulation and vapor barrier
It is worth warming the bath from the outside only with the condition of heating in the building.

For a wooden bath, it is necessary to make a grate that will be inserted into the insulation. The work will need mineral wool, the layer width of which will be 50 mm.
Floor in the bath
In the case of a frame bath, when it remains to insulate the floors, as well as install the floor boards, in addition, it is necessary to install logs, a subfloor, and fix the structure to remove steam, then lay the insulation and check the waterproofing.

It is best to make the floor of concrete, as this will allow the bath to dry faster and it will last much longer. Shields made of wood are laid on the concrete floor; they can later be taken out to dry and calmly leave on their own business.

Note!

DIY bath photo


 in the near future - forecasts and expert opinions")


 in the near future - forecasts and expert opinions")


