Reading time ≈ 10 minutes
Do-it-yourself construction of extensions to a wooden house has become very popular lately, as can be seen from the huge number of projects with photos. Indeed, the owners of private houses often face the question of expanding the space, and the best solution in this case is an extension. Among other things, the extension can radically transform the look of the house, making it more modern, cozy and attractive.
Closed glazed extension option
Types of extensions by form and purpose
In appearance and, accordingly, the functional purpose, extensions are divided into several types:
- Additional full room at home.
- Open / closed veranda.
- Porch.
Consider each of the types in more detail with their advantages and disadvantages.

Various options for extensions to a residential building.
Full room
In this case, an additional full-fledged room is being built, suitable for year-round use. It can also be used as:
- utility room;
- garage;
- pantry;
- winter Garden;
- summer cuisine;
- additional bathroom;
- guest house.

Outbuilding used as a garage.
For construction, a wooden beam, brick or foam block with insulation is most often used.
Advantages of this type:
- a significant increase in the useful area of \u200b\u200bthe house;
- ease of communications (electricity, heating) from the main building;
- ease of re-equipment of the premises, if necessary, for another function.

Construction of an extension from a wooden beam.
A well-executed, beautiful extension can advantageously complement the exterior of the house. However, there are downsides to this solution. For example, you will need to make a reliable foundation and spend money on high-quality insulation, which will be reflected in the cost of the entire project.
Also, for the extension of a full-fledged room, you will need to allocate quite a lot of space, which is not always possible for owners of small plots.

An extension made of logs in the form of a full-fledged living room.
Closed veranda
Usually this is an unheated room with brick or timber walls, fully glazed. Due to the lack of heating, it is used only in the warm season.

Spacious enclosed space.
Design advantages:
- the ability to implement almost any design;
- glass buildings look very impressive and advantageous;
- in summer, you can relax on the covered veranda even in strong wind and rain;
- glazing protects from annoying insects.
The disadvantages of this design are few, but still they need to be considered:
- a large glass area means the need for frequent and thorough cleaning;
- the glass-enclosed design does not give that feeling of being in the fresh air, which many expect from the veranda.

A fully glazed veranda looks very original and stylish.
Another example of a fully glass veranda in the photo:

A glass terrace can become a real highlight of the house.
The construction of a terrace and a house from different materials can also be turned into an advantage. For example, in the photo below, the extension is made of other materials in different colors, but it looks just magical:

Snow-white covered terrace near a gray house.
open veranda
A simple, practical and functional frame structure, which has recently been very popular. An open veranda looks great in tandem with a wooden house.

Outdoor terrace with a beautiful view of the lake.
Advantages of open design:
- significantly lower financial investments in construction due to the minimum material;
- the possibility of being outdoors;
- the need for a smaller building area than for a full-fledged residential room;
- ease of installation;
- functionality and convenience.

Open terrace with one glazed wall.
Of the shortcomings, it is worth remembering the strictly seasonal possibility of use. At the same time, in too cold summer weather, with strong wind or rain, staying on the veranda will be uncomfortable. In addition, insects will torment you in the evening.

The veranda gives the exterior of the house completeness.
Porch
It looks like several support pillars and roofing material and serves to protect the space from rain and snow. The porch is the simplest, but at the same time the least functional version of the extension, which plays a largely decorative role. However, if you install chairs, a coffee table, a small bench on it, the porch may well replace the gazebo.

A miniature porch with a bench and an armchair.
Design advantages:
- ease of construction;
- small financial costs;
- no need for a solid foundation;
- transformation of the facade of the building.
It is obvious that in bad weather conditions it will not be possible to relax on the porch, and it will be possible to use it only in the warm season. Together with little functionality, these are all the disadvantages of this type of extensions.

Spacious front porch.
Most often, the porch is located from the front of the building, through which the residents and guests of the house get inside. However, it is not necessary to build a porch at the front door. If you place the extension in the backyard, you get a cozy closed patio. The space can be supplemented with comfortable furniture, a table, a hammock and turn it into a place for a summer dining room, a playground, a space for friendly gatherings and romantic dinners.

The porch in the backyard of the house serves as a favorite place to relax.
Materials for the construction of an annex
You can build a terrace or a room from various materials - with a wooden house structure, even modern materials will look harmonious due to the decoration.
When choosing materials for an extension, it is worth moving away from the common stereotype that the house and extension should be made of the same material. Of course, an extension is a harmonious continuation of the house, but a combination of different materials can look more advantageous and interesting.
Most often, the following materials are used for the construction of an extension:
- Bar. Practical, eco-friendly, aesthetic and very durable material. Thanks to a special impregnation, the wood is resistant to pests, rot and fungus. When building from a bar, it is necessary to have an expansion joint between the structures. The walls and roof are built in the same way as the main living space.
- Brick. Natural, durable material for the construction of extensions.
- Foam block. Extremely common now, durable, affordable material with excellent thermal insulation properties. An additional advantage is the rapid construction of the premises due to the large size of the blocks. It is convenient to build additional rooms and covered verandas from foam blocks. The disadvantage is the mandatory need for exterior decoration due to the unaesthetic appearance of the blocks.
- Frame. This option is the least costly in terms of finance and time resources. With the help of the frame, you can build a terrace, veranda or porch. The method consists in the manufacture of a wooden or metal frame, which is then finished with chipboard (OSB) boards and insulated with a special material (foam plastic, mineral wool, etc.). Frame structures, due to their lightness, are excellent for the construction of two-story buildings.
- Polycarbonate. This material is used in the construction of frame buildings. This material is extremely popular now due to such properties: ease of use, lightness and strength, aesthetics, the ability to build an extension of any geometric shape. It can only be used for
An extension of foam blocks does not require such a solid and powerful foundation (a columnar one is enough), but a brick and cobbled structure necessarily involves laying a high-quality strip foundation to avoid distortions and deformations under the weight of a brick.

The roof of the extension, made of polycarbonate, provides a high level of natural light in the extension.
The main stages of the construction of the building
Before proceeding with the construction of an extension to a wooden house with your own hands, it is worthwhile to study in detail the finished projects with photos and draw up a work plan. What should it include:
- location of the extension;
- type and design of the extension;
- type of foundation (based on the previous paragraph);
- list of necessary building and finishing materials;
- summing up communications (minimum electricity);
- calculation of the budget (which includes, in addition to the cost of materials, also transportation costs and wages of employees).
When drawing up a project for a future building, it is imperative to indicate the following aspects: the composition of the soil, the level of freezing and moisture absorption, the condition of the walls and foundation of the main building.
Foundation laying
For verandas, a columnar type of foundation is most often used, and if the building is quite large, the pillars must be laid every 60 cm around the perimeter.
Work progress:
- Pits are dug to a depth of 100 cm. The depth of the pits must exceed the depth of soil freezing.
- A pillow of layers of sand and gravel is laid at the bottom.
- The holes are filled with concrete.
- Since the veranda is being built for a wooden house, we build support posts from the beams.

The foundation of the veranda with the finished bottom trim.
Frame erection
After laying the foundation, you can proceed to the frame of the building:
- First, the lower harness is mounted, the corners of which are fastened with a dovetail joint. To fasten the entire structure, dowels or nails are used. The lower harness can also be made double and the racks of the future veranda can already be placed on it.
- Support beams are installed. At the wall of the veranda adjacent to the main room, the racks must be higher for the construction of a pitched roof.
- If the veranda is to be enclosed, the cross beams will determine the height of the windows.
- The installation of the frame is completed by installing the upper trim.
Keep in mind that a roof angle of 45-60 ° almost doubles the consumption of roofing material. With this angle, the resistance of the coating to the wind is expressed, but, on the other hand, the roof is well cleared of precipitation.

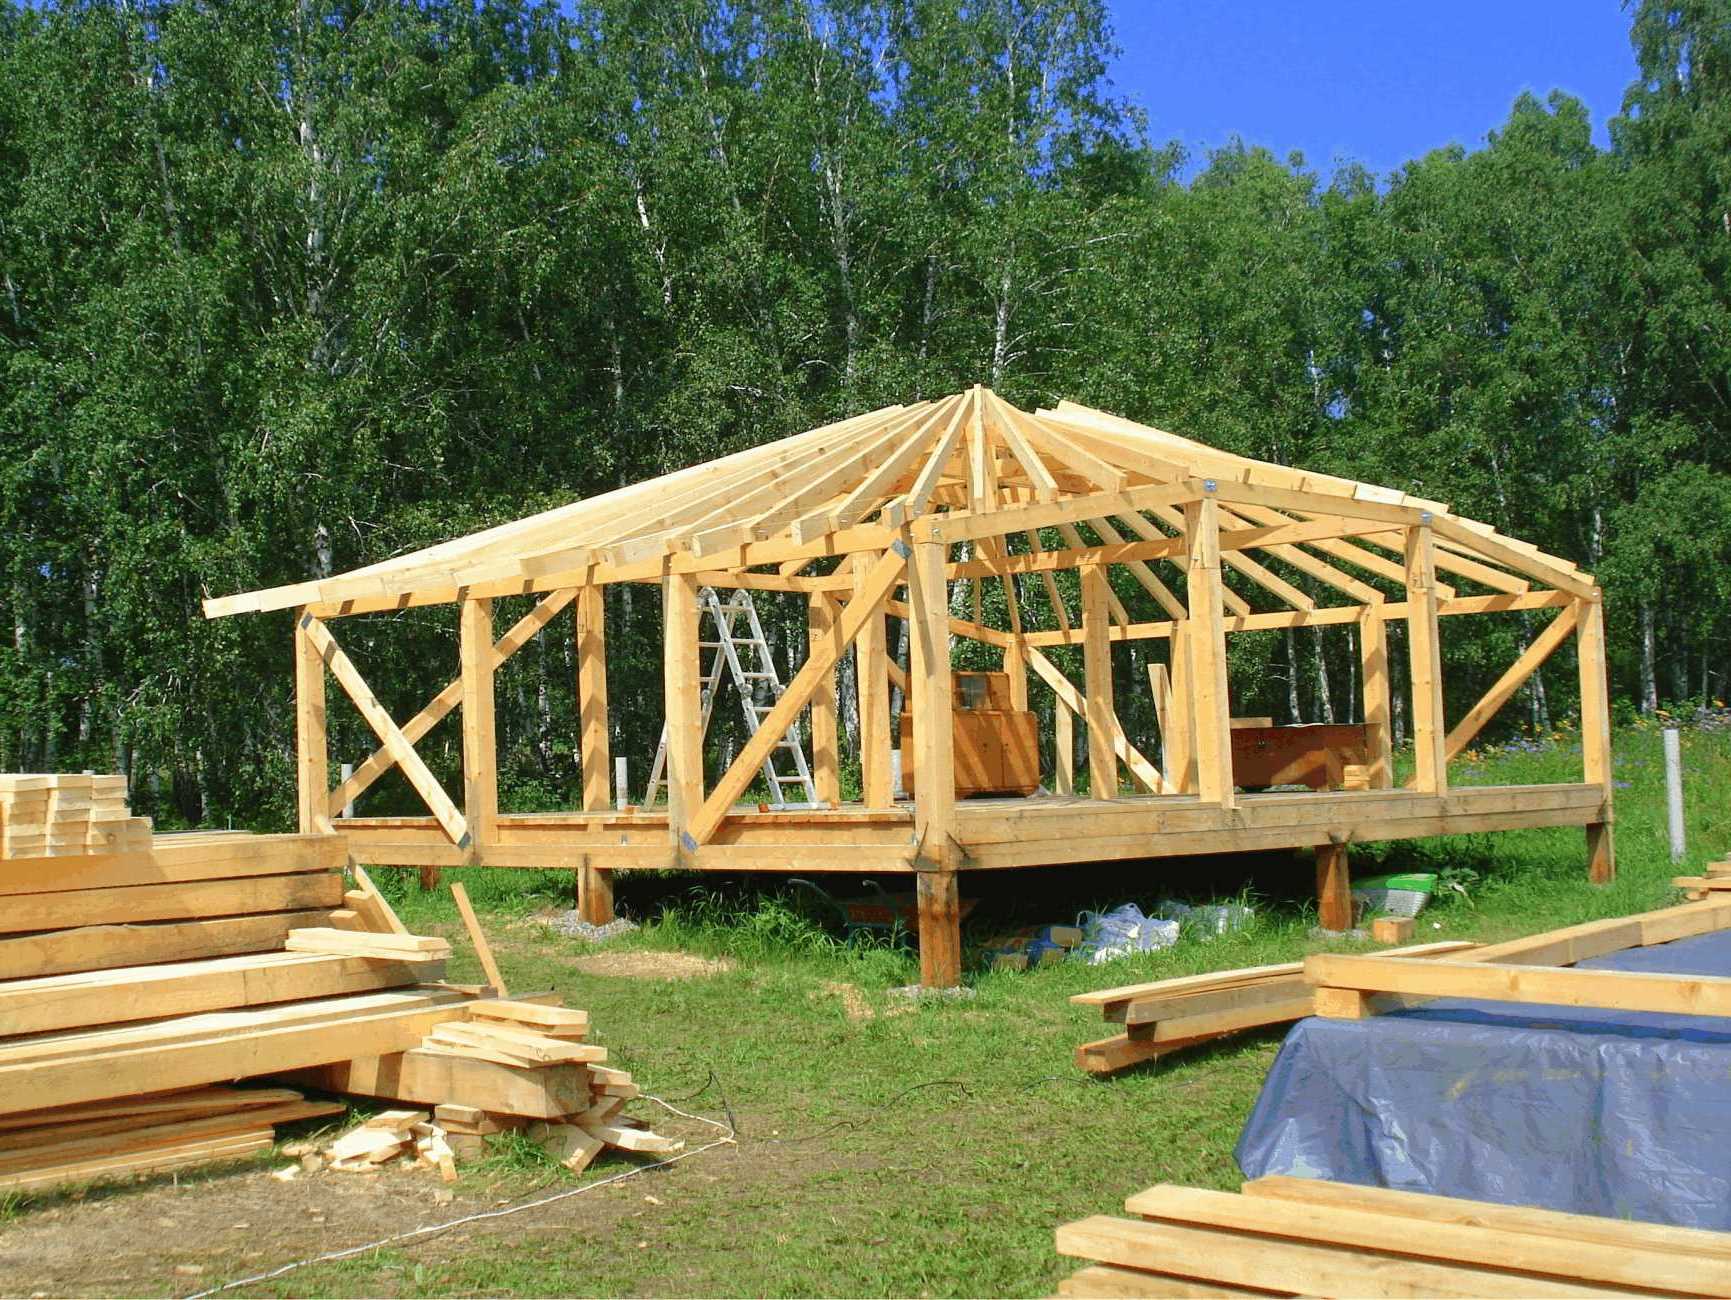
The frame of the wooden veranda.
When using a beam, its cross section should be 10 * 10 or 18 * 8 cm, but if a log is used, then the cross section should not be more than 12 * 12 cm.
Roof and flooring
For verandas attached to the house, shed roofs are most often used. If the extension is located at the end of the building, it is advisable to use a gable roof. Rafters and lathing are attached to the upper trim, on which the roofing material is then laid.
Types of roofing for the roof:


Practical roof made of asbestos-cement slate.
To equip the floor, logs are installed on the lower trim with a distance of not more than 1 m, on which the board is placed. Self-tapping screws are used for fastening. The board must be impregnated with a special solution to prevent fungal infections.
If the veranda is supposed to be open, the floor should have a very small angle for water to drain.
In the final, the building must be furnished with furniture, decor, flowers to your taste.

After arranging furniture and decor, the veranda looks very nice and cozy.
As you can see, building a beautiful, modern extension to a wooden house with your own hands is actually not so difficult, focusing on ready-made projects and photos. If you have certain knowledge and skills, you can do it on your own and hire professionals in their field. But in any case, an extension is a great opportunity to expand the space, transform the house and make it even more comfortable!
You can watch the video on how to build an extension:
Planning a future extension to the house requires a fairly thorough preparation and at least an approximate calculation of the parameters of the foundation, walls, and roof. It will be necessary to resolve the issues of selecting material and, of course, you need to understand the question of how to legalize an extension to the house. Without legal registration of a new housing construction plan, an extension will be considered a self-construction and, according to all laws, is subject to demolition.
How to start planning an extension
Any option for an extension to the house is based on four main documents, on which the future fate of the building will depend:
- building permits;
- A project of a new building with a detailed specification of the implementation of the most important nodes, for example, an adjoining scheme to the main building or a foundation device;
- The layout of the extension on the site plan, with marked distances between individual buildings;
- Construction estimate.
Often the construction of an extension to the house is just a small cosmetic extension of an existing veranda, porch area or outdoor terrace. Both elements already appear in the original project of a private house, so its owners believe that nothing needs to be changed in the documents. The external dimensions of the house with an attached premises do not change, the distances between objects according to sanitary and fire safety standards remain the same, so there is no point in messing with bureaucratic procedures for re-registering a capital building.

Similar logic can still be understood if we are talking about a country shield house, a wooden dacha or any other building erected without a foundation or falling under the definitions of a temporary one. If we are talking about the construction of capital-type structures, the arrangement of an extension always entails certain consequences.
Note! Refusal of registration, except for a fine or forced dismantling of a building, is primarily an investment "in the air" with the risk of losing everything.

A professionally designed and built extension to the house, photo, can increase the capitalization of the object from 30 to 60%. The situation is quite common for modern brick buildings erected on the slope of a hill or mountain. Instead of a porch on piles, an extension to the brick house is being completed, which allows increasing the living space by 40-50%.
Properly executed documents will allow, for example, to increase the amount of collateral in the bank or simply sell the building at its real price. Whereas an illegal extension to the house will only create problems.

Registration of an extension, we understand the details
In order to correctly assess the possible amount of bureaucratic red tape, it is necessary to draw up the following description as detailed as possible, if possible in detail:
- Determine the purpose of the future building, its size and location relative to the house;
- Make sketches, you can even draw by hand, but with the obligatory observance of the generally accepted rules for paperwork, it is best to use ready-made projects for extensions to the house;
- Make a separate document detailing the construction of the foundation or foundation, walls and roof of the extension.
All of the above will be required in order to correctly classify buildings. Any options for an extension to the house, photos are either classified as capital buildings or non-capital buildings.


The paperwork scheme depends on how the employees of the city inventory bureau classify the building.
Papers for non-capital construction
The question of correct classification is not as obvious as it might seem at first glance. Non-capital extensions include:
- Stairs and porches at the new entrance to the house;
- Sheds, terraces, verandas, balconies;
- Auxiliary and temporary extensions, if they do not affect communications or load-bearing structures of the capital structure.
Some experts and some lawyers define a non-capital extension as a structure without a foundation, but it would be wrong to follow such a rule in all situations, since there are a huge number of by-laws and clarifications to the norms of the Urban Planning Code, plus numerous court decisions that contain provisions that contradict each other. Therefore, before legalizing an extension to a private house, it will be useful to get acquainted with at least some of the regulatory documents.

To design such an extension to the house, do the following:
- Order a drawing for an extension and make a technically competent description of the design;
- Write an application to the Bureau of Technical Inventory to amend the passport of a capital building, that is, a house with an extension;
- Wait for the inspection of the erected structure of the extension to the house;
- Make changes to the design of the house.
As a rule, there are no problems with registering a non-capital extension to the house, but even if an official refusal is received, registration can be done by a court decision.
Registration of an extension of a capital type
Most of the brick, stone or metal-framed outbuildings are considered capital by law. One of the arguments used by experts in substantiating their decision is the presence of a foundation in any of its forms. Therefore, when planning a full-fledged extension to the house, the owners show miracles of ingenuity, which is worth building a structure with a cantilever or balcony type of attachment to the walls of the main house.

According to the law, a capital extension will require a building permit from the regional department of architecture and capital construction.
Documents to be submitted:
- Application with a photocopy of the passport;
- Registration certificate for the house and the attached site plan;
- The project of the future extension with a short explanatory note.
Upon a positive decision, the owner is issued a written permit for the construction of the structure, subject to the design and registration of the structure in the state register.
After the extension to the house is completed, it will be necessary to go through all the bureaucratic procedures at the BTI, where they may be forced to make an additional examination for the compliance of individual nodes with the norms of SNiP and GOST. After entering into the technical documentation for the house, the changes are registered in the state register of capital construction and real estate.

Of course, you can put up a building without all this bureaucracy, but as practice shows, it’s cheaper to register an attached room.
How to plan an extension to your house
The second headache of any process of building an extension is the inadequacy of the box of the main housing building. Only in 1 out of 100 cases, when drawing up a house project, the future owner is wise enough to provide for the possibility of expanding the main structure of the building due to one or two extensions. The most common problems are the imperfection of the foundation system or claims from neighbors.

What to do with the foundation
The simplest situation is when a full-fledged two-meter strip foundation is laid under the main building. In this case, under the attached premises, it is possible to use a shallow type of strip foundation without any special fears. If the height of the extension is higher than one floor, then the foundation will have to be deepened to the freezing level, the upper armo-belt must be tied up with the floor slab of the main building.

The most reliable and durable extension to the house is made on the same foundation with a brick box of the house. For example, you can use the foundation area occupied by an open veranda. To reduce the pressure on the corner sector of the foundation, the extension box is partially supported on the foundation of the veranda, and most of the weight is transferred to piles driven at a distance of at least 60 cm from the blind area line.

If the house stands on a shallow or pile foundation, then the simplest solution to the problem is to use a slab foundation. The foundation slab for the building is poured over an area 2 times larger than the dimensions of the annex itself. At first glance, it looks like a waste, but in fact this is just a way to reduce the impact on the foundation of the house and make a reserve for the future. In all other cases, experts recommend placing the building on a pile foundation without rigid binding to the supporting structures of the house.
Wall and roof materials
For the arrangement of the extension box, three types of materials are most often used:
- Gas silicate blocks or foam concrete on a strip foundation;
- Wooden or metal frame structures on a pile foundation;
- Hollow ceramic brick on a slab foundation.
In principle, it is possible to build an extension from any material, even from rubble or concrete blocks, but in practice, they strive to make the attached premises as light as possible so as not to break the foundation, so even brick buildings are already a rarity today.
Most often, the box is erected from foam concrete blocks, they are light, relatively easy to lay walls and are cheaper than bricks. Due to the excellent heat and sound insulating characteristics, the building can be made with huge windows or even a whole wall of glass.

The second most popular is the frame system. The use of a profiled pipe and a steel profile allows you to assemble an openwork glass extension on two floors. The weight of such a structure will only be slightly more than a wooden frame, so a particularly powerful foundation for the building will not be required. The only condition for the construction of a metal-frame extension will be the correct placement of the structure relative to the foundation of the house. The best option is the inner corner of the facade, which provides maximum rigidity of the foundation and stability of the walls.

Traditionally, an attached room to the house is preferred to be installed on the corner of the main building. This part of the foundation of a brick or block house has the highest rigidity and stability, which in turn has a beneficial effect on the attached box itself.

If an additional room is built from wood concrete or aerated concrete, while the place for the foundation is in the center of the main building, in this case it is necessary to take measures to increase the stability of the attached box by all available means.

As such, there may be an additional brick wall or a rebuilt common roof.
The exception is frame structures made of timber, as a rule, a box made of boards and timber has sufficient rigidity and relatively low weight, so it can be attached anywhere in the house, without regard to the foundation.

Conclusion
When choosing a plan or project for a small room, it is necessary to take into account possible problems from the neighbors. Oddly enough, according to statistics, the majority of court decisions on the forced demolition of extensions in the private sector are based on complaints and claims against neighboring houses. Therefore, it is not enough to plan the foundation and start construction, it is also necessary to provide the building with permits in case of a possible conflict.
Very often, you want to add a veranda or terrace to a finished house in order to increase the available living space and simply transform the look of a residential facility. In such cases, an extension is being built to a wooden house, the projects of which can be very different depending on the size of the new object and the materials from which it will be built.
An extension to a wooden house of a veranda and a terrace can be built in different ways in terms of design features. Most often this is done in several ways:
- The extension is built on the side and has a single roof with the house.
- The extension is located on the side, but under a separate roof.
- The veranda is located on the second and higher floor or in the attic.
Of course, most often the extension is done on the side of the house. The option with a common roof is more convenient and profitable, but for this it is important that you can make a roofing system common with the house. As for the add-on, this process is not an easy one. So, first of all, it is important to take into account the possibilities of the foundation of the house, which may simply not withstand the load under the influence of the built-on terrace.

What material to choose
An extension of the veranda to a wooden house can be built using different materials. Most often it is timber, log or frame technology, as these options look harmoniously against the background of the general exterior of the cottage. But extensions made of brick or foam blocks are no less popular. We note right away that each of the options has its own nuances in terms of construction. Consider the features of the construction of each material in more detail.
Timber extension
- the most common material. This is due to the characteristics of the material itself:- Its production is carried out in the factory, so the wood is of high quality.
- Thanks to special processing material possesses high resistance to rotting, a fungus.
- Environmental friendliness and naturalness are the main advantages of a bar of any variety.

But before you make an extension, you need to solve a number of questions for yourself. The most important is the foundation of the future home. There are a huge number of options for its creation, but any foundation must be firmly “tied” to an existing building. Ideally, the extension needs the same foundation as the house. Therefore, it is important to study the condition of the soil, its type, to think about what the load from the extension will be. After that, the second issue needs to be resolved: the veranda will be combined with the common perimeter of the house or will be built as a separate structure. It is not easy to combine structures, since it will shrink, and even specialists will not answer what it will be.
Frame extension
From the frame is a budget option, since significant investments in its construction are not required. In addition, the very construction of a veranda or terrace will be much faster with minimal spending on materials. The construction of the structure is carried out on the basis of a frame consisting of a wooden beam or metal profiles. The frame is being built around the entire perimeter of the future veranda.
Some time after the construction of the house, often, there is a need to expand the usable area. The only way out of this situation is the construction of an extension to a wooden house. With proper design of the structure and the selection of appropriate materials, this event can be performed independently.
What do you need to know?
The construction of any object requires the creation of a project based on calculations. The construction of an extension to a wooden house is no exception. In this case, it is necessary to provide for such a constructive solution that would exclude the occurrence of cracks. When choosing the architectural form of the extension, one should not forget about the need to create a complex that is unified in style.
In addition, it should be understood that the construction of an extension must be agreed with the relevant organization and have all the necessary accompanying documentation. Otherwise, the constructed object will be considered a self-construction and in the future the developer will have to decide the issue of legalizing it.
Types of extensions
Before starting the construction of an extension to a wooden house, it is necessary to study the possible design options and the technological features of their construction. After analyzing the information, the choice of materials and technology of work is greatly simplified. This approach will allow you to harmoniously connect the extension with an existing building.
Canopy. This is the simplest extension design. It is necessary to protect the porch and people from sunlight and bad weather. In addition, under a canopy you can spend leisure time and receive guests.
The construction of a canopy does not necessarily require the construction of a powerful foundation. Installing pillars that play the role of supports can become a fairly solid foundation. A frame is mounted to them, and the surface of the walls is formed, depending on the taste preferences of the developer.
Wooden house may need an extension
Summer room. She, often, is equipped from an extension. The room is designed for relaxation and serves as a place for friendly feasts. As the basis of such an extension, a strip or column foundation is constructed. The material of the walls of the frame structure is plywood, boards or bricks.
In order to create better illumination, the walls are made partially glazed. The roof of the summer room can be with one or two slopes, and it is undesirable to make its structure heavier. Insulation or the creation of a heating system in such a room is impractical.
Living room. The device of a full-fledged living room implies a full construction cycle. When constructing the foundation, a block or monolithic structure is used. For the construction of walls, brick, foam blocks or timber are used. During the construction of the roof, a layer of waterproofing is necessarily arranged. The entire structure of the structure must also be well insulated.
Kitchen. Arrangement in the extension room is a rather complicated undertaking. This is due to the fact that in addition to the construction of a capital structure, all communications are required, including sewerage and ventilation.
Garage. Such a structure is being built on, on which walls of brick or blocks are located. A reliable roof is also being constructed from slate, metal tiles or corrugated board. In addition, the room must be well ventilated.
Porch. Often, when constructing various structures of outbuildings, it is necessary to build a porch. The material can be concrete, timber or metal. With a significant height of the porch or the presence of a turn, a railing is required.
Mounting Features
The device for an extension to a wooden house largely depends on how the premises are supposed to be used and whether it will be residential. If capital construction is necessary, it is necessary to build a reliable foundation, separate from the base of the main building and the wall. Communications are also required.
The main problem with building an extension is connecting it to the house. If there are omissions at this stage, then the formation of cracks on the structural elements of the structure is inevitable.
There are the following ways to connect structures:
- Construction of an independent structure. The method is used in the case of construction on moving soil. The base is arranged closed along the perimeter, having no points of contact with the main foundation. The gaps between the surfaces of the walls of structures are provided with reliable hydro- and thermal insulation. The roof is arranged using a similar technology.
- Integration of the extension into the main building. The implementation of this method is associated with certain difficulties. To connect the structures in the foundation of the house, anchors or pieces of reinforcing steel are mounted. Then, with the help of welding, it is connected to the frame of the base of the attached structure. At the end of this event, they begin to pour the foundation of a monolithic type. The connection of the walls of two structures becomes possible with the partial dismantling of the box of the house. To integrate roof structures, the truss system of the house is dismantled and connected to the extension. Moreover, the fastening occurs both to the rafters and to the beams of the main building. After that, the roof covering is laid so that it represents a single surface.
When building a foundation for an extension, it is necessary to take into account the type of foundation under the house. This is due to the fact that different types of foundations on the same soil give different shrinkage. To prevent this phenomenon, the same base designs should be used.
 Construction of an annex
 Calculation and purchase of materials
At the design stage of an extension to a wooden house, the purpose of the object, its number of storeys and design features are taken into account. This allows you to make the best choice of material and draw up a construction estimate.
The following materials can be used for its construction.
bar
The use of timber for the construction of an extension to a wooden house is the best option. Moreover, the beam can be any: glued, rounded or planed. Standardized material dimensions greatly simplify installation.
As a rule, timber is produced by specialized enterprises, each product has strictly defined dimensions, and the quality of wood meets the standards. In the factory, the material goes through all the necessary stages of protective treatment, which increases the life of the wood. If necessary, the finished product undergoes heat treatment to give the wood a certain shade. Natural wood refers to environmentally friendly materials, which has a beneficial effect on the health of people living in the house.
In addition to the qualities described, the versatility of the timber should be noted, since it can be used to create an extension not only to a wooden house.
If the cost of the timber exceeds the construction estimate, then you should pay attention to other materials.
 The most difficult thing is to connect the extension to the house
 Frame extension
A good option from an economic point of view is the construction of a frame structure of an annex. It is characterized by the possibility of conducting work on the existing foundation, which significantly reduces the construction time.
The technology of building an extension involves the construction of a metal frame or a wooden structure. To create the surface of the walls, the frame is sheathed on both sides using chipboard or OSB boards. Between them, a layer of thermal insulation is arranged from an available heat-insulating material. On top of the insulation, there must be a vapor and moisture barrier.
The frame structure of an extension to a wooden house is easy to install and is available for self-assembly.
Brick
When using brickwork when erecting the walls of an extension to a wooden house, you can get a capital structure. The material has good thermal insulation properties, so the extension can have both economic and residential purposes.
To preserve the integrity of the architectural style, it is recommended to move the brick outbuilding from the visibility zone. This does not exclude its location on the rear side of the building. Brickwork has a significant mass, so a reliable foundation is being built that can withstand the loads from the walls.
The cost of construction in this case increases not only due to the rise in the price of materials and additional costs for the construction of the foundation, but also due to the cost of finishing work.
Main stages of construction
Foundation installation
The base for an extension to a wooden house is selected depending on the design features of the building. If you plan to create a dwelling, then the construction is mandatory. At the same time, its depth should be the same as that of the main building. Reliable connection of two structures occurs due to reinforcement.
The course of work on the construction of the foundation takes place in the following order:
- perform markup;
- dig a pit or trench of the appropriate depth;
- formwork is installed;
- produce a bunch of reinforcing cage;
- pour .
At this stage, moisture protection should be performed.
 Light extension on a columnar foundation
 Wall mounting
The construction of the extension walls is no different from the technology of building a house from a bar or other lumber. In this case, the resulting expansion joint must be sealed with mounting foam.
When using the same materials for the construction of an outbuilding and a house, the walls are connected using various fasteners. Dowels are made in the beam. Screws and plates are used, as well as brackets for fixing walls.
Roof installation
In the case when the height of the extension is less than the height of the wooden house, the roof is made with a significant slope. This will allow you to freely remove precipitation. In this case, the connection of both roof structures is not necessary.
When erecting a two-story warm extension, it is recommended to connect the roofs of structures. For this purpose, a partial dismantling of the roof of the main house is carried out and the ceilings are connected with metal corners. After that, waterproofing is arranged, and the roof is laid. A single drainage system must be organized.
 The roof is best made from the same material as the main building.
 How to cut costs?
You can reduce the cost of building an extension to a wooden house if you consider the following recommendations:
- the cost of timber is lower if you purchase it in winter;
- self-construction of the foundation will achieve savings of about 20%;
- use improvised materials;
- use the frame construction method.
Building a new residential building is an expensive and somewhat risky undertaking. Another issue is the expansion of the existing building in order to increase the usable area. Attaching an extra room to a country house or cottage will cost much less than building everything from scratch. But this does not mean that designing and installing a new room is a simple matter, there are a lot of pitfalls on your way. In order to avoid mistakes, we suggest that you familiarize yourself with the recommendations on how to make an extension to the house with your own hands and at minimal cost.
What kind of extension to make
To answer this question, you will have to do the design, from which any construction begins. Sketch the plan of the old building to scale, locate the extension and plot it on the drawing. By thinking about the internal layout of the new part, you can accurately determine its dimensions. Draw a side view to get an idea of how much space you have in terms of height given the slopes of the roof.
An important point. Careful drawing and verification with real dimensions on the spot will help to avoid unpleasant errors associated with the size of the part being erected, its height, and especially with the slope of the roof. The minimum angle of the roof slope is 8 °, you can’t do less, otherwise leaks will appear after showers and snowfalls.
A full-fledged project should provide material for the construction of an extension. Its choice depends on the purpose of the new premises:
- A full-fledged room with access to the hallway, equipped with heating and other communications - a bedroom, a kitchen, a bathroom or a bathroom. This is a capital building, built of brick, aerated concrete, foam block and their combinations. Timber products are also well suited - timber and logs.
- Light extensions - a veranda, an open terrace, a vestibule or a porch with a polycarbonate canopy. It is better to build such premises on a frame made of wood or metal structures, sheathed with OSB boards with subsequent finishing. The greenhouse and winter garden are made of glass.
- Outbuilding to the house - barn, garage, boiler room. These structures are both capital and light, the choice of material depends on your desire and capabilities. Common options are cinder block, shell rock and wood. A more progressive solution is sandwich panels with insulation on a rolled metal frame.
- A separate question is what to make an extension to the balcony of an apartment building on the ground floor from. The answer is simple: the same partition should adjoin the brick wall so that the structure does not fall out of the exterior of the building. Near the panel house, you can use any stone blocks, but then they will have to be finished to match the color of the surrounding walls.

Note. Regarding the building materials used, not requirements are listed, but recommendations. You are free to make an extension at your discretion, for example, to build a brick structure near a log house. But such solutions are more difficult to implement, and most importantly, more expensive.
How to make a foundation for an extension
For attached premises, 4 types of bases are used, depending on the weight of the structure and the quality of the soil:
- columnar - for lightweight structures on a wooden frame;
- a pile-screw foundation is used on subsiding soils for the installation of wood and metal structures with a small mass;
- tape - for heavy stone buildings;
- a reinforced concrete monolithic slab is poured over the entire area of the attached part, erected from bricks or blocks on unstable soils.

An example of a columnar base made of concrete
Advice. Modern frame houses are increasingly placed on screw piles. If this is your case, then the choice of foundation is obvious - a pile-screw foundation, it makes no sense to use another type.
A solid concrete slab is used quite rarely due to the high cost, and screw piles are best left to professionals in this field. To independently attach a light veranda or summer gazebo, a columnar base is recommended. For brickwork or walls made of gas blocks, it is better to fill in a concrete tape, we will consider these 2 methods further.

Traditional strip foundation
columnar base
A properly made foundation of this type is cheaper than tape and is well suited for light buildings. Its device begins with marking the site and designating the mounting points for future vertical racks of the frame. The pillars, and hence the soles for them, should be placed in increments of 1.5 m, as shown in the diagram.

The further course of action is as follows:
- Dig square holes 50 x 50 cm in size at the indicated points, deepening 70-80 cm. The task is to put a support on a dense, stable soil, so the bottom of the pit must be tamped.
- Sprinkle 15 cm of sand or fine gravel and compact again. From M150 concrete, pour a platform at the bottom, and after hardening, cover with roofing material in 2 layers (waterproofing).
- Lay out the 38 x 38 cm square posts of red ceramic bricks to the required height.
- Apply a bituminous primer to the walls of the columns or stick a welded waterproofing. Lay the roofing material on top of the support again.
- Cover the sinuses around the foundation with earth and lightly tamp.

Reference. Foundation pillars for a frame extension can be cast from M200 concrete, but then you will have to put up formwork and knit reinforcing mesh.
Strip foundation device
Under the base of this type, you need to dig a trench along the contour of the future premises, which is shown in the photo below. The width of the ditch should be made 15 cm more than the thickness of the brick or foam block wall. The depth depends on the location of the stable soil layer and ranges from 50-100 cm. The walls of the pit must be cleaned, and the bottom must be tamped and a sand cushion 100 mm thick should be poured.
![]()
Advice. When digging a trench, be guided by the depth of the foundation of a private house (if it is reinforced concrete or block). The rubble foundations of very old dwellings can be less buried, so you should not be equal to them.
The order of work is as follows:
- Compact the poured sand and install a wooden panel formwork with external supports and internal stretch marks (possible from studs with nuts) that do not allow the sides to move under the weight of concrete. The height of the formwork is not lower than the level of the basement of the existing building.
- Tie or weld frames of corrugated reinforcement with a diameter of 8-12 mm to make cells 10 x 15 cm. Install them in the trench on stands 50 mm high.
- Prepare the M150 concrete mix in the following proportions: M400 cement - 1 part, dry sand - 3 parts, crushed stone with a fraction of up to 40 mm - 5 volumes.
- Perform layer-by-layer pouring of the strip foundation to the height of the base of the house. It is highly desirable to compact concrete with special vibrators (rent).
- Remove the formwork after 7 days, and continue work after 3 weeks, when the concrete mixture has hardened.

Advice. So that the concrete does not lose milk during pouring and subsequently does not absorb moisture, cover the trench with the formwork with plastic wrap before installing the reinforcing cages.

If you want to make the extension warm initially, then after the foundation has solidified, insulate it from the outside with foam plastic, or better with foam plastic. Lay drainage along the bottom of the ditch and fill the sinuses with soil, then cast the blind area with insulation, as shown in the diagram. For an unheated extension, treat the base with bitumen or stick waterproofing (for example, from the well-known brand TechnoNIKOL). Lay roofing material in 2 layers on top of the plinth and proceed to the formation of the floors. You will learn about all the stages of work by watching the video:
Floor installation
The first stage of building an extension to the house with your own hands is the installation of floors, which are of 2 types:
- flooring on wooden logs;
- cement strainer.
Note. On a columnar foundation, floors can only be built on logs, and on a strip foundation - any one to choose from.

The wooden floors of the extension are made using the following technology:
- Lay wooden lintels on the brick posts - bars with a minimum section of 10 x 15 cm and fix them with anchors. On the corner supports, join them in half a tree (how to do this is shown in the photo). Fasten the bars between each other with steel corners on self-tapping screws.
- Install the lags in the same way.
- If insulation is not required, then lay a rough floor of 40 mm thick boards.
- To insulate the floors, nail cranial bars to the bottom of the lag, lay boards and insulation with vapor barrier on them. Then lay the rough floors.

An example of connecting beams in half a tree
For a screed device, the space inside the strip foundation is covered with earth, compacted with watering. From above, fill the recess with expanded clay to a height of 20-30 cm and fill in the screed. Let it harden for 2-3 days and proceed to the construction of walls.

Construction of extension walls
The order of construction of an open veranda or porch depends on the project and design of the structure. But in any case, the installation begins with the installation of vertical racks and tying them together with horizontal jumpers. Here, a wooden beam 10 x 15 cm or steel profile pipes with a section of 80 x 60 mm or 60 x 60 mm are most often used.
Reference. The builders of frame houses practice a different technology: the wall sections are entirely assembled on the ground, and then they rise and are attached to the foundation and to each other.

Docking of the beams is best done in half a tree or in a groove with fixation with steel corners on self-tapping screws, as shown in the diagram. From above, the pillars are united by a horizontal beam, where the roof rafters will subsequently lie. The ends of this jumper are securely attached to the wall of your house. A cold extension can be immediately lined with OSB boards (OSB), which will make it possible to tighten the frame. The heated room will need to be insulated with mineral wool 100 mm thick. For more on the construction of frame walls, see the video:
The main walls of the extension are built of bricks or blocks according to all the rules of masonry - with dressing of the seams and checking the vertical. The first row is laid around the entire perimeter, and then you need to form corners, raising them by 4-5 rows. Next, a wall is built to the same height, after which the action is repeated.
Advice. Tie brick or block masonry to the walls of the house by drilling holes through 2-3 rows and inserting reinforcement with a diameter of 6-8 mm into them.

Roof installation
As a rule, the roof of the extension is made on wooden beams, based on the existing wall of the house and a new partition. The algorithm of actions is as follows:
- Attach with anchors to the wall of the building a horizontal board with a thickness of at least 50 mm to support the rafters. In a stone outbuilding, lay the same boards on top of the walls and secure them.
- Install rafters from a board of 15 x 5 cm (minimum section) in increments of 600 mm to match the size of the slab insulation. Screw them to the supports using steel corners and self-tapping screws.
- Lay the waterproofing on the beams - a diffusion membrane with an overlap of 10 cm and nail it to the rafters with planks.
- Lay roofing - slate, metal or corrugated board. In order for water to drain properly from the roof, slate must be brought under the roof overhang of your home.

Simple truss system of a wooden extension
If necessary, insulate the roof of the extension by inserting mineral wool slabs between the beams by surprise. From below, beat the insulation with a vapor barrier film and sew it with facing material. More information about the installation of the roof of the extension is described in the video:
Conclusion
All work on the construction of an extension to the house is best done with an assistant, many operations alone are inconvenient to perform. You can cope with a one-story building without any problems, you just need to allocate time. Do not forget to treat the wood with an antiseptic compound and paint it well so that the frame of the porch or porch will last for many years.
Related posts:


