A greenhouse is an important handy tool in getting and harvesting an early harvest, as it protects the planted plants from sudden frosts in the spring. Making such a polycarbonate device with your own hands at your summer cottage is not at all as difficult as it seems. Only everyone wants it to be practical, convenient and inexpensive.
Advantages
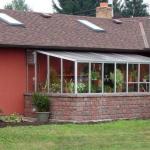
A wall-mounted polycarbonate greenhouse, as in the photo, will allow you not only to save space on your garden plot and rationally use the adjacent area, but also significantly reduce construction costs. Assembly speed, ease of maintenance and beautiful appearance, as in the photo, according to gardeners, is also a big plus of such a greenhouse.

Typically, such a structure is attached to the south side of a residential building, which will allow maximum use of natural light and heat, and on the north side, the plants will be reliably protected from the wind.

If you wish, if you make an entrance immediately from the house and carry out heating, the building will serve you all year round. Moreover, it can be used not only as a greenhouse for plants, but also to equip it with a rest room or a winter garden with your favorite plants.

In extensions of this type, it is more reasonable to use a shed roof, shown in the photo, since it is very easy to build, just clean.

This form does not interfere with the gathering of precipitation, leaves and other debris. The main thing to remember is to choose the right angle of inclination of a shed roof, somewhere around twenty-five, thirty-five degrees.

If the roof is made very flat, then water will constantly accumulate on polycarbonate sheets, thereby lowering the optical properties of the plastic.

Building
It is quite easy to make a wall-mounted greenhouse with a shed roof, as in the photo, with your own hands. Yes, and self-production, installation and assembly, according to gardeners, are not only an interesting and creative activity, but also saves a considerable amount of money.
- Having decided on the place where the structure will stand, you can proceed to the creation of a drawing. If you are going to use ready-made drawings and projects, it is recommended that you check all the data well and make all the calculations for your greenhouse yourself.
- When developing a drawing of your future building, pay attention not only to the external construction of the structure, but also to the internal improvement of the greenhouse. Take careful measurements and mark the pit and walls.
- If you want the erected structure to be similar to the one in the photo and video, you will need the following materials: arcs from a metal profile pipe, pipes for horizontal rails, a small amount of wooden blocks for doors and vents, cellular polycarbonate with a thickness of six to ten millimeters . Polycarbonate is best used transparent, it allows certain types of sunlight to pass through. You will also need nails, cement, foundation materials and tools.
- In order for the wall-mounted greenhouse to stand for many years without losing its stability, you need to put the structure on a foundation, see the photo. After all, your house stands on a foundation, and a greenhouse is the same house, only for plants. When creating it, you need to take into account the method of binding to the main building. The best option is concrete pouring, lined with bricks using metal corners. It is usually recommended to use anchor bolts that are concreted into the base of a load-bearing wall.
- In the manufacture of the base, attention should be paid to the joints. They are best made on the basis of large diameter bolts or self-tapping screws. All connections must be rigid. When constructing a structure with your own hands, also do not forget to equip doors and windows with additional stiffeners to avoid deformation during operation. Installation of polycarbonate is better to start with cutting the material. For fastening, holes are drilled in the frame at a distance of at least forty millimeters. It is necessary to connect with cellular polycarbonate using special fasteners with seals and thermal washers.

Internal work
- After installing the greenhouse, you need to check all the connecting seams for cracks. If there are any, then it is worth repairing them with plaster or professional mounting foam. Joints can be passed with perforated tape.
- It is necessary to make the room completely sealed and insulated in order to reduce the outflow of heat.
- For ventilation, in addition to the vents, you can install an exhaust pipe.
- Water supply for irrigation and hygiene should also be provided.
- For additional lighting, it is worthwhile to draw an electric line and install lamps of various types of incandescence.
Following these recommendations, you will get a greenhouse, as in the photo. And the harvested crop will give you pleasure until late autumn.
A greenhouse with a gable or shed roof is a necessary building in any summer cottage. Such a model will allow the summer resident to grow a large number of heat-loving crops. In this article we will talk about how to build a high-quality and reliable greenhouse with your own hands.
Before we figure out how to make single-sided polycarbonate greenhouses with our own hands, let's talk about their advantages and disadvantages. Let's start with the positives.
- Compactness. A wall-mounted shed greenhouse does not take up much space, but on the contrary, it will make it possible to use the adjoining territory with benefit.
- Simple start. Such a greenhouse will not be large, which means that few plants will fit in it, and it will be easier for you to take care of them. A shed greenhouse is great for a beginner.
- Easy to find application. When you build a large greenhouse, a small greenhouse against the wall will also not be idle, because you can grow seedlings in it.
- Minimum costs. A do-it-yourself greenhouse with a shed roof is made simply and at the lowest cost in terms of building materials and strength.
- Reliable building. The wall greenhouse rests on the outer wall of the house.
- Heating. A wall-mounted greenhouse will be partially heated by heat that will penetrate through the wall from the house. And if you build a greenhouse on the south side, then it will be less exposed to frost.
It is impossible not to say about the disadvantages of a shed greenhouse. First of all, she is very small. Also, some experienced gardeners believe that in such a greenhouse there is rarely enough sunlight. Another disadvantage can be considered the fact that the construction of the greenhouse will be carried out next to the house, there is always a chance of inadvertently damaging communications.
Video "Greenhouse with your own hands"
From this video you will learn how to build a quality greenhouse yourself.
Advantages and disadvantages of gable greenhouses

Now let's talk a little about greenhouses with a gable roof. The advantages of this type of greenhouses are:
- the ability to easily build with your own hands;
- snow does not linger on the roof, which avoids breaking the latter;
- vents are simply installed;
- a large selection of coating materials.
Now we will discuss the disadvantages of a greenhouse with a gable roof.
- in most cases, a solid foundation is required;
- the design is difficult to expand during operation;
- Lots of fasteners.
However, as you have noticed, the pluses fully justify all the minuses, especially if you want to build a really reliable and durable greenhouse.
Frame materials
It doesn’t matter if you decide to build a wall-mounted greenhouse with a shed roof with your own hands or a full-fledged gable greenhouse, you need to decide on the material for the frame. Three materials are usually used: plastic, wood or galvanized metal (profile). Probably, wood is considered the most unfortunate material today due to the fact that it is too susceptible to the negative effects of the environment. A metal profile or plastic profiles is what a modern gardener should choose.
Coating selection
The coating should transmit sunlight well and at the same time retain heat inside the greenhouse. The most advantageous covering material is polycarbonate. Its construction is strong yet lightweight. The cost for it is acceptable, especially when compared with glass.
True, the last coating has the highest throughput as far as light is concerned. But this material is fragile, heavy. Glass greenhouses are usually made by those who have old window frames left. Polyethylene film is used for summer greenhouses. The coating is cheap, but it will have to be changed annually.
How to make a project
Shed
Before you start construction work, you need to think over the project, how you will build a greenhouse with a pitched roof. It should contain the following items:
- choice of place for construction;
- design choice;
- greenhouse size;
- necessary materials.
When choosing a place, give preference to the south side of the house, if this is not possible, then the east side. Decide on the design - it will be a winter or summer greenhouse. After all, the structure itself is decomposed into several more elements: foundation, frame, rafters, sheathing, etc.
When making a drawing, think about the dimensions in advance. The length and width of your greenhouse will depend on what and how many crops you want to grow in it and, of course, on the amount of material. Note that the height of the wall greenhouse is limited by the height of the wall to which it will adjoin. When choosing materials, base them on your budget and the expectations you have for a greenhouse.
gable
Now let's talk about what data we need in order to draw a greenhouse with a polycarbonate house with a gable roof. The optimal dimensions of the future building: length - 5-7 m, width - 2.5-3 m, height in the ridge - 2.5 m. It is good if the greenhouse will have a length from west to east. If there is a building for storing garden tools in the summer cottage, install a greenhouse somewhere nearby.
Foundation installation
A double-pitched greenhouse requires a columnar foundation. The columns should be 12 cm in diameter and 3 meters long. You need only 6 of these posts, which are dug into the ground to a depth of half a meter. Four piles are installed at the corners of the future rectangular structure, and two - in the center. After that, the supports are poured with concrete.
Frame and upholstery
A greenhouse with a heavy gable roof must be strong, so you need to take care of its frame. In fact, the foundation columns are the main part of the frame, to which horizontal bars are attached, rafters are installed on top, which will be the basis for laying the roof. When building a frame with your own hands, do not forget to equip places for windows and doors.
If the frame is fully erected, you can proceed to cover it. Since the most successful coating is polycarbonate, we will talk in more detail about the installation of this material. The coating is fastened with self-tapping screws, while rubber gaskets are also used. You need to install the sheet with a protective layer outward, the factory marking will help you decide on the sides.
It is better to stretch the film in a whole piece. But for mounting glass in each opening, quarter grooves are chosen.
When we hear the word "greenhouse", we immediately imagine a free-standing structure or a greenhouse located in the middle of the garden. However, recently, in suburban areas, dachas, a rather interesting, rational version of a greenhouse device has begun to gain popularity - a wall-mounted greenhouse. This solution is convenient, practical from any point of view: reducing the cost of construction, heating (since the structure is adjacent to the wall of a residential building), saving space on the site. According to summer residents, gardeners, the most successful, practical option is a wall-mounted greenhouse with a pitched roof made of polycarbonate.
The roof of such a greenhouse can be of any shape, however, from a practical point of view, it is the shed version that has many advantages. Also, this greenhouse may look like a temporary (not permanent) structure with a stretched polyethylene film on a frame made of pipes or wooden beams. If you take the matter seriously, then it is better to spend a little more time, building materials, to make a reliable, aesthetically pleasing greenhouse that will last you for more than one year.
Photo of the temporary greenhouse:

Shed greenhouse
This form of the roof contributes to the natural removal of natural precipitation, the sun's rays will penetrate into the greenhouse at an angle of 90 degrees, evenly dissipate over the entire area of the room. Why polycarbonate? This modern building material is ideal for buildings of this type: it allows the sun's rays to pass through, while protecting plants from ultraviolet radiation (a special polycarbonate recommended specifically for greenhouses). This cellular material is not afraid of severe frosts, as well as extreme heat. It has a low weight (14 times lighter than glass), high strength (50 times stronger than the same glass). Polycarbonate is easy to install, well drilled, cut, plastic, has good thermal insulation.
Polycarbonate, photo:

A polycarbonate greenhouse attached to the main wall of the house can be used for its intended purpose. And it can be used as a winter garden, a relaxation room or even a small gym. You can make an internal entrance / exit directly from the house, conduct heating, electricity - in a word, equip this extension at your discretion. However, in our article we are talking about a greenhouse for plants, so we will consider the polycarbonate structure in this context. To maximize the use of natural daylight, it is recommended to attach the greenhouse to the south side of the house. Thus, the "coldest" northern side will be blocked - this is exactly what is required for comfortable development and plant growth.
A simplified version of the wall greenhouse, photo:

DIY wall greenhouse
It is quite easy to build a temporary frame, hastily knocked down in strategic places, covered with plastic wrap, the specifics of arranging such a structure does not require a detailed description. Therefore, we will consider a more complicated option, with laying the foundation, installing a durable frame. Do-it-yourself shed greenhouse is attached to the supporting part of the house. The foundation acts as a support for the future frame. The traditional strip foundation is the best suited for this building.
Let's consider the working stages in more detail:
- We make measurements of the greenhouse, mark the boundaries of the foundation according to the plan.
- At the outer corners of the perimeter we hammer in the pegs, pull the twine (rope).
- We dig a trench under the foundation, the width is about 25-30 cm, the depth is determined individually (according to the degree of soil freezing in your region in winter). Be that as it may, the recommended depth of the foundation should be at least half a meter.
- We install load-bearing supports at the corners of the trench - they are the basis of the frame. If wooden bases are planned, then the parts of the supports buried underground must be pre-coated with resin (or burned on fire). Such a technique will extend the operational life of wooden parts, prevent destruction, decay.
- Those supports that are adjacent to the wall of a residential building must be securely attached to it. If it is a tree, then it is fixed with construction brackets. If metal, then you can fasten it to the wall using impact dowels or special fasteners.
- At the bottom of the foundation trench we fall asleep a layer of rubble, about 10 cm.
- We mix the cement mortar (cement, fine gravel, water, sand). If we consider the proportions of building materials by weight, then the composition will look something like this: 10 kg of cement, 30 kg of sand, 40 kg of gravel, 40-50 liters of water. The initial moisture content of the sand should be taken into account.
- We cover the gravel cushion with the resulting concrete solution.
- We install lighthouse blocks (hollow in our case) at the corners of the foundation (we press them into freshly poured concrete). We take the building level and thus lay out the entire foundation with these blocks.
- We pour cement mortar into the recesses of the blocks, and we strengthen the blockwork itself on the sides with earth (filling).
- To make everything neat, we level the top of the fill with a trowel, at this stage the foundation should be flush with the soil surface.
- Starting from the corners, lay out 5 rows of red brick (it is not afraid of moisture), do not forget about the stretched twine (for even masonry).
- After the masonry has hardened, we cover the seams.
The next step is to install the frame, as mentioned above, it can be steel, wood, aluminum or plastic. In any case, the material must be strong, stable, light. If we consider the installation of a wooden version, then it is initially installed, the lower horizontal bed is fixed (wooden beam - support for racks). The top bed is attached to the wall with brackets or suitable fasteners. With the help of tape tow or jute, all existing gaps are closed. Next, we install the slopes between the upper and lower beds, fastening is carried out by means of a tie-in.
Greenhouse frame, photo:

When a shed greenhouse is being built, the slope of the roof is calculated in advance according to the climatic features of the region of residence (nature, amount of precipitation, wind strength). The optimal angle of inclination should be 25-35 degrees. The drainage system is mounted on one side. Air vents (places for them, hinges) are determined at the stage of installation of the roof cross members.
The frame of the greenhouse is fixed with screws, metal corners, self-tapping screws, nails. If the tree is replaced by metal, then the appropriate fasteners are used, a welding machine is used. At the frame installation stage, entrance doors are installed (if they are initially determined by the project). A greenhouse attached to the house, erected by oneself, implies the installation of the same number of frame cross members. If, for example, the length of the structure is 5 meters, then 12 vertical crossbars should be located on the back (adjacent to the house) and on the front wall. A similar number of rafters also goes to the installation of the roof (do not forget about the angle of inclination).
Wall greenhouse made of polycarbonate
Polycarbonate sheets are cut to size. All measurements must be made very carefully. To avoid breaking the sheet, the mounting holes must be drilled at least 4-5 cm from the edge. To preserve the internal microclimate, heat, especially if a wall-mounted winter greenhouse is being built, all docking points on polycarbonate must be sealed with special adhesive tape (seal the joints). Condensate should not accumulate in the cavities of the material, this is especially true for the lower and upper ends. Reinforced aluminum tape is perfect for these purposes. The connection of polycarbonate sheets and the frame of the greenhouse is carried out using special thermal washers, rubber gaskets.
Installation of polycarbonate, photo:

To be on the safe side, to be completely sure that your shed greenhouse is properly sealed, carefully check all butt joints. Examine the area of the foundation, the joints of the frame with the bearing wall, the roof, carefully blow out all the cracks found with mounting foam or plaster. At the final stage, electricity is supplied to the greenhouse, additional heat sources are installed, the interior is equipped (racks, paths).
Separately, it is worth mentioning a more simplified version of the coating for the greenhouse - a dense polyethylene or reinforced film. The film greenhouse has the same frame as its polycarbonate counterpart. The difference lies only in the material of the coating, which is wound on the rail, after which it is nailed with thin nails to the bottom bed and frame posts. The width of the film web should be equal to the length of the rail.
Attached film greenhouse, photo:

Such a greenhouse is not designed for the winter season. Reiki with a film, if desired, are removed from the recesses formed by the nails (for example, on a warm day). With the onset of night or cool weather, the film falls into place (the slats are set to their original position). Reinforced film is more durable, keeps heat better. With the onset of autumn, the slats with the film are removed, washed, dried thoroughly, and put into the room until the next season. With careful handling, the film can last up to 5 years.
With well-performed work, a properly adjusted ventilation and watering system, your wall-mounted greenhouse will become the best place for comfortable development and growth of plants. And if you put heating into it, you can speed up the ripening of vegetable crops and increase yields.

The only place suitable for installing a wall greenhouse is south wall of the house. When placed against walls facing the other directions of the world, the plants will not be able to receive enough solar energy throughout the day. In addition, a shaded greenhouse will not have time to warm up to the desired temperature.
IMPORTANT
It is unacceptable to place a wall greenhouse near insufficiently strong structures. It creates a certain load on the wall, and if it is not made of brick or stone, the destruction of the entire building is possible.
Fig.1 Placing a wall greenhouse
In close proximity to the greenhouse there should be no trees and tall shrubs. Their crowns will create unacceptable shading. It's the same rule also applies to climbing plants capable of braiding the entire structure and blocking sunlight.
Preparatory work
Before attaching a greenhouse to the house with your own hands, you need to do some preparatory work, the description and photos of which are presented in this chapter. An important preparatory step is developed drawings on which the future shed greenhouse will be built. The drawing must indicate the dimensions of the structure, including its length and height. Both of these dimensions should not exceed the dimensions of that house to which it is planned to attach a greenhouse.
IMPORTANT
When determining the overall dimensions of the greenhouse, one should take into account the characteristics of the crops that are planned to be grown in it. Tall and climbing crops require more space. Respectively, the height of the greenhouse should provide some free space.
Also, before starting construction, it is worth attending to the preparation of the foundation. Most often used for such purposes shallow strip foundations. The sequence of actions for arranging a foundation of this type will be as follows:
- Rummages around the perimeter of the future greenhouse trench 40-50 cm deep. Width - 25-30 cm.
- From boards, sheets of fiberboard or chipboard formwork is mounted.
- In the trench is placed reinforcing mesh to strengthen the structure.
- Installed supporting pillars.
- Poured concrete mortar.

Fig. 2 Preparation of a shallow strip foundation
After 5-7 days the solution will harden completely and you can proceed to further work.
DIY wall greenhouse: assembly instructions
The assembly of the greenhouse itself consists of several stages.

Cheaper option organization of the entrance - hanging canvas made of dense polyethylene. In this case, the dimensions of the sheet must exceed the dimensions of the input by 40-50 cm both sideways and vertically. A stock of film will be required to more tightly close the opening.

Fig. 5 Do-it-yourself ready-made wall-mounted greenhouse attached to the house - photo
Upon completion of all work, it is necessary to complete sealing of the resulting structure. If at least small gaps remain, the greenhouse will not be able to reliably retain heat and the plants may die during frosts.
Can be used as a sealant silicone-based sealants. Roofing bituminous sealant is also suitable.
IMPORTANT
When installing a wall greenhouse, it should be understood that the air inside it will have high humidity. This may adversely affect the condition of the wall near which the greenhouse is installed. Therefore, it will not be superfluous in the hot summer months to disassemble it to dry the wall. There is no point in removing the frame, it is quite enough remove greenhouse walls.
The option with a wall-mounted greenhouse is interesting in that such design is very easy to assemble. The main load in it is transferred to a solid wall of the house, which allows you to use less durable frame. In addition, next to the wall, the greenhouse acquires wind protection, which avoids cooling in windy weather. At the same time, assembly does not cause difficulties even with only basic skills in construction work.

