Tatyana Zhukova
Moscow city
I want to express my gratitude to the DomServiceStroy company, its management and employees. I ordered from them the design and decoration of the new office of my travel company. How everything should look, represented only in general terms. And I had no idea where to get the materials to implement my ideas. Therefore, the services of the designer of the company were very useful to me. I just voiced the main points that were important to me, together they determined the general style. Then I chose the best of the three options offered to me. Now my office looks almost like in the picture, clients are immersed in the atmosphere of relaxation as soon as they come to us. And what is especially important for me, they did not miss the deadlines for the completion of the object. Opened when planned.
Svetlana Sergeevna
I bought an apartment on the secondary market in a state that needs repair. I decided to turn to professionals, since there was no time to understand the intricacies of the process myself. The firm was advised by friends, I turned to DomServiceStroy, after reviewing the reviews on the Internet, and was satisfied! The company's specialists took upon themselves not only the actual execution of the work, but also the coordination of redevelopment (I combined the bedroom with a balcony). Made a project. From a larger repair was cosmetic, they made it to me on a turnkey basis, after agreeing on all the details. All I had to do was go into the long-awaited own housing, which began to look like new. Thank you very much!
Alexander
The apartment was purchased in a new building, so there was a lot of work. It was necessary to separate the electrician, and install partitions, and solder the pipes. We contacted DomServiceStroy. We agreed that I pay for the work, plus for every little thing if necessary. And I buy large purchases (solutions, pipes, taps, etc.) myself. All points were signed in the contract, paid in fact only for the work. At first, he came every day to monitor the progress of work, then I realized that the company is serious, they do everything in good faith. So I only went on weekends. As a result, the repair was done about 8 weeks. And then, because my wife and I chose a bath and wallpaper for a long time. In the end, the result of the repair coincided with expectations. Satisfied with the quality and timing. Thank you.
Julia and Vladimir
Moscow city
Good afternoon! We would like to leave a few nice words to the specialists of the DomServiceStroy company for the repairs that they just recently completed in our three-room apartment. You have completed a truly difficult task, decorating and putting in order the room for our children, our room, the great hall and other areas of the apartment. We were delighted with the decision to combine a small and unnecessary balcony with a large room. Now in that corner there is a real recreation area overlooking the park and the river. Children are delighted, they now have everything for complete happiness - bright colors in the interior of the room with heroes of their favorite cartoons, a lot of free space around. We ourselves are happy just like children, thank you very much!
Stanislav
After reading the recommendations, cosmetic repairs can be done even by those who have never held a spatula in their hands. The article is written based on personal experience. If a non-professional woman was able to update the room, then you will succeed all the more.
Not everyone has the means to hire a construction team to carry out repairs. In addition, people who are not always found on the ad will really do everything in good faith. If you do not need a global reorganization of the premises, you can do the cosmetic repairs yourself. This is a very fun and easy process. The main thing is to purchase everything you need, follow the phased work, do everything carefully and with soul.
Necessary materials, tools
Here's what you need to purchase before you start your redecoration:
- Spatulas - wide and narrow;
- Primer;
- Putty (dry or ready-made);
- Wallpaper;
- Ceiling tiles and glue for it;
- Flat brush, rag;
- Skirting boards for floor and ceiling;
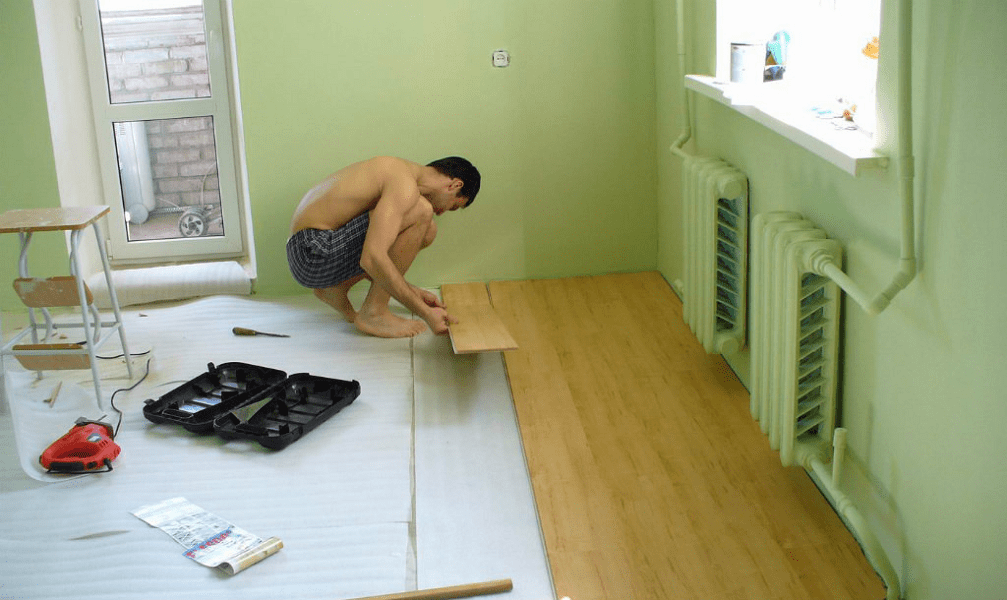
- Floor covering (linoleum, laminate);
- Roller on a long handle;
- cuvette;
- Glue for linoleum (if you lay it);
- Film, adhesive tape for covering furniture.
Preparatory work, wallpaper removal

Remove furniture to free up space. Put things from the cabinets in large bags, bags and also transfer them to another room. If the cabinet is heavy, there is no way to tilt it to another room, disassemble it by carefully folding the components. If this method does not suit you either, move the cabinet away from the wall, cover it on all sides with a wide cellophane film, secure it with a stapler or tape.
After everything unnecessary has been removed from the room, proceed to dismantling. First tear off the old skirting boards. If they are wooden, it is convenient to remove them with a nail puller. If these are plastic skirting boards with screws, a screwdriver or screwdriver will help.
If you are doing Khrushchev repair with your own hands, you want to save money, you can lay linoleum on the floor. To do this, it is rolled out, put with the wrong side up, allowed to rest, then glue is applied, turned over and glued to the base. If the floor is uneven, you can lay a solid underlay, such as plywood.

When the wallpaper is completely dry, drape the top of the wallpaper with a ceiling plinth. To do this, apply glue for PVC tiles on its wrong side, attach to the desired place and hold for 10-15 seconds. Once you've glued the first one, move on to the second one.
You will remove the wires in the wall part of the floor plinth, screw it onto the screws. After that, put on the top of the plastic plinth.
- Read the article about yourself.
Video about cosmetic repairs in 3 days:
Cosmetic repair is a concept that is interpreted by everyone in different ways. I call cosmetic repairs a set of works that does not affect the capital structures in the room, and is also not associated with the replacement of communications (electrical wiring, plumbing and sewerage) in the room. Redecoration does not affect floor screeds, does not imply installation of drywall structures, replacement of doors, installation of drywall arches.
Stages of cosmetic repair
The stages of cosmetic repairs, which I will discuss in this article, include restoring the previous state of the apartment without carrying out work to change the types of finishes. These works include re-pasting old wallpaper, re-painting ceilings, painting window frames, painting doors, skirting boards and architraves if necessary, as well as replacing simple flooring (linoleum flooring or laying laminate). All the work included in a simple cosmetic repair, if desired, free time and basic skills, it is quite possible to do it yourself. In the article, for example, consider the repair of a room.
Preparation for repair
1. Clear the room of furniture (if possible). Place the remaining furniture in the center of the room and carefully cover with plastic wrap. This will provide free access to the perimeter walls and provide access to the entire ceiling area. 2. If you do not plan to change the flooring, also protect it from building debris and dust, as well as mechanical damage. Be sure to cover parquet, laminate with sheets of hardboard or thick cardboard. Lay a thick plastic film on top with an overlap of 10 cm, glue the joints with adhesive tape. It is desirable to fix the protective film with tape also around the perimeter of the room. 3. Dismantle the plinth in case of replacement of the flooring or parquet scraping. Use masking tape to protect individual elements that do not require repair. Masking tape is a special sticky paper tape that can be easily removed after completion of work. 4. Remove the front panels from the sockets and switches, and cover the sockets and switches themselves with paper masking tape. Do not forget to first disconnect all electrical circuits from the voltage.cosmetic repair stages: Dismantling works
Dismantling of old coatings for cosmetic repairs
Old coverings of walls, a ceiling, a floor are removed.
Ceiling preparation for cosmetic repairs
Start by removing existing coatings. There are ceiling coatings with water-dispersion paint, in old houses there is lime whitewashing. Rarely there are ceilings painted with enamels (oil or alkyd).

Ceiling wash and rustication
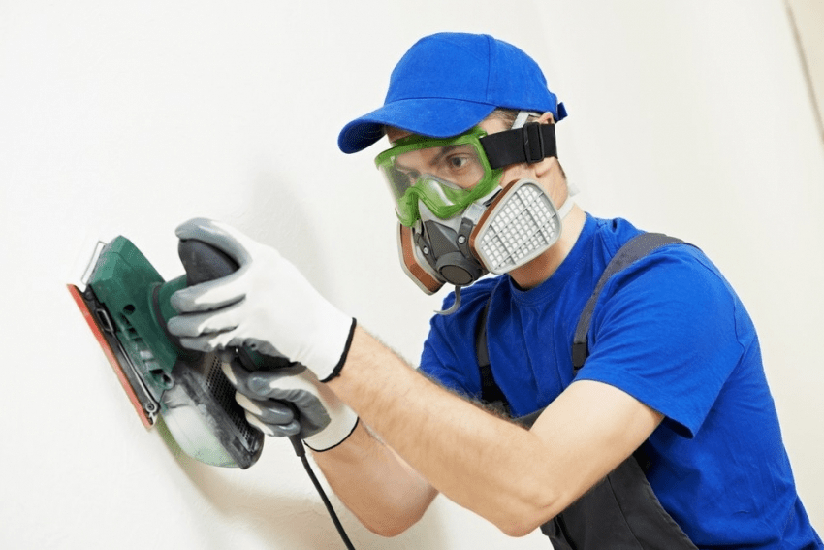
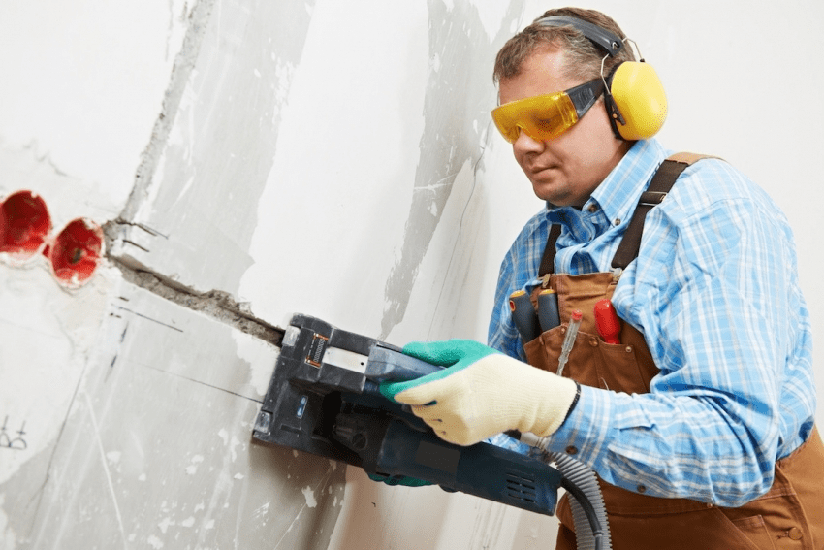
Water-dispersion paint and enamel cannot be washed off with water (they do not dissolve in water). Therefore, remove the peeling areas of the coating with a steel spatula, open the cracks with the angle of the spatula. Roughen the enamel with coarse sandpaper to roughen and increase adhesion with new applied layers of finish.
Rinse off limescale to the ground. The bottom layer of putty does not need to be removed. The technology of this process is not complicated, but laborious and dirty. Using a roller, wet the ceiling with water, then scrape off the whitewash with a spatula. After cleaning the entire ceiling, rinse the ceiling with a warm water solution with a sponge.
Preparing walls for cosmetic repairs
The technology for removing old wallpaper does not differ from the technology for removing lime whitewash. Peel off peeled wallpaper fragments “dry”, soak the remaining firmly glued areas with warm water and remove with a spatula. If there are many layers of wallpaper, be patient and remove layer by layer to the primary base.
Cleaning paint before cosmetic repairs
Remove old paint, platbands, window frames and doors only in case of severe peeling. The process is laborious but necessary.
Choose from two methods for removing oil (alkyd) enamel: chemical and thermal. With the chemical method, the paint is softened with special chemical compounds, they are called "washes", and the paint is removed with a hard spatula or scrapers. Ready-made washes are sold in hardware stores. With the thermal method, the softening of the old is carried out with a jet of hot air from a special building hair dryer, do not confuse it with a hair dryer. The paint softens in small areas and is also removed with a scraper or spatula.
Preparation of surfaces for finishing for high-quality cosmetic repairs
After removing the old ceiling and wall coverings, it is necessary to eliminate the defects of the walls and ceiling. Widen (expand) the cracks. Loosely adhering and muffled-sounding "mumbling" areas of plaster must be completely removed. Surfaces prepared in this way must be treated with a primer. Primers provide uniform drying of applied materials and their better adhesion to the surface.

Filling cracks with gypsum mortar
Plastering is part of a facelift.
After the primer has dried, close up deep potholes and places with chipped plaster on a gypsum base such as "Rotband", "Prospectors", TIGI Knauf. Perform this operation with a rectangular stainless steel trowel. For large plastering areas, use the building rule of the desired length.

stages of cosmetic repair: Plaster work
Stages of cosmetic repairs - obligatory putty
Prime the plastered areas and level the surfaces, for example, “Vetonit KR” (up to 1 mm) or “Vetonit LR +” (up to 3 mm) (Weber). This operation eliminates small surface irregularities and fills small cracks.
Remember, a large thickness of the putty layer is ensured by applying several layers, with each subsequent layer being applied after the previous layer has completely dried.
I recommend gluing serious cracks in the ceiling with strips of plaster fiberglass with a cell size of 2 × 2 mm. The technology for gluing the tape is as follows: a layer of putty is applied to the ceiling area, the fiberglass mesh is pressed into the putty with a spatula and rubbed. Remove excess putty squeezed out through the mesh cells with a spatula and return to a container for further use.

Wall putty

Ceiling putty
Is it necessary to completely putty the walls and ceiling during cosmetic repairs, or can you limit yourself to leveling individual sections.
My answer is very clear. Putty the ceiling completely at least 1 time. Walls when sticking dark and heavy wallpaper can be limited to partial puttying, with light and thin wallpaper - puttying at least 1 time, when painting walls - the topic is not cosmetic repairs.
Ways to prevent the formation of cracks again, after the completion of cosmetic repairs
The probability of a crack appearing on ceilings with rust (rust-connection of floor slabs), as my practice shows, is very high. For your peace of mind, I recommend using the "cobweb". Gossamer is a fiberglass ceiling wallpaper. The web is sold in rolls, has a thickness of up to 2.0 mm. The considerable thickness and loose structure of the cobweb does not allow the resulting cracks to appear on the ceiling.
The technology of gluing the "cobweb" is the same as gluing wallpaper in a joint.

With very uneven surfaces, as well as wooden floors, I recommend that before gluing the cobweb, the entire surface of the ceiling is covered with a paint grid with 2 × 2 mm cells. The mesh is puttied, sanded, primed with diluted wallpaper glue and pasted over with a cobweb, like wallpaper. This multilayer "pie" will provide maximum protection against further cracking of the ceiling.
Preliminary result. After the work listed above, you will receive:
- Wall and ceiling defects plastered.
- Cracks glued with paint (plaster) mesh or all surfaces (it depends rather on your desire).
- The surfaces are puttied in 1-2-3 layers (the amount depends, also on the expected result). They came out smooth and white. It's time to paint the ceiling!
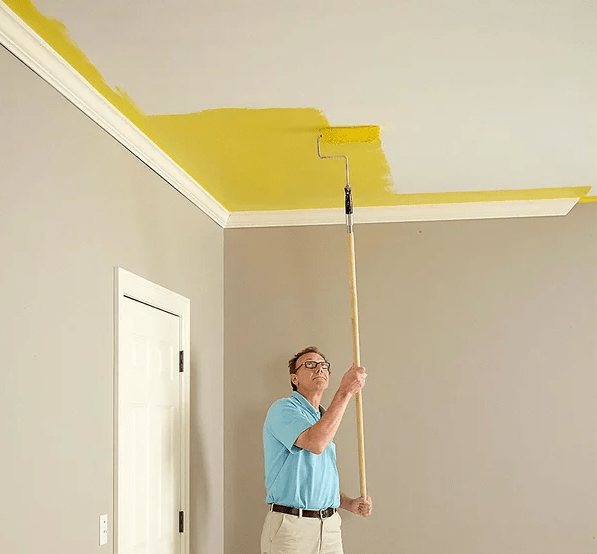
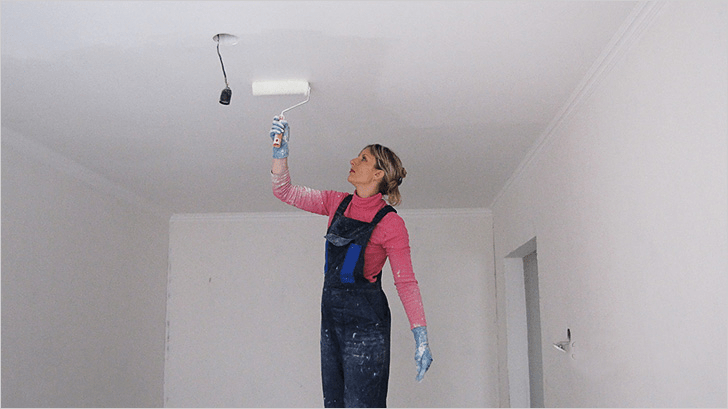
Cosmetic repairs are not possible without painting the ceiling
Finish painting the ceiling with a new polyamide paint roller with medium pile. I do not recommend using foam rubber and velor rollers. Foam rubber is twisted, velor does not stain. When painting, use a special tray (ditch) to wring out excess paint.

stages of cosmetic repair: Painting the ceiling
Prime the prepared ceiling with water-dispersion paint diluted with water. This is done in order to reveal almost imperceptible defects on the putty. After puttying and sanding (“zero” sandpaper) of defective areas, paint the ceiling with undiluted paint.
Determine the paint consumption in advance. This is important when painting the ceiling with colored paints. The amount of pre-tinted paint should be enough for 3 stains. Do not re-tint the paint. When using a web, paint consumption increases by 25%.
Wallpapering the final stage of cosmetic repairs
After painting the ceiling in 2-3 layers, proceed to wallpapering. If you decide to glue the ceiling plinth.

1. Primer walls before wallpapering
Before wallpapering, prime the entire surface of the walls with wallpaper paste, diluted as indicated on the package with glue: preparation of glue for priming the surface.
2. Marking before wallpapering
Using a long building level or plumb line, draw a vertical line to guide the first canvas. Wallpaper is traditionally glued from the window, but with modern butt-gluing, this does not matter. Can be glued from the door.
3. Preparing wallpaper before sticking
The wallpaper is cut into canvases with an allowance (5-7 cm) in length. When cutting canvases, consider the frequency of repeating the pattern (rapport). Be careful when choosing adjacent canvases in height to match the pattern. If the wallpaper is "no selection" then you are a little lucky.
4. Wallpapering
Wallpaper is pasted in two ways.
Sticking paper and vinyl wallpapers
Cover the wallpaper canvases with glue (paint roller or maklovitsa), naturally from the front side. Fold the canvas in half (glue inside, edges in the middle). Keep in this state for the time indicated on the adhesive package (usually 3-7 minutes). Don't hold onto the canvases. It's better to underdo than to overdo. Be especially careful and careful when using thin paper wallpapers. If they get too wet, they will simply spread in the hands.
The canvases impregnated with glue are superimposed on the wall at a pre-marked vertical level. Smooth out wrinkles and bubbles with a pressure roller or a stiff brush. I do not recommend using a rag, because. some types of paper wallpaper may wash out the paint.
Sticking non-woven wallpaper

Wall papering
When sticking non-woven wallpaper, glue is applied to the wall. The wallpaper itself can be cut into canvases according to the size and selected pattern. Apply glue to the wall with a roller and glue the canvases end-to-end, following the alignment of the pattern of adjacent canvases.
5. Undercut wallpaper
Since the pieces were cut with an allowance in length, after gluing the canvases under the ceiling and at the plinth, cut off the excess wallpaper with a construction knife along a metal ruler or with a special wallpaper cut that resembles a spatula. Watch the sharpness of the canvas. A blunt canvas tears and pulls the paper of the canvases along with it.
6. Pasting wallpaper border
Stick the upper part of the canvases up to the planned border. Beat off the horizontal level marks of the border along the entire perimeter of the room. The “end” of the line should meet the “beginning”. With a sharp knife and a metal ruler, cut the canvas along the perimeter. Butt to the cut edge, glue the border. At the same time, do not glue the bottom of the border. Glue the lower canvases, leading them under the border. Glue the bottom of the border, after cutting off the excess from the canvas.
You can glue the border without such a "bother" - in the "overlay". Use special glue for gluing borders.

We glue the wallpaper border
Clean up the room. Don't open windows! Avoid drafts until the wallpaper is completely dry! Wallpaper pasted!
10. Floor repair during cosmetic repairs
These are all stages of cosmetic repairs. That's all!
Photo gallery "Renovation of the kitchen before and after the repair"


The issue of repairing a room almost always rests on the budget for future work. Most often, the owners of an apartment or house are faced with a choice - to do a cosmetic renovation of the room with their own hands, without putting it off indefinitely, or to plan a major restructuring with redevelopment and a major design update for an indefinite future. Most masters in such a situation recommend a redecoration of the room, during which the vast majority of problems with the interior of the room can be solved.
How to approach the organization of repairs in one room
Starting repairs in a room is always inconvenient and even scary, especially if there is not enough experience, and of the assistants at hand, there is only a cheat sheet on doing a do-it-yourself room renovation for beginners. But, as a rule, uncertainty and doubts pass when the scope of future work becomes clear and the question is resolved in what sequence to make repairs in the room.
Therefore, the first step is to draw up a master plan for cosmetic repairs, and most importantly, before trying to make repairs in the room, it is necessary to draw up a detailed estimate for the purchased materials and consumables. This is a prerequisite, even for repairs in a small room you will need to make a list of several dozen items.

Where to start repairs in the room is not important, you can carry out repairs in the sequence that seems more convenient in these specific conditions. Traditionally, do-it-yourself room repairs begin with the most “dirty” or rough work and end with fine finishing procedures.
A typical list of work or a sequence of repairs in a room is as follows:
- The old finish is removed from the walls, ceiling and floor. Removing the floor covering gives the largest percentage of dust and dirt, so it is removed first;
- A rough preparation of the floor is being carried out for further laying of a new floor covering;
- Wiring is being repaired, lamps, switches are being moved and hung, corrugations are laid out for television and Internet cables;
- Walls and ceilings are cleaned and plastered. If the plans for cosmetic repairs involve changing the wallpaper to a more modern type of finish, then you will need to level the walls with gypsum plaster;
- The ceiling surface is leveled in a similar way. For whitewashing or painting with a water-based emulsion, the ceiling is overwritten, plastered with a lime-gypsum mixture and a decorative coating is laid;
- Decorative wall decoration is being carried out, ceiling plinths are being glued, the lining of interior doors is changing;
- A new floor covering is laid, skirting boards are installed, lamps are hung, switches are being installed.
Of course, at each stage of repairing a room, a photo, a large amount of debris and dust will be generated. Not only will you have to regularly clean the room and take out rubbish blockages, you will need to try to cover areas with already completed repairs with a protective plastic film to avoid dusting the surface.

What not to include in a room remodel
Master finishers often call redecoration work "for three days", in order to update the interior in a room, more, as a rule, is not required. The list of repair measures does not include the most expensive work:
- Redevelopment of premises with the transfer of interior partitions;
- Replacement of the heating system;
- Installation of expensive multi-tiered suspended ceilings;
- Balcony glazing and replacement of windows with double-glazed windows;
- Underfloor heating equipment in the room.
It is clear that all of the listed components of the repair require serious financial costs and the involvement of qualified specialists in the work. It will take more than a day or two to carry out such serious events. In addition, such is the specificity of the repair in the room that, willy-nilly, dust and construction debris spread throughout the apartment. Therefore, the situation is regulated in this way - either cosmetic repairs are made in a single room, or the entire apartment “gets up” for major repairs.
In general, the redecoration plan includes everything that can be done in a couple of days with your own hands for relatively little money.
The main task of cosmetic repair
The main goal of repair work is to refresh the interior of the room, remove minor defects and damage accumulated over the years, which are insanely annoying and interfere with everyday life.
In rare cases, cosmetic repairs are the result of force majeure, for example, the flooding of the room by the neighbors on the floor above or the preparation of the premises for rent. There can be many reasons, but the main thing is still maintaining the premises in a comfortable condition for living.

Properly performed cosmetic repairs make it possible to save on the volume of future overhauls. For example, performing a floor base screed and leveling the walls will at least reduce the time and effort spent on preparing for a major overhaul, of course, provided that the repair of the room with your own hands is done as conscientiously and efficiently as possible. .
The next stage of repair, distribution of costs and loads
One of the most difficult stages of redecoration is fairly considered to be budget planning and material procurement. Especially if you plan to do most of the repair procedures yourself. The reason is simple - amateurs and novice craftsmen have no idea at all how much specific material is required for a particular area of work.
In this case, the problem is solved in two ways:
- Compiled List works and estimates can be shown to an experienced craftsman who will help calculate the expense by squaring the room;
- Calculate flow on the basis of standard recommendations of building materials manufacturers, increasing the stock of glue, plaster mixtures, wallpaper, flooring by 10% of the calculated indicators.
In the latter case, the cost of purchasing materials will increase significantly, but in the end, the remains of cement, dry plaster and glue can be used to redecorate other rooms in the apartment. In addition, having a list often helps to get a wholesale discount, so there should not be significant gaps in the budget for a future cosmetic renovation of a room with a competent organization of the purchase.

Preparatory stages of repair in the room
The first, most time-consuming stage has always been and remains the rough peeling of the walls and ceiling. Usually, repairs in a room begin with the removal of furniture and sealing the front door with a protective awning. You can use thick plastic wrap or an old blanket. An impromptu curtain will protect the rest of the apartment from noise and dust, which, even with very careful work, the use of a vacuum cleaner and wet cleaning of floors, always accumulates in considerable quantities in the room.
Before repair, lamps must be removed, instead of a chandelier, a cartridge with a light bulb is left in the room. If double-glazed windows are installed in the room, then it will be useful to tighten the window opening with foil before repair. It is clear that the floor covering is also covered with a film, it is easier to roll up the laid polyethylene than to wash out the dirt in the room every evening.
Removing old finishes from walls
It takes about a third of the planned time to prepare for cosmetic repairs. During this time, you will need to remove the whitewash and wallpaper from the walls of the room. If there are areas with damaged plaster, it will take another day to knock the plaster off the walls.
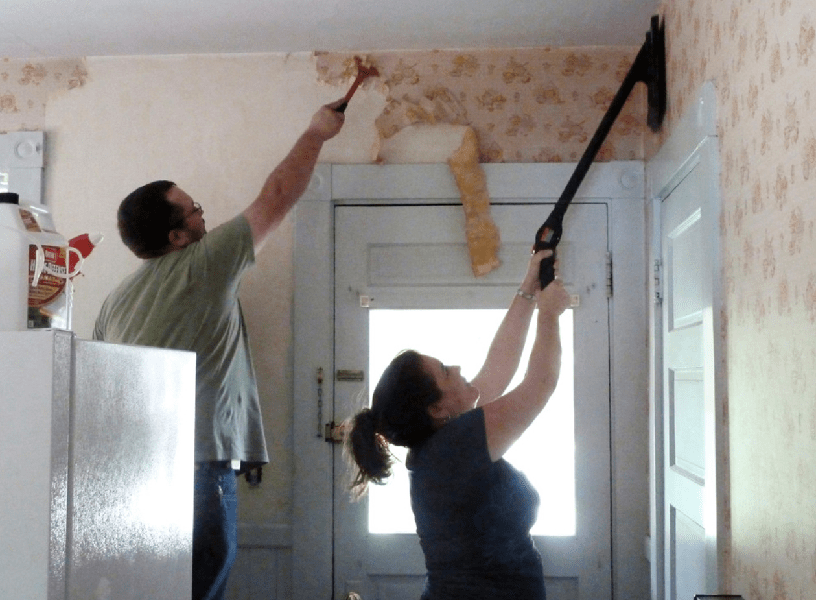
Old wallpaper is removed either with one panel or scraped off in small pieces for a long time, it all depends on the glue used. Before removing the wallpaper, the surface is moistened with a spray bottle with a small amount of water. After 20-30 minutes, the tapestries can be removed in patches. For particularly strong adhesives, boiling water and steam are used. In any case, after peeling off the old trellises, you will need to go through with a vacuum cleaner and a stiff brush to remove dust and glue residue.
Stripping and restoration of the ceiling surface
The ceiling is freed from the decorative coating much faster and easier than the walls. If the plans for cosmetic repairs include sticking polystyrene plates or laying plastic panels, then it will be enough to remove the top layer of whitewash.
The situation is more complicated if the ceiling in the room is painted with water-based paint or whitewashed with lime. In this case, it will take at least a day to remove the durable layer of the old finish.
The most common option for restoring the ceiling during cosmetic repairs involves leveling the plane of the ceiling. In any room of any apartment, floor slabs lie with a trim of several degrees, which leads to a difference in ceiling height near the opposing walls of the room from 2 to 5 cm.
If the time and budget for cosmetic repairs allow, then it is best to level the ceiling with high-quality gypsum plaster.

To do this, plastic slats are sewn onto the ceiling and the plane is tightened with a plaster mesh. Reiki-lighthouses are glued with alabaster, guided by pre-stretched marking horizontal cords. The mesh is sewn on dowels. The total time required for the final leveling of the ceiling in the room is 5-6 hours of work.
In one working day, you can complete a complete ceiling repair. The next day, you can rub, prime and paint the surface.
Cosmetic repairs to the walls of the room
During cosmetic repairs, the walls are leveled and plastered only in exceptional situations when the situation requires it, for example, the appearance of a large number of cracks or chipping of the plaster. In addition, the total area of the walls of the room, as a rule, is three times the area of \u200b\u200bthe ceiling, which in itself requires a lot of time and materials.
Therefore, during cosmetic repairs, the preparation process is limited to cutting small cracks, followed by puttying and grinding the surface. Sometimes, in order to level the plane of a single wall, especially problematic areas are subjected to grinding with an electric grinder.
In addition, at this stage of the repair work, it is not difficult to change the profile and configuration of the electrical wiring in the room. It is enough to drill channels in the lower part of the walls to the installation site of new electrical outlets, break through the "glasses" for the undercuts and install the outlets themselves. Corrugations with wiring laid in channels can be rubbed with gypsum or alabaster mass. All work will take a maximum of 2-3 hours. At the end of the preparation for finishing, the surface is vacuumed and primed.
Rough floor preparation
After the completion of the most time-consuming work with the preparation of the ceiling and walls, you can proceed to cleaning and preparing the floor. If the floors are concrete, with laminate-based flooring, then cosmetic repairs may be limited to re-laying laminate boards, with or without replacement of the lining material. Most often, damaged plates are changed in the room, after which the coating is polished using wax mastic.
During cosmetic repairs, linoleum coatings are cut out, the base is cleaned to concrete, primed and covered with a heat-insulating lining based on polyethylene foam.
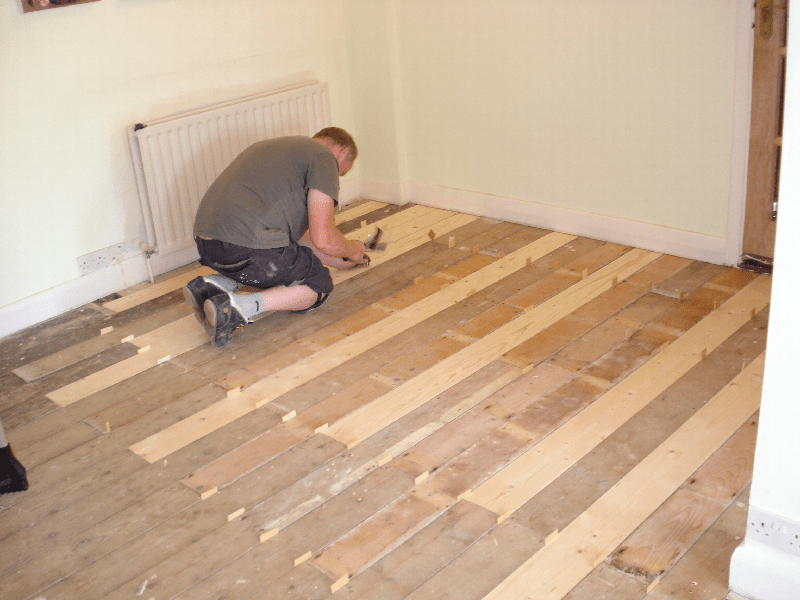
If the room has wooden floors, then first of all the floorboards themselves are cleaned and repaired, then the joints are clogged and minted, after which the surface is polished and prepared for painting.
Don't forget about debris and dust
Any repair work, even the most simple and superficial, is always accompanied by the formation of a large amount of debris and dust. Before repair, you need to prepare two or three polypropylene bags, in which all the garbage from the room will be collected daily. At the end of the day, after each finishing operation, the walls and floor are cleaned of crumbling crumbs and plaster residues, and before finishing, the walls are vacuumed or wet brushed.
If it is supposed to level the walls of the room with gypsum plaster, then the amount of garbage will increase by five to six times. It will be necessary to think in advance and find a way to collect and remove from the premises 150-200 kg of cement-sand garbage screenings. You cannot send it to the garbage chute or garbage cans; you will need to order a special service for the removal of construction waste.
Fine cosmetic repairs in the room
The first is the finishing of the ceilings. Usually, the repaired and sanded surface is primed and painted with light-colored acrylic paint.

If wallpaper is used in the interior of the room, the ceilings can be decorated with non-woven or vinyl wallpaper to match the future wall decoration. A common practice for decorating lamps and chandeliers is the use of imitation styrofoam moldings and decorative ceiling plinths.

The fine finishing of the walls in the room is considered one of the most responsible and at the same time time-consuming cosmetic operations. Even taking into account the fact that half of the walls in the room will be covered with furniture, a certain part of the walls will still be clearly visible to everyone in the room. If during the cosmetic repairs it was not possible to qualitatively level the surface of the walls, you can hide the flaws only under the wallpaper. Best of all, tapestries on a fabric basis or with a pronounced embossed textured surface. It will take 7-8 hours or a full day to paste over the room.

Repair of doors and floor in a small room
The wooden plank floor of the old layout often has to be hidden under linoleum or laminate. In this case, the surface of the floorboards is polished with a sander, and the joints are sewn together with nails hammered at an angle to the board. At the next stage of the repair, the floor surface is sewn up with OSB boards, after which linoleum or any other type of flooring can be laid in the room.

The situation becomes more complicated if the concrete floors are aligned with the level of the screed throughout the apartment. In this case, any floor covering in the room will lead to the appearance of a threshold, so the laying of laminate or parquet must be planned simultaneously in all rooms.
The final stage is the restoration of interior doors. The hatch and the door itself, if they are in good condition, can not be changed, but restored with cleaning and polishing of the surface. The outer lining of the door frame during the repair is traditionally replaced with a new one. The replacement of doors with a carrier frame is planned for a major overhaul, usually so that the entire apartment or house has doors of the same style and design.

Conclusion
Repair of a room, even in a cosmetic version, requires careful preparation, first of all, in the details of the future interior of the room, the method of decorating walls and floors. Any attempt to postpone the decision to the future, to do it randomly, as it happens, will lead to a significant increase in costs and increase the time required to restore the room by two to three times.
A well-made repair lasts 8-10 years, but sometimes residents get so bored with old interiors that they want to at least update them a little, make the room more comfortable and beautiful. Our company will carry out turnkey cosmetic repairs at low cost - the apartment will noticeably change, and the standard of living will increase.
When do you need to make cosmetic repairs to your home?
It is enough to look around your house with a critical eye to understand that the time has come. We recommend using our services if:
- the first signs of destruction are noticeable - the tile breaks off, stains are visible on the ceiling, the floor began to creak, cracks appeared in the doorways;
- overhaul was carried out more than 10 years ago, cosmetic - more than 5 years, the work is necessary in order to maintain hygiene;
- poor lighting - redecorating the room will allow the room to noticeably change, become lighter, more comfortable;
- I want changes, because the situation is morally obsolete or tired;
- a new family member has appeared, so you need to adjust the finish to his requests;
- there is a stale smell in the apartment, or the room has turned into a warehouse of old things.

We are sure that it is also necessary to make repairs when changing social status, obtaining a new position and increasing income. It is also required in order to sell your apartment more expensively, to attract more buyers.
What does cosmetic renovation of apartments include?
The company "Blagodat" carries out professional repairs at affordable prices. This type of restoration of residential and office premises does not provide for cardinal changes and significant time costs. It includes:
- drawing up a design project with the development of an individual interior;
- change of flooring;
- painting surfaces, pasting ceilings and walls;
- painting doors and windows of the apartment;
- painting of batteries, risers, heating pipes;
- work with light - installation of additional lamps.

Repairs carried out by our specialists are necessary when the premises do not have significant problems, are not dilapidated or emergency. Finishing will update the interior, add coziness and comfort for all family members.
Cosmetic repairs - price per m2
We offer to repair apartments inexpensively - without sacrificing quality, using only proven materials and with strict control of all processes on our part. How much does cosmetic repairs cost in the BlagoDat construction company?

- 1-room apartment 33 sq.m. - from 193,050 rubles;
- 2-room apartment 42 sq.m. - from 245,700 rubles;
- 3-room apartment 60 sq.m. - from 351,000 rubles;
- 4-room apartment 73 sq.m. – from 427,050 rubles.
Timely finishing is a way to save you money, as it will protect against further damage, which will require more complex manipulations. The cost of a cosmetic repair is several times lower than a major one, and when carrying out turnkey work, you will additionally receive a design project as a gift and a 15% discount.

How do we do cosmetic repairs?
In our company, cosmetic finishing takes place without headaches and nerves for the customer - quickly, efficiently, professionally. We work according to the following scheme:
- We receive the application and agree on the time of the visit, when it is convenient for you;
- We take measurements, consult, find out your wishes - this is completely free of charge, you are not obligated to anything;
- We draw up a contract with the calculation of the estimate, agree on its terms, sign;
- We order and deliver finishing materials to the object;
- We carry out high-quality repairs, completing it just in time;
- You accept the object, get a guarantee for it.

BlagoDat is the market leader in finishing firms in Moscow. Such a high achievement is due to the professionalism of employees, loyalty to the client, compliance with the terms of the contract and attractive prices. We value our reputation, so there is no doubt about the quality of the cosmetic repairs carried out - it will be done exactly the way you wanted!


 in the near future - forecasts and expert opinions")


 in the near future - forecasts and expert opinions")


