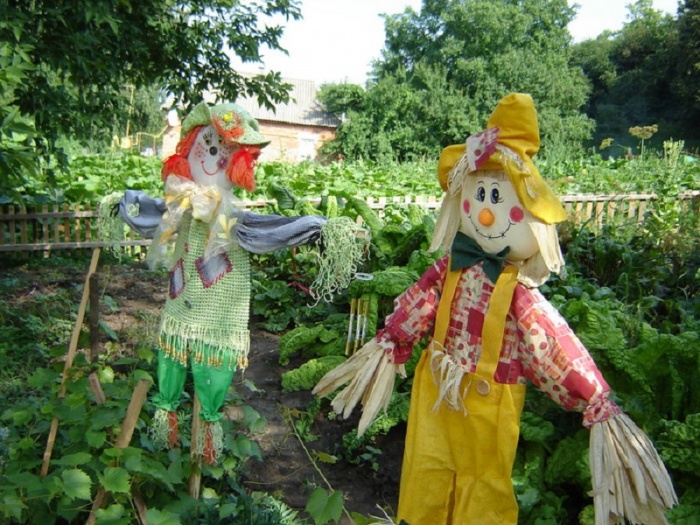
Since ancient times, to protect the crop from feathered raiders, gardeners placed scarecrows on the site. In the 21st century, this tradition not only did not disappear, but also developed: scarecrows became more fashionable and attractive.
Making a garden scarecrow
Settled to protect the ripening crop in the garden or in the garden, a garden scarecrow can be made, as in the famous song, "from what was." But it is very important that it not only cope with the task of scaring away birds, but also decorate the place on the site where it registered for residence.
A scarecrow should be not only functional, but also attractive.
Preparation of materials and tools
There are many options for creating a garden scarecrow, but the principle of operation is the same: clothes are put on a wooden frame of intersecting poles and the head is attached. The rest is the details that make each scarecrow unique.
The principle of creating a scarecrow is very simple.
frame
The frame can be made from two slats of suitable size, boards and even sticks, which are crossed at any desired angle and fastened with screws.
A simple version of the frame for a scarecrow: wooden coat hangers mounted on a rail
Head
For the head of a scarecrow, any more or less spherical object is suitable:
Beautiful curls on the head of a scarecrow can be created from an old magnetic tape. Such a hairstyle, in addition to everything else, will also sparkle in the sun and rustle in the wind.
Magnetic tape curls have additional deterrent properties: rustle and shine
Hands, feet and clothes
To create a scarecrow of the hand, you can fill the gloves with voluminous material (synthetic winterizer, cotton wool, straw) and fix them on a transverse pole. To create legs on a vertical pole, trousers, shorts, etc. filled with suitable voluminous material are also attached under the clothes and suitable old shoes are fixed on them.
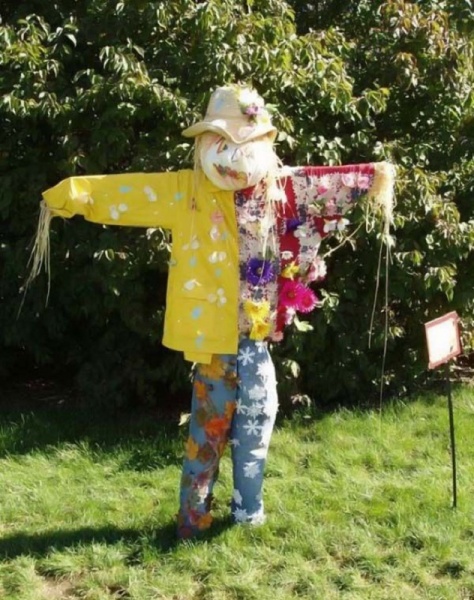
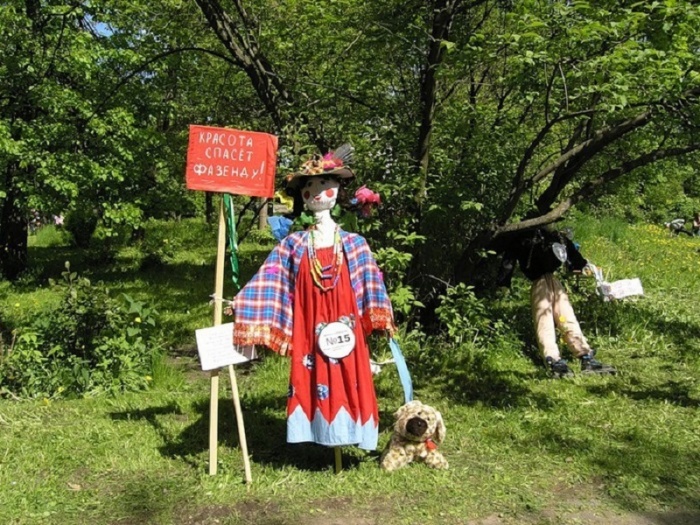
To make your stuffed animal pleasing to the eye, you should not dress it casually and pick up some torn clothes that no one needs. Dress it brightly, with charm, then it will not only scare away birds, but also decorate your site and please the eye.
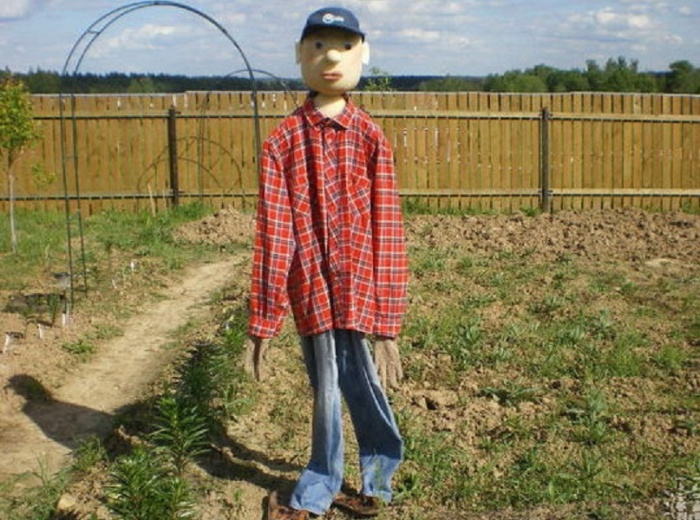
Dressed up cute scarecrow can decorate the site
Adding accessories to your look will depend on your overall design. The scarecrow can be decorated:
It is believed that birds are especially suspicious of the blue color, so it makes sense to add blue scarecrows to the costume.
A scarecrow dressed in a blue suit will scare away birds more reliably
So that in the future you can quickly protect a new garden resident from the rain, you should immediately prepare a large plastic bag or even an umbrella.
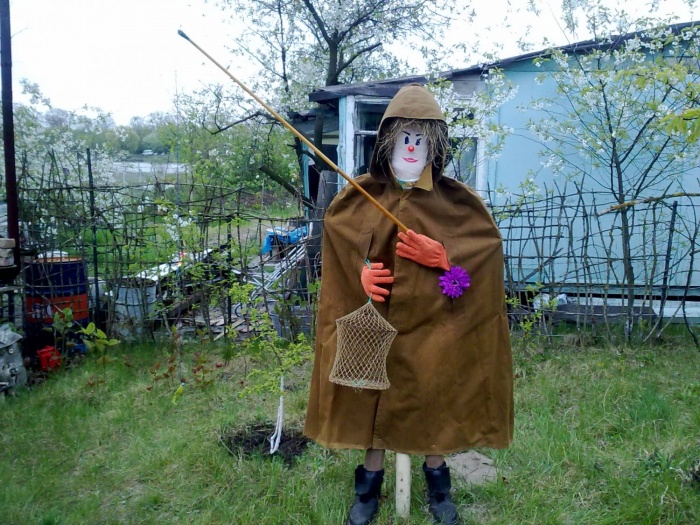
To protect from the rain, you need to prepare an umbrella or immediately dress up the scarecrow in a raincoat
If it suddenly turns out that your scarecrow, instead of scaring away the birds, began to play the role of a convenient airfield, you will have to change the design and move it to another place. Therefore, it is better to have more than one scarecrow, but at least a couple, in order to periodically change their places.
Master class on creating a straw man
To get started, prepare the following materials and tools:
- two handles for a rake or two even sticks (from hazel or aspen);
- a couple of screws and a screwdriver;
- bag of dry straw or hay;
- synthetic twine;
- scissors;
- headdress (preferably a hat);
- black marker;
- thick wire for attaching a hat;
- wide shirt, trousers or breeches.
The sequence of operations is as follows:
- Let's tackle the frame first. To do this, connect the two prepared rails with screws. It is better to immediately sharpen the lower end of the vertical rail so that later it enters the ground more easily.
Reiki for the future scarecrow fastened with screws
- We create the volume of the body with the help of straw. To do this, we twist the straw bundle, twisting it with twine, and fix it on a vertical rail. We also form the volume for future hands on the transverse rail.
Two straw bundles will add volume to the future scarecrow
- We form the head of the scarecrow. To do this, we fill a white bag with straw and synthetic filler, fix the resulting head on a vertical rail.
The head can be made from a white bag or pillowcase.
- Create a scarecrow face. Eyes, nose, mouth can be made from pieces of skin or fabric of the appropriate color, glue eyebrows, eyelashes.
A scarecrow's face doesn't have to be intimidating.
- We put a wide-brimmed hat on the head of the scarecrow and fix it with a wire.
A straw hat will add a human resemblance to the scarecrow
- We dress up the scarecrow in a shirt and pants. Preference should be given to blue.
We also fill the pants with straw and attach them with twine to the shirt.
- We decorate the scarecrow by adding scary accessories. To prevent the scarecrow from being static, you can attach fluttering and rustling elements to the hat, sleeves, belt:
- beads from bottle caps;
- canned food cans fastened in pairs;
- CD belt.
A belt made of CDs will add charm and shine to the scarecrow.
Video: creating a scarecrow
Master class on creating a scarecrow crow Karkusha
Often, to scare away jackdaws in the garden, a dead bird is hung on a pole. We will not do this, but we will try to create a scarecrow in the form of Karkusha's crow. Perhaps she will cope with scaring away the feathered robbers.
Scarecrow in the form of a crow will help expel other birds
To craft Karkusha, you will need the following set of materials:
- pole with crossbar;
- black fabric (polyester);
- nitron (synthetic fiber);
- Styrofoam;
- children's shorts / breeches in black;
- black and yellow knee socks;
- black nylon stocking;
- black tow or linen;
- glue, twine, thread;
- black marker;
- willow rods.
Sequence of operations:
- For the frame, we take two poles 1.5 and 0.5 m long, connect them together.
- We cut out a square with a side of 50 cm from black fabric, in the middle we make a hole for the head, and cut the edges into strips 5 cm long.
- We bend the resulting part in half so that both the front and the back of the fabric look like a triangle, and put it on the frame.
- We sew the torso, and then to add volume we fill it with nitron.
- We attach bunches of flax or tow to the “wings” hanging along the edges of the transverse crossbar. They will imitate feathers.
- We also fill the black stocking with nitron to make Karkusha's head.
- We cut out the eyes and beak from the foam, glue them on the head, which we fix on a vertical rail.
- At a height of one and a half meters, we fix willow rods horizontally, Karkusha will comfortably “sit down” on them.
- We put the stockings and panties stuffed with nitron together and sew them to the rods.
- We cut out paws for Karkusha from foam plastic and glue them to the golfs.
- On the rods you can hang cans fixed on twine, which will ring in the wind.
Variants of garden scarecrows
Ideas for creating exclusive options for a garden scarecrow are endless. You can choose to create your scarecrow some of these options, but it is better to use them for inspiration and come up with something of your own.
Photo gallery: defenders of orchards and orchards
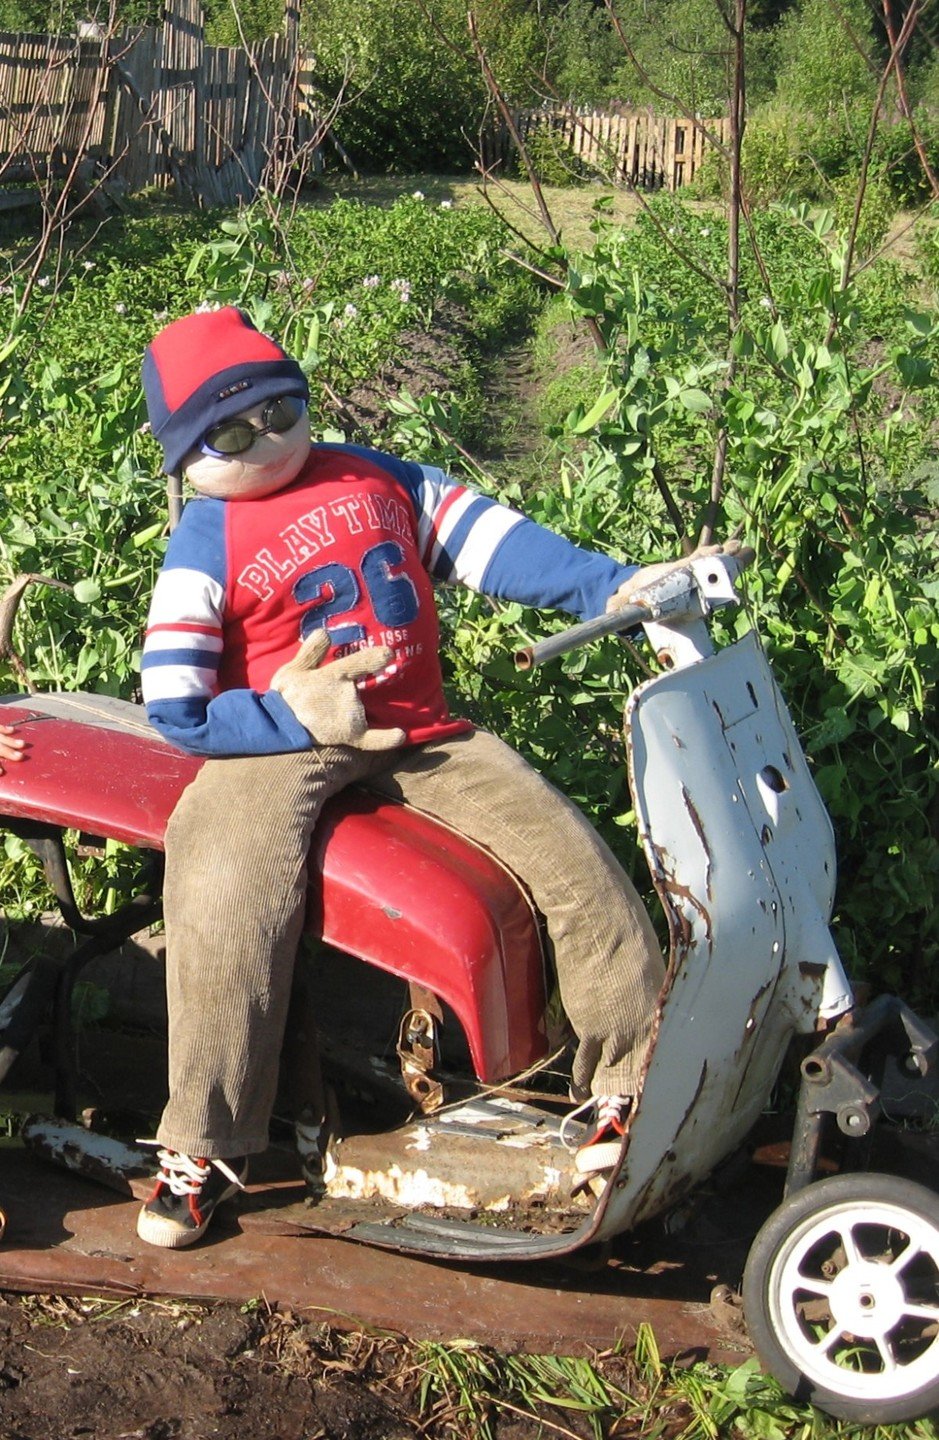
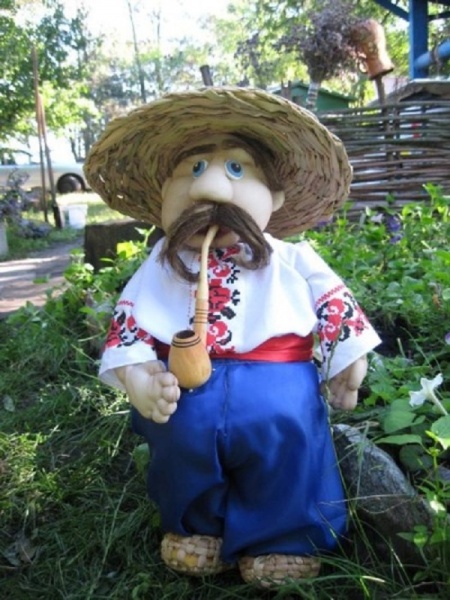
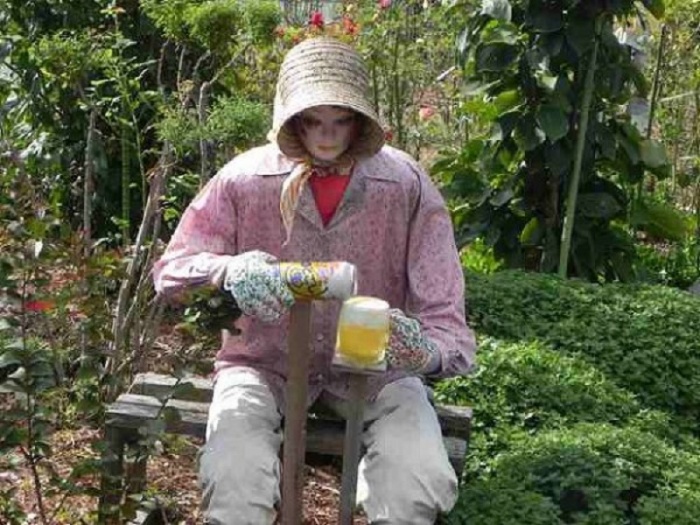
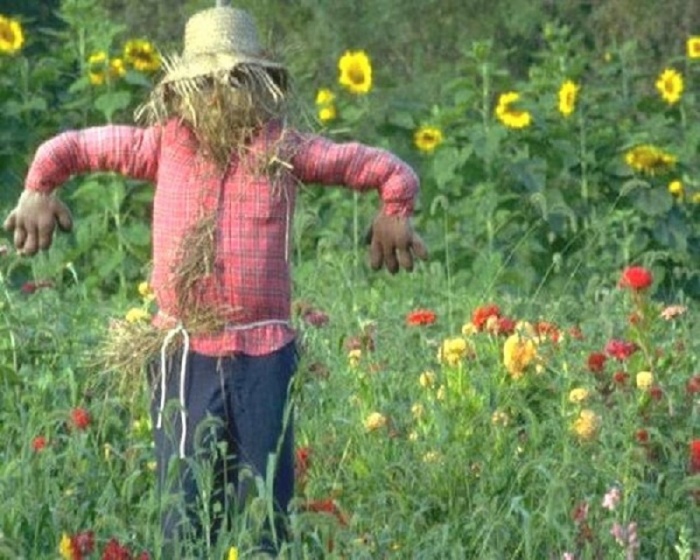
A straw man can help protect an entire field You can create a scarecrow and without much effort A scarecrow can be given a national color Bright details of clothing will give a scarecrow elegance When creating a garden dweller, you can show imagination A scarecrow head can even be made from a pumpkin Scarecrow can perform some kind of agricultural work Special resemblance to a person will have a scarecrow made from a mannequin
Video: ideas for creating creative "guards" of a ripening crop
Creating a scarecrow for your garden is very simple, so you can show your imagination and make it unique by working on your own "patterns". And let it be as it is said in these lines: “... our scarecrow with you is no longer a stuffed animal, not a doll and not a mummer, but a faithful, kind friend!”.
Growing a rich harvest is not an easy task, but it is equally important to take care of its safety until it is fully ripe. After all, bright fruits attract birds, and long-awaited vitamins from their own plot become someone else's prey. Since ancient times, the garden scarecrow has guarded the land from uninvited guests.
The scarecrow cannot boast of high protection efficiency. Birds are quick-witted creatures and after a short observation will make an attempt to feast. An electronic device for scaring away birds is capable of protecting the garden plot.
But the traditions of the ancestors are still strong, so a do-it-yourself garden scarecrow invariably adorns country estates. The proposed master classes will help you become the owner of the original model of a garden scarecrow.
How to get the maximum effect from a scarecrow
It is believed that in ancient times, living creatures were afraid of the presence of a scarecrow in the garden, but evolution has touched all living things, and now they understand its harmlessness. It is difficult to agree with such a version, most likely, during the period of paganism, the garden scarecrow symbolized a certain deity, on whom they pinned hopes for protection from evil spirits and receiving a generous harvest.
Followers of the esoteric theory will be especially interested in making a garden scarecrow with their own hands. Using certain elements, putting a special meaning into every detail, in the image of a stuffed animal, you can make a kind of amulet. For example, there are the following beliefs:
- a wreath of flowers symbolizes good health and natural beauty;
- the presence of fruit on a scarecrow will ensure fertility;
- a couple of pretty garden scarecrows can create an atmosphere of mutual understanding in the house or attract the other half.
But mentally endowing a scarecrow with magical abilities, one should not forget about its direct purpose - to scare away birds. Therefore, when designing a garden scarecrow, it is worth considering the psychology of birds and making a scarecrow using effective elements of intimidation. Birds are afraid
- shades of blue;
- loud and sharp sounds;
- shiny elements;
- moving parts.
The blue color in nature is a rare phenomenon, so the birds perceive it as an aggressive element that poses a threat. This nuance should be actively used when choosing a wardrobe for a scarecrow, generously using bright blue shades.
The scarecrow is hardly capable of constantly making sounds. An effective assistant will be the wind, which will set in motion various elements. Light details in the form of bells, rustling ribbons or decorative pots can create the necessary sound aura around the garden scarecrow.
New Year's tinsel, unnecessary CDs and foil are available materials when making a garden scarecrow with your own hands. The combination of all frightening factors will lead to the desired result and the birds will less likely to taste the long-awaited harvest.
The scarecrow garden in the photo clearly demonstrates the boundless imagination of craftsmen.
Scarecrow design highlights
A garden scarecrow with your own hands can take on various shapes. The information collected from numerous master classes creates a complete picture of the design options for a scarecrow for a garden plot.

Head
It is customary to start with the scarecrow's head. Usually it is located on a cruciform frame made of wooden sticks or beams. And here the creative process of creating a scarecrow begins, among the possible head options you can choose:
- A bag or an old shirt stuffed with rags crowns the top of the cross.
- Rescue an old soccer ball.
- Often the pumpkin performs the function of the scarecrow's head.
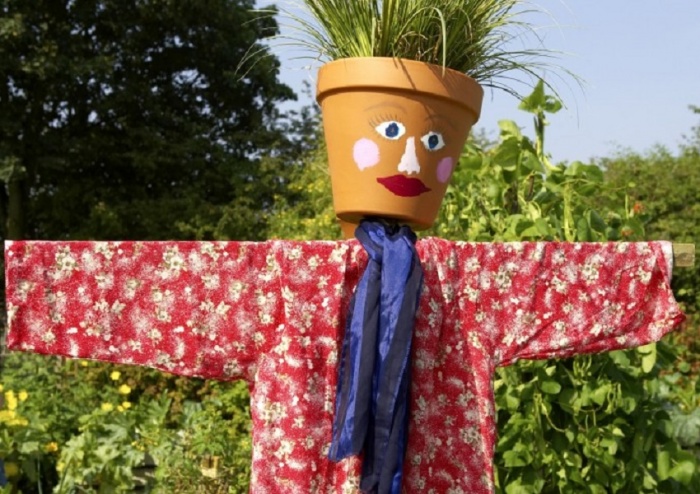
- In addition to decoration, a light pot will create additional noise.
Comment! It is easy to give the head of the scarecrow the desired shape with the help of straw sewn into burlap.
Any element used as the head of a garden scarecrow is endowed with human features. Depending on the material, the eyes and mouth of the scarecrow are drawn with a marker or original details are sewn on. For example, a voluminous nose is constructed for the rag head of a garden scarecrow. A rag is placed in a small piece of fabric, pulled together along the edges with a strong thread and fixed to the head.

The role of the eyes will be performed by buttons. Scarecrow hair is rarely done. But if an old bright wig is lying around the house, this will be the perfect decorative element for a stuffed animal. When used as a pot head, it can be fixed in the usual position upside down, and lush grass can be placed inside.
Most often, instead of hair, a hat is put on the head of a garden scarecrow. Its wide brim is an additional intimidating factor for birds.
torso
Just dressing the frame of a scarecrow in an old T-shirt or dress is too banal. In addition to repellent properties, a do-it-yourself scarecrow must have aesthetic qualities.

The main elements that deserve attention when dressing a scarecrow:
- It is easy enough to form legs from old jeans by placing foam rubber or rags inside.
- The torso of a garden scarecrow is made from any suitable thing, but they follow the recommendations for shaping the volume. The inner padding is similar to the material used for the legs. In order for the scarecrow to retain the given shape for a long time, the edges of the sleeves and legs are sewn up with threads to avoid loss of the filler.
- A scarecrow without hands and feet looks a bit ridiculous. Gloves and old shoes, securely fixed to the frame, will add attractiveness to the image.
- All sorts of details will add individuality to the character. In the hands of a garden scarecrow there may be a bucket, bells or a pot. All these elements will create an additional noise effect, so necessary to intimidate the birds.

Advice! A do-it-yourself garden scarecrow is made in accordance with the height of human growth.
The realistic silhouette of a scarecrow can play into the hands not only in the fight against birds, but also scare away uninvited guests in human form.
As soon as the first cherry begins to blush on the site, all local sparrows, starlings and crows flock to the feast. And if such a flock “lays an eye” on the tree they like, the crop disappears in a day. Therefore, the owners are trying in every possible way to drive out uninvited guests and put a pretty scarecrow in the garden. The most interesting thing is that after a couple of days, gossips-magpies can peacefully talk on this stuffed animal, sparrows clean their feathers and “they wanted to sneeze” at the purpose of the guard.
Scarecrow Video Ideas
Why, then, in the old days, birds were afraid of stuffed animals, but today they are not? It turns out that the first scarecrows arose not at all for the purpose of scaring away birds. They were amulets that helped protect crops from evil spirits, and the family from witchcraft from outside. Over time, the magical purpose of garden dolls was forgotten, and the role of the guard remained, who must protect the berries from bird raids. And a scarecrow can really do an excellent job with this role if, when creating it, you take into account the objects that birds are especially afraid of and introduce them into the design of the figure.
What are birds afraid of?
So, before making a garden scarecrow, let's decide what the birds are afraid of:
- Of blue color
In nature, the blue color is quite rare, so the birds do not have time to get used to it and prefer to avoid places where this color is present.

The blue color in the scarecrow's clothing increases its effectiveness as a guard
- Noise, cod, loud sounds
Noise and crackling for birds means danger. But if these are urban "residents", then they have already got used to the noise and do not react to moving cars, loud music, because they managed to understand that this noise does not pose any threat to existence.
- Shiny and moving objects
Shiny objects frighten them with glare when they begin to move in the wind. The same applies to suspended strips of magnetic tape, film, etc. It is not the movement itself that frightens them, but the fact that an object that is moving is unfamiliar. For example, the owner can move around the garden, but they will continue the feast, because they understand that the person is too low or far away, which means that there is no threat to life.

A smiling scarecrow will meet you in the garden
- Birds of prey or their dead brethren
Ornithologists believe that of all the methods of struggle, the most effective will be the use of specially trained birds of prey, which drive "little things" from the trees, and even peck someone. The second option is to hang the dead bird on a high stick so that it can be viewed from all sides of the site. For birds, a killed relative is the clearest signal that there is no need to “poke your nose” here.

A pretty wonder for the garden
We create the perfect garden scarecrow with our own hands
So, when we know what the “cherry eaters” are most afraid of, we can make a stuffed animal by introducing all the deterrent elements into its image. But birds gradually get used to even the most ideal scarecrow, so it’s best to make 2-3 different dolls and swap them in a week or two so that the birds don’t have time to get used to it. Here's how to make a garden scarecrow in three ways.
Scarecrow Kuzya fabric

A bird on the shoulder, or better - on the head, will help the scarecrow scare away the birds
For Kuzi you will need:
- Old shirt and pants. Let at least one thing be blue.
- Hat/cap, gloves.
- A cloth bag from which the head will be created.
- Nitron or straw for stuffing.
- Sewing pins or needle and thread.
- Markers.
- Leg-split.
- Two CDs.
- A stuffed bird, a dead crow, or a balloon.
Work progress:
- We create the frame of the future scarecrow: we nail the transverse crossbar to the pole at a height of 1.7 m. It will serve as the basis for the shoulders and arms.
- We construct the head: in a white cloth bag (today they pack shoes, spare parts from plumbing, etc.), we stuff nitron or straw to give the shape of the head. If there is no bag, make it from an old pillowcase, pulling it together with stitches around the perimeter.
- Put the finished head on top of the pole and pull off the edge of the bag (they are sold immediately with ropes). If the head is from a pillowcase, tie the edge to the pole with twine.
- Create a face with markers. They, unlike felt-tip pens, do not fade from the sun and do not peel off when it rains.
- From nitron threads (you can take ropes, straw, etc.), create a head of hair and attach it to the crown with pins or sew.
- Put the shirt on the crossbar and pin it.
- Stuff the sleeves and interior with straw. Sew up the edge of the sleeves and shirt or pin it with pins so that the filler does not come out.
- Stuff the nitron into old gloves and sew them to the edges of the shirt sleeves.
- Thread the rope into the disks and tie its upper edge to the gloves. Let them toss and turn and frighten the birds with their brilliance.
- Stuff your pants with straw so that most of them fall on the legs. Pull the edges of the legs with twine, and sew the top to the shirt. No need to fix the bottom of the pants. Let them flutter freely with gusts of wind and give the impression of a moving figure.
- Put a hat on your head, and place a dead crow (if you find it somewhere) or a stuffed bird on top.
- If the crows are not found, attach an inflated balloon to the cap. Just leave a little thread at the end so that the ball sways from any breeze.
The stuffed Kuzya is ready - put it on the territory between ripe cherries.
Scarecrow Dusya from plastic bags

The more voluminous the packages from which the scarecrow costume is created, the more noise and movement they will create
To create a beautiful Dusi, you will need:
- A stocking or piece of flesh-colored tights.
- Plastic bags for garbage (or regular bags).
- Tin cans for beer or drinks.
- Twine, pins, thread with a needle.
- Nitron.
- Black tow.
- Color markers.
- Scotch.
- A pole, about 2 meters high, and a shorter crossbar (about a meter).
Work progress:
- See item 1 in the previous master class.
- We create the head from a nylon stocking, which we stuff with threads, nitron, fabric scraps, etc. (but not with straw, because it will stick out in many places and pierce the nylon).
- We put the head on the top of the pole and fasten the bottom with twine.
- We draw a face with colored markers, and sew on eyebrows from black tow.
- We create hair from tow and fix it at the crown with threads or pins.
- From the package we create a bow and attach it to the top of the head. It is desirable that the package was blue.
- We make sleeves: we put plastic bags from garbage on the crossbar so that the open edge turns out to the sides, and the glued one - to the center. (When we put on the bag, the glued edge in the center will break through the crossbar). We wrap the edge with tape to fix the package on the frame. Let the second edge flutter and scare the birds.
- We pull on Dusya a T-shirt or a blouse with a short sleeve.
- We fill the T-shirt with nitron.
- For the skirt, you will need plastic bags of two colors (it is desirable that one be blue). First, we attach a long petticoat to the pole with tape, creating it right on the pole. The second tier - a short skirt - is fixed with tape over the first. The more fluffy the skirts are, the better they will move from the wind.
- We give iron cans tied with twine into Dusya's hand, and let her rattle them, frightening the birds.
Scarecrow "Karkusha"
Karkusha is a scarecrow with which you can replace a live bird that you don’t want to kill. The silhouette of a crow will scare if not a crow, then sparrows and starlings.

To scare birds with a bird is the surest way
For Karkusha you will need:
- Black fabric (polyester).
- Children's shorts / breeches in black.
- Black and yellow stockings.
- Black nylon stocking.
- Styrofoam.
- Black tow or linen.
- Black Nitron.
- Glue, twine, thread, pins.
- The marker is black.
- Rods.
- A pole with a crossbar.
Work progress:
- This scarecrow is smaller than Kuzya and Dusya, so a pole 1.5 m long is enough, and the crossbar is half a meter.
- We cut out a square from the fabric, the side of which is 50 cm. We cut a hole in the center to put it on a pole, and cut all the edges into ribbons, the length of which is about 5 cm.
- We put the fabric on the crossbar so that we get triangles in front and behind.
- To give the figure volume, we stuff the nitron inside, and sew the edges (up to the cut ribbons) with threads or fix them with pins.
- At the edges of the crossbar we tie bundles of tow or linen, which will imitate bird wings. The longer the tow, the better it will flutter.
- We create a head from a black stocking, stuffing it with black nitron. We put on a pole and fix it with twine.
- Cut out eyes from foam and glue.
- We cut out the nose from the foam and glue it (the glue must be quick-setting!).
- In the whites of the eyes, draw the pupils with a black marker.
- From the tow we create a forelock and glue it to the top of the head.
- At the level of a meter, we tie a bundle of rods to the pole, on which Karkusha will sit.
- We stuff children's shorts and stockings with nitron, sew the stockings to the legs.
- We sew shorts to the body and rods so that it seems that the scarecrow is sitting.
- We cut out the paws from the foam and glue them to the golfs.
- We tie iron cans on long threads to the rods.
We hope that these three scarecrows, having appeared on your site, will save the crop from bird raids.
With the appearance of the first ripe cherry on the site or in the garden, sparrows, crows and other local birds begin to flock to it. Literally, in a day, a flock can destroy the entire crop. One way to keep the birds away is to install a garden scarecrow. Unfortunately, this does not last long - after a few days, uninvited guests return, calmly sitting on a horror story that is supposed to scare them away.
A cute multi-colored scarecrow does not always fulfill its main role - scaring away birdsThe question arises why the scarecrow has ceased to have the proper effect on modern birds, because in the old days the scarecrow was a fairly effective method. It turns out that the purpose of the first scarecrows was not at all to scare away birds. They were placed as amulets that prevent evil spirits from destroying crops, and protect the family from external witchcraft. Over time, this property of dolls in the garden was forgotten, and they turned into just scarecrows protecting the crop from bird raids.
In fact, the scarecrow can be very effective in dealing with the problem of birds. It is important, when creating it, to include attributes that frighten birds into the appearance.
What can scare a bird?
Before installing a scarecrow in the garden, you should find out what the birds are really afraid of, and how you can use this when creating a scarecrow with your own hands. Below are the main facts that can scare birds:
- Blue colour. It is not found in nature so often, and birds do not develop a habit of it. They try to avoid areas where there is too much blue.
- Noise, crackling, loud noises. All of the above is a signal for birds about the danger. Alas, the birds that live in megacities have time to get used to cars, loud music, and understand that this kind of noise and rumble is not particularly dangerous.
- Shiny moving objects. In motion, objects create glare, which causes fear in birds. In this capacity, suspended strips of magnetic tape or film will perform perfectly. Birds are wary of an unfamiliar moving object, and movement as such is not scary to them. For example, they will ignore a person who is walking by, as they are moving far below and are not a threat.

 Moving shiny objects are a danger signal for birds
 - Alive or dead. According to ornithologists, the most effective method of dealing with small birds is birds of prey, which are trained specifically to protect plantings. They will easily drive away uninvited guests, and some may even peck. A dead bird, suspended in such a way that it can be seen from all sides, also works effectively. Such a warning makes it clear that it is better to avoid this place.
Garden scarecrow made by hand
Making a guard in the garden with your own hands is not difficult. Nevertheless, even if you apply the entire list of frightening elements when creating a scarecrow, sooner or later the birds get used to it and stop paying attention. To prevent this from happening, it is worth building not one, but two or three monsters and rearranging them periodically. This approach of alternately changing dolls will solve the addiction problem.
Master class: garden scarecrow from plastic bottles
In my opinion, plastic bottles are the perfect material for making a garden scarecrow. Judge for yourself: plastic is not afraid of either rain or sun, it makes a wonderful noise in the wind, scaring away birds, and the source material is worthless. Of course, you will have to tinker a little, but the process can be turned into joint technical creativity with your child, and the result will amuse friends. You can see what I got.

 Original stuffed animal from plastic bottles
 When assembling the above-mentioned copy, about fifteen brown bottles, seven white, two green and one five-liter transparent bottles were used. The tool was an awl, a staple gun (stapler), scissors, a drill with a drill, a pencil, a knife, a screwdriver. Some thick copper wire, clear tape, and a few self-tapping screws all helped hold the figure together.
Now consider the manufacturing process step by step. The step numbers correspond to the numbers in the photos.
1. Washing blanks is an unpleasant job, but it must be done. Then, of course, you will need to dry the "priceless" material.
2. In the next step, I cut out the white socks with scissors in accordance with the image. Five protrusions on the bottom of the white container made it possible to focus on the eye and cut out five petals without marking.

 3. He bent the petals 180 degrees and pressed through the place of the bend with his fingers.
4. I returned all five petals back 90 degrees, and I got a golf with ruffles.
5. Picture number 5 shows golf and a paw. The paw was made using the same technique as the golf, but the toes were cut from the bottom of the white bowl to add volume.
6. We put golf on the paw, and the outlines of the leg appear.
 7. We take another white bottle, cut off the lower part and put a golf paw on it. Got a leg. Now let's do the second one.
8. There are three details in photo No. 8 at once. The collar, as you can see, is cut out of a white container using bottom elements. A smaller collar, in the form of a ring, is cut from the conical part of the workpiece. Two plugs: from a regular container and a five-liter one are twisted together with two self-tapping screws. This part will connect the head to the body.
9. Let's make the upper limbs of the weirdo from brown material. We cut off the lower, uneven part of the container and cut strips about 8 cm long and 2.5 cm wide on the “skirt” of the part. We wind them on a pencil and crimp them with our fingers to give shape.
10. Align the bends until the same bends are obtained. You will need four such details (I remember that there were two paws).
 11. Now we make the paw in the same way as the white one, using the lower figured part of the container.
12. For two of the four parts in photo No. 10, we cut off the neck obliquely to form the shoulder.
13. We insert two parts into each other and get part of the upper limb of the devil.
14. Add a brown paw from below - and the hand is ready. How many upper limbs do you need - guess for yourself.

 15. It's time to do the torso. We cut off the top of the five-liter container and do not throw it away!
16. We make holes for attaching the legs from below. The diameter of the holes corresponds to the diameter of the neck of the bottle: tightly and without gap, even with resistance!
17. I hurried a little and already began to cut out the samurai's chain mail. The staple gun holds the part for the photo and shows off its appearance.
18. Blue spots are not eyes, these are legs, or rather bottle caps, with which the legs inserted into the body are screwed.
 19. Now he is already with his legs and in chain mail. I had to cut out many parts of the chain mail and fasten it with a stapler to the body. Staples do not pierce plastic, unless you substitute a support in the form of a piece of wood. I got so carried away that I didn't show how the top half of the 5 liter blank was put back in place and taped to the bottom of the torso. The upper parts of the brown clothes were also pre-fastened with adhesive tape, and then with a staple gun.
20. You can cut off the "umbilical cord" in the form of a handle on the neck.
21. This is how the upper limbs are attached to the body: a couple of holes in the shoulder, one on the arm, plus a copper wire ring.
22. Already with arms, and sections of blanks on the shoulders are covered with elements of the upper part of the clothing.
 23. We take a blank for attaching the head and fasten a specially selected volumetric capacity of the head. (They say people will do the same in 100 years).
24. This is the nose. So as not to get lost, spikes with hooks are cut out on it, as in the photo. In the head, in place of the nose, two slots are made for the spikes. The size of the slot - without taking into account the protruding part of the spikes. The spikes are bent 180 degrees and inserted into the slots. The folds will straighten and fix the nose.
25. Cut out a piece of plastic from the flat part of the container.
26. We roll the plastic into a tube and fasten it with narrow tape in the upper part - it turned out to be an ear. (You can twist hard, it's the scarecrow's birthday!)
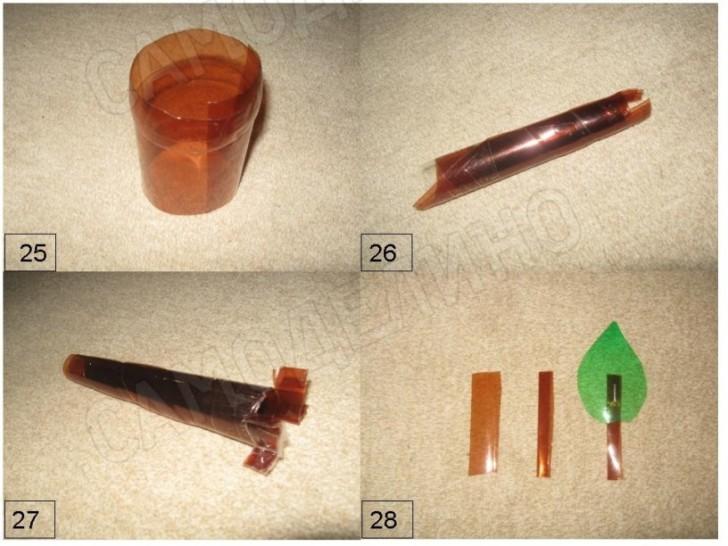 27. On the ears we cut out the hooks and make bends to fasten like a nose. Now on the head, between the curly protrusions of the bottom of the bottle (it is possible between the cerebral convolutions), we cut out holes.
28. These are leaves on the ears: piercing. The leaflet is fastened with a staple. The handle is simply inserted between the layers of the ear.
29. Insert ear hooks with curved folds into the holes for the ears. The latter straighten and fix the ears.
30. Now two ears are in place, plus the eyes and mouth are screwed with screws. (Don't be afraid, it doesn't hurt).
 31. Green spiders are three tiers of future hair. We already know how to cut strips 0.5 cm wide and 10 cm long. Then we bend and fix the bends.
32. We drill holes in the center of all three chignons, then we insert three floors of hair into each other and fasten them to the head with a self-tapping screw. In photo #8 there were two collars. We unscrew the head, first we put on a large, then a small collar and put the head in place. All! I also did not regret the blue ribbon: it scares away birds.
Plastic bags - clothes for Feni's scarecrow
Below is a master class on creating a doll named Fenya, which is easy to build using plastic bags. The main nuance is that the bags are as voluminous as possible, then the clothes from them will make more noise and simulate the necessary frightening movement. Our stuffed animal will need the following materials and tools:
- beige stockings or tights;
- polyethylene bags;

 Rustling shopping bags will be great "clothes" for the scarecrow
 - aluminum beer cans or similar containers;
- rope, pins, threads, needles;
- nitron or other stuffing material;
- black tow;
- a set of colored markers;
- scotch;
- a two-meter support and a crossbar up to 1 m long.
The sequence of actions is as follows:
- Creating a framework. The crossbar is nailed to the pole at a height of about 1.7 meters. This is the basis for Feni's shoulders and arms.
- The head is made from a nylon stocking or tights. It is stuffed with nitron or pieces of cloth. Straw is not suitable as a stuffing, as it will tear the nylon and will peek out from everywhere.
- We tie the bottom of the head with a rope at the top of the pole.
- The face is depicted with markers, with the exception of the eyebrows. They are made from black tow.
- Tow is also suitable as hair. They are sewn or pinned to the top of the scarecrow.
- A bow made of a plastic bag, perfectly blue, is attached to Fenya's head.
- It is convenient to use garbage bags as sleeves. They are put on the crossbar in the following way: the open edge is directed to the side, and the glued edge is directed to the center. In the process of dressing, the glued edge must be broken through in the middle. The resulting sleeves must be fixed with adhesive tape in the shoulder area, leaving their lower parts to flutter freely.
- We put a T-shirt or something from short-sleeved clothes on the frame and stuff it.
- To make a skirt, you will need to use packages of two or more colors, one of which must be blue. The lower tier of the skirt is made the longest and is attached to the frame with adhesive tape. The upper tier is already shorter and is attached, partially covering the lower one. The more luxurious the skirt, the more it will move and more effectively scare away birds.
- Tie the metal cans together with a rope and hand such a bouquet into Fene's hands. The rattling of the cans will also be a way to scare the birds.
 Stuffed animals from packages of different ages
 Old rags for stuffed Fili
Fene will be replaced by the charming scarecrow Phil. Below is a master class on creating a doll from matter. For its manufacture you will need:
- old trousers, shirt - it is desirable that a blue thing be present among them;
- hat or cap, plus seals / mittens;
- a two-meter pole with a meter crossbar;
- to create a head - a rag bag;
- nitron/straw to stuff the doll;
- sewing and additional tools, namely: needles, threads, pins, twine and marker;
- CDs as shiny objects;
- an inanimate crow, a stuffed bird or an ordinary balloon.
 It is better to draw a face with markers, otherwise it will quickly be washed off by rain
 Instructions for creating a scarecrow step by step:
- We build a frame - similar to the first paragraph in the previous instructions.
- Stuff a cloth bag with straw or nitron to give it the desired shape. In addition to the bag, a pillowcase can be used as a head.
- The finished head is placed on top of the pole and tied with ropes that such rag bags usually already have. The pillowcase head is tied to the frame with twine.
- Draw a face. For this, it is better to use markers, not felt-tip pens, as our art will not disappear after the rain and will not fade in the sun.
- Hair for Fili can be made from straw, ropes or nitron threads. They should be sewn or attached with pins.
- Throw an old shirt or T-shirt on the crossbar, pinning it to the frame.
- Inside sewn or pinned sleeves and under the shirt, stuff straw or other material.
- Sew gloves stuffed with nitron to the ends of the sleeves.
- Tie ropes with strung discs to the resulting hands.
- Pants should be stuffed in such a way that the main part of the stuffing gets into the legs. Sew the pants to the shirt, and the edges of each leg must be pulled together with a rope. At the bottom of the pants it is better to leave unfixed. So they will flutter in the wind and create the illusion of a moving object.
A hat is placed on the head along with a dead bird. Not everyone dares to touch a bird that died under the wheels of a car. Instead of a bird corpse, you can simply tie a balloon on top of a thread so that at the slightest breath of wind it begins to sway from side to side.
Also, resourceful gardeners can offer other equally effective ideas - one of them can be seen in the video.
Summer residents are looking forward to the first summer berries with special impatience, because after a long winter the family missed sweet vitamins. Feathered "neighbors" - starlings, sparrows, and also crows are no less passionately waiting for this moment. And when the time comes for the ripening of early cherries or strawberries, a stubborn struggle begins for who will get the harvest. To prevent unexpected raids, summer residents are on duty all day in the garden, throw nets on small trees, and a garden scarecrow is fixed next to tall ones or on them.
But not every guard is afraid of birds. They use many as an airfield, from where you can more carefully study the contents of the master's garden. It turns out that in order for a scarecrow to "work", it must be created taking into account all the factors that birds are afraid of. Let's consider these factors in more detail and create a couple of ideal scarecrows based on them.
What birds are afraid of: we select elements for the future scarecrow
Any bird will not attack a tree if there is even the slightest threat to life. And this threat is not only a person. Here is a list of the most frightening objects and objects that birds cannot get used to:
- Everything that moves and glitters.
- Anything that makes harsh sounds and noise.
- Anything dyed blue.
Let's deal with each point.
Shine and movement: causes bird fear with its impermanence
By themselves, shiny objects for birds are not terrible. Let us recall at least forty, which drag into the nest everything that attracts with its brilliance. But if a shiny object begins to move, spin, scattering glare from the sun's rays, then it becomes frightening for birds, because it is incomprehensible. The birds do not know how this "horror story" will behave in the next minute, and therefore prefer not to get close. So old CDs and DVDs can do a good job if added to a scarecrow's wardrobe.
In addition to shiny objects, you can include in the paraphernalia of the garden guard everything that starts to move from the slightest breath of wind: film, magnetic tapes from old cassettes, balloons, etc.

Anything that has chaotic movements disturbs birds, even if it does not look like a person.
Blue color: scares with unusualness
For some reason, out of the entire color palette, starlings and sparrows are afraid of rich blue (it is also called royal blue). Such a tone is quite rare in nature, and birds simply do not have time to get used to it. So in the clothes of a garden scarecrow you need to use this particular shade.

Crack and noise: signals danger
In the dachas there is no such movement as in the city, and the birds get used to the silence. If something starts to crack or make noise on the site, then this is out of the usual rhythm of the life of birds and scares them. True, if the sounds are made constantly, with a certain regularity, then the birds will soon get used to this danger. Therefore, it is necessary to alternate different types of rattles and noisemakers, changing their places every week.
Birds of prey or their dummies: a direct threat to life
Ornithologists who study the behavioral reactions of different breeds of birds have come to the conclusion that there is no better way to scare away feathered "little things" than their predatory "brothers". Not without reason in the city, trained falcons, eagles and golden eagles are used to eliminate colonies of pigeons that shit on monuments of historical significance. A couple of flights of a predator - and the birds will forever forget the way to this area. True, summer residents rarely manage to get a real bird of prey. An easier way is to hang her stuffed animal on a high pole or find a dead crow. Hanging a dead "kinsman" is the best proof that it is not safe here.

If there was no dead bird, you can make it yourself
So, four deterrent factors are known to us. It remains only to introduce them into the future stuffed animal, so that it becomes a real guard for ripe berries.
Master class: how to make a perfect garden scarecrow
To create a garden DJ, you need to stock up on the following materials:
- A high wooden pole (about 2 m) and 2 crossbars (up to a meter).
- Unnecessary clothes in which the color blue will be present (trousers, shirt, cap).
- Last year's pumpkin to create the head (if you don't have a pumpkin, use a cloth bag stuffed with straw).
- Filler with which you will fill clothes (nitron, rags, straw, etc.).
- Music discs.
- The radio is in working order.
- Markers.

Look for open areas to install the scarecrow so that it is clearly visible from all sides.
When everything you need is collected, we get to work. The sequence of actions is as follows:
- We bring down the frame on which the DJ will sit. To do this, we nail the crossbar to the pole, retreating 30-40 cm from the top. She will wear a shirt.
- We make the head. If last year's pumpkin or zucchini was found, then we cut a small hole in the center and select all the contents through it from the inside with a tablespoon. Then carefully cut out the face with a knife. If there is no pumpkin, use a light linen bag. We fill it with hay, nitron, etc., and draw eyes, nose and mouth with markers on top.
- We put the head on the pole. The pumpkin will hold on due to the fact that there is no through hole on top. The bag must be pulled off at the edge with a thread and tied to a pole.
- We decorate the head. To give the DJ's head a natural look, we put on an old wig on top or fix the nitron hair with pins, and then we put on a cap or hat.
- Create the upper body. We pull the shirt on the crossbar, completely pin it and stuff it with filler from the inside. Fill the sleeves first, and so that the nitron does not come out, sew up the cuffs with large stitches. Then stuff the rest of the shirt, and pin the bottom together with pins to keep it from spilling out.
- We put pants on the scarecrow. Cut the second crossbar so that it fits snugly into the waist of the trousers. Stuff the pants to the knees with filler, and so as not to fall out, sew the line of the knees with threads. Leave the bottom of the pants empty. Let it flutter in the wind. Insert the bar into your lower back and nail it to the pole. So you fix the "legs" of the stuffed animal to the body.
- We create musical decor. Tie several pieces of music discs on threads of different heights to the sleeves of the shirt. Let them sparkle and move in the wind. Wrap the old radio, which is still in working order, with a film (in case of bad weather), cut a hole around the speaker, and hang it around the DJ's neck. And so that it does not fall from the wind, wrap 1-2 circles of adhesive tape around the shirt. Run an extension cord from the radio to the nearest outlet and tune in to the clearest wave in your area. At night, the extension cord will have to be removed.
- Install a DJ near the ripe berries and turn on the radio.
Advice! Do not leave the radio on all day, otherwise the birds will get used to the noise. Use it for a couple of hours at different times of the day.
Option 2. A young lady from garbage bags
It is very easy to make a scarecrow garden with your own hands from garbage bags. They come in different colors, but still the main one is better to make blue. Since we have already created a male guardian, we will make a girlfriend for him. The same two-meter pole will serve as a frame for creating a young lady. Only the crossbar needs one, not two.

Stuffed plastic bags scare birds with the constant rustling of the film
In addition, you will need:
- multi-colored garbage bags;
- a thicker package for the head;
- nitron;
- adhesive tape of medium thickness;
- magnetic film;
- tin cans for drinks;
- balloon;
- markers.
The principle of creating a scarecrow is similar to the first master class, i.e. each detail is strung on a pole gradually. But since the base is polyethylene, hard straw cannot be used as a filler. It will break through the thin film and spoil the appearance of the scarecrow. Therefore, we will fill our heads only with nitron.
Features of creating a garden lady:
- For the head, use a package of a light solid color so that the face drawn with markers is clearly visible. First, put it on the top of the pole, then stuff it with filler, tie at the base and paint.
- Cut long strips from magnetic film and glue them either immediately to the head of the stuffed animal, or first on a paper blank, and then on the top of the doll. Magnetic ribbons will serve as hair for the young lady and, fluttering freely, will instill fear in the birds. Hide the bald spots from above with a scarf or a bow from a garbage bag glued with tape.
- To create a blouse, you will need 3 bags: 2 for hands, 1 for chest. We cut a small hole at the bottom of the package and stretch the sleeve through it until it meets the pole. We fix it with tape on the shoulder and in the elbow area, leaving the wrist part of the sleeve to flutter freely. We make the central part (chest-back) from one package, pulling it through the bottom of the pole with a cut hole. We fix with adhesive tape only in the upper part, and leave the lower part free.
- The skirt is created from several bags inflated with air, fastened together with adhesive tape. The more magnificent you make it, the more effective the scarecrow will be. All packages are wrapped around the pole and fixed to it with tape.
- We tie an inflated balloon to one hand of the young lady, and hang several empty tin cans on the other, which will create noise.
As soon as this "sweet couple" appears in your garden, the birds will boycott the sweet cherry. And if you plan to put garden scarecrows on different edges of the site, swap them a couple of times a season to enhance the deterrent effect.


