All photos from the article
Wood trim is deservedly considered a classic, not subject to any newfangled trends. There are many good floor borders on the modern market, but natural wood, like a hundred years ago, is valued higher. In this article we will talk about the advantages and disadvantages of this material, and also tell you how to correctly select and install a plinth made of wood with your own hands.
What you need to know about wooden skirting boards
Tip: when choosing such products, you should remember that today high-quality wood cannot be cheap.
These borders belong to the upper or maximum, middle price category.
Even if you decide to make wooden skirting boards with your own hands, they will cost more than budget plastic.
Product types
At the moment, the market offers two types of natural wood products: this is a curb carved from solid wood and a veneered version.

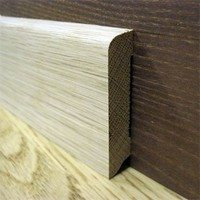
- Solid wood skirting board is a classic. The cost of such planks depends, first of all, on the type of wood, as well as on the complexity of the profile, grade and level of processing. Such borders can be found both among elite goods and in the middle price niche;
- The basis of the veneered border is a natural array of inexpensive conifers, as a rule, it is pine or spruce. In some models, glued laminated timber is taken as the basis. After the formation of the front profile, the veneer is glued onto the bar in an industrial way. As a result, at the output we have a product that is absolutely identical to the elite natural array, but the price of this skirting board is an order of magnitude lower than the original.

Important: in part, planks made of pressed MDF and covered with natural veneer can be attributed to wooden products.
Most often they are used for arrangement.
Product shape
Gone are the days when the entire range of such goods was limited to a few models with a triangular cut. And these plinths differed only in the presence or absence of a chamfer. The modern woodworking market is constantly improving technologies and equipment.

Now wooden laths are practically not inferior to polyurethane products or plaster moldings in terms of the complexity of the ornament. The patterns that CNC programmable machines are capable of applying can only be compared with hand-carved wood.

Each manufacturer is now trying to stand out with its unique models. Of course, there is a standard classic line of products in which the size of the bar base ranges from 10 to 25 mm. As for the height, there are no restrictions here, it starts from 40 mm and in some models can reach up to 300 mm.

Important: when choosing a size, they often start from the height of the ceiling.
For a city apartment with a standard ceiling in the region of 2.7 m, the height of the bar should not exceed 70 mm.
For ceilings up to 3 m, planks of 70 - 90 mm are suitable, for higher ceilings a plinth of at least 50 mm is taken, there is no upper limit here.
What wood is the plinth made from?
It has always been believed that the skirting board should be selected, starting from the material from which the floor is made.
But modern design trends allow you to successfully combine different breeds and bypass old dogmas.
- Among conifers, of course, pine is considered the most popular. It is a pleasure to work with this material. The soft array is well cut and processed. Texture and color allow you to use a variety of tinting compositions, achieving an original design solution. Spruce is less commonly used in production, as this array is considered less elastic;

- A separate niche is occupied by larch borders. The price of such an array is quite high, but larch is not afraid of moisture, and most importantly, it is not subject to decay. These skirting boards are great for spaces like the kitchen or shower room;
- Oak is traditionally considered an elite massif. It has unique strength and durability. But it is valued not only for this, the aesthetic qualities of oak are deservedly considered one of the highest. Skirting boards made of stained, bleached or artificially aged oak emphasize the solidity of the interior;
- Beech also belongs to the elite varieties; in terms of its characteristics, it is practically not inferior to oak. But in its pure form it has an original pink tint and a smooth texture;

- Walnut borders have a noble brown color. These strips have good elasticity and are often used for the production of bent profiles. The high content of iodine gives the nut healing qualities and makes it resistant to decay;
- Ash has a beautiful light olive color. Like walnut, it bends well, its texture is vaguely reminiscent of oak, but with a clearer drawing of the fibers;

- Alder is quite pliable in processing, but the planks practically do not bend. In addition, this array is afraid of any moisture, even light, temporary dampness can lead to rotting and damage to the curb;
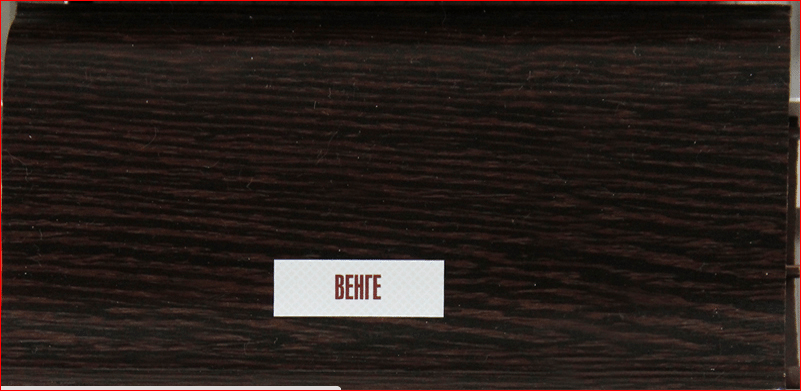
- Exotic wenge and mahogany people choose because of the original colors and textures. The array itself is quite durable and lightweight, but not everyone can afford such a plinth;
- Aspen and linden are quite resistant to moisture, flexible and well processed. They are relatively inexpensive, so baths and other similar premises are often trimmed with these rocks;
- Cherry is also quite popular. It is certainly not as strong as oak, but it is more elastic and resistant to decay. When choosing such a plinth, one should take into account the fact that cherry changes color over time.

Tip: when you buy an unvarnished, clean border, be aware that after varnishing it will seriously change the shade.
In order to find out what awaits you at the finish line, you need to wipe the bar with a wet sponge.
But this only works for colorless varnishes.
Installation subtleties
Although wooden planks are much tougher compared to their plastic counterparts, the instructions for self-assembly of even an elite baseboard, as a rule, do not cause difficulties for people who are familiar with a hacksaw, screwdriver and drill. Moreover, some masters make borders with their own hands.
Can you make your own border?
The question of how to make a plinth with your own hands from wood is asked by many. But here it should be remembered that independent production of borders is not always cost-effective.
First, you need to choose the right board. The moisture level of the forest should not exceed 16%.
Raw wood cannot be sanded well, plus it is poorly milled. Knots, rot, chips and other defects are also undesirable. Ideally, you need a clean, dry, planed board.
Well, here we rested and again it's time to get down to business. It's time to do skirting boards. Skirting boards are, of course, a trifle, but you can't do without it, they make the interior more harmonious and complete. Now the trend is more and more high painted plinth, so we wanted the same
What we wanted
After monitoring the market, disappointing moments came to light: firstly, such a plinth is difficult to buy, and secondly, its price per meter depends on the height and starts from 400 rubles. For me, it’s very expensive for such a seemingly simple thing, so we decided to experiment - to make it ourselves
It may seem wild to someone to make a plinth on their own, but on the other hand, it's just a board of the desired height and width, well, and a decorative element. These pictures from the net served as inspiration:


Another example
Well, isn't it really that difficult? Let's try...
... And we tried it almost 2 years ago, when we were doing repairs in the nursery, the result suited us, therefore, we already knew how to implement this in the kitchen, we will tell you))
We go to the construction market
For the manufacture of a high plinth, as mentioned above, you need boards and corners. We will cover with a plinth only the visible parts of the wall (that's how we are lazy, or economical), our "perimeter" was 7.5 meters, in total we get:
- Boards 24x120x2000 - 4 pieces, you need to choose carefully, because they are not all perfectly even and smooth;
- Corner decorative rail 20x20x2200 - 4 pieces;
You will also need:
- White acrylic enamel;
- tassel;
- self-tapping screws;
- Nails with hidden heads
- Plastic dowels;
- Miter box saw
- Stuslo, Sasha decided to please himself and bought the most expensive model;
- Putty on wood;
- Skin;
Preparatory work
To begin with, all boards should lie down indoors and "acclimatize", ideally a week. But we safely forgot about this rule)))

Fitting
We wanted white skirting boards, for this they need to be painted. You can paint after installation, but I prefer to do it before.

The first layer was a primer - diluted the paint 1: 1

Water in the paint raises the pile of wood, so we grind
When the board has become smooth, you can start painting. I need to cover the wood texture as much as possible, but keep the relief. The basic rule of painting works here - several thin layers instead of one thick one. I needed 3 layers to get the desired result.

I start from the ends

At the junction of layers

Another layer
Difficulties arose with painting the corners, and indeed they were not successful at all - there were a lot of knots and burrs. When priming, the paint clogged the relief, so after drying, it took a long time to pick it out of the recesses. I decided to paint them after installation.

Mounting
The next day, when the paint was dry, we started the installation.
First, we decided where the joints would be. Because our wall is 4.2 meters, and the boards are 2 m, we decided to make a solid board in the center of the wall, and on the sides of the board 1.1 m each.

I really, really regretted it - either the saw was dull, or the board was very thick, in general, one saw cut took 15-20 minutes. But did! It's good that we only have 2 corners))

Angle at 45 0

Fitting to the wall
Sasha fastened the boards to self-tapping screws: he marked out where to cut 4-5 points on the board, then drilled thin guide holes. Having attached the board to the wall, through the holes in the board, he marked out places for holes on the wall. I drilled holes in the wall with a puncher, hammered in the dowels and screwed the boards to the wall.

pilot hole

dowel hole

Fasten to the wall

fixed
Because of the irregularities in the corner, the board did not want to adhere to the wall in any way, so I had to chop off the board a little along the contour of the unevenness. All the same, the gap remained, but nothing, let's putty.

Hewn plinth under the relief of the wall

The crack is almost invisible

fasten to the main wall immediately on self-tapping screws without dowels

Work Mess
When Sasha finished, I puttied all the cracks, bumps and caps of the screws, and then sanded the excess and bumps. Now it's the turn of the corners, we fasten them to the finishing nails.
The corner is nailed to the board, you can’t nail it to the floor!

At first glance, the plinth may seem like a very insignificant element of the interior decoration of any room, but in reality it is difficult to get a complete full-fledged interior without it. The installation of the plinth is carried out at the final stage of all work, that is, after the surface of the walls and ceiling is finished, and the flooring is laid.
According to its purpose, the plinth is divided into two main categories: ceiling and floor. Each of these types is worth talking about in more detail.
The plinth is not just a decorative detail of the interior, but also implements a number of functions, among which it should be noted:
- protection of the wall surface from high humidity and, as a result, premature aging of the wallpaper;
- reliable masking of shortcomings and minor defects that form when laying the floor covering. Most often they are concentrated at the junction of the floor and the wall;
- creating a pleasant and thoughtful design of the room;
- masking additional cables and wires.
Types of floor plinth
To date, for the manufacture of skirting boards, numerous materials are used, the choice of which determines the basic properties of a decorative and protective element. The diversity of the assortment is due to the existence of a large number of different finishing materials, and in order to achieve a harmonious color transition between the wall and the floor, it is necessary to choose an element that will best suit these goals.

Choice of floor plinth

The choice of a suitable decorative element should be based on many parameters. The main criteria are usually the aesthetic considerations of the owners, as well as the features of the room for which the skirting board is selected. If the first factor is purely individual, then the situation with the second is simpler.
When it comes to the features of the room, we mean the surface of the walls. The fact is that not every skirting board is suitable for walls that are characterized by a large number of defects and irregularities. From this point of view, plastic seems to be an ideal option, since it is highly flexible and has functional elements that can hide flaws - a special edge and fasteners.
In order to purchase the right amount of building materials, it is important to calculate the perimeter of the room. It is necessary to arm yourself with a centimeter and measure the length of the room, including the so-called hard-to-reach places, and then divide the resulting figure by the standard skirting board length - 2.5 meters.

This technology is considered the main one and is applicable to most types of skirting boards. Depending on the material, there may be minor discrepancies, which are specified in the course of work. For example, plastic skirting boards are fastened with dowels and screws, and fastening clips are used for MDF panels.

Stage 1. At the first stage, you should take the necessary measurements described above. In order to avoid unpleasant situations, building material is bought "in reserve", that is, 3-5 meters more. At the stage of acquiring a skirting board, it is important not to forget about the connecting elements and plugs.
Stage 2. It is necessary to arm yourself with a set of tools, without which it will be difficult to complete the installation: a drill, a hacksaw, a miter box, dowels and screws.

Important: in order for the skirting board joints to be tightly fitted to each other, the material at the ends must be cut at an angle of 45 degrees. We insert the plinth into the miter box, adjust the angle and cut it with a hacksaw.
Stage 4. Marking usually starts from the corner, which is located on the longest wall of the room. You need to step back five centimeters from the corner and make a mark with a simple pencil. The following points are placed at a distance of forty centimeters from each other.
Stage 5. It is necessary to attach the product to the surface and mark the places where the holes will be drilled. For this, a drill with a diameter of three millimeters is used.
Stage 6. After that, you should mount the corner and screw the plinth to the wall surface with screws.


Stage 7. At the final stage, install the upper half of the plinth or decorative tape.
Mounting the plinth on the ledge
Step 1. First of all, we make oblique cuts so that the connection is not inward, but towards the outside.
Step 2. We nail the part with a nail without a hat.
Step 3. We fix the element with dowel-nails.
Step 4. We eliminate defects with putty or varnish.
Ceiling plinth - types and features
A ceiling plinth or fillet is a special type of cornice that is used to avoid broken corners in the room and make the interior design as harmonious as possible.
- PVC skirting board- cheap, light, functional, but unstable to temperature fluctuations;
- foam board skirting board- economical, easy to process, but combustible and has low strength;
- polyurethane baseboard- durable, flexible, easy to install, resistant to temperature extremes, moisture resistant. Among the shortcomings, only the high cost of products can be noted;
- styrofoam skirting board- relatively affordable, looks good and imitates real stucco. Cons - fragile and brittle;
- gypsum plinth- high-quality, durable, environmentally friendly. Allows for a unique design. Disadvantages - fragility, bulkiness, high cost;
- wooden crafts- strong, durable, aesthetic and environmentally friendly. Among the minuses is a low plasticity index.
Choosing a ceiling plinth


Usually the choice of ceiling plinth is based on its parameters. The length of the products is standard - two meters, but the width can vary from one centimeter to twenty. Before giving preference to one or another option, you should understand how the width of the skirting board affects the appearance of the entire room.
A wide plinth visually smoothes the corners of the room, and also helps to hide numerous surface defects and the junction of the ceiling structure and the wall. However, such a solution would be appropriate only in situations where the size of the room allows the use of a bulky baseboard. Otherwise, a wide product will visually reduce the room, make it uncomfortable and low. For compact rooms, thin baguettes are ideal.
Do-it-yourself installation of a ceiling plinth

For quick and efficient installation of the ceiling plinth, you will need a set of tools:
- construction knife;
- brush;
- pencil;
- roulette;
- ruler;
- miter box;
- rubber spatula;
- sealant;
- glue;
- plinth directly.
Step 1. At the first stage, you should prepare the plinth, lay out the elements along the walls and determine the desired dimensions. Corner elements are cut with a miter box at an angle of 45 degrees. The "puzzle" of the parts must converge so that there are no problems during installation.

Step 2. It is necessary to take two pre-prepared corner parts of the plinth, cut so that the ends fit snugly against each other, apply glue to the inside of the elements with a brush.


Step 4. Then you need to take the next element, apply glue to it and attach it to the end of the plinth glued from the corner. All other parts are glued in the same way. It is important to press the skirting boards tightly against each other so that there is no gap between them.
Step 5. At the last stage, it is necessary to wipe the gaps between the baseboard, ceiling and wall with a sealant.
It is important to remember: if the plinth is mounted on a stretch ceiling, then a special polyethylene lining should be used. It is placed between the plinth and the surface of the stretch ceiling. After the installation work is completed, the lining is carefully removed from under the elements.
Following the above rules will allow you to get a quick and high-quality result that will delight the owners of the premises for a long time.
Good luck!
Video - Do-it-yourself floor plinth installation
Video - Do-it-yourself installation of a plinth (ceiling plinth)
For many years, wood finishes have been considered a real classic that is not subject to newfangled trends. The modern market offers a huge selection of high-quality floor borders, but it is natural wood that is valued above all else. In this article we will talk about the pros and cons of this material, we will try to figure out how to make a plinth on our own and install it.
Features of a modern skirting board
When choosing such products, first of all, you should remember that high-quality wood has never been cheap. Such borders belong to the middle or upper price category. Even if you understand how to make a wooden skirting board with your own hands, you must first take care of choosing the right material. Naturally, wood will cost much more than plastic. Now let's look at what skirting boards are, and get acquainted with their advantages and disadvantages.
Varieties of plinth
Today in the store you can find only two options for products made from natural wood:
- Plinth made of solid wood. Their cost largely depends on the type of wood, in addition, the complexity of the profile, the level of processing and the variety play an important role in the formation of the price. As a rule, such borders are classified as elite goods and products of the middle price niche.
- Veneer plinth. They are made from a natural array of less expensive conifers, in particular, spruce or pine. There are also models made of glued laminated timber. After the front profile has already been formed, the expensive wood veneer is glued onto the plank in an industrial way. As a result, a product is obtained that is identical to the expensive natural elite array, but it costs much less than the original.
Important! Planks made of pressed MDF covered with natural veneer are also wood products.

Skirting board shapes
Long gone are the days when the manufacture of such a product was limited only to models with triangular sections. They differed only in the absence or presence of a chamfer. Fortunately, the current woodworking market regularly improves equipment and technologies.
According to their form, they are divided into the following models:
- traditional forms. Modern wooden planks are in no way inferior to gypsum stucco or polyurethane products in terms of the complexity of the ornament.
Important! High-tech programmable machines allow you to apply patterns that are as similar as possible to those created by hand carving.
- Running forms. All manufacturers are trying to somehow stand out from the crowd with their unique models. Therefore, there are also classic standard products on sale, in which the main bar has a size of 10 to 25 mm, and models with non-standard heights from 40 to 300 mm.
Important! When choosing the optimal size of the plinth, try to build on the height of the ceiling:
- In city apartments, the ceiling has a standard height of 2.7 m, so the height of the bar in such cases should not exceed 7 cm.
- For higher ceilings, it is better to buy borders no lower than 5 cm.
What material is the plinth made of?
Previously, people chose a skirting board based solely on what material it was made of. But modern designers successfully combine various tree species, so they easily bypass the already established rules. Before you make a plinth, familiarize yourself with its varieties depending on the material:
- Pine. This type of conifer is considered the most popular, because it is quite simple to work with it. The array itself is very soft, it is easy to cut and process. The variety of colors and textures allows you to use a variety of tinting compositions in order to achieve an original design solution.
- Larch. Borders made of this material occupy a separate niche in the modern market. It is not cheap, but it is not at all afraid of moisture, due to which it does not rot. Larch borders are ideal for showers or kitchens.
- Oak. It belongs to the elite massif, as it is distinguished by its unique durability and strength. But this material is valued more for its aesthetic qualities.
Important! Models made of bleached, stained or artificially aged oak are usually used to give solidity to the interior.
- Beech. It also belongs to the varieties of elite wood, because in terms of its characteristics it is in no way inferior to the aforementioned oak. In its pure form, it has an original pink hue, a perfectly even texture.
- Nut. Such borders are distinguished by a noble brown hue. Walnut strips are elastic, mainly used for the manufacture of bent profiles.
Important! Due to the high content of iodine, the nut also has certain healing properties.
- Ash. This material has a charming light olive shade. Like a walnut, it bends perfectly, the texture is a bit like oak, but the fibers are more clearly traced in it.
- Alder. It can be processed, but it bends quite difficult. Such planks are afraid of water, even temporary dampness can lead to damage and rotting of the curb.
- Exotic mahogany and wenge. Basically, they are preferred because of the original texture and colors. The array itself is very light and durable, but in terms of finances, not everyone can afford it.
- Linden and aspen. The materials are flexible, resistant to moisture, perfectly processed. They are relatively inexpensive, so they, in particular, trim the baths.
- Cherry. Such borders are in deserved demand. They are not as strong as oak, but more resistant to decay and resilient. If you choose such a thin baseboard, then keep in mind that over time it will change its color.
Important! When buying a clean, unvarnished border, remember that after you varnish it, it will change color a lot. If you want to know how it will turn out as a result of varnishing, then wipe the bar with a wet sponge.
The nuances of self-assembly of skirting boards
Despite the fact that wooden products are much tougher compared to their plastic counterparts, even a beginner will figure out how to make a do-it-yourself wooden skirting board. The self-installation guide does not cause any difficulties, especially if you have ever worked with a drill and a screwdriver.
Material selection and preparation for installation
Many people wonder if it is possible to make wooden borders on their own, but the main thing in this matter is not to forget that their manufacture is not always cost-effective.
Important! All financial and labor costs will pay off only if you choose the right board.
Remember:
- The moisture level of the material should not be lower than 16%. Raw wood cannot be sanded; moreover, it cannot be processed on a milling machine.
- Rotten, various chips, knots, and other defects are undesirable here.
- The ideal option is a dry, clean, planed board.
Important! The main type of processing at this stage of material preparation is milling. To do this, you will need a milling machine or a high-quality manual router with stops and clamps.

Installation of wooden plinth
The installation instructions for natural wood products are as follows:
- Using a tape measure, determine how many bars you need, then add 20% to the resulting figure. This tolerance is necessary for trimming and joining.
- Start the arrangement with a door hatch or a near corner. Move clockwise.
Important! Remember that wood is not plastic, there are no adapters and plugs, so in this situation, competent docking in a straight line of planks and cutting corners is especially important.
- If the corners in the room are perfectly even, then use a carpenter's miter box to cut the planks at an angle of 45 degrees and join them. Since this situation is rare, it is better to use a flat plinth for marking, apply it alternately to both sides of each corner, then draw a line along the top and bottom edges of the plank. The cut angle line is the intersection of these lines.
- Mount with self-tapping screws. To fix the slats with them, simply make through holes in them. Or fix them on the wall with clips, then install the plinth on top.
footage
In this article, you learned how to make a wooden plinth with your own hands, so do not hesitate, choose quality material and get to work. As you know, natural wooden borders are preferred by people with a refined, well-developed taste. But, nevertheless, it is not difficult to mount them, as you can see by reading this material.
As you know, the final touch in the repair is the installation of a plinth on the floor. It's not easy, but it's very responsible. After all, the first thing that catches your eye is the coating on the floor, and, accordingly, the skirting boards installed on it. In addition to an impeccable appearance, it is very important to ensure a reliable, durable fastening. Since the plinth on the floor is often touched by feet, a vacuum cleaner brush, and even moving furniture.
After finishing the floor, the final stage is the installation of floor skirting boards. It is important that the floor and skirting boards match in color.
Particular attention should be paid to fixing the outer corners. How to make skirting boards on the floor correctly? To get started, you need to stock up on the following tools:
- drill;
- screwdriver (can be replaced with a screwdriver);
- diamond drills;
- roulette;
- a hammer;
- hacksaw (miter saw);
- ruler;
- simple pencil.

Skirting boards on the floor must be installed correctly, otherwise, no matter how perfect your flooring is, its appearance will be spoiled. Since it is necessary to make skirting boards on the floor after all finishing work has been carried out, it is believed that this is an element of decor. For its manufacture, different materials are used, for example, wood, MDF, metal, plastic, stone or ceramics.
As a rule, floor planks are chosen based on the interior design, as well as in accordance with the flooring of the room. At the moment, few people install wooden and metal skirting boards. The thing is that the price of products made from these materials is quite high. In addition, to make decorative trims from metal or wood, a perfectly flat surface is required. Since they do not differ in flexibility, any unevenness on the wall will be reflected by a rather noticeable gap between the plank and the wall.

MDF skirting boards are very fragile, so it is undesirable to install them in rooms with high traffic.
It is impractical to make skirting boards on the MDF floor, since this material is considered very fragile. Plinth on the floor, made of ceramic or stone, is suitable for appropriate coatings, but not for parquet or, for example, laminate.
Today, the most popular among the above plinths is plastic. The reason for this popularity is the large number of its benefits. First of all, this is the low price of a plastic plinth. But at the same time, it is easier to install, flexible, water resistant, durable, and it also has special channels for electrical cable. Moreover, the construction market presents a wide range of colors for plastic decorative floor strips.
How to mount a skirting board and where to start

First of all, you need to calculate the required amount of plinth. The standard rail length is 2.5 m. Therefore, the perimeter of your room is divided by the length of the material. As you understand, such work requires constant movement from place to place. That is why, in order to make skirting boards on the floor as convenient as possible, put everything you need in a box and move it along the floor with you. What exactly is needed to install the skirting board on the floor? You will need accessories, fasteners, as well as all of the above tools.
Cutting skirting boards for the floor
Start installing the skirting board on the floor, usually from doors or corners. You should start by attaching the first two pieces of fittings to pre-marked places. Insert the end of the plinth into one of the elements, and make a mark on the second. At the same time, do not forget that 5 mm rails will go into the plug.

First of all, install those planks on the floor that do not require trimming.
Try to foresee in advance that the joints are in places that are not particularly striking or covered by furniture.
Drilling holes in the walls for installing skirting boards
No wonder many believe that this stage of work is the most responsible. After all, if you make a mistake in the height of the holes, the installed plinth will have to be removed as a result. If your walls are perfectly flat, you should leave a distance of 50 cm between the holes. For fastening the plastic look, 6 x 30 mm dowels or 3.5 x 25 mm self-tapping screws are suitable. Having drilled the required number of holes, do not be too lazy to vacuum the floors in the room.
How to make skirting boards if the wall is made of drywall

The height of the metal profile for drywall is approximately 30 - 50 mm. In the installation of skirting boards, one often has to deal with a situation where the fastening of the rail comes across a profile. In this situation, the dowels should be replaced with self-tapping screws. But first you need to drill the frame with a drill or use special dowels with drills designed for such situations. Using an awl, you can avoid a collision with the profile. To do this, it is enough to pierce the drywall with them.
Do-it-yourself floor plinth installation

Make holes on the rails for self-tapping screws with an awl.
Many craftsmen advise first of all to make holes in the baseboards, through which they subsequently drill the surface on the wall. But, as practice shows, this installation method leaves gaps between the floor and the plinth. In addition, if over time you want to change, for example, the floor covering, it will be quite difficult to dismantle the slats.
In order to perfectly set the bar without leaving any gaps, you can use the following method, which few people know. Holes on the rails for self-tapping screws should be pierced with an awl. By avoiding drilling, you will ensure the tightest edges of the hole. An awl can be made from an old screwdriver by sharpening its blade to a trihedral point.
In order not to make a mistake with the place for the hole in the baseboard, attach it to the wall surface so that the dowel is visible. Exactly along the line of its location in the place under which the cable channel is located, make a mark. After that, thread the self-tapping screw through the already prepared hole into the dowel and tighten it. This method of installing the plinth ensures its strong and reliable fastening, in addition, it leaves a minimum of gaps.
It is very important that the outer corners on the skirting boards are fixed as firmly as possible, since they most often have to be touched. When installing them, be careful, because often drilling a hole for a dowel ends with a chipped corner. In conclusion, it remains to install special plugs for the cable channel, and your floors will sparkle with completely new colors.


 in the near future - forecasts and expert opinions")


 in the near future - forecasts and expert opinions")


