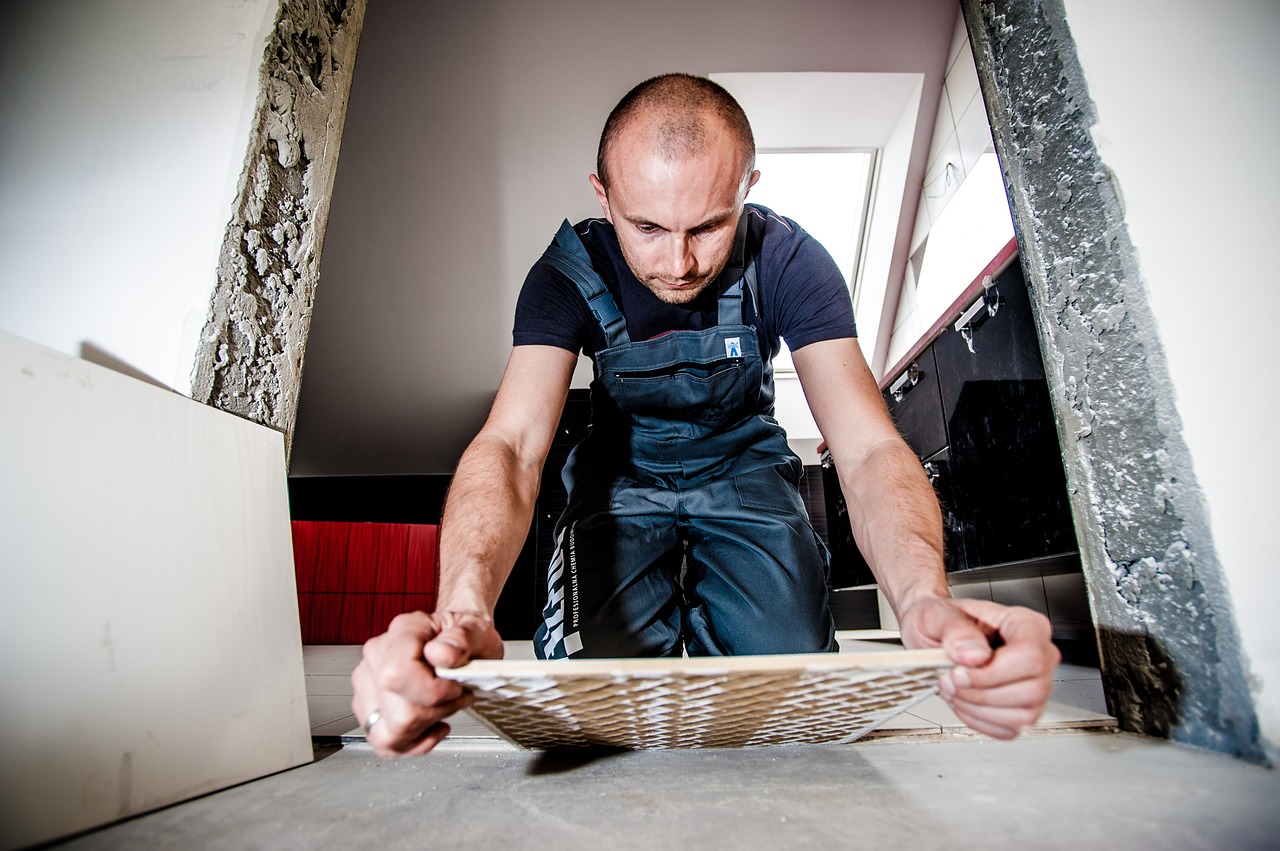
In order for the repair not to turn into a bottomless pit for pumping out money and not drag on for a long time, you first need to understand what exactly you want to do. If you have an apartment without finishing, then you need a major overhaul. In many new houses, apartments are rented completely bare - only a concrete or panel box. There is nothing at all - no electrics, no plumbing, no interior doors - crooked walls and uneven floors. In this option, you have to do everything from scratch. It is necessary to start overhaul with the design of the apartment.
Apartment design is the design of the interior of housing with a definition of where, what and how it will be located. You can think over the design yourself (there are special programs) or order from specialists.
Only after you have decided where and what will be, you can start repairing. Initially, this can be electrical wiring (without connecting to the shield), sewerage and water. It is also better to immediately install the front door if you do not live in the apartment and leave all the materials and tools for repairs there. Then it is worth leveling the floor, walls, ceiling (if you do not stretch). All these works are classified as draft. After the apartment is prepared, you can do fine finishing - wallpapering, laying floors, installing doors, laying tiles and more. There is a lot of work, but it is also worth remembering that new buildings often shrink (after a few years) and this can damage the repair just made (give cracks in the walls, deform doorways, etc.), therefore, or make materials with the ability to stretch (stretch ceiling, fabric wallpaper, etc.) or make the simplest repairs, and after shrinkage of the house - redo it.
If you are planning to make major repairs in the apartment in which you already live, then in principle, it is no different from repairs in new buildings. With the exception of dismantling everything you want to change (removing old tiles, wallpaper, plumbing, pipes, etc.).
Perhaps you do not need big changes, and you just want to update your home. Then for this you just need to re-paste the wallpaper, change the floors, doors, etc. This is already called cosmetic repairs, which do not require such enormous costs, but still take enough time and effort.
What you need to buy for repairs
After you have decided on the type of repair, it is worth deciding whether you will do it yourself or hire a special team.
The teams involved in the repair of an apartment can do everything on a turnkey basis (the housing is completely ready for living) or perform work in stages (you can hire different teams for different jobs). The first option is usually cheaper.
Of course, it is much easier to take special people, pay them and enjoy the result after a certain time. They can also be responsible for the purchase of materials. It's convenient, but definitely more expensive than doing it yourself. If you hire craftsmen, but buy everything you need for repairs yourself, then usually you are given a list (estimate) of what and how much you need to purchase. Some work only with materials of a certain company.
If you decide to do everything yourself, then for this you need to have at least some idea of \u200b\u200bthe upcoming work and prepare for it. There must be a different tool available (some more expensive ones can be taken from friends - a drill, screwdriver, puncher, etc.). You also need tools for measuring levels (rulers, tape measures, levels, etc.), for painting work (brushes, rollers, etc.), a hammer, saw, ax, various screwdrivers and much more (including consumables - nails, screws, various fasteners).
Well, of course, you need the material itself to carry out all the work. It is selected depending on your desires and capabilities. The same floor - you can make an ordinary screed (from a cement-sand mixture), you can choose a self-leveling floor, and you should also think about sound and heat insulation, installing a warm floor. There are a lot of options, most importantly, it must be very even in order to continue laying the top coating (linoleum, laminate, tile, carpet, parquet, etc.).
Several layers of preparation are also needed on the walls (putty, primer, plasters), and therefore wallpaper. Do not forget about such trifles as glue for tiles, wallpaper, putty, etc. In order not to make a mistake with the amount of everything that needs to be purchased, you (if you do everything yourself) just sit down and paint in stages all the work and what materials will be involved in this.
Final result
Modern apartment design often requires non-standard materials if you want to impress friends and acquaintances with your taste, skillfully selected styles. Sometimes the scariest thing is to create something gray, like a thousand apartments. And then the imagination turns on, for which there are no boundaries, especially since the choice of building material for repairs today is simply huge.
The choice of building and finishing material is an important stage in the repair of an apartment.
When the design project is ready, and we go to the Stroylux store or to the market, we should already have a complete list of everything we need to buy in our hands. It must be borne in mind that we will not only have a pleasant choice of finishing materials (wallpaper, laminate, tiles, etc.), but also the purchase of the draft building material that will be used as interior coatings during repairs. Without it, some stages of repair are technologically impossible, as well as high quality exterior finishes..
What building materials are needed
 Draft building materials are used as interior coatings during repairs
 It could be:
- Knauf building mix for leveling and plastering walls and ceilings
- Drywall (also used to create an even, smooth finish)
- Reinforcing mesh (for sealing cracks)
- Finishing putty for creating the perfect surface for wallpaper or painting
- Primer for paint
- Cement and sand (if floor screed is required)
- Waterproofing material for the bathroom and toilet (if you don’t want to flood your neighbors from below)
- Wooden beam or metal profile (for a frame for lining or drywall)
- Insulating or sound-absorbing material - you need to remember about it in advance if insulation and soundproofing are included in your plans, since it is an internal coating
In addition, it requires:
- Tile adhesive
- Paint thinner
- All kinds of spatulas, brushes, rollers
- Fasteners for beams, lining and much more ...
In order not to forget anything, break the entire repair into stages and describe in detail all your actions
Standard selection of finishing materials for renovation
Ceiling coverings
For cosmetic repairs, they usually produce:
- Leveling plaster mixture with reinforcement
- Painting with water-based paint
- Or they make plasterboard sheathing, followed by putty joints and painting the entire ceiling
For major and European-quality repairs, install:

In most cases, the ceiling is the brightest place in the apartment: it visually makes the room taller and facilitates the construction of the ceiling itself.
However, among the bold design decisions is a bright colored ceiling that draws attention to itself.
Ceilings with a pattern applied using photo printing (for example, blue, starry sky) are considered special chic.
wall coverings
In a room, this is most often wallpaper, the color of which is selected in the general color scheme of the apartment. The walls usually carry the main neutral shade, a lighter tone than the second main color of our interior palette, the brighter one that floors, furniture, curtains usually have..
 Wallpaper is a very common wall covering.
 However, here too the standards break down:
The trend of recent years:
Drawing on one of the walls of wallpaper in an accent color.
According to the texture and pattern, the wallpaper can be different:
- with a picture or just with a background
- paper-based (can be used for cosmetic repairs)
- washable: vinyl and fabric backed (they last longer, look much prettier and are worth applying if you are doing repairs for more than one year)
To cover the walls in the bathroom, toilet and kitchen, ceramic tiles are most often used..
In the kitchen, it is not necessary to lay out all the walls with tiles: it is enough to lay out the wall area between the worktop of the kitchen table and the cabinets - a working “apron”.
The choice of tiles of various sizes and textures today is great. It’s also good that there is no need to lay out some complex combinations of tiles today:
both kitchen and bathroom tiles are completed with borders and decorative elements, from which small panels, finishing belts, etc. can be laid out.
- When choosing a tiled flooring for a small room, do not stop at too large sizes, but the mosaic type is also not suitable here, as it will look too colorful.
Immediately choose a decorative grout for tiles of the same palette, lighter or darker in tone.
Instead of tiles, PVC panels can be installed in the toilet and bathroom.
Floor coverings
Parquet or laminate can be installed in the hall, bedroom and corridor.
The floor can be either the same throughout the apartment, or different in individual rooms.
Modern laminate imitates absolutely all types of wood, as well as tiles, therefore it is considered an excellent finishing material for an apartment.
However, in the bathroom or toilet, of course, tiles are more appropriate.
Floor tiles must also meet the following requirements:
it must be durable and non-slip, and at the same time not absorb moisture, grease and dirt
Matte tiles do not have the second properties, so today a glossy finish with a printed pattern is often used.
The floors in the nursery are selected with a cheerful bright pattern.
A very good solution is the floors of colored puzzle mats for the children's room. Material - soft modular coating.
 Soft covering for children's floor
 Non-standard selection of finishing materials
What else is put on the walls
To break the stereotypes that there must certainly be familiar wallpapers on the walls, get acquainted with the following options:
- Alternative to conventional wallpaper –
- applying paint to fiberglass
- decorative plaster (Venetian, textured)
- liquid wallpaper (dry mix of silk or cellulose fiber)
Decorative plaster allows you to create a completely non-standard look of the apartment, as it is possible to apply individual drawings and bas-reliefs
- A good choice of finishing materials for walls:
.
Venetian plaster (neutral background) + decorative 3D panel on one of the walls.
.
Such a panel is made from a variety of materials:
PVC, MDF, fiberboard, chipboard, aluminum Decorative 3D panel
 - If your apartment is in a loft style and you need to imitate brickwork, then you may need old brick tiles.
 Old brick tiles are used as a finishing material for a loft-style apartment
Original selection of building materials for floors

For lovers of unusual surroundings

How to do all this - about this in our future articles.
When choosing building and finishing materials, remember that they should not be harmful to your health..
Video: How to choose safe building and finishing materials
Last update: 04-01-2020
Alternative options: floor on logs (wooden supports) and dry floor screed. The advantage of these methods is that you do not have to waste precious time waiting for the floor to dry.
Instructions for making concrete screed
Material for concrete screed
- coarse leveler- if the surface difference in height is more than 5 cm. after leveling the surface with this material, it will be necessary to equip the finishing screed, the thickness of which should not exceed 1 cm. The quantity is calculated based on the material manufacturer's instructions, which can be found on the package
- bulk coating- it is used if there are small irregularities or cracks on the surface of the subfloor
- beacon profile- is bought based on the area of \u200b\u200bthe room and is installed at a distance of 1 meter from each other
- primer- it is better to buy a deep penetration composition, it will improve the adhesion of the material to the surface, while preventing cracking and peeling
- gypsum mixture– fixing beacons at a certain height
- waterproofing - used in the bathroom, as well as for seams, so as not to flood the neighbors
- edging tape
Tools
- mixing container
- perforator with mixer nozzle
- rule
- level
- roller, for spreading the primer
Prepare the surface before pouring concrete- cover up all cracks and crevices so as not to flood the neighbors.
After that, you can start arranging the screed:
- Prime the prepared surface.
- Stick sealing tape on the walls around the entire perimeter of the room.
- Prepare a gypsum mixture for installing beacons, it is kneaded with a puncher with a mixer nozzle.
- Using a level, install the beacons at a distance of 1-1.5 meters from each other on the slaps of the plaster.
- As soon as the gypsum mixture dries, you can start pouring.
- Mix the solution according to the instructions.
- Fill the distance between the beacons with the composition and level with the rule.
- Leave the screed until completely dry.
Dry screed instructions
Materials for dry screed:
- Dry mix for leveling the floor, fine expanded clay
- Knauf floor elements
- self-tapping screws
- Edge tape
- Cellophane film 200 microns and adhesive tape
- Construction adhesive PVA
From tools:
- screwdriver
- rule
- plastic trowel for compaction
Work execution algorithm:
- Prepare the floor surface.
- Spread a film over the entire surface with a mandatory overlap of 15 cm on the walls. If the width of the film is not enough for the whole room, then the strips are covered with an overlap of 5 cm and the seam is glued with metallized tape.
- It is worth noting that stationary beacons in this case cannot be installed, therefore profiles are laid on the surface with the wide side up, at a distance of 1.5-2 m from each other (depending on the length of the rule). Installation is carried out by level.
- Expanded clay is poured, leveled along the profiles and well compacted with a plastic grater.
- The profiles are pulled out, their installation sites are sprinkled with expanded clay.
- You can start laying floor elements.
- The edge of the plates is coated with PVA glue, until they are joined together.
- After all the plates are laid, the seams must be additionally fastened with self-tapping screws every 25 cm.
Dry screed is ready immediately and you can start arranging the finishing floor covering. You don't have to wait. Detailed from personal experience.
How to calculate the required amount of materials
It is impossible to write any specific figure and say that this is how much is needed for any one-, two-, three-room apartment. It all depends on the footage and the unevenness of the floor.
General calculation principle:
- find the highest point on the floor
- measure from this point you need the floor level that will be throughout the apartment
- find the lowest point of the floor
- consider the volume to be filled as the product of the height from the bottom point to the length and width
- add up all the numbers for each room
- consider how much a bag of mixture or expanded clay fills (written in the instructions)
- divide the total volume by the volume by the volume that fills the bag of mixture
- get the right amount of bags
In this case, get materials with a margin, since the floor differences throughout the apartment are unlikely to be the same, somewhere less, and somewhere more. Calculated to the maximum.
As a rule, the remains of building materials in a whole package and with a receipt can be returned to the store without any problems, but just in case, check.
It is better to return the surplus than to understand in the process of work that one bag is not enough.
Wall decoration in the apartment - materials
The main and important stage in the repair of an apartment is the alignment of the walls. There are several ways to make the surface perfectly flat, two of the most common are described below.
Wall plastering and putty
The process is laborious, but it is quite possible to do this work yourself.
- gypsum-based dry plaster
- primer
- putty
- beacon profiles
From the tool you will need:
- spatula
- construction bucket
- perforator with nozzle
- Master OK
- level
- rule
The material is calculated based on the condition of the walls and their curvature, similarly to the calculations of materials for the floor (see above).
The work is done as follows:
- The surface is being prepared, large cracks and potholes are covered up, the plane is primed in 2 layers to improve the adhesion (sticking) of the plaster.
- Lighthouses are installed at a distance of one and a half meters from each other. The installation starts from the corner, from which 15 cm should be retreated. On the opposite side, a second beacon is installed at the same distance from the corner. A construction cord is pulled between the beacon elements: from above, below and in the middle - this is a guideline for installing the remaining profiles.
- Once the beacons are installed and the mortar has dried, you can begin to level the walls.
- Dilute the plaster mixture according to the instructions on the package. Starting from the floor, throw the distance between the beacons with a mixture, while gradually leveling the rule along the beacons.
- The process continues until the entire surface of the walls is completely covered with a plaster mixture.
At this stage, work stops until the plastered surface is completely dry.
Depending on the finish, the walls may also need to be puttied and sanded, for example, for wallpapering. If you plan to use decorative plaster or stone, then there is no need for this.
Important! When buying materials, it is also worth making a margin of 10%, since the consumption may be more than planned.
Method two - finishing the walls with drywall (gypsum plasterboard)
This method of leveling the walls is much simpler and cleaner, besides, you can immediately make, albeit a small, but soundproofing of the walls. To do this, you will need to lay additional soundproofing material.
The cost will certainly increase, but in return you will get more comfort.
You will need the following materials:
- guide profile - will be installed on the ceiling and floor
- wall profile - used as a crate
- boards GKL 12 mm
- screws and dowel nails
- direct suspension
- sickle
- plaster mixture
- polymer-based putty
- damping tape - to reduce noise from neighbors through walls
From tool:
- profile puncher
- screwdriver with bits
- spatula
- metal scissors
- level
Once everything is ready, you can start assembling the crate from the profiles.
- Install the guide profiles on the ceiling and floor according to the level, using dowel nails, the pitch of which will be 25 cm. Do not forget to glue the damping tape from the side where they will adhere to the walls, floor and ceiling.
- Then the installation of wall elements begins, which are inserted into the guide profile and screwed with small self-tapping screws. Step between profiles 60 cm.
- A wall profile is attached to the suspensions, for better structural rigidity.
- The next step is to install the jumpers. They are formed from a wall profile, which is cut with scissors for metal. Jumpers are installed at a distance of 50 cm from each other in a checkerboard pattern.
- As soon as the frame of the profiles is assembled, you can proceed to the sheathing of the sheathing with drywall. Sheathing starts from the far corner in a checkerboard pattern, with the next sheet mixed by 50 cm.
- Drywall is screwed with self-tapping screws, the pitch of which is: along the seam - 15 cm, along the sheet - 25 cm.
- As soon as all the walls are covered with gypsum boards, they proceed to the final finishing.
- First of all, you need to seal the seams: glue them with a sickle and cover them with putty.
- Then the surface must be covered with primer in two layers and puttied.
As soon as the putty layer dries, it needs to be sanded and you can start gluing wallpaper or other finishing materials.
What ceilings to make in the apartment?
The ceiling surface can be finished in several ways:
- build stretch ceilings
- install plasterboard suspended ceiling
- apply plaster and paint
Let's consider these methods in more detail.
Stretch ceiling
It is done simply. Choose a company and order a job. Installation will be completed within a few hours.
The cost will depend on the type of canvas, the area of \u200b\u200bthe ceiling surface and the number of lighting fixtures.
It’s not worth saving a lot of money, there is a risk of running into cheap materials or installers violating safety precautions (the most harmless thing is that you will have an unpleasant smell in your apartment, the worst option is an explosion of a cylinder during installation).
Of the advantages of stretch ceilings can be noted:
- a kind of protection from the bay of the apartment by the neighbors from above
- mounting speed
- looks neat and nice
Of the minuses:
- To make normal soundproofing, you must first mount the plasterboard, which leads to an increase in the cost of work and an underestimation of the ceiling.
GKL ceiling
To build a false ceiling with your own hands, you will need to purchase material:
- guide profiles
- rack elements
- straight suspension
- gypsum boards
- crabs - profile connectors
- fasteners - self-tapping screws and dowel nails
- sickle
- putty
- primer-impregnation
- dye
Installation begins with marking the surface. Then the guide profiles are installed. Once the guides are installed, proceed to install the main elements.
After assembling the crate, drywall is mounted on the ceiling and a fine finish is carried out:
- Close up the seams between the plates.
- Apply soil.
- Putty the surface, clean it.
- Apply paint.
From the pros:
- You can make additional soundproofing from the neighbors from above.
Of the minuses:
- The work can take several days or even weeks.
- Cost of work.
- If you are flooded from above, then everything will have to be redone.
Plastering and painting the ceiling
Nowadays, it is used very rarely, since the work is very laborious and dirty. If a decision is made to apply plaster to the ceiling surface, then it is better to hire a professional team of finishers.
You can save money and do everything yourself, but it will take time and effort to do it, and you are unlikely to get any advantages.
What ceiling is better to make in the apartment?
There is no single answer to this question, it all depends on the apartment.
The options are:
- If the neighbors do not interfere (for example, you have the last floor), then make a stretch ceiling.
- If the neighbors are noisy, then make the ceiling of the plasterboard with soundproofing. If so far they are not making noise, this does not mean that tomorrow the owners will not change.
- If the ceilings are high, then make plasterboard with soundproofing and use stretch ceilings instead of finishing. The price won't be much more expensive.
Important! Do not make a plasterboard ceiling with ledges, even if it looks beautiful. Dust will constantly accumulate there, which will sooner or later adversely affect health.
Electrician in the apartment
In a new building, the wiring needs to be checked and where it needs to be redone. In old houses, aluminum wiring is definitely changed to copper.
You will need the following:
- three-core VVG cable with a cross section of 3x2.5 mm² for sockets, for lighting - 3x1.5 mm²; for installation of high power electrical appliances - 3x6 mm²
- RCD and diff. automatic (protection of people), voltage control relay (protection of electrical appliances)
- automatic switch 10 A for lighting fixtures, 16 A for sockets, 32 A for a stove
- sockets and switches
- junction boxes and connecting terminals
Advice!
It is better to buy all wires with a margin in length, as in distribution. boxes need to leave extra wire for repairs in the future.
Trust only professionals. Ask what, how and why is done. Be sure to control the work done, as your safety depends on it.
4 rules for doing electrical work with your own hands
The machine should turn off before the wiring starts to heat up.
For example, the wiring is designed for 16 A and there is an automatic machine for 25 A. You turn on the kettle, iron and microwave at the same time. The machine does not turn off, the wiring is heated. Sooner or later, this can lead to a fire. In this case, you need to put the machine on 16 A and not turn on many powerful household appliances at the same time in one network.
Equip two networks in each room - one for light, the other for sockets. If possible, then for the boiler and refrigerator also make a separate network.
Wiring must be carried out strictly along horizontal and vertical straight lines. Using this rule, you will remember where the cable runs in a year.
All connections are well insulated, no twists (soldering is also not desirable). If an electrician connects the wires by twisting them together, then feel free to kick him out. Soldering, although a reliable connection, leads to a complication and an increase in the cost of repairs.
Bathroom renovation (bathroom and toilet)
Repair in the bathroom is a separate topic of conversation, since the amount of work is quite large. Some you can do yourself, and for some it is better to invite a plumber.
For wall decoration, you can use several options:
- laying ceramic tiles
- wall cladding with MDF or PVC panels
- painting
What materials are required for each type of finish?
Finishing with ceramic tiles:
- cement-based plaster mix
- tile adhesive
- beacon profile
- grout for tiles
- priming
- crosses, for the formation of smooth seams
- ceramic tile
Before laying, the walls should be plastered along the beacons, this will reduce the consumption of tile adhesive and thereby save you money. This type of finish is quite expensive and laborious, but durable.
It's better to save money on something else and tile right away than to redo it later.
Panel mounting:
- moisture resistant MDF or PVC panels;
- profile guide and wall;
- straight hangers;
- fasteners.
Any owner without a certain experience can perform this type of decoration. The order of work is as follows:
- assemble a frame from profiles
- install panels
- equip the plinth
Painting the walls in the bathroom and toilet:
- plaster mixture
- putty
- water-based waterproof paint
- priming
Before you paint the walls in the bathroom, you need to plaster the surfaces, putty and clean. The most budget option, but will often require repairs.
Important! All materials used in the bathroom must have a good degree of moisture resistance. It is also desirable to treat all surfaces with antiseptic compounds.
Glazing of a loggia/balcony
To carry out this type of work, it is better to contact a company that manufactures and installs plastic window structures. The specialist will take measurements and in a short time the team will produce glazing.
Depending on the design of the balcony, loggia, there may be different options for which glazing to choose:
- If you have an old Khrushchev building and a concrete slab of a balcony resting on the word of honor, then there is no point in spending money. The maximum will be to make sliding aluminum windows.
- If you have a new building with a large loggia, then you should think about its insulation. To do this, you will have to install good double-glazed windows.
Glazing a balcony or loggia is not a task of paramount importance, if the family budget is limited, then these works can be postponed.
An article about. It will also be useful for glazing loggias and balconies.
Conclusion
Renovation of an apartment is a very troublesome business., labor-intensive and requires investment. You can read for an example - medium, budget, no frills.
Some work can be done independently, but time-consuming work or requiring special tools should be entrusted to specialists.
One thing can be said for sure, definitely necessary, preferably with an estimate.
If in this article you do not have enough information, then write in the comments. I also recommend reading
When we talk about apartment renovation, most often we mean cosmetic repairs, since this is the most common type. After all, doors, windows and utilities can serve for quite a long time, but finishing materials quickly lose their appearance and attractiveness. Even a simple rearrangement of furniture can reveal a strong discrepancy in the color or condition of surfaces that have been covered and in plain sight, this applies to both walls (wallpaper) and flooring.
Of course, we do not always strive for renewal, when we can’t do without it, but sometimes it’s not the crumbling finish that motivates us to repair, but the appearance of modern beautiful and technological materials, in which we see new opportunities and solutions. In catalog http://www.stroi-krep.ru/ you can just find a new generation of building and finishing materials that will add new touches of novelty and comfort to your home. Beautiful booklets and magazines with interior design options also add excitement, in general, you can’t sit and wait until the old finish becomes unusable.
Where to begin
Like any other important event, repair begins with planning, first we need a project, a sketch, a drawing, a drawing, in general, something that will clearly show us what we will get when the repair is completed. This is especially true for modern studios, in which the layout is free, and you need to clearly know where which zones will be, how comfortable and acceptable it will be..
After, or during design and design surveys, the sequence and types of work are determined. And for each type of work and stage, we determine the budget.
Types of jobs
The easiest way to freshen up the look of a room is to paint the ceiling and doors, and cover the walls with new wallpaper. This quick and cheap method will give you time to really think things through without having to see worn, dull walls and shabby doors. However, this method assumes that your surfaces are perfectly even, since walls that are bumpy and knotted under wallpaper will look bad, as well as a cracked door, on which the new paint simply cannot cover chips and deep scratches.
1. Find out what materials you need
To buy exactly what you need and not overpay, you need to decide what kind of work you will carry out. For this, it is compiled.
The design project also relieves you of the agony of choice. The architect or designer explains in detail what materials of what colors and textures are needed - all that remains is to buy them.
When choosing finishing materials, you need to pay attention to the repair of which particular room they will be used. For example: for the kitchen it is better to take moisture-resistant ones, and for the bedroom - environmentally friendly paper or non-woven ones.
2. Decide where and from whom you will buy materials
If you want to save money, it is best to go to construction hypermarkets: they sell most of the goods at the best prices. But various little things, like brushes or fasteners, can also be bought on the market - large chains sometimes inflate prices for such products.

As for manufacturers, it is always better to give preference to well-known and proven brands. So the risk of running into low-quality products is lower.
3. Carefully study the packaging
Often it is already clear from the packaging. On the packaging of a quality product, information about the manufacturer and the numbers of quality certificates of conformity should be indicated. If something is suspicious, for example, a blurry picture, errors or typos in words, it is better not to take such a product.
Packaging will help determine the condition of the material. Look at the expiration date, pay attention to how the packaging itself looks, whether it is frayed: some materials may deteriorate due to improper storage.
4. Save wisely
4. Order materials in advance
Materials from abroad or items that are custom-made are better to buy in advance - their delivery can take a month or more.


 Constellation Scorpio description")


