Using MDF panels is the easiest way to finish the walls of a room, especially if you need an additional layer of thermal insulation. At the same time, it is quite possible to do the installation of MDF panels with your own hands in a very short period of time.

To install panels you will need:
- tape measure and pencil - with their help you will mark the places for fixing the bars of the crate and the required length of the panels;
- metal corner and level - to check the evenness of the corners, horizontality and verticality of the mounted elements;
- jigsaw - for cutting panels to the desired length or width;
- a construction stapler or nails with a hammer - to fix the panels on the crate;
- drill and self-tapping screws (dowel-nails) - for attaching the lathing bars to the wall;
- screwdriver or screwdriver.
Surface preparation

One of the main advantages of MDF panels is that there is no need to completely level the surface to which you are going to attach them. In this case, it does not matter at all whether the wall was pre-painted or not, and what material it is made of (brick, concrete, blocks, wood). It is enough just to cover the plastered or wooden surface (2 times) with a primer (or a special composition for protecting wood), and then either fix the crate for mounting MDF panels right away, or first fix a layer of thin thermal insulation on the wall (using liquid nails glue). (such as folgoizol).
Ceiling

If desired, MDF panels can be easily mounted on the ceiling. In this case, it is better to follow the rule that the MDF panels should be perpendicular to the wall with the window. The principle of mounting MDF panels to the ceiling and walls is the same, with one small exception: for ceiling cladding, you will most likely need an assistant to support the panel and feed the tool.
Mounting technology

The process of mounting MDF panels with your own hands implies that you will mount them on a wooden crate, which is bars of any section fixed with a certain step (in the direction perpendicular to the direction of installation of the panels). In this case, the size of the bar (its width and thickness) does not matter much (that is, any of the same thickness will do).
If you are going to lay a layer of insulation under the MDF panel (mineral wool or glass wool), the thickness of the bar should correspond to the thickness of the thermal insulation layer.
After preparing the bars for the crate, do-it-yourself installation of MDF panels will be carried out as follows:
- Choose the direction of installation of MDF panels.
- In a perpendicular direction to the panels to be installed, fix the crate: the lower beam at a distance of 3 to 5 centimeters from the floor, the upper beam - 2-3 cm from the ceiling, fix the bars between them with self-tapping screws in increments of no more than 45-50 centimeters.
- Check the verticality of the resulting surface. If necessary, place pieces of plywood, fiberboard or laminate under the lathing bars.

- Around (along the perimeter) of windows and doors, as well as in the corners, fix the vertical bars of the crate.
- If you decide to mount the panels vertically, then you should start mounting the MDF panels with your own hands from the corner, moving from right to left. Attach the first panel (from the edge with a comb) to the bars along the entire height using self-tapping screws, which should be as close as possible to the corner of the room.
- Fasten the second edge of the panel with clips specially designed to work with MDF, which can be attached to the bar with a construction stapler or small nails.
- We install all other panels on the wall in the same way, inserting the comb into the groove.
- The last (on each wall) MDF panel must be cut to the desired size, and then inserted into the groove of the previous one, securing the cut side with self-tapping screws to the bars.

- Having finished the installation of MDF panels with your own hands, do not forget to close the corners of the room with special MDF corners, which are simply glued on top of the panels. Under these corners, self-tapping screws holding the extreme panels should hide.
- Similarly, stick the MDF corners on the edges of the panels near windows and doors.
Advantages and disadvantages of MDF panels

The undoubted advantages of MDF panels include not only ease of installation (they can be fixed both vertically and horizontally), but also a beautiful appearance, which, thanks to a wide variety of colors, allows you to choose panels for almost any interior. In addition, MDF panels are easy to care for, as they do not require special cleaning (just wipe with a slightly damp cloth). And, of course, MDF panels are relatively cheap finishing materials.
But MDF panels also have disadvantages:
- Firstly, the walls of such panels, due to the fact that they are attached to the crate, remain hollow.
If you decide to hang something on such a wall, you will have to use special long dowel-nails. In addition, MDF panels do not hold up well to sharp objects (although a damaged finish can be taken apart and the panel replaced).
- Secondly, the wooden crate under the MDF panels refers to combustible materials (like the panels themselves), so they cannot be used to finish escape routes - corridors, stairwells, etc. (this rule does not apply to individual residential houses and apartments).
- Thirdly, MDF panels do not form a continuous, smooth, even surface (that is, you will always see recesses at the points of their joining), which imposes certain restrictions on the designed design of the room using them.
- Fourthly, if you make the crate step more than the recommended one (45-50 cm), then the panels may begin to “play” under external influence from the room (for example, if you lean on them).
However, even despite the shortcomings of MDF panels, they still compete with drywall, the installation of sheets of which requires much more skills and people (at least two), while you can work with MDF panels alone.
Video
This video demonstrates the installation process of MDF panels.
Interior decoration of premises is a task that is relevant for both residential buildings and public buildings. Among the presented range of building materials, various panels made of synthetic and natural raw materials are very popular. The last group of products includes MDF panels, whose variety of types allows you to choose the material for facing rooms of any type.

Peculiarities
Natural materials have always been at the peak of popularity, but, unfortunately, their volume is very limited. In this case, the correct and effective solution was the use of various production waste from a natural product, which allows to reduce losses, as well as to obtain attractive and high-quality raw materials.
It was in this way that materials such as chipboard and fiberboard appeared on the shelves of hardware stores, and later a fibreboard called MDF.
Similar products are widely used in the decoration of walls in rooms., they are preferred to be used in apartments, for lining bedrooms, kitchens and bathrooms, for finishing office premises, etc. This trend is due to the environmental safety of raw materials, reasonable cost, as well as ease of installation, due to which it is quite possible to fasten these products at home with your own hands.


The main components that make up the MDF panels are wood chips and other waste from this raw material. Special substances are introduced into a similar composition and compressed.
The manufacturing technology of the material includes the following processes:
- The threshing device grinds wood into elements of a given size.
- The resulting fragments are washed and sieved. As a result, larger chips and various debris are sifted out.
- After that, the resulting composition undergoes steam treatment.
- Epoxy resin is introduced into the finished and purified raw materials and the mass is carried out under a press under high pressure.


- The resulting sheet material is cut into products of specified dimensions.
- To give a smooth surface, the panels undergo a process of grinding and processing with decorative compositions. Works to make products visually attractive consist in covering the base of the material with a film, laminating or staining. The first option allows the panels to become similar to wood or stone.
In addition, the decorative coating provides products with protection from dirt and moisture, which greatly expands the range of products.

The positive features of MDF panels include the following properties:
- Environmental friendliness of the material - phenol is not used during the manufacture of products, which indicates the safety of the raw materials obtained.
- It is possible to sheathe walls or ceilings without the involvement of hired workers.
- Cutting the material is quite simple, with almost no debris left during this task.
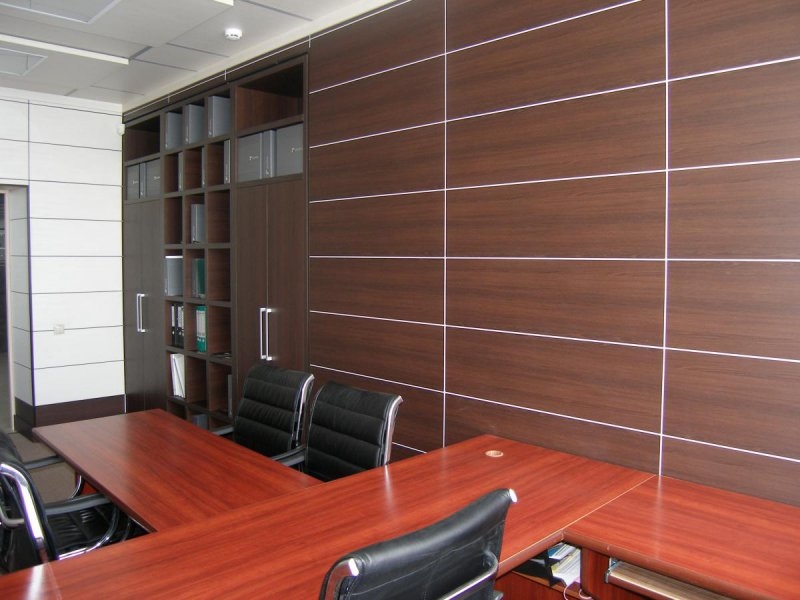
- Today, a large assortment of similar products is on sale, among which there are panels that have different colors and textures. Due to such a variety, with the help of products, it is possible to implement almost any design solution not only for small intermediate rooms, such as a hallway, corridor or toilet, but also to decorate the main living rooms - a hall or a living room.
And cabinets decorated with MDF panels will emphasize the good taste and status of the owner.


- The material is inherent in heat-insulating and sound-proofing qualities, due to which the level of comfort in the room increases.
- The product does not require any specific maintenance, any dirt can be easily removed with a damp cloth.
- Since the main raw materials used for the production of products are of low cost, the material itself is distinguished by an acceptable price.
- Surfaces can be sheathed in several ways, so that in some cases there is no urgent need to level the bases.
Fasteners on the frame will hide all the existing defects on the walls.

In addition to the advantages, the products have some negative qualities:
- the presence of an additional coating on the products does not provide 100% resistance of the material to moisture;
- it should be borne in mind that the design will take up some area of \u200b\u200bthe room when mounted on the crate;
- despite its environmental safety, the products belong to the category of fire hazardous building materials.


Kinds
Taking into account the specifics of the production technology at each individual stage, MDF panels have the following characteristics common to all products:
- material strength varies from 600 to 1200 kg/m3;
- the average tensile strength of the product is 0.55 MPa;
- the allowable leaf moisture level should not exceed 10%;
- in percentage terms, the level of various additives in raw materials is 10%;
- the thickness of the product varies between 6-40 mm.


Based on the production method, there are several main types of MDF panels:
- Moisture resistant products. The material is notable for its high strength and high cost. Such products do not deform even with prolonged contact with water, they tolerate mechanical stress and loads well. The panels are recommended for use in rooms with high humidity, and in some cases, the products are used for exterior decoration of buildings.
- Whole-piece products. The material is produced by hot pressing of the panel components. The finished product has a smooth base, the level of strength of the panels is average compared to other types. Based on the cost of the product proposed by the manufacturers, it can be attributed to economy class products.
- laminated products. The product manufacturing process is similar to the method described above. Among the individual features, it is worth noting the ability of the material to repel water, abrasion resistance, as well as resistance to contact with chemicals. Due to their features and strength, the products can be installed not only indoors, but also outside, however, they are not suitable for constant contact with moisture.

Taking into account the variety of external design of the rails, products can be classified as follows:
- Veneered panels. They are similar in texture and color to natural wood. To achieve this effect, the outer side is covered with veneer with a layer of about 3 mm.
- Glossy. They have a laminating film layer. Due to its presence, the material acquires a shiny appearance and resistance to moisture.
- Painted panels. For work, a special composition is used, which sets the required shade and hides possible irregularities in the base.
Painted products can be either matte or glossy.


Given the differences in product density, manufacturers distinguish the following types of material:
- HDF - where the value exceeds 800 kg/m3;
- LDF - density is from 200 kg / m3 and above.
The front surface of the panels can be milled or flat.


Focusing on covering possibilities, the material is divided into the following types:
- rack;
- tiled;
- sheet.


Scope of application
MDF panels have found their application in several industries at once. These include the production of furniture, the construction industry, with the help of products you can mount partitions, arches, etc.
We can distinguish the following types of work where this product is in demand:
- production of door panels;
- roof lathing device;
- production of window sills;
- using panels, protective screens are made for ventilation and heating devices;
- products are used for suspended ceilings and flooring;
- during wall finishing work.


Preparatory work
To determine the amount of material required for the design of the bases, certain measurements should be taken - measure the width of the walls. Since the panels are available in various sizes, having decided on a specific type of material, the width of the wall should be divided by the same value of one product.
However, even properly organized work can be associated with various damage to facing products, so it is best to purchase a little more material.

The preparatory process prior to the installation of MDF panels on the frame includes the following set of works:
- In order to fix products on a frame of a wooden or metal type, it is not necessary to level the surfaces. In this case, it will be enough to clean the walls from dust and dirt. But serious defects need to be fixed.
- All wiring that is available in the room is hidden in corrugated pipes.
- If you plan to lay the material in fairly damp rooms, the walls should be pre-treated with an antiseptic primer.
The preparatory work that precedes the installation of products on the adhesive comes down to the mandatory cleaning of the base, after which the walls must be primed.
Rack-type panels are cut taking into account the height of the walls, the corners are cut off, the edge is processed with sandpaper.
If you plan to glue square products, their size is adjusted after fitting.


How to fasten?
The choice in favor of one or another method of installing such products is based on the condition of the walls, as well as the specifics of the room and the conditions in which the material will be used in the future.
The frame mounting option is reduced to installing lamellas on a specially equipped crate.
- if there are serious defects on the wall that cannot be repaired;
- when there is a question about the need to provide sound insulation and thermal insulation;
- you need to hide various communications under the finish, for example, wiring.


The frame can be made of a wooden beam or a galvanized profile. Each option has positive and negative features. The wooden structure does not need a large number of fasteners, it can be attached with self-tapping screws, in addition, the raw material has similar characteristics in terms of moisture absorption as the finishing material itself.
The crate needs additional treatment with antiseptics, as it is susceptible to moisture.
The metal construction is distinguished by a long service life and moisture resistance. In addition, the metal frame guarantees a more reliable and rigid fastening, which is important in wet rooms, where the panels can deform and elongate.
But the construction of the crate, which will be many times more durable than the finish itself, is impractical.


Products can be mounted both horizontally and vertically. in addition, to create a specific pattern, some experts mount products diagonally. Regardless of the installation direction chosen, the frame and panel rails must be perpendicular to each other.
Vertical installation is considered the most common, since during such work a minimum amount of waste remains after cutting products.
After the construction of the crate, you can begin to install the panels.

There are the following cladding options:
- The panels can be glued - in this version, the products are processed with the composition in those places where they will be fixed with the frame. This method is relevant for products with a small thickness of the plates.
- Mechanical fastening with hardware - this option will be acceptable for rooms with a stable temperature and normal air humidity.
- Fixing the elements with clamps - the essence of the installation is to put a clip on the edge of the rail and connect it to the frame with nails. This method is the most popular.


Installation is carried out in the following sequence:
- The panels are adjusted in length, the edge of the products is sanded.
- It is best to install in the direction of the window opening, if any.
- The first bar is installed in such a position that its edge with the comb is directed into the corner. Next, the panels are fastened to the frame guides, a clamp is put on the edge.
- The following panels are fixed with a comb into the groove to the previous element. The corners and the upper edge are formed with a universal corner.


The frameless method is chosen only when the bases in the room have a perfectly flat surface.
Installation involves the following steps:
- work must begin from the corner of the room, moving towards the window;
- before mounting on a concrete or any other surface, it is necessary to make markings on it that correspond to the dimensions of the facing material;
- for high-quality sizing, the adhesive composition is applied to the back of the product in a zigzag pattern, after which the element is pressed against the wall and immediately removed;
- after a few minutes, the product is finally pressed to the surface;
- installation can be performed both end-to-end and overlap;
- corners and edges are closed with skirting boards or corners.
Today, in the modern construction market, panels are becoming increasingly popular. This material for finishing work is a type of fibreboard, which is distinguished by moderate density indicators.
MDF wall decoration is carried out with plates, that are produced by the action of special equipment. Processing lends itself to high-quality sawdust (shavings), which are additionally affected by elevated temperature, pressure, and a dry press.
To give the material maximum density, not chemical elements are used as an adhesive base, which negatively affect the environment, but ecological urea-formaldehyde resins.
As a result, manufacturers put on the market a variety of types of panels that are used for interior decoration of MDF walls. They are able to make an ordinary room - designer.
Advantages
Wall paneling MDF has the following advantages:
- ease of installation. Relatively affordable material price and excellent external characteristics;
- before the surface should not be further processed, while its condition will not affect the finishing material in any way;
- You can install panels regardless of the chosen or desired direction. Along, across, or diagonally, the manufacturer did not specify any restrictions;
- during installation, there is space between the panels and the wall, which can be additionally used to hide wiring. Also, many repairers prefer, accordingly, to additionally isolate the supporting structure.
Views for separate in the hallway
If you pay attention to the design of the room, you can choose many types of panels. The choice should be based on practical features. should highlight the interior and complement the hallway.
Depending on the production characteristics, the installation material is conditionally divided into:
- all-pressed;
- covered with a laminated surface;
- ball resistant to moisture.
Fully pressed panels are distinguished by such differences: a flat and smooth surface that does not depend on the side (internal or external).
They stand out for their average density, perfect hygiene and environmental features.
The technology for the production of such types of panels was indicated above. In order for them to enter the market in finished form, wood pulp exposed to pressure, high temperature and a special adhesive.
If you want to know in more detail what MDF wall decoration is, you can see the photos on the website of the manufacturer of the models you like.
According to tradition, wall cladding on a balcony should begin at the junction of two walls. The first and last panel should be fixed using self-tapping screws.
At the same time, it is desirable to control their position, and the building level will help you with this.

After installation, it is advisable to hide the self-tapping hat under a decorative corner. The second and other panels are mounted to horizontal belts with professional brackets. Mounting edges can also be found on the market. They can use with clamps.

During installation, the panels must be adjusted to the dimensions of the room, as well as cutouts along the openings. For this buy an electric jigsaw, that without the efforts of the operator will cut the panel. Adjustment should be carried out directly in the room, the panel is fixed on the wall.

If you decide to apply the marking earlier, you must take into account its possible shrinkage. Wall decoration with mdf wall panels is most often carried out on balconies. The material is processed not only walls, but also ceilings. about the ceiling. This is quite logical, if you pay attention to its positive characteristics.
When comparing chipboard and MDF, the latter material is several steps higher in terms of strength, durability, resistance to high humidity.
The panel does not deform, does not become covered with mold or fungus, does not shrink, when compared with natural wood.
A photo of wall decoration in the hallway with MDF panels is carried out by the material in question for the same reasons. The wall, due to the special technology for manufacturing panels, after processing is as smooth as possible, which is extremely important at the stage of surface cladding. The price of finishing MDF walls is calculated per square meter of the work done.
findings
The material considered in the article has undoubtedly become the most purchased for the processing of load-bearing structures in any room. Regardless of design decisions, you can always find something that harmoniously complements your interior.
In the corridor, as a rule, more muted tones are used, so keep this rule in mind when choosing the necessary material for finishing the supporting structures.
October 5, 2016Specialization: master in the construction of plasterboard structures, finishing work and laying flooring. Installation of door and window blocks, facade finishing, installation of electrics, plumbing and heating - I can give detailed advice on all types of work.
Today we will consider such material for interior decoration as MDF panels. This type of product is great for budget repairs, and an additional plus of such a solution is that installation work can be done without problems with your own hands. I will describe the whole process in as much detail as possible, and you just need to use all the recommendations from this review.
How the work is carried out
I will say right away - there are many ways to fix decorative MDF panels for interior wall decoration, but I will talk about the option that I have personally tested. The method is suitable for any bases and allows you to quickly level even the most problematic surfaces.
We will talk about mounting panels on a wooden frame, this is the most budget solution, which, among other things, is one of the easiest to implement.
What you need to work
You can’t start editing without having everything you need at hand, you will have to constantly be distracted and look for a tool or go shopping in search of the right material. Therefore, make sure that all the most important components are available in advance:

| materials | Application |
| MDF panels | You can buy MDF wall panels for interior decoration at any more or less serious hardware store. Their colors can vary significantly depending on the manufacturer and collection, but most often the elements imitate the texture of wood, but there are also options for stone or brick. The width of the products is most often 250 mm, the length is 2.7 meters, as for the cost, it averages about 200 rubles per square meter |
| Wooden block | We will make a frame from it, the section of the elements can be different, I personally use the 20x40 option, it is convenient and takes up little space. But if a balcony or loggia is being finished, then it may be necessary to lay the insulation in the frame, in which case the size of the bar should be no less than the thickness of the heat-insulating material |
| fasteners | The easiest way is to use special fasteners, which are called kleimers and are staples that fix the finish. Here it is important to choose an option according to the thickness of the protrusions on the MDF, most often it is 2 or 3 mm, it is important that the structure is fixed securely |
| Universal corner | If you have internal or external corners, as well as joints, then you can not do without a special universal corner. It is a bar on which there is a line in the middle, along which the element can be bent both outward and inward, or you can use it straight as a docking bar. This is very convenient, because you do not need to buy different components. |
| Liquid Nails | This composition is necessary for fixing the corners, it can also be used when finishing the door slope, I will talk about this in a separate section. Any composition that is suitable for MDF is suitable, all the information is usually indicated on the packaging, so choosing the right option is not difficult |

If the kleimers could not be found, then you can use finishing nails with a length of 20-25 mm and a thickness of not more than 1.6 mm, with their help you can also quickly and reliably fasten MDF.
MDF wall panels for interior decoration are installed using the following tool kit:
- If you have brick walls or, then you will have to fix the frame elements with the help of quick installation dowels. In order to drill holes for them, you need a puncher with a drill of the desired diameter and length;
- For wooden bases, drilling of holes is not necessary, self-tapping screws can be directly screwed into them, and for work we need a screwdriver with nozzles of the desired size and configuration. If the wood is very hard, then you can pre-drill holes of small diameter with the same screwdriver;
- Kleimers are most often fastened with cloves, so do not forget to take a small hammer - a weight of 300-400 grams is enough;
- MDF wall panels are quite easy to cut, but to ensure the perfect quality of the ends and speed up the workflow, it is best to have a jigsaw on hand. Also add a fine-toothed blade to it to ensure the best result. If there is no power tool, a fine-toothed wood saw or even a regular metal saw will do.

I want to focus on one more nuance - although MDF panels are intended for wall decoration, they can also safely sew up the ceiling. The workflow will be no different, except that, due to the position of the plane, the installation will not be very convenient.
Preparatory activities
Now let's look at how the preparation of work is carried out. You know the list of all materials, but you need to consider how to calculate the right amount, here you can highlight a few basic recommendations:
- To begin with, using a tape measure, you need to measure the length and width of each trimmed section. By multiplying these indicators, you can determine the area, each figure is written on a piece of paper, you should not rely on memory, you can easily mix something up, and in the end you either don’t have enough panels, or some amount remains and returning the material will be very problematic;

If there are window or door openings, do not forget to subtract their area from the final result.
- If a window or doorway will be finished, then they also need to be measured to determine how many panels will be needed during work. Here it must be borne in mind that a lot of MDF waste can be obtained in the openings, decide in advance whether they can be adapted somewhere;
- As for the calculation of the MDF corner, it is sold in linear meters, the length of one element is usually 260 cm, width 5 cm. You need to measure the length of all corners and joints in order to determine the total number in linear meters, which is subsequently simply divided by the length of one product, this is how the required quantity is determined;
- The material for the crate should be considered as follows: I recommend making the step of the elements 40-50 cm, MDF panels are not very rigid, so they need a good frame. The number of rows of the frame is counted, after which their total length is summed up. As a result, we get the required volume in linear meters, there is no need to count cubic meters - you will be helped to do this in the store where you will purchase lumber.
When the calculations are over, you can begin to prepare the base, the work is simple, but you should not skip them:
- First you need to clean the base from dirt and dust, if there are remnants of the old coating on it: wallpaper, panels or something else, then it is better to remove them as far as possible.
- Carefully inspect the surface - if there are significant irregularities or cracks on it, then it is better to repair them. To do this, you can use ordinary cement mortar or mounting foam. The second option is suitable for any cracks and is good in that it not only fills in irregularities, but also prevents cold from penetrating through these places;

- If the surface is too loose, then it is better to strengthen it with a reinforcing soil, this will make the walls stronger. If the bathroom or toilet is finished, then you can use options with antiseptic additives, they are also very well suited for wooden surfaces.
Frame construction
Finishing the walls with MDF panels begins with the construction of the crate, on which our finish will be attached. The process consists of the following steps:

- The options for finishing with MDF panels are simple: they are placed vertically or horizontally, based on this, the configuration of the crate is determined. If the panels will stand vertically, then the frame should be horizontal and vice versa. That is, the crate is always placed perpendicular to the position of the panels;
- When you know how the MDF will be attached, you can start drawing lines along which the frame will be attached, the distance between them should be 40-50 cm, in any case, a bar is attached along the floor and ceiling in order to firmly fix the panels. In the corners, the bars are attached so that between them an angle is obtained, along which you will be guided in the process of work;

- Now you should cut the bar into pieces of the length you need. It is important to prepare the required number of racks, and jumpers between them, if any, can be made from waste. They do not have to be solid, in extreme cases, you can make them from two pieces;
- As for drilling holes, first you need to mark up - put dots on the bar at a distance of 50 cm from each other, but the element must be fixed at the top and bottom at a distance of 5 cm from the edge. Next, a bar with dots is placed near the line and from it the points are transferred strictly horizontally to the wall. After that, the tree is drilled with a drill for wood, and the walls with a drill for concrete, the drilling depth should be 10-20 mm more than the length of the dowel;

- The bar is attached to the wall, dowels are driven into the surface through it, after which you need to start leveling each element. Most often, you need to put chips or pieces of wood under the bar so that it is positioned as needed, for a guideline, it is easiest to set up two extreme racks and pull a cord between them in 2-3 places;

- Lastly, screws are hammered or screwed into the dowels, it is also important to check the position of the frame, if suddenly some element has moved from the level, then the screw can be unscrewed and corrected. The smoother the base, the better the end result will be and the easier it will be for you to work.

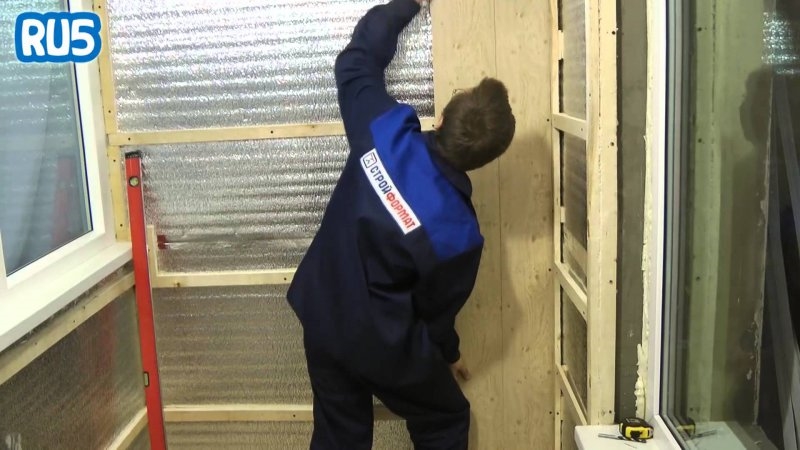
If the balcony is finished with MDF panels, then insulation is most often laid between the elements of the crate - mineral wool, polystyrene foam or extruded polystyrene foam. Here it is important to place the heat-insulating material as tightly as possible, if there are gaps after laying, then it is easiest to fill them with mounting foam.

Fixing MDF panels
When everything is done as expected, the installation of the finish coating itself is easy and quick, here you need to follow a few simple recommendations:
- Work starts from any of the corners, you need to take measurements, and then cut the panel to the desired length. Cutting is done with a jigsaw or a hacksaw, it is important to do everything carefully. The size of the panel should be 5 mm less than the height from floor to ceiling, since the material can change its size with changes in humidity and temperature, and it simply needs an expansion joint;
- The element is inserted into the corner, after which a clamper is placed in the groove on the side, which is fastened with studs or small self-tapping screws. There should be one clamp for each frame element, otherwise the finishing panels will not hold securely. If you are using studs, simply drive one into each block through the groove in the panels;
- The next panel is inserted into the groove of the previous one until it stops, after which it is necessary to check the tightness of the joint along the entire length of the connection. If everything is fine, then you can fix it with clamps. Work is done in a similar way until you reach the end of the wall;
- The last two panels need to be docked together with a “house”, that is, the middle should protrude. In this position, they are inserted into the free space, after which you need to gently press the joint and snap it into place so that the panels become even. The very edge can be screwed with self-tapping screws, all the same, the joint will be closed with a corner or a plinth;
- When the walls are finished, you can start fixing the corner, for this the elements are measured and cut into pieces of the required size, after which they are bent as needed. Then it is necessary to apply assembly glue on the reverse side of the element with zigzag movements and, having placed the corner in the right place, press it tightly, so you can quickly decorate the joints.

At the junction of the walls with the floor and ceiling, you can fix the plinth, it can be different: even wooden, even plastic. It all depends on the interior and your preferences, these elements are also attached to liquid nails, it's simple and the surface remains intact.
Finishing slopes MDF
I promised to tell you about how to make slopes using MDF panels. The workflow in this case is quite simple:
- First you need to decide on the location of the panels: along or across the slope. It all depends on the width of the opening and your preferences, think and decide which option will look best in your interior. Sometimes you can arrange elements of different colors, this solution is suitable for the transverse arrangement of panels;

- First of all, you need to level the surface with a plaster mortar, if the slopes are very uneven, then it is best to pre-fix the beacons, on which the work can be done very quickly. Lighthouses are exposed to the same solution that will be used for puttying. The composition is simply applied with a spatula or trowel, and the excess is removed with a rail or level;

- When the surface is dry, which takes at least a few days, the front doors can be used without any restrictions. Next, you need to treat the surface with a primer, this will strengthen it and protect it from moisture, it is better to choose a composition with antiseptic additives, since both the slope of the front door and the slope of the window are often exposed to temperature and humidity changes, which is dangerous for mold;

- If there is frozen foam around the perimeter of the window or door, then its excess must be cut off with a construction knife. It is important that nothing interferes with further work;
- First of all, you need to cut the panels into pieces of the size you need, the work is done with an electric jigsaw or a hacksaw. Do not forget to try on the elements so that later it does not turn out that the finish protrudes beyond the plane of the wall;
- An adhesive composition is applied to the back of the panels, both liquid nails and special glue can be used for work, which is available in cylinders as mounting foam and allows you to fix the panels even with significant slope irregularities. The glue is distributed by a snake to ensure maximum fastening reliability and not to cover the entire surface with the composition;

- When pressing the panels, be sure to check their position with a level, it is important that the slope is level, any distortions can ruin the appearance and require redoing the whole work. While not frozen, the elements can be moved, remember this;
- When the glue hardens, you can start decorating the corners; for this, universal corners are glued, which are cut at an angle of 45 degrees for perfect joining. As for the joints with the door leaf, if the gaps are wide, then it is also easier to close them with a bar, and if they are narrow, then it is easier to use colored silicone sealant.

If you are lining a doorway without a door, then the work will be different, you need to cut the MDF so that the elements are the width of the structure. They are fastened in the same way as in the case above, and as for the decorative elements, the corners are glued on both sides, if everything is done carefully, the result will be no worse than in the photo.

Alternatively, you can consider a design with a frame on the door, it is suitable if it is difficult to align the slopes and it is easier to attach a wooden bar or a metal profile.
If the issue of environmental friendliness is not an empty phrase for you, then you have probably paid attention to mdf panels for walls for a long time. With their help, you can seriously decorate your interior, make it more expressive and modern, while not completely emptying the family budget, which is precious in the current economic conditions. In addition, the installation process does not differ in any transcendental level of complexity and is quite accessible for mastering by a "mere mortal". Therefore, feel free to arm yourself with a tool and hurry to buy material - today we will talk about how to fix MDF panels to the wall in such a way that you will experience well-deserved satisfaction at the sight of the result.
Pros and cons of using in the interior

It is quite logical before the direct installation of this or that finishing material to inquire about what positive and negative sides it has. Moreover, from the point of view of the appropriateness of using MDF panels, they are far from such an unambiguous solution as plastic or drywall. Similar instructions, but already on fixing drywall, you can read in the article: "How to fix drywall to the wall: 2 installation methods".
+
- environmental friendliness already mentioned above;
- the simplest installation;
- good soundproofing performance;
- a wide selection of textures and colors;
- elementary care;
- low cost.


-
- combustibility of the material;
- irregularities are possible at the joints of the fragments;
- not suitable for outdoor decoration;
- poor moisture resistance;
- possible deformation under mechanical action;
- inconvenient installation of hanging furniture.

As you can see, it is possible to fasten MDF panels to the wall surface only in relatively dry rooms with favorable thermal conditions. Be sure to get rid of mold on the walls, if any. At the same time, it is necessary to take into account the fact that this material is very afraid of any force impact and will inevitably crack in case of any active contact with it. Otherwise, all the negative aspects of using it are safely leveled by its pluses. One of them is a wide selection of a variety of textures and colors, allowing you to decorate the interior in full accordance with your aesthetic needs. 

Tools and Consumables

In order to fix the panels, you do not need any specific tools. You need to keep on hand all the same standard set that is used to mount any other finishing material.
- plumb;
- level or corner;
- a hammer;
- screwdriver;
- electric jigsaw or wood saw;
- construction stapler;
- roulette;
- pencil.
Prepare and consumables:
- nails;
- dowel;
- self-tapping screws;
- wooden slats or metal profiles for the frame (subject to this method of installation);
- liquid nails or other adhesive composition.


It remains only to add the MDF panels themselves - and then there will already be a complete set of everything necessary for high-quality and successful installation. In order to calculate their exact number, you need to make the correct markup. 

Foundation preparation and marking

Probably the most tedious and tedious stage, which many masters (both beginners and already professionals) do not take quite seriously. It's a pity, because a lot depends on the quality of the preparation of the base surface. Especially if you mount the mdf panels directly to the base without creating a leveling frame. Therefore, it is better to think soberly and perform the necessary manipulations with the utmost quality and care:
- if possible, carefully, but without too much fanaticism, remove the old finish (read how to remove liquid wallpaper from the wall);
- if the paint stubbornly does not want to get off its "familiar" place, then leave it - it will not interfere with you during further installation;
- eliminate all possible cracks with a primer and repair compound;
- if the cracks are minor, then first make them wider with a hammer and chisel, and then treat them with a deep penetration primer - this will help protect your base surface from mold and mildew;
- after all the processing, decide where and how you will attach the panels to the wall - in order to make accurate markings;
- lean the level against the wall and determine the upper and lower mounting points;
- draw a horizontal line along the perimeter of the room in which the repair will take place, and then directly under the ceiling;
- we determine the location of the guides based on the optimal step of 50 cm.


All your further actions depend on how you decide to fix the panels on the wall - directly on the glue or through the auxiliary frame device. Consider both types of installation, noting the features of their use, the pros and cons, as well as the specifics of the various stages. 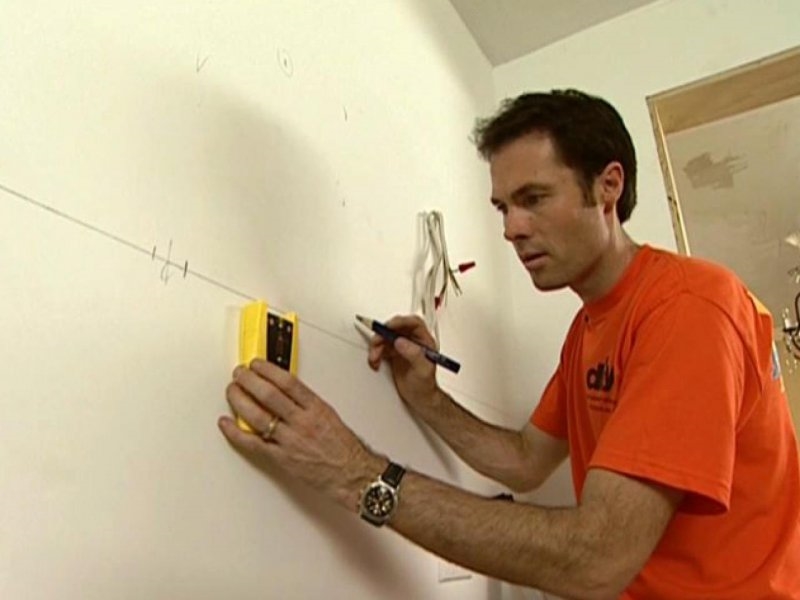


Method one. Installation using the crate

- recommended in cases where the base surface is characterized by severe irregularities that cannot be corrected manually;
- for rooms with high humidity, it is best to use not wooden slats as a base for the frame, but metal profiles;
- the method using the crate is indispensable in cases where additional wall insulation is planned.

The main disadvantage of this option is the need to mount the frame, which slightly lengthens the duration of the work. In addition, the frame takes up a certain number of centimeters of free space. Are you ready to put up with such "arbitrariness"? Very often, you simply don’t have options, because achieving the perfect surface is far from possible every time you need it. 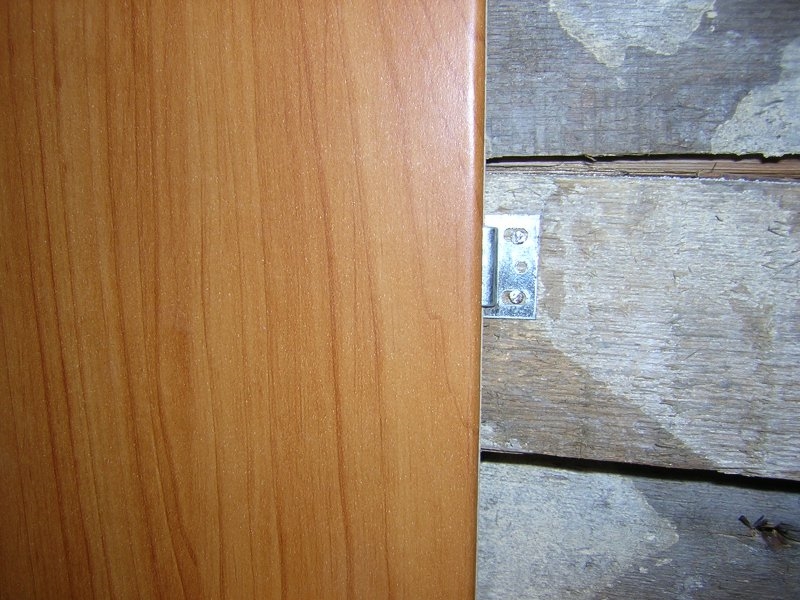
Lathing device
A very important point is to know how to fix the MDF panels to the wall: vertical or horizontal. The nature of the device of the auxiliary frame directly depends on this.
- horizontal arrangement of MDF panels - vertical lathing scheme;
- vertical arrangement of MDF panels - horizontal lathing scheme.


As you can see, everything is quite simple - it is unlikely to be confused! 


Some points to pay attention to:
- before installation, the rails should be treated with an antiseptic - this way you protect the wood from the appearance of microorganisms;
- the length of the rail must be at least a few millimeters less than the actual distance from the top to the bottom of the structure.


Subsequence
- no matter what type of frame you are going to design - metal or wooden, in any case, first of all, you need to fix the corner posts, and then the transverse ones and those that will be located in the openings;
- a step of 50 centimeters is optimal for all types of crates;
- for fixing narrow and wide metal profiles, it is best to use self-tapping screws, since the so-called dowel-nails are less reliable for this kind of fastening.


The whole process of mounting the frame is in the next video.
Fixing panels
- we cut off the comb at the first panel and with the same side we clamp it to the crate of the adjoining wall;
- we fix it to the horizontal bars with the help of self-tapping screws, do not forget to retreat 1 centimeter from the very bottom;
- each subsequent panel is inserted in the same way into the groove of the previous one and secured with nails or clamps;
- the most difficult element is the last one: it is cut to the desired size, inserted and fixed on the vertical rack of the frame with self-tapping screws.
A video detailing the key points of the operation is below.
Method two. Mounting with glue

- used only in cases where the base surface of the wall is close to ideal;
- not recommended in rooms with high humidity;
- saves usable space.

Surface preparation and marking with this method are practically no different from the previous method we have considered. The only difference is that you need to work hard primer in order to exclude the appearance of fungus or other destructive processes.
For the rest myself action algorithm
looks like that:
- prepare the MDF panels, cut the necessary fragments with a hacksaw or jigsaw;
- apply the adhesive around the perimeter of the sheet, and draw a line exactly in the middle of it;
- apply glue not with a continuous line, but with dots - this way you will save the composition;
- press the panel against the wall and fix;
- First of all, fix whole sheets, all corner elements and fragments - last.

As an excellent adhesive for MDF panels, we recommend using liquid nails- fast, reliable and very inexpensive. 


How to fix MDF panels to the wall surface with glue, the following video will tell.
Conclusion
Information on how to properly attach MDF panels to walls of any type will definitely not be superfluous. In some cases, this material appears to be almost the ideal solution for decorating a wall surface. In addition, it is quite light and easy to install, so it is quite possible to cope with it even alone. The main thing is to clearly follow the time-tested algorithm for fixing MDF panels and not be lazy to work hard on the base base, so as not to reproach yourself for the fungus and other troubles that have appeared. 


Photo: vk.com


