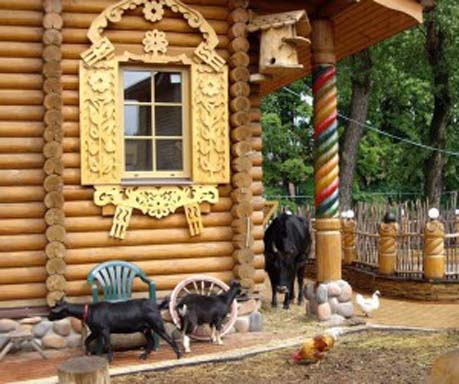
Putting platbands on the windows with your own hands is the easiest and cheapest way to give the exterior of the house an individuality and express its character, which has survived from antiquity to the present day, see fig. In the old days, an illiterate newcomer, guided by the architraves, could find the dwelling of the necessary master, specialist, official, office or hot spot. In our time, the functions of window trims are predominantly decorative, but the patterns on them have not lost their significance, see below.

Story
Architraves on the windows of the dwellings of the peoples who practiced mass wooden architecture appeared simultaneously with the windows “glazed” with fish bladder and mica. Initially, their purpose was purely functional: to cover the insulation and wind insulation - caulking - in the gap between the window and the frame.
Architraves with sacred patterns were first noted among the ancient Celts, but the true flowering of the art of creating carved architraves is associated with the unification of the resurgent Russia under the rule of Moscow and the overthrow of the Mongol yoke; Russian masters in wood carving knew no equal. The Bolsheviks wrote down the architraves in the remnants of the philistinism and declared a war of destruction on them, but at present, artistically designed window architraves are experiencing a rebirth.
This article is intended, as far as possible, to satisfy the reader's demand for how to make beautiful trims on windows with your own hands, how to give them artistic expression and install them in place.
Design
Types of structural design of window platbands are shown in the photo. Overhead platbands (pos. 1) are attached to the wall; plug-in, or box-shaped (pos. 2) - to the slopes of the window opening of windows (this is better) or in the window frame (worse). Overhead platbands are placed on the windows flush with the wall; inserted - on windows in niches.

According to the possibilities of isolation and protection of the window insulation, the platbands are divided into framing (pos. 3) and portal, pos. 5. The platband-portal is often supplemented with a visor. The platband-frame practically does not protect the window insulation/seal from blocking and is placed on windows from the inside or on windows overlooking a canopy, for example, on a veranda.
Installation
Traditionally, the installation of platbands is carried out by fastening to a wall or window slopes. Now for this it is best to use self-tapping screws (4.2-6) x (80x150), if the wall is not wooden - in propylene dowels. Attachment points are placed as evenly as possible at the rate of 1 point per 5-7 square meters. dm surface of the clypeus, outlined by its outer contour. When attaching to slopes, the attachment points are placed in a row with a step of 150-300 mm (depending on the mass of the casing, which, in turn, depends on its artistic performance, see below) along the center line of the protruding part of the bearing (base) wall. Holes with fastener heads are either hidden in the tie of the upper levels (see below), or they are puttied and painted over with the main tone.
Platbands-"telescopes"
In modern houses, insulated from the outside and sheathed with siding / clapboard, windows are often flush with the base wall, otherwise the window will sink into the wall altogether. In this case, there is nothing left to fix the casing, except for the window frame. In such a case, the so-called. telescopic architraves, but quite reliably they will hold only on windows in reinforced frames designed for regions with a harsh climate; frame material - reinforced PVC or modified wood (see below), does not really matter.

All the "telescopicity" of the platbands comes down to installing them on additional elements cut in place, rigidly connected to the window frame. The most reliable are the platbands on the groove extensions, on the left in fig. Telescopic architraves with a groove in the frame (for example, on the right in the figure) are not intended for outdoor installation: a gust of wind can break the trim, breaking the frame at the same time.
If the window frame is modern wooden or PVC with a groove for the key, telescopic architraves can be installed to such a window without removing it. If a PVC window with a wall with an inaccessible base surface is not intended for installing a trim, then there is no other way out than to remove the window, put a box under the trim in the opening, attaching it to the base wall, and reinstall the window. In this case, the platband box must have grooves that fit into the places where the window anchors are attached.
Wood for architraves
Painted, carved and slotted platbands wooden platbands (see below) are made from high-quality straight-grained pine or larch without knots. The thickness of the boards is from 30 mm. Knotty spruce is not good: outside, the knots will soon outline under any coating, and there they will begin to fall out.Carved architraves require wood that is suitable for carving - fine-grained, viscous, fairly dense - and resistant to outdoor conditions. The best species for this are oak and beech, but they are quite expensive. Linden, alder and aspen are suitable after 2-fold impregnation (the first impregnation - until seepage through) with a water-polymer emulsion; oil, silicone and mineral (borax solution) impregnation from decay does not increase the viscosity and surface strength of wood. Birch is absolutely unsuitable: from the outside, no impregnation will save it from being attacked by fungi.
Note: a magnificent carved platband is very simply obtained from the cheapest plywood, twice impregnated with a water-polymer emulsion. For more information about plywood trims, see the end.
Shield for platband
Sometimes one board is not enough for the desired width of the casing, but fastening 2-3 boards into a shield with steel fasteners in this case is a gross mistake. The wooden shield on the steel outside will soon split, then the fasteners in the gap between the casing and the wall will rust and crumble. But it is also impossible to assemble boards into a shield for a casing in a furniture way without additional reinforcement, because a cabinet or table is not designed to withstand strong winds, rain and snow. They rally the shields from the boards for the platband. see also fig. below:
- A plastic film is spread on a table or workbench with a 3-fold margin along the width of the future shield;
- The boards are folded into a bag on a film and glued with PVA or waterproof wood glue;
- When the glue sets, the package of boards is wrapped with a film;
- Plywood cheeks are placed under the package in the film and put on it;
- The package with cheeks is tightly wrapped with a linen cord;
- Pairs of wooden wedges are knocked under the turns of the cord so that the cord is pulled as tight as possible;
- After 2-3 times of complete drying of the glue, the cord, cheeks and film are removed;
- From the underside (back side), the shield is additionally reinforced by stuffing 40x20 bars laid flat across the boards.

Note: boards are assembled into a package, observing the rules for alternating the orientation of the layers of wood, like furniture panels, see on the left in fig.
Not a tree
Wooden unpainted platbands do not look good on any non-wooden wall, even if its material imitates the colors of wood well. In such cases, it is better to either put simple PVC platbands complete with the window (on the left in the figure), or more expensive polyurethane platbands, the rest of the pos. in fig. Polyurethane platbands can imitate external stucco and painted multi-level cut-out platbands (on the right in the figure); the latter option can be prefabricated on glue from elements purchased separately.

Arts are different
Artistically designed window trims can be made, firstly, framed (pos. 1 in the figure below) or in a salary, pos. 2; functionality, i.e. window seal protection, both are the same. The platbands in salaries are the most informative and sacrally significant, which we will discuss below. Frame platbands, in addition to functionality, are mainly decorative.

From the point of view of woodwork, frame platbands, in order of increasing complexity, are divided into:
- Cut-out - boards or shields are cut along the figured contour, pos. 3.
- Slotted, pos. 4 - a pattern is cut out in the board / shield. They are relatively rare, because. fragile.
- Slotted multi-level, pos. 5, up to 5 or more levels - sawn patterned modules are attached to a solid plain or cut-out base. In addition to strength, multi-level platbands are good because powerful fasteners to the wall are hidden in the tie of the upper levels, and the upper levels themselves can be fastened with small, inconspicuous fasteners.
- With overhead relief details, pos. 6. In our time, technologically, they may turn out to be simpler than cut ones, because. on a tree it looks quite appropriate acc. painted purchased polyurethane relief.
- With low convex thread, pos. 7 - they look great, but very laborious, you need to choose a lot of wood.
- With low depressed thread, pos. 8 - the complexity is less, but the work is more difficult, because very difficult to correct visible flaws.
Note: on pos. 8 shows a casing with the so-called. pillow carving - the corners of the protruding fragments are smoothed. The platbands with pillow carvings look almost as luxurious as those with a convex one, but they are almost as labor-intensive.
As for the colorful decor, the platbands can be painted, pos. 3, unpainted lacquered, pos. 4, or natural look, pos. 7, painted in different colors by levels, pos. 5, 6, and painted entirely, pos. 8. Almost exclusively carved platbands are painted, and natural - from especially resistant wood species (bog oak, etc.)
About the sculpture of architraves
In general, platbands with sculptural carvings, high (round, semicircular) and low, see Fig., could not be mentioned in an article with the tag “do it yourself”. Anyone who knows how to cut wood like that does not need explanations on how to make and put a window trim. But there is one point, little known to experienced craftsmen.

MDF - have you heard? In fact, this is tracing paper with MDF, medium density fiberboard, medium density wood board. The well-known fiberboard is low density fiberboard, low density wood board. And there is also HDF, high density fibreboard, high density fibreboard, which is little known in our country due to its relative high cost. All these materials are quite environmentally friendly, because. obtained by hot pressing wood pulp without synthetic binder, the difference is only in the temperature and pressure of the press.
So, HDF, firstly, subject to 2-fold impregnation with a water-polymer emulsion, is resistant to outdoor conditions. And in terms of viscosity and density, it is suitable for fine wood carving, but it is much cheaper than wood species for artistic carving and is produced in large, absolutely homogeneous slabs. HDF cuts not as well as walnut, but quite similar to oak and beech.
Salary
A complete set of elements of the Russian casing frame is shown on the left in the figure; the names of its parts are also given there. In specific products, certain modules may be absent, because. they overlap in importance.
The teremets with a kokoshnik and an apron have the main sacred meaning; the informative and functional load is carried, as a rule, by heads and overhangs. A tympanum with an apron usually protects from evil, and a kokoshnik with a frill, robes and a window sill are talismans that attract good. Specific figures for both were in old Russia, not only in every village, but almost in every house. What is common to goodness is a circle with radii, rays or wings (the Sun), a bird (the firebird is the heiress of either the phoenix or the simurgh), the horse is a symbol of prosperity and social status, and the fish is the original positive symbol of Christianity. Universal charms from evil - a stylized floral ornament based on useful plants.

Note: the wing, as part of a bird that carries it in the sky, has the same sacred meaning as a bird. The Winged Sun is a good messenger. The Christian six-winged seraphim is nothing but the pagan winged Sun with an angelic face.
In the European-Oriental tradition, the universal symbols of goodness are the cartouche and the medallion. The medallion, of course, is the Sun, and the cartouche is either a stylized tree of life, or the phoenix bird is on it. Both do not contradict both Christianity and ancient Slavic beliefs. In Russia, they even undertook to combine the cartouche with the medallion, for which the teremets of the casing was cut, on the right in fig.
amulets
In the city, the amulet on the tympanum and the kokoshnik were of the greatest importance, they were from damage, the evil eye, etc. The templates of the upper amulets of the window trim of a city house are given in fig. The top one has a cartouche, stylized birds, fish (the tails are clearly visible) and at least 12 other positive elements visible to a knowledgeable person.

The lower one is more for adherents of primordial beliefs. There, in a stylized solar circle, there is some ancient Slavic deity. Which one is not quite clear, but definitely good. Good tramples evil in the form of a snake: note that the lower elements of this board are not symmetrical.
In the countryside, and even more so in the forest, it was considered necessary to protect oneself equally from the upper (evil eye, slander, etc.) and lower evil: creeping reptiles and forest evil spirits. The platbands with a weighted or heavy apron were called to help in this, equal in height or greater than the upper amulet. An example of the upper and lower boards of the architraves-shore with a weighted apron of a village house is given in fig. You can try to decrypt it yourself.

Ornament
Ornaments of window frames are usually built on the basis of the so-called. rapports - elements that are self-adjoint in one direction, forming a linear seamless pattern, on the left in fig. By changing the size and number of rapports, you can quickly develop a slotted casing for any window. Combining only 2-3 rapports, it is possible to get a wide variety of patterns; stencils of several types of fully conjugated rapports are given on the right in fig.

The rapports of the pattern do not have to be completely matched with each other, this will make the pattern visually more complex and effective. For example, the pattern of the top row on the next. rice. is built by flipping "upside down" each subsequent fragment relative to the previous one. The rapports of other ornaments in fig. are conjugated either along broken or curved lines (marked in red).

Note 5: decorating the corners of frame architraves with end elements common to rapport lines often turns out to be difficult, there just isn’t enough space at the corner. In such a case, follow. rice. templates of isosceles ends of the ornament are given. Turned by 45 degrees, linear ornaments can also be built from them. These details are best cut out of plywood, see at the end.

Thread
If you want to make unique carved architraves for yourself, then the main difficulty along the way is the selection of a tool. In addition to flat chisels of 5, 10, 16/18 and 24 mm (pos. A in the figure), you will need oblique ones of the same widths, but always in pairs - right and left, pos. B. Corner chisels will be enough 6, 12 and 18/24 mm at an angle of 90 degrees, pos. AT.
Much more semicircular chisels, pos. G: to start with 4, 8, 13 and 16 mm normal, with a gutter depth equal to its width. 4 and 8 mm chisels will also need deep ones, the so-called. U-shaped, and 13 and 16 mm are also sloping.

For fine artistic carving, you will also need curved chisels-clucarzy normal, sloping and angular at 60 degrees, pos. D1, D2, D3. For pillow carving, you can not do without reverse cranberries for smoothing corners, pos. D2a. The minimum required sizes are marked on pos. D red.
You need to look for chisels for wood carving in art stores, but buying all the initially necessary randomly will be very expensive. It is better to immediately take a set for woodcarving, but not for a fine sculptural one of 40-60 items (pos. E), it will not cost less, and at first it will simply be incomprehensible to you what to do with most of these tools. You need to take a set for beginners from 12-15 items, pos. Well, it will only be necessary to buy knives-jambs at 90 and 60 degrees (shown by arrows in pos. E). With tools from such a set, it will be possible to ennoble cut-out overlays and make rather thin geometric carvings, see Fig.:

Note: if you have the opportunity to use a manual milling machine for wood, then a cut-out or slotted platband can be significantly improved visually by putting a figured chamfer along its edge with a shaped cutter - mug, see fig. on right.

Plywood
The worst packaging plywood, after 2-fold impregnation with a water-polymer emulsion, becomes suitable for medium-level artistic carving, and when painted with water-dispersion paint and varnished with acrylic lacquer, it turns out to be resistant like oak from the outside. But more importantly, the strength of plywood, unlike boards, is almost equal in all directions. The minimum thickness of 30 mm required for the architraves is 5 layers of plywood and 5 levels of decoration of the architraves. In this way, it is possible to make plywood platbands, visually almost as good as the masterpieces of the masters of the past; compare left and center in Fig.

Antique carved platbands, modern plywood platband and jigsaw for sawing out plywood
However, it will take a long time and inaccurately to cut so much plywood with a manual jigsaw, and a joiner's electric jigsaw for such thin lace is unacceptably rude. We need a jigsaw machine, it is also a stationary electric jigsaw, on the right in fig. Branded jigsaws are expensive, but those that are not inferior to them can be made with your own hands from a manual electric jigsaw (which does not deteriorate from this and remains suitable for basic work), an old sewing machine, and other methods, see for example. track. video.
Video: homemade jigsaw for woodcarving
Note: sewing machine machines are the safest and may not be electrified if the machine is foot operated. In this case, the frequency of the file moves is regulated elementarily without any electronics: you just need to jerk your feet more or less often.
After installing windows in a wooden house, there is always a gap between the wall and the window frame. The easiest way to eliminate it is to install platbands. In addition to functionality, they play the role of a decorative element that decorates the facade of the house and makes it look unique and complete. One of the most beautiful are carved platbands made of wood.
Types of platbands made of wood
Today, there are not only wooden platbands, but also wood-fiber, plastic and even ceramic. But the most popular material for their manufacture is still wood. This is due to its environmental friendliness, affordable price and high aesthetic qualities. In addition, wood can be restored, thereby extending its service life.
Smooth or profiled from solid bars. If in the future the platbands will be painted, then conifers are used, most often pine. When made from precious woods, they are varnished. Nails, screws or liquid nails act as fasteners.
With figured carving from solid bars. They are mainly made of precious wood and varnished. They can be fastened both on screws and on simple and liquid nails.

Smooth or profiled from glued beams. They can be produced already with a laminate or fine wood veneer finish, eliminating the need for additional finishing. But, there are also unfinished, intended for painting.
Stylized for a certain style. The most expensive type of platbands, which are made exclusively to order.
In addition, they are divided in appearance into flat, shaped and figured architraves.
Flat. The cheapest and easiest type of platbands. But it has a low aesthetic value.
Shaped. Most often they have a convex surface, which has cuts, protrusions or grooves. They cost more than simple flat ones. This is due to the production technology, which requires the use of special equipment.

Architraves wooden figured. They are elements of decor and give the house individuality. They are produced on special machines equipped with vertical cutters. In this case, the desired pattern is programmed, and the machine automatically mills the surface. But, despite the latest technology, the capabilities of such equipment are limited.
And only a master can make an openwork relief. The price of a handmade wooden trim will depend on the complexity of the ornament and the type of wood.
But the main difference between manual milling and machine milling is that the machine does not make a through thread, but only applies a pattern to a certain depth of wood.

Wood for making platbands
If it is necessary to make a flat or shaped casing, then a simple pine is used. For the manufacture of carved, soft wood is needed, such as linden. It is easy to process even with hand tools and is easy to grind. But because of its high hygroscopicity, it needs a high-quality finish. This involves the application of several layers of paintwork.
In regions where significant temperature fluctuations are possible, as well as high humidity or, conversely, a dry climate, wooden platbands are made from dense and hard woods. These include birch and oak, which are extremely difficult to process, but they will last for decades. Therefore, platbands from these types of wood are most often made on milling machines.
The only drawback of all types of wooden platbands is their high hygroscopicity, which eventually leads to their cracking and drying out. This can be avoided by periodically updating the protective paint layer.
Tools needed to make carved architraves
Through carving is the most affordable way to decorate trim for non-professionals. It does not require special skills, you just need to have patience, diligence and a sense of beauty.
A large number of companies offer a variety of platbands made industrially. But it is much more pleasant to make it yourself. As a tool, manual milling machines, conventional or electric jigsaws, various types of drills, chisels and hacksaws can be used.
Basic rules for making a platband
When making wooden platbands with your own hands, it is important to consider that after installation they should not interfere with the normal opening of windows. Therefore, the internal dimensions of the casing are made larger than the size of the window frame by 2-3 cm.
The upper part of the casing is called the “kokoshnik”, if necessary, it can be increased by fastening the parts with spikes. The lower part is called "towels" and is attached at an angle from the wall to drain water. It also has a thread that matches the style of the “kokoshnik” thread, but the bar for it should be 1 cm thicker than the top bar.

Before installing the platband, it is necessary to nail the slats around the perimeter of the entire window - this will completely cover all the irregularities of the wall. The joints, however, must be carefully adjusted.
All platbands are made in the same style.
Preparation for work
To make a carved wooden casing, you should choose a board 3-4 cm thick. It is optimal for the free opening of window sashes. The width should be sufficient to cover the edges of the walls and protect them from moisture. Alder, linden, aspen or conifers can be used as wood.
Choosing a small ornament is not the best solution. It will be difficult to distinguish at a distance, and for manufacturing it will require more time and a special thin tool. Therefore, the ornament should have large elements that are clearly visible from afar.
The location of the carved elements along the fibers of the tree will protect the casing from cracking. This is especially true for coniferous wood.
Use simple patterns first. The easiest for beginners in carving are round elements of the pattern, which are simply drilled with a drill. Below are sketches of samples of wooden platbands.


You can watch the video for more details on how to make them.
Installing trim on windows
You can make stencils yourself or transfer the drawing from ready-made sketches. First, a pattern is applied to the workpiece, then a hole is drilled with a drill, and the necessary ornament is already cut from it with a jigsaw. Further, the cut-out platbands must be well sanded with sandpaper.
After the carved blanks are made, they should be properly connected. In total, there are two ways to connect: on spikes or on a half-tree connection. The first method is much simpler and more popular, the second is rarely used.
A special glue is used to fasten the platband. It is important that it is synthetic, since fungus can appear in the organic compound, and moisture can also collect. All this is very harmful to wooden platbands.
If the elements are attached to nails, it is advisable to pre-lubricate all joints with glue, and only then fix them with nails. We should not forget about the treatment with glue of all joints and especially spikes.
The easiest way to install platbands on windows is with wood screws. You can decorate their hats with sawdust mixed with glue, which will later be painted over. But even without this work, the screws will be almost invisible against the general background.
Finished platbands must be coated with a protective compound that will extend their service life for many years. To do this, it is better to use special impregnations, which are enough to be updated periodically. The paint, no matter how high-quality it is, will eventually begin to crack and peel off, and it will be much more difficult to fix it.
When choosing a pattern for the future trim, it is very important to take into account the style of the whole house, because they should harmoniously complement it. Here are some examples of photos of wooden carved platbands.

The decorative framing of windows and roof ends has always been considered the element of decoration that gives the entire structure individuality and recognition. But due to the fact that the laboriousness and cost of such a decoration is simply enormous, many owners prefer to install trim on windows in a wooden house with their own hands.
When planning to save on this operation, it is necessary to soberly assess your capabilities, since the method of manufacturing and installing platbands has a large number of technological nuances, ignoring which can nullify all costs and time.
This review discusses several ways to manufacture and install decorative trim and focuses on non-standard technical issues.
Depending on the design of the cashier, different types of equipment may be needed for its independent production. In some cases, a standard set of “home carpenter” is sufficient, but if woodcarving is present in the decor elements, you will have to purchase special tools and fixtures.
Consider the relationship between the cashing design and the complexity of the technical equipment used in its manufacture.
From industrial blanks
If window trims are supposed to be made from purchased blanks with an already formed pattern or profile, then most likely there will be no need to purchase additional equipment.
When writing a review, we proceed from the fact that the workshop of the owner, who decided to equip a wooden house, already contains the following minimum of tools:
- universal screwdrivers;
- pliers and pincers;
- rasps and files;
- hand saw;
- plane;
- a hammer;
- clamp;
- axe;
- measuring devices (tape measure, square, building level).
It will not be a mistake to assume that an electric drill and an electromechanical jigsaw are also included in the mandatory tool kit of any self-respecting home craftsman.
The only thing worth purchasing before self-assembly of platbands from industrial blanks is a device for cutting boards at a given angle (“miter box”) and an end mill for punching blind holes for dowels.
We emphasize that the tools listed in this subsection are a basic set, supplemented by more specialized models as the design of the casing becomes more complicated.
With elements of wood carving
In those cases when it is planned to make platbands with elements of wood carving with their own hands, the stage of preliminary preparation of the workshop will be more difficult.
Note that it is not at all necessary to buy all the tools listed in this review, since there is a narrow specialization in this area of construction work.
So, to create slotted decorations, it is enough to supplement the basic equipment with the following tools:
- Sander;
- an electrified jigsaw in which a round saw can be used.
 The use of a machine for cutting patterns is not necessary, but highly desirable in cases where the patterns are large in area and contain small elements.
Another situation where a stationary jigsaw is indispensable is the manufacture of plywood trim, since it is extremely difficult to accurately follow the lines of the template with a manual model of such a saw.
Please note that when creating slotted patterns, it is highly recommended to use not a flat, but a round version of jigsaws. This will avoid accidental deviations from the lines of the pattern, the occurrence of which is especially unpleasant in the last stages of processing the product.
To make voluminous carved jewelry yourself, you will need to purchase a set of special chisels.
To cash out the whole house with patterned decor, it is necessary to perform a very large amount of work, so it is necessary to provide for the possibility of quick sharpening of chisels. For these purposes, you can purchase an inexpensive sharpening machine, which, moreover, is useful for straightening drills, knives, planer blades and some types of milling cutters.
Using machine profiling

 A review of the tool base used in the course of exterior finishing of wooden houses will be incomplete if we do not mention manual and stationary milling cutters.
A relatively inexpensive manual model of such a device will solve the following tasks:
- creation of profiled frames for external and internal architraves from ordinary edged boards;
- quickly cut grooves for tongue-and-groove joints or chamfer when assembling frames "with overlay";
- to make patterned figures on blanks, both in the slotted technique and in the form of volumetric carving (moreover, to do this as soon as possible).
- perform inlay of wooden panels in the original technique of internal carving.
Note that when buying a milling cutter, you need to decide in advance what types of them will be needed in the future, and add the appropriate items to the purchase estimate. The figure below shows the most commonly used designs of edge and internal milling cutters.
We select the material
We talked in detail about what platbands are made of in our article.
Here we recall that in the manufacture of cashing it is necessary to be able to find a balance between the technological qualities of wood and its climatic resistance.
In general, the following rules should be followed:
- for volumetric carving, take soft woods (linden, cherry, alder);
- for the manufacture of frames, use durable and stable types of wood (larch, oak, ash, pine).
 If the decoration is carried out according to the slotted technology, then all the elements of the casing can be made from hard rocks, since manual sawing of patterns is practically not used today.
Separately, we emphasize another advantage of slotted technology - you can use ordinary plywood to make such a decor. Surprisingly, this material, after impregnation with water-polymer compounds, becomes strong as oak, while remaining the most convenient for cutting patterns.
Moreover, volumetric compositions can be made from plywood by gluing several layers into one patch block.
The only disadvantage of such glued compositions is that in order to cut large patterns, a stationary machine is needed that allows the installation of a rounded jigsaw saw. It is almost impossible to go through all the bends of the pattern without errors and serifs, using only classic flat files, on such a thin material.
When making platbands with your own hands, it must be borne in mind that any decoration, although it is an original element of decoration, at the same time remains part of the design of the window opening.
- First of all, cashing should not interfere with the opening of windows and the closing of shutters. This requirement, simple at first glance, is not so easy to implement in practice, and it is precisely when determining the dimensions of the frame that errors are most often made.
The internal dimensions of the frame must be such that the trim completely covers the end of the pigtail, but at the same time does not interfere with the full opening of the windows. That is, when drawing up a drawing, it is necessary to first determine the working area of the windows in the open position and only then develop the wiring diagram of the casing.
In cases where the platband is joined to external slopes (and this often happens when PVC double-glazed windows are installed in casing from a embedded beam), its internal contour must correspond to the outer perimeter of the slopes.
- The next general requirement for the design of the casing is that the upper block (bar) must be thicker than the lower one. This is necessary to reduce the amount of water entering the bottom of the cashing.
 In the classical designs of architraves for wooden and timber houses, this requirement was implemented in the form of a massive cornice, which creates a kind of cover for the entire lower part of the window.
More stringent options for exterior window trim do not imply a difference in the thickness of the planks, but the installation of ebbs, both under the window and above the frame.
- Separately, we emphasize that the casing is exposed to direct exposure to solar ultraviolet radiation for a long time, as well as to strong temperature and moisture changes. No matter how high-quality the wood processing is, it will in any case change its original dimensions and begin to let moisture through to the fasteners.
In view of this, the classical method of its assembly does not involve the use of metal nails and screws (they rust and fall out). The best option for manufacturing a wide frame and shields for platbands is to use glued compositions from boards and wooden dowels.
Below is an example of the manufacture of a prefabricated shield for a decorative cornice without the use of metal parts.
The illustration shows that the shield is assembled from boards glued end-to-end. Laying of boards is carried out with the coordination of the internal pattern of wood. Adhesive composition - PVA or waterproof wood glue (holding time - 2-3 glue polymerization periods).
Pulling is done with the help of ropes and pegs that increase compression.
Production of slotted platbands
As a detailed answer to the question of how to make platbands for a window opening in a wooden house yourself, we will consider the technology for manufacturing and assembling a slotted platband.
Despite the fact that there are more complex options for framing frames (for example, with three-dimensional wood carvings), this description adequately conveys all the subtleties of this stage of facade decoration.
First, we give a complete list of operations that must be performed to make a platband:
- Drawing up a technical sketch and calculation of the main dimensions.
- The choice of the artistic scheme of the product (drawing patterns, preparing templates).
- Preparation (or purchase) of the necessary lumber and fasteners.
- Marking parts and connections.
- Cutting blanks and adjusting dimensions.
- Production of the supporting frame of the platband (for those cases when the slotted pattern is invoiced).
- Transferring pattern patterns to blanks.
- Development of a scheme of cuts and determination of points for drilling initial and closing holes.
- Cutting out a drawing.
- Chamfering and grinding.
- Antiseptic treatment and priming of all parts.
- Painting each part individually (especially if multiple color schemes are used).
- Installation of overhead parts on the frame.
- Installation of supporting rails on the wall of the house (if the house is made of timber or frame, this operation is not needed).
- Installation of the frame on the window opening.
Now consider the most difficult stages in more detail.
Pattern selection
 We note right away that, without having practical experience in wood carving, the pattern for the casing should be chosen as simple as possible, without small details.
The easiest way is to take a ready-made template and print it in full size. It is best to do this on a large plotter, but you can use the partial printing feature found in many graphic editors.
Frame manufacturing
There are two different approaches to making a frame for a platband:
- Cutting a solid frame from a glued shield.
- Assembly from boards of each element of the base (frame, shield for decorative cornice).
The first option was discussed above, but for its application it is desirable to have the appropriate experience and skills.
The second scheme is classic and consists in assembling a square frame of four planks.
Corner joints are performed in two ways:
- by the "thorn-groove" method;
- overlap.
A tongue-and-groove connection is considered more reliable, but special equipment (milling cutter) is required for its manufacture. The overlap joint is made using a simple hacksaw and a drill.
Please note that the base of the platband may include not only a frame, but also a triangular shield for placing decorative elements of the cornice. When assembling it, there is a problem of connecting several boards into a single whole. If end gluing is excluded, this problem can be solved with the help of anodized brackets and self-tapping screws.
Making carved elements
 The slotted platband can be both overhead and solid. In the first case, the frame and patterns are made as separate structural elements. In the second, each framing plank simultaneously performs a functional and decorative role.
The most popular is the first option (consignment note), due to its manufacturability and versatility.
Pattern cutting is performed after the pattern is transferred from the template to the workpiece. Through holes are drilled at the start points of the cut and in the area of bends.
The working tool in this case is a manual or stationary jigsaw.
If, nevertheless, a manual saw model is used, then in order to avoid distortions, the workpiece must be fixed with a clamp on a horizontal plane.
In most cases, the cut plane is strictly perpendicular to the outer surface of the board, but to give a three-dimensional effect, chamfers can be removed from the outer side of the pattern.
After the drawing is completed, the workpiece is cleaned of large burrs and chips (inside and out), after which grinding is performed. Surfaces inside the decor are cleaned with a drill and a schreiber. It is most convenient to finish the outer planes with a grinder.
Protective treatment and painting
 All efforts to make a wooden casing will be in vain if measures are not taken to protect it from decay and moisture deformation. This is especially true for carved elements, as they are made from unstable wood species, as well as internal trim installed in baths and saunas.
In order to properly process the carved and power elements of the frame, we recommend that you follow the following sequence of actions:
- Painting.
- Protective lacquer.
The antiseptic composition can be used the same that is used to stabilize logs during the construction of log cabins.
 Painting should be started only after the antiseptic has completely dried. Please note that most modern protective compounds have priming properties, so a separate primer coating can be omitted.
Narrow brushes are used to cover the inner surfaces of the pattern, wide brushes for the outer ones.
Lacquering is carried out before the assembly of the product: when the painting of all products is completed and after the paint has completely dried.
To protect the platbands on wooden windows, acrylic wood varnish is suitable.
In those cases where plastic decorative overlays are used, all the operations listed in this subsection apply only to the frame elements.
Casing assembly
After all the necessary components are made and painted, they must be assembled into a single structure.
This is best done on a flat surface, prior to installation on a window opening.
The fastening of decorative elements to the supporting frame can be done in the following ways:
- self-tapping screws;
- finishing nails;
- deaf wooden dowels with landing on glue.
In those cases when it is necessary to sheathe the upper edges of the casing with carved patterns, the decorative element and the frame are joined perpendicularly. Reliable fixation in this type of joints is provided by mounting corners.
Separately, we note that the most durable platband will be obtained when the decor is planted on wooden dowels. At the same time, not only the contact zone, but also the entire inner surface of the carved element is covered with glue (to prevent moisture from leaking).
If, nevertheless, metal fasteners are used, then it is necessary to select the most protected samples of screws and nails.
Tip: a good "camouflage" for the heads of the screws is obtained from a mixture of fine sawdust and waterproof wood glue.
window installation
 In order to correctly install the assembled casing, it is highly desirable that at least two workers perform this operation. This is necessary in order to accurately align its position before final fixation.
Despite the fact that the installation of the assembled frame is carried out at pre-marked points on the casing, a visual correction of its position will still be required.
It should also be borne in mind that when assembled, the entire structure can be very heavy, and if you follow all the points of the safety rules, then the installation of such products should only be carried out from scaffolding.
Conclusion
At the end of the review, let's dwell on one more feature of the platbands: non-standard docking with the wall of the house.
Since it is impossible to make fixed connections between the elements of the framing frame and the wall of the house, the problem arises of closing the gap between the inner surface of the casing and the uneven contour of the logs. From a technological point of view, its presence is insignificant, but from an aesthetic point of view it is very noticeable.
Therefore, in cases where the platband too clearly emphasizes the uneven contour of the wall, wooden slats are installed between the wall and the platband, providing sliding contact and giving the entire window unit a more complete look.
The company "Master Srubov" accepts orders for the entire range of work performed in the course of the transformation of a log or log cabin into a comfortable house, including the manufacture and installation of platbands. You can clarify the terms of cooperation and calculate the cost of the work by going to the page and contacting us by any of the methods of communication published there.
If inside the house you can allow a variety of interior design options, then outside the possibilities are significantly limited. In addition to the original color of the wall painting or the material with which it can be finished, it is difficult to come up with something else. In the old days, this issue was solved with the help of window frames, which served as a real decoration for any house, showed the mastery of the owner or master creator. This tradition has survived to this day, although it has partially changed.
Peculiarities
Platbands were traditionally used in wooden houses. They helped decorate the windows and effectively complement the composition of the facade. With the help of such elements, you can visually enlarge the window opening or reduce it. Initially, great importance was attached to the design of the house, each owner sought to show the individuality of his building.


With the help of platbands, you can achieve a different effect.
- Visual decoration of the house, giving it a special flavor and charm, the ability to distinguish it from a number of standard ones.
- Giving the window a different shape with the help of platbands of different configurations, sizes and patterns. A small window can be made large using openwork designs.
- Creation of a holistic composition of all elements of the facade. Using the same platbands on windows and doors allows you to complete the design of the house.

With the help of platbands, you can protect window openings from the negative influence of environmental factors. The seam between the frame and the house may have small gaps in which moisture enters during rain, and dirt clogs with strong winds. All this contributes to the development of harmful microorganisms that destroy wood. Therefore, the frame begins to let air through, which significantly reduces its thermal insulation qualities.


The platbands cover the very gap and do not allow moisture or dirt to get to it. In addition to the obvious advantages of platbands, there are also negative factors. It is also worth knowing about them when planning the installation of such details on the windows of a wooden house. These include several factors.
- Active reaction of decorative elements to weather conditions, which contributes to the deterioration of the material. To prevent this from happening, it is necessary to treat the products with a special substance, which significantly increases the service life of the casing.
- The need for constant care. Platbands need to be painted or varnished annually. If this is not done, then the product begins to crack. As a result, instead of decoration, it will only spoil the appearance of the house.
- When planning the manufacture of platbands, you need to choose the right material for them. If this is not done, then it is unlikely that the desired effect will be achieved. If it is difficult to cope with such a task alone, it is better to enlist the support of a professional.


Now there are products made from modern materials that can have the most diverse appearance. At the same time, caring for them is much easier. They are not affected by the environment, they are not afraid of moisture and even cold. They do not crack over time and reliably serve for many years. For connoisseurs of aesthetics, this is not the best option. But for those who want to decorate their home, diversify the appearance of the facade, this is what you need. It is such a product that will create the necessary appearance, while not requiring increased attention.
Kinds
The species diversity of platbands is enormous. It also lies in the drawings that are applied to the tree, the shape of the product itself. In addition, modern technologies make it possible to create window decorative elements from a wide variety of materials.

If we talk about the appearance and patterns, then there are several types.
- slotted through which you can create elegant and beautiful images.
- openwork, which are distinguished by bizarre shapes that can distinguish the hand of the master from other options. They look like a continuous canvas on which they create a pattern.
- carved, able to create a unique appearance and protect the window opening.
- Overhead, which have a complex shape design, since the carved element is superimposed on the plate. Such products can be created separately or as a decoration for existing platbands. In this way, it is convenient to update existing decorative elements.
- Simple, which have a smooth surface. They don't have any patterns. The shape of such elements can be different (with rounded edges, even, narrow and wide).


When choosing a material for a platband, it is important to understand that it should serve as protection for the window, and therefore you should not rush to buy material without knowing its features.
The most popular decorative platbands are made of wood. They fit beautifully into the design of the facade of a wooden house, so they still do not lose their relevance. In order for such parts to serve as long as possible and correctly perform the tasks assigned to it, they must be properly processed.

If such processing is done, the tree will not rot, moisture will not damage it. In order for wooden architraves to remain beautiful for a long time and decorate the house, it is best to open them with varnish. To date, there is an alternative option that can replace varnish. This is a wax based product. Both options preserve the appearance of the tree, give it a more elegant look, significantly extending the service life of the architraves.
In addition to wood, there are also decorative products for windows made of other materials.


MDF
The MDF panel has a laminated finish. Usually such platbands have the form of a plank with a pattern for natural wood. There can be quite a lot of colors and textures, you can easily choose a frame for the window opening of any wooden house.


Plastic panels
Products made of plastic panels are considered the most modern, because they are easy and convenient to care for. This option can be chosen by those people who do not have time to take care of their own home, but they want to see a beautiful building that they can admire. Most often, plastic platbands are used for metal-plastic windows. However, recent trends have shown that they are well combined with wooden structures, fully fulfilling their task.


Polyurethane
Polyurethane platbands can also be used on windows in wooden homesteads. They are light weight and deformable, which makes it possible to bend them in the right direction. Installing such elements is quite simple, and the terms of their operation will please anyone.


PVC
PVC products are considered the most common today. You can find varieties of such platbands in white and a wide variety of color variations. Install the product from the side of the street, it can easily cope with any weather conditions. The advantages are the abundance of colors and shapes that can be given to such a material.


Styrofoam
Styrofoam can also be used as a material for the manufacture of platbands. For this purpose, a dense variation is suitable, which will not differ in the same strength as a metal casing. This is the reason why such products are not used in countries with high seismic activity, where even the slightest vibrations of the earth's crust would crack the windows. The color of such decorative elements is white, but with the help of paint you can change it by choosing the right one for the estate.


Metal
There are also metal platbands, which of all are considered the highest quality in terms of protecting the window from environmental influences. For their production, metal sheets with a small thickness are required, which makes it possible to manufacture structures of various shapes. The advantage of this option over the same plastic is the resistance of the material to mechanical damage. This makes the service life longer.
To give a fresh and interesting look, iron products can be painted, and the appearance of the house will immediately change. The popularity of this type of product is also created with the help of a price that is quite low, taking into account all the positive qualities of the material.
To install metal products, it is extremely important to measure the window correctly in order to install them without much difficulty. If there is a desire to install unusual metal trim, you can order carved items that will look interesting on the facade of the house.


Inside, you can also provide something similar to create a holistic image of the building on each side. Usually the outer and inner casings are quite different from each other. It has to do with their functions. Facade decorative elements should combine aesthetics and quality. Otherwise, they would hardly have been used to decorate the premises.
Sketches
The use of platbands on the windows of a wooden house should give the building a complete look, make it more beautiful. Therefore, simple glossy panels are unlikely to be able to fully cope with such a task. It is best to pick up carved elements or make them yourself.
With a complete lack of skills in working with wood, it is better to choose the first option. But for lovers of manual labor and original products, the ideal solution would be to work according to a sketch.


The first step is to decide on the choice of the pattern that will be on the casing. To do this, you can use books, the Internet. You can come up with a sketch yourself. As soon as the ideal option is found, you need to enlarge it to natural scale and print it. All patterns must be cut out and accurately transferred to cardboard, with which the main work will already be. A piece of cardboard should correspond to one part of the casing.
It must be placed on a piece of wood and circled with a pencil drawing, which will continue to cut. In order to choose the right pattern on the casing, it is worth making a drawing of the whole house using all the decorative elements. If the finished version turned out beautiful, and all parts are in harmony with each other, then the idea was chosen correctly, you can proceed to its implementation.
For some houses, simple architraves are suitable (for example, if the estate was envisaged in the minimalist style during construction).

If you want to create something grandiose and beautiful, you need to choose wide planks and start creating. For the manufacture of good architraves, it is best to choose pine (especially those planks where there are practically no knots). As tools that are useful in the process, you need to have a soft-start jigsaw to manually cut out all the necessary details. In addition, it will be useful:
- feather drill with a diameter of 12 mm;
- screwdriver;
- Sander.


The active process of working on window trims begins immediately after the entire drawing has been transferred to the future product. First, they take on the inside of the pattern, making openwork details. To make the process more convenient, using a drill, you need to make several holes in the board, which will be located on the outline of the picture. Sawing the pattern itself is done using an electric jigsaw, which is inserted into the finished hole. Then they simply lead along the contour, cutting out the necessary part.
Once the inside of the drawing is ready, you can proceed to the outside. It is necessary to make two files (at the beginning and at the end of the product) to make it easier to navigate the work.
It is important to make sawing in one motion, without stopping, so that the finished casing turns out to be as curly as possible. Such a sequence of actions is inherent in each detail in the overall design of the platband on the window leaf.


The resulting product is far from what it should be. Therefore, you need to use a grinder, clean out all the bumps and roughness. Only after this stage, part of the structure is treated with special solutions. After that, it can be ready to be used or painted for a more original look.
How to do it yourself?
Making architraves for a wooden house with your own hands is much more interesting than the banal purchase of such elements in a store, because you can choose the pattern that will meet the spirit of the owners themselves and emphasize the design of the facade desired by the residents of the house.


You can choose from a variety of options.
- flat cornice. In this case, the architraves symbolize the wealth and style of the house. They are used for beautiful and elegant buildings, made in a simple style.
- Arched finish. The platbands, which are complemented by an arch on top, will be an ideal addition to window openings that do not have a standard rectangular shape, but a rounded upper part.
- With patterns and carvings. Platbands of such a plan will be able to give the house elegance, make it unusual and beautiful.
- With the use of hanging elements. These are the details that complement the product after it is completed. In this way, you can add what could not be done initially. The use of hinged parts makes the design voluminous and more interesting.


If you are going to make platbands yourself, you need to choose the right material for the future product. It is important to choose a color based on the color of each component of the house, to find the perfect option for decorating this product. You can take advantage of the offers that are in hardware stores and buy a ready-made version, which is much easier and faster. Installation of such a platband will be easier, since it already provides all the necessary fasteners, as well as ease of installation.


If there is a firm intention to do everything yourself, there are several options for making beautiful platbands.
- slotted option- a product in which there is an internal pattern and a beautiful border. Traditionally, such a casing has a white or light color, it is attached to buildings with a contrasting shade of walls.
- Laid on thread type created by cutting out individual elements and gluing them or nailing them onto a solid wooden canvas, which will serve as a casing. This design option makes the pattern voluminous and at the same time airy. With the help of such overlays, you can decorate any platband.


If the house already has carved platbands, but they require repair, you can remove all or part of the structure and restore it. If there is no way to repair some part, you can remove it completely, replace it with a new one. If there is a need to make completely new designs on the windows, you need to prepare all the necessary equipment, which includes:
- jigsaw;
- plane;
- grinder;
- cutter;
- sandpaper;
- strips with a section of 30x100 mm.

This is what will be needed to create simple platbands. To start work, it is necessary to process all future details with a planer, and then use a cutter to give them a finished look. In order for the product to have a presentable appearance, it is sanded with sandpaper. This is the simplest option for making platbands, which does not require great skills and abilities. If you want to make something original and beautiful, you should choose a carved type of product. For such work, you need to add curly chisels to the main inventory.
For the manufacture of the platband, you can use two technologies (normal and overhead). In the first variant, the drawing is cut out on the plank of the casing itself. In the second, it is made on an additional bar, which is then attached over the main element.
For the first attempts at woodcarving, it is better to choose the simplest options for the pattern so that you can easily deal with them.


If the platband is made by an overhead option, then the work process will go in the following sequence:
- processing planks with a planer;
- preparation of overhead strips with a thickness of at least 10 cm;
- the formation of the future drawing on cardboard and its cutting;
- transferring the pattern from the stencil to the overhead bar;
- a drill needs to make holes throughout the pattern;
- with the help of a chisel, you need to finish all the carved elements;
- polishing the finished lining;
- fixing the lining on the platband with glue or self-tapping screws;
- collection of each detail of the platband;
- installation of the finished structure on the window opening.


Installation of finished structures on the window can be carried out using nails, screws or glue. Most often, platbands are placed on the sides and top of the window, sometimes there are lower parts of the structure. In order to properly and aesthetically join the edges of each part, they need to be cut at an angle of 45 degrees with a hacksaw or miter box. If the wall is concrete, dowels and screws are needed for reliable fastening.


To beautifully decorate the window of a country house, you need to know not only basic information, but also some nuances, without which it may not be possible to create a truly wonderful piece of handicraft. These moments include several factors.
- When choosing boards for the manufacture of platbands, it is better to give preference to those options whose thickness will be 3-4 cm. It is much more difficult to work with thicker materials, especially to perform curly cutting.
- Starting the work on the carving of architraves for the first time, it is worth taking a simple pattern and polishing it, after which you can try something more complex and interesting.
- In addition to the thickness of the wood for the platbands, it is worth taking care of the correct selection of its width, because the main purpose of these elements is not so much to decorate, but to protect the window.
The platband should cover the opening between the wall and the window frame.


- When planning to cut any patterns, it is worth positioning them correctly on the board so that they go along the grain of the tree, and not across.
- When choosing a pattern for the first attempts at carving architraves, it is worth looking at something large with convex shapes, which will not be difficult to do, and the result will please with its beauty. If you choose a small ornament, in case of an unsuccessful outcome, the casing will look sloppy. This will spoil the impression of the external facade of the house.
Making platbands on the facade of the house is a long process and requires perseverance. Therefore, it is worthwhile to clearly assess your strengths before taking on work. Choosing the right material, the right pattern, its successful implementation in life is only half the battle. This is followed by a no less time-consuming process of processing platbands so that they serve for a long time, while performing their functions with high quality.
The final stage of work with these decorative elements is their installation. At each stage there is a specific choice, the result of all work depends on the correctness of its adoption.


Beautiful examples
When planning the manufacture or purchase of platbands for a wooden house, you should choose the option that is best suited for a particular building.
With the help of the Internet and other sources of information, you can see sketches of drawings, ready-made works, which will give food for thought.


Carved window frames- this is a simple and inexpensive option for decorating your home and giving it personality since the days of old Russia. Several decades ago, each region of our country knew masters with an individual style of decorative execution of architraves.
In this way, you could express your character. For example, in ancient times, a stranger could determine by the architraves whose house it was - an official, a craftsman, or just a hot spot.
These days they are only decorative. Today, even a building built according to a standard project can be distinguished and made unique. I am glad that interest in the origins and carved architraves is being revived.
Everyone can make their home individual, and besides, remember the origins of this art direction, which originated in the days of the ancient Celts.
You can design and come up with a composition for framing yourself, and then proceed to implement the idea, armed with the right tools and patience. Platbands have received a second life in our time, and are becoming an increasingly popular decor.
A bit of history
The word "platband" indicates its location, that is, on the face. Among different peoples, platbands were practiced during the time of wooden architecture. They appeared at the same time as windows that were glazed with fish bladder or mica. Initially, platbands were created to cover the insulation and to isolate from wind and precipitation.
Patterned elements were originally seen among the ancient Celts, but their significance came to them in the era of the revival of Russia after the Mongol yoke. Masters in Russia were the best in woodcarving.
When the time of Bolshevism came, the carved platbands were recognized as philistinism and declared war on them. The destruction has begun. Today, carved elements have received a second life.
It is interesting that in the old days they believed that platbands could protect from the evil eye and served as a talisman, so often in the patterns one could see various figures and plants that make sense.
The value of the platband in the building
Platbands, in fact, are elements of decoration and the correct name is cashing, which has many functions:

Design
There are several types of carved platbands.
Overhead
Materials and form
For the manufacture of platbands, natural or artificial materials can be used. Previously, elements were carved from wood, which has resistant qualities to atmospheric factors.

Important! Platbands should be regularly treated with waterproof paint or varnish to prolong their life.
Other materials used include:
- — laminated MDF, thanks to which you can accurately repeat the color of any type of wood. But, such a thread is only suitable for internal use;
- - ideally combined with plastic windows. It does not rot, with a rich color palette, resistant to light;
- — polyurethane- light and unpretentious. Recommended for rounded windows;
- — metal- mainly used to protect the assembly seam.
Wood before falling into the hands of the master must lie down for at least 3 years to a dry state. The board, if possible, should not contain knots, chips, resin pockets. It is almost impossible to buy wood of this quality on the market. It is better to contact hardware stores or sawmills. It is also interesting that today you can buy ready-made platbands.
For self-production, chamber drying is perfect, after processing in a special chamber. It definitely won't warp or crack. Its humidity is only 10-12%.
Thread types
Let's talk about three ways of framing:

Do-it-yourself platbands
Drawing templates
To create beauty for windows, you first need templates for a pattern that is transferred to a wooden surface.
The template is created based on the choice of a pattern that can be found in large numbers on the Internet or just in a photo.
To enlarge a drawing, there are several options:

When the drawing is enlarged, it is transferred to cardboard to be cut out and used as a template. For each pattern, there is a pattern. Then the finished template is applied to the board, outlined in pencil. If the windows are of different sizes, then it is better to make a drawing with a repeating pattern. To do this, one or two elements are selected in turn.
The upper part of the casing is called the kokoshnik, and the lower part is called the towel. It should be taken into account that fine threads are complex and quickly become unusable, which will require replacement of parts in the future. When working with drawings, you can come across the concepts of a lower bar, it is also a window sill, a vertical rail, an upper bar, coat hangers, flowerpots, a diadem, an ear, a panel, a valance, croutons, a sandrik, an ochelie, etc.
Important! It is necessary to take into account the slope at the top of the carved casing in order to prevent the accumulation of snow and water during operation.
Design
At the heart of any process is a developed project. To do this, you need to make a drawing of the facade of the building with a detailed drawing of the elements. This will help you understand how the exterior of the building will look. If you have a visualization program, you can complete the project in volume.
If we turn to traditions, then in ancient times the elements on the platbands carried the following meanings:
- The sun is carved on the kokoshnik and is a symbol of life and energy.
- The snake - reminds of wisdom and fertility.
- The cross is a symbol of harmony between two worlds - material and spiritual.
- Plants are the embodiment of unity with nature.
- Earrings - means hospitality.
- The bird on the window is the connecting symbol of all times.
Work
The workflow begins with the preparation of materials and tools. It is better to use pine boards without knots.
From the materials you need:
- jigsaw with a smooth descent and files;
- feather drill with a diameter of 12 mm;
- chisels;
- sandpaper;
- Sander.
Measures are taken from the window, stencils are outlined. When the stencils are circled, cutting begins. First of all, work is carried out with internal openwork parts. To do this, you need to drill holes along the contour of the pattern.
Important! The drill should be perpendicular to the board.
Then the jigsaw comes into play. You need to start work with holes and then go along the contour of the picture. When the patterns inside are done, you can proceed to the outside. The tool must work from one end of the casing to the other. To facilitate the work, you can make incisions.
 The result is a finished part on one side. For the other side, you need a mirror image of the pattern.
Be sure to use a grinder or paper to give an aesthetic appearance. An emery wheel with a grain size of 80 is used. The fastest option is a grinder, it will be slower to do it with a drill with an emery wheel and for a very long time with sandpaper.
After the work done, the casing can be primed to protect against bugs, fungi, rain, sun and painted.
Painting
It should be understood that wood is a very sensitive material and can rot or be damaged by insect attacks, so the part is often machined. The better the processing, the longer the decoration will last. Parts must be thoroughly dried. Then you can paint the surface. Water emulsion for wood is ideal. The color can be chosen at will, in this case white and cherry are more often used.
You can buy wood oils that soak into it. It is easy to update such a coating - brushed off the dust and painted on top. Among the minuses are the high price and a small selection of colors.
For painting, you need to prepare two brushes - a wide one for the outer surface and a narrow one for the side parts and hard-to-reach places.
Coloring is carried out in two stages. The second layer can be applied after the first has dried.
The final stage is varnishing, it is better to buy a water-based acrylic composition. The varnish is applied in one layer so that there are no smudges. Drying of platbands is carried out in the open air.
How to assemble
 Before the installation itself, the parts are assembled on the window to make it more convenient to work in the future. Scaffolding is recommended to make the process safer and more convenient.
The classic option for installing platbands is to mount to a wall or slopes. Today, this is done using self-tapping screws 4.2-6x80x150. In the case when the wall is not wooden, then propylene dowels are used. As a rule, one attachment point per 5 square decimeters of the casing.
When attaching to slopes, a step of 150-300 mm is used. The figure varies depending on the mass of the casing, which depends primarily on the thread. Heads from fasteners are hidden in the upper level tie, or putty and painting are used.
With overhead threading, finished elements are attached to a wide casing with nails without caps. For strength, the joints are lubricated with glue. Self-tapping screws can damage the carved area.
telescopes
Modern buildings are already insulated and often sheathed with siding. Windows are usually placed flush with the main wall so that it does not sink into it. Fastenings are carried out on the frame without options. Of course, unless telescopic models are provided. However, they can only be held in reinforced frames used in places with a harsh climate. The frame material itself is more durable or modified wood.
Telescopic elements are installed on undercut additional elements related to the rigidity of the frame. Fastening is provided by groove dobors. Such telescopes are not intended for installation outside, even a gust of wind can break not only the casing, but the entire frame.
On a wooden frame or PVC with a groove for the key, telescopes are installed without removing it. If the base surface of the window is not available, then you will have to pull out the entire window.
The nuances of the carved finish
- compatibility with the house - often when combined with plastic frames, difficulties arise. It is better if the plastic in this case imitates a wooden structure;
- your experience, if the platbands are made for the first time, then you need to choose an easier pattern;
- each region of the country had its own traditions and design


 Constellation Scorpio description")


