How to make beds from boards in the country to get not only a well-groomed neat garden, but also practical benefits? Making garden plantings with your own hands is easiest with the help of wooden borders.
This is what homemade beds from boards look like
Advantages and disadvantages of wooden beds

The disadvantage of wood is rapid deterioration, especially with constant contact with water and earth. However, if the material is treated with protective antiseptics, the service life can be extended by 10 years or more.
What wood for boards to choose
Any boards for fencing beds can be used: slab, timber, edged material, lining.

Step-by-step instructions for making beds from boards
The choice depends only on how much the buyer is willing to spend on the design of the beds.
- Oak and ash. High strength and durable material, with excellent rot resistance. However, they are also expensive.
- Larch. An excellent choice - larch has high strength and resistance to a humid environment.
- Cedar. Coniferous wood is the best option for a wooden garden bed in the country. Good value for money and high quality.
- Pine. Pine boards are inexpensive, but do not have a long service life.
- Acacia. Sufficiently strong acacia boards can be used for arranging beds.
Wood processing and protection
To extend the life of a wooden bed, the boards should be treated with protective compounds:
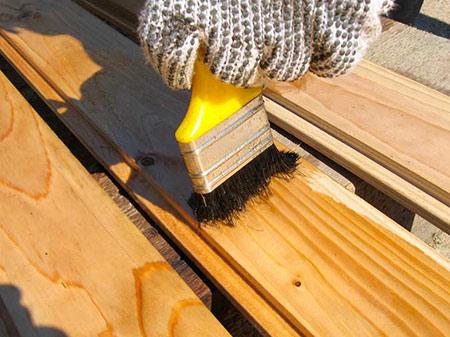
Dimensions of the beds from the boards
Everyone chooses the shape and size for the beds according to their taste and the area of \u200b\u200bthe greenhouse or plot that allows. There are general recommendations on the size of the fence, in which the garden bed will be most effective:
- width from 90 to 120 cm;
- height from 15 to 50 cm.
The length of the fence can be any, however, with a large length, it is desirable to provide the bed with additional supports. The width of the beds is the most important parameter. It is best to organize the area so that there are no more than two rows of crops in the garden. Firstly, with such a planting, all seedlings will receive enough sunlight and air. Secondly, an overly wide garden bed is difficult to care for and water.
The height of the beds is chosen arbitrarily, as long as caring for it is not difficult.

Scheme with the dimensions of the beds from the boards
Depending on the type of soil and type of crop, the following advice is given on the height of the plant fence:
- If the soil in the country is fertile, the bed can be low 15-20 cm. If the soil is stony or unsuitable for planting, from 30 cm. Some gardeners make the height of the beds up to waist level so as not to bow down when working.
- The height of warm compost beds should be at least 50 cm. High beds with compost will reliably protect the roots of plants in the spring from unexpected frosts.
- For early ripe crops of radishes, lettuce, onions, it is better to use beds above 20 cm for their rapid ripening.
- If it is planned to grow potatoes in the beds, their height should be at least 40 cm.
Installation of a simple box of boards
The design of the fence for the beds is quite simple and can be easily done by hand. To work, you will need simple equipment and materials:

Instructions for making a box for beds
- boards - 2 short of the same length and width, 2 long;
- wooden posts made of timber, pointed on one side - 6 pieces;
- drill and screwdriver;
- wood screws or nails;
- shovel;
- hacksaw;
- a hammer;
- tape measure and level.
Work order:

A wooden garden bed of a simple design is ready. You can fill it with earth and plant fruits and vegetables.
Do-it-yourself raised or raised bed
Raised beds have many advantages over traditional beds:

With all the undeniable advantages, high beds also have disadvantages:
- It will take, albeit elementary, but carpentry skills and knowledge to build a raised bed with your own hands.
- High beds dry out faster than classic ones, so if there are problems in the country with enough water for irrigation, such beds can become a problem.
We will send the material to you by e-mail
A dacha is not just a plot for growing and harvesting. For many, this is a favorite place to relax and implement ideas for. Often the method of planting vegetable crops is relegated to the background, but this is not correct, because the appearance of the entire landscape largely depends on their interesting location and attractive appearance. This article tells you the easiest way to make beds for the lazy at the dacha. Photos and descriptions of the most successful ideas, as well as ways to implement them, should help make your site comfortable and well-groomed.
Tall structures made of boards for planting crops will be the highlight of any site
A garden bed is most often a fenced plot of land intended for growing a certain type of plant.
The main thing for a good harvest is fertile soil, the right planting time, and high-quality processing. However, in some cases, you should pay attention to other factors:
- Orientation to the cardinal points.
For most crops, this does not matter, but for example, rows of tomatoes and cucumbers for a good harvest should be located from north to south.
- Height.
If you want to harvest earlier than usual, you should mount tall structures. It is not difficult to make them (for example, you can assemble them from boards with your own hands without special devices in a short period of time), and the earth in them warms up faster.
When planning future beds, you need to know several aspects:
- The yield of the selected crop (that is, how many plants grow per 1m2 of area).
- Compatibility of plants that you plan to plant in the same area.

- Slate.
Usually this material is used only if it is available (for example, left after the repair of the roof).

- Plastic.
The main feature of plastic is that it can be given any shape, so it is great for round or other curved fit options. In addition, it is not affected by precipitation and low temperatures, so it will last a long time without losing its original attractiveness.

An expensive and durable option.

- A natural stone.
It produces the most spectacular bumpers that will serve for many years. Unlike bricks, stones have an irregular shape, which will allow you to make landscape design in an eco-style. Disadvantages of stone ledges: high cost and gradual sinking into the soil under the influence of its own weight, so such a ledge must be periodically checked and corrected.

Qualitatively made with your own hands from improvised materials will serve for many years, but for a good harvest, its correct location is also necessary.
Placing beds in the garden: how to arrange, photos, tips
The quality and quantity of the crop depends on the proper location of the beds in the summer cottage, so this issue should be given special attention. First of all, you need to know the following:
- Beds located on the cardinal points (from north to south) are a good solution only for low plants on a flat horizontal area.
- If the site has a slope that cannot be leveled, the beds should be across it regardless of orientation.
- It is desirable to make rows of one plant of the same size. This will make it easier to calculate the amount of fertilizer, the degree of irrigation and planting.
- If the site has multidirectional slopes, choose the south side (the crop will ripen faster on it).

In small areas, there is often a lack of free horizontal areas for planting. If this is your case, try one of the following ideas:
- Create vertical designs.

- Use unused items for planting plants (for example, a wheelbarrow, a barrel, and so on).
- Attach the bed to the recreation area.
How best to make beds in the garden - options
The beds are classified according to design features, while the following types are distinguished:
- Traditional (flush with the rest of the site, dimensions make it easy to reach the center from any side (right or left)).

- High (30-40 cm above ground level, contribute to the most rapid ripening of the crop).

- Deep (during the device, a trench is dug 20-30 cm deep, due to which the earth most often does not freeze through, and the landing can be carried out earlier).
- Narrow (for example, according to the Mittlider method, described in detail in the next chapter).
- Vertical (an excellent solution for small areas, but not all plants can be planted in this way).
Related article:
How to make beds from boards with your own hands
Now let's look at how to properly make beds in a garden made of wood. This material is the most common when arranging beds. Board structures have the following advantages:
- Reliability.
The tree perfectly retains moisture inside the row, and also does not deform for a long time.
- Low cost.
This material often remains after construction. If it was not there, you can buy boards at a fairly low price.
- Ease of installation.
The main thing is high-quality wood processing, if this is not done, insects and moisture will quickly destroy the structure.
- Attractive appearance.
Wood is a material ideal for eco-style beds.
The only drawback of board structures is their fragility (in comparison, for example, with plastic or brick). However, the ability to change them quickly and at the lowest cost more than covers it.

How to make a bed of boards with your own hands: photos, dimensions, installation sequence
If you decide to make a wooden structure, first of all you need to choose the type of wood:
- Oak or ash- hardwoods, the boards of which are perfect in this case, but their price is quite high.
- Pine- cheap, but short-lived. You can extend the life of such a fence with the help of periodic chemical treatment.
- Cedar or larch– the best price-quality ratio. Due to the presence of resin in these conifers, there is no need to process them.
- Acacia- also a great option for arranging beds.
What are the optimal sizes of the beds from the boards? First you need to decide on the height of the structure, which depends on the following factors:
- Features of the planted culture.
Some vegetables require a certain depth (for example, for potatoes, the planting depth must be at least 40 cm).
- Soil fertility.
If the soil is fertile, the sides can be made 10-15 cm high. If fertile soil is required to be backfilled, 30 cm or more.
- Bed type.
For example, for warm temperatures, a height of 50 cm or more is typical.
The most important parameter when arranging beds in the country is their width, since ease of use largely depends on it. If you make it too wide, it will be problematic to reach its center. Therefore, the maximum value of the width is considered to be 100 cm.
In most cases (if the planned design does not have a too complex shape), it will not be difficult to make a bed of boards with your own hands. The size of the boards depends on the size of the future bed, but if you only have material of insufficient length, it does not matter, several boards can always be spliced in length.
The procedure for the construction of a wooden structure:
- Territory preparation.
At this stage, it is necessary to level and dig the site for the structure.
For a rectangular structure, it is necessary to connect 4 boards and attach support bars to them, which should be 20-30 cm longer than future sides. They need to be slightly sharpened with an ax from the free side (to simplify entry into the ground).

- Construction installation.
We hammer the structure into the ground, while it is important to use the level to achieve maximum evenness of the structure.
- Surface treatment of boards.
First of all, the surface is primed (to protect against moisture and pests), then covered with oil paint (optional, you can leave the color of the tree).
- Backfill.
The composition depends on the type of construction and the selected culture. But in all cases, the first layer should be drainage.
Most often, they try to plant only one crop in one area, but sometimes they practice joint planting of vegetables in the garden. However, it is worth remembering that not all plants get along with each other. Therefore, the following is a table of compatibility of vegetables in the beds.
Related article:
Interesting ideas come to mind for many summer residents and owners of private houses. In the article, we will consider original photo examples and several instructions for creating such beauty.
Mixed planting of vegetables in the garden: examples, photos
More and more summer residents are interested in obtaining not only a large harvest, but also an environmentally friendly one. Therefore, the question arises, how to achieve a quality crop without resorting to chemicals?
An excellent solution is a mixed planting of vegetables. After all, some cultures have a beneficial effect on each other. However, in this matter it is worth being extremely careful, since not all plants like any kind of neighborhood at all.

Thanks to the science of "allelopathy", a table of the neighborhood of vegetables in the garden has been compiled, using which you can significantly reduce the use of chemicals for pest control and fertilizer.
Neighborhood of vegetables in the beds - compatibility table
The table below reflects the compatibility of vegetables in the garden. Planting using this information will provide a quality crop with a minimum investment.

Mixed planting vegetables in the garden: examples with photos and tips
Each benevolent or unfriendly neighborhood of vegetables in the garden has its own rationale. For example, strawberries and onions are great neighbors. Onions protect the berry from rot and disease, and if parsley is also planted nearby, it eliminates the appearance of slugs.

Onions are also a great companion for most garden crops, as they keep pests away. The most interesting neighborhood of this plant is with carrots. Both cultures have their own pest - the onion and carrot fly, and the first one cannot stand the smell of carrots, and the second - onions.

Garlic is excellent for pest control, making it a good companion for most crops. However, it is not recommended to plant it next to plants of the legume family, since the latter are leaders in nutrient intake, and garlic needs quite a lot of them.
Joint cultivation of crops in the garden can be detrimental to other vegetables. For example, tomatoes should not be planted with cucumbers, as they require varying degrees of watering. Thus, the proximity of these two crops will create difficulties in processing (there will be a need for spot irrigation, which will take much more time and effort).
In addition to the properties of plants, it is necessary to pay attention to their size. For example, when alternating cabbage and radish, the second crop will receive insufficient sunlight, causing the quality of the crop to deteriorate significantly.
So, you have developed an ideal layout for all the vegetables in your summer cottage, but every year the harvest is getting worse. What to do? It is necessary to ensure crop rotation.
Table of crop rotation of vegetables in the beds
Crop rotation is the organization of crop rotation in the garden. Ideally, this process should be continuous and annual. However, in real conditions, this is very difficult to achieve for the following reasons:
- There is not enough information about the contamination of the soil and the presence of pests in it.
- There is no time for precise calculations of the ideal landing option.
Why is crop rotation essential for a good harvest? Each crop has unique characteristics in terms of obtaining nutrients. Someone is looking for them in the surface layers of the soil (for example, a cucumber), someone, in search of water, lowers the roots several meters deep (for example, a watermelon). In addition, the growth of each plant requires (to a greater extent) different elements (for example, for a tomato - phosphorus, for cabbage - nitrogen).
Now imagine that from year to year a certain layer of soil is depleted, and the content of precisely those substances that are necessary for this crop decreases. To make it easier for you to decide how to rotate vegetables, below is a table of vegetable crop rotation in the garden.

Important! The main thing is that the culture does not return to its original place within 3-4 years. During this time, the soil will have time to recover and accumulate the necessary amount of nutrients.
How to make a garden bed for cucumbers in the open field: photos, methods
Cucumbers are a rather capricious crop that requires special care. Many believe that it can only be planted in seedlings, however, thanks to many years of selection, there are currently several varieties that can be planted immediately in open ground.

First of all, it is necessary to prepare beds for cucumbers in the spring:
- Correctly choose the direction of the rows - from north to south.
- Fertilize the soil (the best solutions are cow dung or chicken manure, if they are not available, any mineral fertilizer will do).
- Put the sides (preferably at least 25 cm).
The main secrets of growing cucumbers in the open field are choosing the right planting time (from May to mid-June, depending on the region) and choosing the right variety.
How to make beds for cucumbers - common features
In the case when seedlings are not used, it will not work to grow a quality crop in the usual way (on standard beds). You must use one of the other ways to grow cucumbers in open ground:
- The device beds with a bookmark.
- Installation of a warm bed (including a raised structure).

These methods are non-standard, therefore, they are described in detail below to prevent errors during the arrangement.
How to make beds for cucumbers with a bookmark in the garden
To arrange a bed for growing cucumbers with a bookmark, it is necessary to dig a trench 30 cm deep and successively fill it with the following layers:
- Branches and sawdust.
- Straw, leaves and compost (at this stage it is necessary to fill everything with warm water).
- Sand.
- Organic waste (leaves, bark, etc.).
- Straw.
- Fertilizer (manure is best).
- Earth and humus.
- Lack of dirt from the beds due to the presence of bumpers.
- High yield.
- Aesthetic appearance (you can make beautiful identical beds).
- Even faster warming of the soil, which means that the harvest will appear earlier.
- Convenience (no need to bend over to care for cucumbers).
The main thing is to carefully compact each layer, otherwise the soil will turn out to be too loose, and you should not expect a good harvest.

Advantages of warm beds for cucumbers:
Raised beds for cucumbers in the open field
In an unfavorable climate, it is advisable to arrange raised (or high) beds 40-50 cm high (for convenience, you can make it higher). At the same time, the sequence of layers remains the same as in conventional warm structures on the surface of the earth. Such structures have the following advantages:

What amateur gardeners just don’t come up with to get a good harvest.
Today we will introduce you to an unusual technology - growing crops in high beds.
Advantages and disadvantages of high beds
High beds are a limited space raised above the ground. They are used for growing other crops.  It is best to build such structures in the fall, but with proper maintenance, you can create an "elevated" site at other times of the year.
Important! If you build too high sides - more than 70 cm, the bees will not be able to perform pollination, which will negatively affect the further growth of the crop.
Like any vegetable growing solution, this one has its advantages and disadvantages.
We list the advantages of high beds:
- in spring it warms up faster, and sowing can be carried out much earlier than in open ground; this will increase the yield by 2 times;
- thanks to the borders of the box, the mulch will not be washed away or carried away by gusts of wind;
- the design provides good drainage - this will avoid moisture stagnation;
- there is the possibility of individual selection of soil for each site, which will provide optimal conditions for growing crops;
- thanks to the design, it is possible to protect the crop from sudden changes in temperature;
- it is much easier to cultivate the soil, as the amount of work is significantly reduced;
- raised areas are convenient in that you do not have to lean too much towards;
- the structure looks beautiful, with the right approach to construction, it will last a long time and will not collapse;
- can be built in any sunny place.
 Despite the huge number of advantages, this method also has disadvantages. The disadvantages of high beds are:
- the need to constantly carry out top dressing due to limited space;
- physical and material investments necessary for the construction of the structure;
- the risk of reproduction of pathogenic microorganisms that can be dangerous to plants.
Do not be afraid of possible difficulties - it is enough to seriously approach the construction of an unusual design, and you will get a rich harvest.
Optimal dimensions
Each gardener can independently choose the size of the future beds, since there are no clearly defined dimensions. However, there are certain recommendations that may come in handy when you build high beds with your own hands. 
Height
The optimal height of the sides varies from 15 to 50 cm. If you plan to place the structure on fertile soil, you need to limit yourself to a height of 15–20 cm. This amount of embankment is quite enough to get a good harvest.
If the land on the site is not very favorable for growing crops, the bed should be raised higher - by about 50 cm. Depending on the wishes of gardeners, you can raise the walls of the structure even higher - in this case, you do not have to bend over during weeding or planting. But, remember that such a design will require more materials. 
Width and length
The optimal width of the structure is considered to be a distance from 90 to 120 cm. It is necessary to equip the site in such a way that it can fit 2 rows. Such a layout will allow the plants to receive a sufficient amount of air and sunlight, which will undoubtedly affect the yield. 
If you plant a lot of rows, it is likely that the ones in the center will not receive the necessary amount of air and light, which will lead to a decrease in yield. The ridge of standard width is convenient in processing.
Important! When choosing plastic for construction, be careful: some of its types emit toxins and are not suitable for use in agriculture.
Reflecting on the length of the site, you can be guided solely by the possibilities of the territory. However, most often there are structures with a length of 1.5 to 3 m. Such areas look compact and neat.
Choosing a place on a summer cottage
It is very important to responsibly approach the choice of a place where the structure will be located in the future. It is better to place high beds in the country in sunny areas: light should come to this place for at least 6 hours a day. Be sure to consider this requirement if you plan to place the structure near any buildings or fence.
When placing an embankment on open ground, you should adhere to the following recommendations:
- put a metal mesh on the soil - this will protect the roots of plants from rodents;
- lay out old newspapers at the bottom of the structure - this technique will significantly slow down the growth of weeds.

Material selection and step-by-step manufacturing instructions
A wide variety of materials can be used to build high beds. We offer you to get acquainted with the most common options for structures and the features of their manufacture.
Wooden structure
This material is perhaps the classic for creating beds. It attracts gardeners with its accessibility. For manufacturing, you can use boards and logs.
Did you know? By choosing larch boards for the construction, you will significantly increase the service life of the structure. The resin of the tree is an excellent protector from external influences and prevents the destruction of the boards.
- Before proceeding with the assembly of the structure, it is necessary to process the boards. To do this, you can use all kinds of impregnations that will prevent the decomposition of the tree. You can also cover the boards with varnish or paint. The safest and most affordable way to process wood is lime - just whiten the elements.
- Using a conventional tool, you need to attach the bars to the boards. To do this, it is necessary to nail posts to the edges of short boards. Long boards are also connected to the bars. Choose the bars so that they go 20–30 cm into the ground.
- The next step is to knock down the box. Try to avoid cracks, the boards should fit snugly against the bars.
- The final stage is the installation of the mounted box. After you hammer the bars into the ground, check with a level that it is level.

Important! When installing a bed next to fruit trees, you will need to install a barrier for the root system before marking.
After installing the structure, you can fill it with soil and start planting plants.
Use of stone
Undoubtedly, there can be no doubt about the durability of such a design. But due to the high cost of the material, not everyone can afford such beauty. If you find funds for a stone bed, it will be a wonderful decoration for your summer cottage. 
Instructions for the manufacture of such a design include the following steps:
- it is necessary to dig a trench along the perimeter of the proposed site, 30 cm deep;
- we lay polyethylene or roofing material on the bottom;
- we fill the trench with sand to a third of the depth;
- laying stones;
- we fill the concrete foundation with a pre-prepared solution;
- then masonry is carried out along the perimeter using a solution that is applied only to the inside of the stone;
- after 2-3 weeks, you can pour the soil and plant the plants.
brick beds
Having built a high brick bed, you will undoubtedly decorate your site. Such a construction is very similar to a stone structure: it has the same construction principle and the relatively high cost of materials. 
In addition to the cost of materials and the lengthy manufacturing process, you will have to find a specialist who can lay out a beautiful even composition.
from slate
This material is known for its durability. Everyone in the country has unnecessary pieces of slate, which are just right for building high beds. 
We invite you to read the manufacturing instructions.:
- First of all, the materials are prepared: it is necessary to cut the plates and give them the desired size.
- At the next stage, a trench is dug according to predetermined dimensions.
- Sliced slate plates are installed in the dug hole around the perimeter. If you use flat slate, you need to connect the strips with corners - this will add reliability to the structure.
- Then the trench must be covered with soil and compacted well.
Made of plastic
Plastic beds can be of two types. The first is the use of plastic panels. In this case, this is almost an ideal option for creating a design. It has excellent thermal insulation, has a long service life and allows you to create a bed of any shape.
Such blanks can be purchased in specialized stores. The principle of construction of the structure is the same as in the case of slate.
Important! When making beds from slate, you should not drive it into the ground - this way there is a possibility of its destruction. To install the sides, carefully dig the slate into the soil.
Another option is to make a bed out of plastic bottles. However, this is not a very good way, since tightness is out of the question. In addition, plastic bottles quickly yield to deformation, which over time will make the site not very attractive. 
From straw and branches
One of the cheapest materials for making beds is straw.. Bales have a very affordable cost, so this way to build beds is the most budgetary. 
To make the necessary design, it is necessary to spread cardboard on the ground, lay bales on it in rows and fasten them with wire to give shape.
Before planting plants, straw must be prepared: in autumn and spring, it is plentifully watered and fertilized with special means.
You can also build a ridge of branches. To do this, you need the branches themselves and spunbond. The step-by-step instruction looks like this:
- Pegs are dug in along the perimeter of the proposed landing area.
- Then these pegs are braided with branches, as if you are making a basket.
- Small branches should be laid out on the bed itself - they will act as drainage.
- Along the perimeter, it is necessary to lay the spanbond, digging it a little into the ground and placing it on the fence. It is necessary to hold soil and water, otherwise the earth will simply fall out through the bars.
- Place old newspapers or cardboard on top of small branches - they will not allow weeds to break through.
- At the final stage, the site is covered with soil.

Highlights when arranging high beds in the country
Despite the fact that when making beds, you can choose their height yourself, you should not go beyond 70 cm. It is this height that is optimal and allows you to create a plot with suitable soil for further growing plants. By raising the ground, you can minimize the occurrence of various crop diseases, as well as minimize the chemical treatment of plants.
Did you know? The use of straw beds is ideal for cold climates, as the warming up of the straw occurs much earlier than the soil becomes suitable for sowing.
In order for the structure to be strong, the material that is used to build it must be dug into the ground by about half the height of the sheet.
To get a good harvest, it is recommended to lay a layer of compost on the bottom before filling the structure with soil. 
If you decide to build several beds, the paths between them can be decorated with green lawn grass. Such a decision will make the site more beautiful.
Now you know how to make high beds, and you can not only increase productivity, but also decorate your summer cottage with an original and useful structure.
Was this article helpful?
Thank you for your opinion!
Write in the comments what questions you did not receive an answer to, we will definitely respond!
35
times already
helped
- bulk, elevated above the ground earthen structures intended for planting and growing herbaceous plants. They are used in garden plots for garden crops and for planting flowers.
Advantages and disadvantages
Raised land has a number of advantages and disadvantages:
| pros | Minuses |
| No shedding of the side walls of the soil, with protected structures by means of partitions. | Through the side walls, made of "breathable" material, soil moisture leaves faster, as a result of which the frequency and volume of watering have to be increased. |
| It is independent of the soil located on the site - you can use purchased black soil. | Periodic costs are required for the purchase of black soil. |
| Creating a favorable climate for plant growth - elevation above the general level of the earth significantly reduces the risk of cold damage during the frost period. In addition, the bed can be easily protected from external influences by covering it with a tarpaulin or covering material. | The limited interaction with the total mass of the earth forces to increase the use of mineral fertilizers. |
| An earlier period of growing crops - in the spring, snow melts earlier, the soil warms up faster. | There is a risk of reproduction of insects that will harm the planted plants. |
| The possibility of creating a greenhouse or a mini-greenhouse, which are dismantled with the onset of the warm season. | At the initial stage of creating high beds, you have to bear material costs and make additional physical efforts to create a land structure. |
| Good drainage to optimize watering and soil moisture. Due to this, there is no risk of waterlogging of the soil, moss growth, and there is no rotting of plants. | Restriction on the plant assortment - not all plants endure an open, blown area. |
| Deep digging of the soil is carried out 1 time in 3-4 calendar years. The rest of the time it is enough to carry out shallow loosening. | |
| Convenience when working with low growing plants, this is especially important for the elderly or those with limited physical abilities. | |
| Getting more yield, compared to traditional methods of growing plants. | |
| The high level of the ground allows you to reduce the physical effort required when cultivating the soil, caring for green spaces, harvesting crops - for example, you can use a folding chair. | |
| Optimal layout of the garden plot. | |
| Creation of beds with an unusual shape and design. |
From the above comparative data, it can be seen that the idea of high beds has the right to life. Measures aimed at reducing negative factors will contribute to this.
How to eliminate cons?
Ways to reduce negative factors:
- The increased use of organic fertilizers contributes to a decrease in the amount of mineral fertilizers applied to an elevated plot of land:
- droppings of birds, manure from cattle, the creation of tinctures for liquid feeding on their basis;
- the use of ash from burning wood in stoves or fireplaces;
- creation of a private compost pit on the site for processing plant residues and human food, which will reduce the amount of purchased black soil;
- use of sludge from a septic tank.
- To reduce dependence on irrigation, the “drip” mode device will help: such designs can be found in abundance on the Internet.
- Reducing the material costs required when creating high beds is facilitated by:
- the use of materials left over from the construction of a country house or the arrangement of a fence, for example, or corrugated board;
- the use of industrial substandard material, which is sold at significant discounts;
- remnants of building products that appear during the demolition of dilapidated housing, or in other similar cases.
- The appearance of harmful insects and weeds can be avoided by preliminary soil preparation:
- chemical treatment,
- removing roots.
Kinds
High beds differ from each other in several ways:
- geometric dimensions, - length, width and height above the general level of the site;
- side wall trim.
Wooden
 Wooden high beds
 Wood material is used as side support walls:
- boards;
- plywood of moisture resistant grades, for example, OSB-3;
- log construction;
- materials with the presence of wood, for example, wood concrete sheets (wood concrete) - a mixture of cement and shavings;
- vine rods.
Main advantage of this material is its availability and ease of processing. But common deciduous (birch, aspen) and coniferous (pine) varieties of wood are prone to decay, they are sharpened by bugs. The use of resistant species, such as larch, is associated with its higher cost and difficulty in processing. But this type of wood improves its properties over time (part of the old Venice still rests on Siberian larch).
Plastic

For fencing, products made of dense plastics are used:
- plexiglass;
- , including cellular;
- profiled polymers;
- plastic pipes, for example, used for sewerage with a diameter of 100–200 mm;
- container, - plastic boxes with perforated walls.
Dignity– plastic refers to “eternal” materials, does not rot, does not decompose, is resistant to water and exposure to bacteria and insects.
But in winter it becomes brittle, so during this period of the year it requires careful handling.
Easy to machine, easy to install. Plastic products have a variety of colors, which contributes to the decoration of the garden plot.
metal

For the device of an earth embankment, finished products and semi-finished products are used:
- galvanized metal sheet, for example, going to the roof;
- corrugated board and other metal products.
Basic requirement for metal– lack of corrosion, therefore, in the absence of protection, it is necessary to take measures to cover the surface of products with anti-corrosion compounds. Outwardly, the beds can be made in a classic rectangular shape or give a designer look - to model an oval design that resembles a large bath.
In addition to the above materials, slate sheets, bricks, concrete products, gabions and many other products that fall under the requirements for earth embankment fencing are widely used.
Technology
Before considering the technology of arranging a high bed, you need to familiarize yourself with a number of rules.
Creation rules
The requirements for beds are necessary for proper placement on the site, they must take into account local climatic conditions, the range of grown plants.
- Bed sizes. The length of the earth embankment is limited by the size of the site and the ease of passage. Hence: the optimal range is 2–5 m. The width is up to 1–1.2 m, a large value will create inconvenience when processing the middle part. The height of the structure should not exceed 1 m, otherwise it will also create problems with plant maintenance and require significant costs when using purchased soil. The minimum level is 25–30 cm, which is determined by the climate and the size of the fence that is “at hand”.
- The soil. The meaning of creating high beds is to increase fruiting and speed of harvest. Chernozem is one of the components. Therefore, saving on the quality of land means wasting your efforts, time and finances in vain.
- Location. The abundance of sunlight is one of the keys to the normal growth of plants and their fruiting. It is advisable to arrange the beds in open, unshaded places. But you should take into account the general layout of the site, - not to the detriment of other plants and outbuildings.
- Fencing material. You should not chase ultra-modern products - the boards left over from the formwork, or the old brick, will completely fulfill the functions of the enclosing walls. And money will be saved.
- Protection of green spaces. Most of the country is located in difficult climatic conditions, under which frosts are not uncommon at the beginning and end of summer. To reduce the risk of plants being damaged by cold air, a pre-installed protection system will help, for example, a design for a greenhouse.
The device of the earth embankment
Stages of work:

Landing planning
It is advisable to arrange high beds at the end of summer or early autumn - this will contribute to additional overheating of organic matter and the creation of its own local microflora. If it is necessary to create a seat in spring or summer, if possible, the soil should be covered at least 1 month before planting plant material.
Most vegetable, berry and flower crops can be grown on raised land plots. Moreover, they can be successfully placed in the same fenced area. For example, cold-resistant: radishes, green onions, lettuce, can be planted around heat-loving ones - in summer all these plants will be comfortable, and tomatoes will receive additional protection when the air temperature drops.
Berry and vegetable crops on such raised embankments, under favorable temperature conditions and timely watering, ripen 1-2 weeks earlier, so it is necessary not to miss the harvesting time, otherwise it will begin to rot and simply disappear.
You can appreciate the advantage of high beds even on one initial experience - just start with simple crops - onions, radishes, carrots, and gradually expand the experience that has appeared to other plants.
Recently, high beds have become increasingly popular among gardeners and gardeners - an original technology that came to us from Canada. Although, in fairness, it should be noted that such structures used to be found everywhere. They were called dung beds and cucumbers were grown there.
Raised beds: what is it and what are they for?
A high, or raised, bed is a box-shaped structure with a height of 0.15–0.2 m to 0.5–0.6 m and a width of 0.5–1.2 m. Its length is limited only by the dimensions of the site. But these dimensions can vary in an arbitrary direction, depending on the desires and needs of the owner. A nutrient substrate is laid inside the box and plants are planted.
Do-it-yourself high beds can be a highlight of garden design
It is best to prepare the bed in advance in the fall, so that the soil has time to settle and compact. In addition, in the spring there is no need to spend precious time on this, and with the advent of heat, the soil warms up very quickly and sowing can be done 2-3 weeks earlier.
Video: why do we need high beds
How to make a high bed
The boards that hold the ground are made from a variety of materials and improvised means:
- wood;
- metal;
- plastic;
- slate;
- brick or stone;
- concrete;
- plastic bottles, etc.
Photo gallery: what you can make a raised bed from
To make a bed and horizontal logs very quickly A bed of vertical logs will require the application of great forces Such beds can also be made of wood High beds are most often made of boards Gravel in a mesh frame looks very unusual Often high beds are made of cinder blocks The fence can be straw The mesh frame is filled with any decorative material Even mesh plastic containers are used. The bed can be made from flat slate (OSB)
In some cases, high ridges may not have a side fence at all and are simply earthen hills.
Raised beds are also available without fencing.
Video: what high beds are made of
from wood
For the manufacture of a frame structure made of wood, you will need support bars and boards for the walls.
A wooden box for high beds can be tinted in any color and covered with paint
Work is carried out as follows:

Video: making a garden bed
From stone
Stone structures are built to last for centuries, they look monumental, but it is extremely difficult to move them to another place.
A high bed made of stone or brick will successfully fit into the classic design
The technology of work consists of the following stages:
- Along the perimeter of the selected place, they dig a trench 0.3–0.4 m deep under the foundation.
- A layer of waterproofing (roofing material, polyethylene, etc.) is laid at the bottom of the trench.
- Pour a sand cushion to a third of the depth.
- A layer of stones is laid on top.
- Filled with concrete.
- A few days later lay out the masonry.
Difficult masonry work is best left to professionals.
A brick bed is built by analogy with a stone one.
Video: making a brick bed
From sheets of slate, metal or plastic panels
For the construction of a frame structure, any pieces of old slate or metal removed from the roof will go.
A bed, the walls of which are made of sheet metal, can have a very different shape.
The sequence of actions is as follows:
- The plates are cut to size.
Sheets of slate cut into the desired size
- Dig a narrow trench around the perimeter of the future beds.
First dig a trench
- Sheets of material are installed in the excavated ditch.
- At the corners, the plates are connected using metal corners.
Slate sheets are connected using ordinary wire
- The trench is covered and the soil is well tamped.
To give greater rigidity, stakes are driven in at the corners, to which a wooden frame of bars is attached.
One of my good friends makes the sides of the beds from plastic bottles with a volume of 1.5 liters. She digs them around the perimeter with their necks down, trying to press them closer to each other. Frames intended for different cultures are spray-painted in various colors. It turns out very lively and unusual.
A high bed can be built from empty plastic bottles
Video: we make a bed of sheet material
From branches
The branch structure is constructed as follows:

Plastic containers can be placed inside the wicker box
You can simply poke branches into the ground in several rows and fix them with wire.
Branches in the bed wall can be arranged vertically
Video: making a bed of twigs
High bed: how to fill it
After installing the frame, the bed must be properly filled:
- The bottom is lined with a fine-mesh metal mesh (from rodents).
Cardboard will not let weeds germinate
- Drainage is poured (especially if the area is wet) from stones, brickwork, shards, rubble, etc. In hot southern regions, large saw cuts, branches, lumber waste are placed, which, on the contrary, will retain moisture.
Then stack thick branches, chocks, branches, etc.
- Then smaller plant residues are laid:

- The last top layer is fertile soil with the addition of humus and complex mineral fertilizers.

Video: filling the garden
Raised bed railings are commercially available. They are prefabricated modular structures, most often made of plastic. But it is not difficult to build such a box with your own hands.


