It will become a simple and at the same time elegant decoration of your personal plot. You can make it on your own from improvised materials. The only thing that is needed is a great desire and perseverance. Also, patience will not be superfluous.
Materials and tools
Before you make a swan out of bottles, you need to prepare the materials and tools that you may need during work. Let's start with materials. AT
in this case you will need:
- a large number of white plastic containers;
- a large canister with a capacity of 5 liters (its color does not matter anymore);
- a piece of metal-plastic pipe;
- wire;
- candle;
- paints of red and black colors (buttons can be used instead of the latter, for example).
Materials must include:
- stationery scissors;
- knife;
- marker.
Idea
First, the plastic bottle swan must materialize on paper. That is, there must be a sketch. It can be done independently or taken from special literature. Agree, it is much easier and more convenient to create something when the result of the work is already in front of your eyes.
The foundation
A 5-liter container for liquid acts as a frame for the figurine. Neck

it should look at the tail, and the neck should come out of the top of the bottom. The frame for it will be a metal-plastic tube, in which you must first need an appropriate hole. Additional fixation is carried out with a wire. On this basis, from which the swan of plastic bottles will be made, is ready.
Creating the look
Next, let's move on to the head. The beak can be cut out of plastic and painted red, and the head can be built from a 0.5 liter container (white). You should cut it in the middle and install a beak from the side of the neck. Eyes can be painted with paint or buttons can be glued in their place. Then you need to cut a lot of feathers from a white container. After that, you can start gluing the rest of the body. All parts must

Very close to each other. If you need to bend the pen in a special way, then a candle is used for these purposes. The workpiece heats up, bends and then cools down. This design is most often used on the neck. This allows you to give the craft a natural look. But below the feathers are even and fit tightly to each other. After the end of this stage, it is necessary to wait for the time required for the glue to dry. After it has dried, the plastic bottle swan is ready, it can be taken out into the street and installed in the required place. If desired, you can make not one, but a flock of swans. Everything depends only on desire and time.
Conclusion
Swans from plastic bottles are not such a rarity in summer cottages. With their help, you can turn an ordinary garden into a part of a fairy-tale land or a magical pond. There is nothing difficult in making this craft, so a novice master can cope with such a task. The only thing that matters is persistence and desire. Yes, and there should be no problems with materials - they are available in most summer cottages, and if necessary, they can be replaced with something else.
Any summer resident wants his site to be the most spectacular among the rest. As soon as they do not decorate the local area, but the most common way is to create figures from plastic bottles due to the ease of installation and the availability of material. Birds and animals are most often performed. Today we will talk about the creation of a noble swan bird with graceful outlines from plastic bottles. Such a craft will become the highlight of the whole garden and will definitely not go unnoticed.
Varieties of swans from bottles
At the moment, from plastic bottles, you can create any configuration and design of a swan. Moreover, it can be not only decoration, but also a functional addition to the site, for example, a planter. The final result depends only on the imagination of the master and the materials and techniques used in the process of work. Among the variety of options for creating from plastic bottles, you can easily choose the one that is most suitable for the time spent, materials and just the algorithm of actions for a particular master.

Planter in the shape of a swan
To complete such a craft, you will need one bottle of 5 liters and a sufficient number of small plastic bottles. It is best to take those in which milk was bought, since they are white, which will be relevant for a swan, and subsequently it will not be necessary to color the material. In addition, you will need a metal rod to create a long swan neck, a metal mesh to decorate the base of the wings, adhesive tape, thin wire and fishing line that serve as connecting materials.

We carry out blanks
The preparatory step before creating a swan is to clean plastic bottles from dirt, labels and glue. Next, markings are made on each small bottle.
So, for starters, a line is drawn 2 cm below the neck of the bottle. The lower dotted line should be located 1 cm above the relief part of the bottle. They are connected by a strictly perpendicular line. It is necessary to mark and cut the details as evenly as possible.
After cutting off the neck from white bottles, you do not need to throw away these parts, they will serve as a decoration for the swan's neck. The lower part under the neck is cut into 6 rounded parts. You can hold them over a burning candle for a bit to get a more realistic look. At the base of the finished petals, 3 paired holes are made.

The head of the swan is a 0.5 liter bottle. It is performed according to the following algorithm:
- Removing the neck plug.
- Making an incision along the seam in a cone-shaped section.
- Cutting lines with a gap of 0.5 cm.
- Gluing a clothespin to play the role of a beak.
- Cutting a fringe on a bottle from the side of the bottom.
The basis of the body of the swan is a bottle of 5 liters. Holes are made on it from below and from above to attach the neck.
Construction assembly
After all the components of the future swan are completed, you can begin to assemble it. First you need to fix the eyes on the head of the swan. It is best to do this not with glue, since with the constant influence of the environment they will quickly fall off, but to fasten the buttons with wire.
The blank of the swan's beak must be wrapped with tape so that the halves of the clothespin do not fall apart. From above, the design is decorated with a red cloth or foil.
Next, you need to fix the neck rod in the head of the future swan with wire, and fill the bottle itself with padding polyester. After that, you can string the bottle necks created earlier on the rod. The fringe on the head is fixed with fishing line to cover the beginning of the swan's neck.

The rod from the swan's neck goes through a large plastic bottle and out. The whole body of the bird is shaped with nylon threads or a nylon stocking is pulled over it. Strong synthetic threads, starting from the tail, mount parts of the plumage, laying them on top of each other to hide the fixation points.
As a result, a chic swan will turn out from the bottles, which, in addition to external beauty, will also serve as a spectacular container for planting flowers. You can put such a craft anywhere in the site, but the most organically the swan will fit into the territory near the artificial reservoir, if one is present on the site. And if it is not there, then from the same plastic bottles it will not take long to simulate a pond.

Swan from bottles and tires
If there is one or more tires available in the summer cottage or in the garage, it is quite possible to build a swan from them. The combination of plastic bottles and rubber allows you to get not only beautiful, but also resistant to external influences and turning over crafts for the garden.

Execution Technology
To create the body of a swan, a tire with a diameter of approximately 50 - 55 cm is taken. So, the formation of the body of the future swan follows the following technology:

The head of the future swan is made from a piece of foam plastic with dimensions of 20 * 12 * 10 cm in this way:
For plumage, birds will be needed
- plastic bottles preferably white;
- pliers and a sharp knife;
- construction mesh;
- cutters and wire.
When calculating the number of bottles, one should take into account the fact that one container will become the basis for 5 - 6 feathers. Petal-like elements of the same size are cut out of it, on which 4 holes are created for fixing on the grid. For more believability, the edges of each petal can be slightly melted or just cut a fringe on them.
Important! The mesh is pre-coated with an anti-corrosion compound to extend the life of the finished swan.

All swan feathers must be mounted on a piece of mesh, shaped like a wing, with overlapping wire so as to cover the joints. Even on the inside of the wing, it is necessary to create several rows of feathers so that the net is not visible in the finished design. The tail of the swan is done in the same way.
After the preparatory work, they proceed to the direct assembly of the structure. The connection of the neck with the body of the swan is made by screwing in the bolts. It is important to bend the end of the metal rod from the neck so as to fix it in the ground. The wings must be fastened together with wire and fixed with a rod. After that, the tail of the swan is installed.

Putty and bottle figure
An interesting version of crafts for a summer cottage is a swan from a five-liter bottle, designed in the form of a sculpture. This is a unique creation that allows the fantasy to run wild. Such a swan will decorate the veranda, terrace and even look good just in the clearing. Among other things, it is very practical, since inside it is possible to create a small flower garden. If you decorate it with white flowers, you can achieve the effect of bird plumage.

The main stages of making a swan:

After completing the figure of a swan, it is necessary to wait for it to dry completely, carefully process it with sandpaper, and then paint it in the likeness of a living bird. The swan is a symbol of fidelity, so it is best to pair it up right away. Such figures will enliven and diversify the landscape of the suburban area. Marigolds can be planted in the recess from a plastic bottle, which will complete the composition.

Spectacular film swan
From a plastic film and an ordinary five-liter bottle, it is easy to assemble a real proud swan, which no guest will pass by without surprise. Consider the manufacturing technology step by step:
- We make 2 holes in the bottle and stretch a thick wire into them that can keep its shape. It will become the frame of the neck and tail of the future bird.
- To give a neat and smooth outline, the bottle is slightly crushed in front and on top. The resulting form is fixed with adhesive tape.
- Ribbons about 7 cm wide are cut from isolon. The entire swan blank is wrapped around them and fixed with adhesive tape.
Important! The head is also formed from isolon, but with more layers.
- A plastic film is being prepared to create the plumage of a swan. To do this, strips of ribbon are folded into several layers and cut so that a fringe is obtained. 17
- The whole bird is wrapped with such blanks, fixing the film with narrow tape. Each subsequent revolution is shifted by 2 cm relative to the previous one.
- The head is supplied with button eyes. They are easy to just sew on.
- The beak can be made from a red clothespin or marker. In the second case, it is necessary to make several cuts on it so that the wide part of the beak can be formed. After that, the marker is mounted on the wire.

Such an unusual swan will bring originality to the landscape of any site, and with any breath of wind, its plumage will sway easily, which is also very unusual.

Conclusion
The swan on the site is a wonderful decoration that will bring variety to the landscape of an ordinary summer cottage. Thanks to the creation of figurines of this bird from plastic bottles, you can not only take time, develop your imagination, get a spectacular decoration, but also get rid of unnecessary containers. Thanks to the presented master classes, everyone will be able to choose the equipment for themselves and update their site.
In this article, we will talk about how to make a swan with your own hands from improvised materials, five-liter plastic bottles will serve as the basis for the design. Probably, every person will agree that the swans in the garden, in principle, look quite romantic, and if functional qualities are added to the romance, there will be an indispensable composition in general. Below is a method for making swans, which will serve as excellent flowerpots.
To make the creation easy and not burdensome, we need:
- Large plastic bottles with a face value of 5 liters;
- putty;
- Metal mesh, for the manufacture of wings and tail;
- Twisted two to four times thick wire or metal rod;
- Polyethylene film;
- Putty knife;
- Brush;
- Bandage.
Figurine base
We cut the bottle lengthwise so that one side has enough space for planting flowers. This detail will be the body of a swan, so to give it roundness, fill it with wet sand.
Screw the bottle with a lid, check the fit and then insert a wire or metal rod, slightly bending it, like a swan's neck.
Take part of the putty, put it on a pre-prepared film in an even layer 5 centimeters thick. From above, on the putty, put and press the bottle tightly. Any excess that rises, gently smooth up the bottle. It is most convenient to do this operation with a spatula. Remember, in order for the putty to stick to the work surface, the spatula must be periodically dipped in water. 
The bottom of the flowerpot is ready and it's time to start making the swan neck.
Neck making
You need to wet your hands, take a small amount of putty and roll a roller out of it. Next, gently press the resulting roller into the base - a wire or a metal rod. In order to fix the putty roller, immediately after pressing it, wrap it with a small piece of wet bandage. This is how the whole neck is molded. Do not forget that a thickening of the transition from the torso to the neck is an obligatory element; without it, the craft will look unnatural. Upon completion of these works, a head with a flattened beak is molded.
Gradually coat the entire body of the resulting swan with putty, smoothing uneven areas with a wetted brush. Remember to constantly wet your hands.
Next, the wings and tail are made.
Press a metal mesh into the putty on the sides and hold for a while. It is necessary to wait until our future wings stick. Next, very painstakingly, with wet hands, we form wings from putty. The technology is simple: with one hand, from above, putty is applied to the mesh, with the other hand, it is supported from the back side. Using the same technology, a swan's tail is made from mesh and putty.
The figurine is ready. Now you need to wait a couple of hours until it hardens and move it for a few days to a place where it will not be exposed to direct sunlight and rain. When the swan is completely dry, it must be processed with mesh plaster sandpaper and then with ordinary fine sandpaper.
Priming and painting
After smoothing the surface, we treat the entire surface with a primer. It is she who will allow us to very carefully paint our crafts with paint. For painting, it is best to choose enamel paint, although, of course, ordinary facade paint is also quite suitable. Don't forget to draw the eyes and color the beak. For additional protection, you can varnish the swan.
That's it, the work is finally done. You can fill the container with fertile soil and plant beautiful flowers.
Before you make a swan from plastic bottles, you should prepare all the material necessary for manufacturing:
We prepare the necessary materials
- white plastic bottles with a volume of one liter - at least 25 pieces;
- white plastic bottle with a volume of five hundred milliliters - 1 piece;
- transparent plastic bottle with a volume of five liters - 1 piece;
- strong and as thick as possible, but easily bent wire - three meters;
- dense elastic tights - 1 piece;
- several pieces of synthetic winterizer and a small piece of isolon or bottle caps;
- a few foam pieces;
- thin and strong wire;
- a small skein of fishing line;
- small stones;
- a small square of red cloth for the beak;
- regular and double-sided tape;
- buttons for making eyes and a plastic clothespin for making a beak;
- the most durable and thick synthetic thread of white color.
In addition, a set of the following tools will be involved in the manufacturing process:
- a knife with a wavy blade or a hacksaw;
- the largest needle for sewing;
- any large and sharp scissors for cutting plastic;
- standard pliers;
- marker for marking;
- sharp awl with a comfortable handle.
Step by step instructions for making a swan
Despite the fact that a do-it-yourself swan made of plastic bottles is quite easy to do, nevertheless, you must carefully follow the entire sequence of actions. The process of manufacturing a plastic structure takes place in several stages.
Manufacturing of blanks
All elements that are required for manufacturing must be prepared very carefully and carefully.
Preparation of liter bottles
The stage consists in carefully removing caps and rings from the bottle necks, as well as removing all stickers and labels.
Open liter bottles

Cut the bottle along the marked lines
To perform a smooth cut, it is necessary to apply a preliminary markup.
The bottom marking line should recede one centimeter from the uppermost corrugated part and run parallel to it around the circumference of the entire bottle. The top line should recede two centimeters down from the bottle neck and run parallel to it along the circumference of the entire bottle.
Both parallel marks are connected by a third straight line. Then the most accurate cut of the plastic is performed in accordance with the markings made. The result should be three parts.
Preparing parts for the neck
To make the neck, it is necessary to cut the neck part of the blanks to the thread into six identical fragments. The cutting of the conical part is performed into eight fragments.
All corners formed as a result of the cut must be rounded off, and three paired holes must be made at the base of the resulting “petals”.
Preparing parts for the head
From a half-liter bottle, cut off the neck with the cork. Next, parallel cuts are made on the cylindrical part of the bottle until it passes into the cone-shaped part. The guideline for the first cut is the injection seam, and all subsequent cuts come in increments of five millimeters.

We straighten the ends of the clothespins for the swan's beak
In order for the clothespin-beak to lie as tightly and evenly as possible, it is necessary to slightly melt its ends and pierce a pair of holes with an awl.
Through the holes of the clothespin attached to the bottle neck, it is required to make similar holes in the plastic. In addition, it is necessary to make holes for the buttons-eyes, choosing the most optimal place.
Preparing parts for the body
For the manufacture of the body of a swan, a five-liter bottle is ideal, in the bottom and lid of which a pair of holes should be made to secure the frame of the wire neck. A small "window" is cut out in the sidewall of the bottle, which will allow the hand to pass freely into the bottle.
Assembling a swan from blanks
Finished elements must be assembled in a certain sequence.
head making

We fix the eyes and insert the beak. The resulting voids are filled with foam
To fasten the eyes, buttons and a piece of thin wire are used, which are twisted inside the bottle with pliers. By means of synthetic threads, a clothespin-beak is sewn on, from which the metal ring is removed.
To fasten the two halves of the clothespin, you need to use adhesive tape. The free space in the beak is filled with a piece of foam and isolon, on top of which double-sided tape and a piece of red cloth are glued.
Neck making

We string the prepared six-petal details on the neck
A strong and thick wire bent in half should be passed through the wire fastening in the head of the swan. A synthetic winterizer is laid inside the head, and corks are strung on the wire, which alternate with six petal parts.
The fringe, made on the head, should be tightened with fishing line at the neck.
Making a torso
Initially, the neck wire is passed through the bottom of a five-liter bottle, and then exits from the holes in the cap. The wire is guided by hand through the cut "window".
To stabilize the position of the finished swan, fill the bottle with small stones, which will give weight to the body. The ends of the wire are fixed at the outlet of the cover in the form of a tail. Elastic tights are stretched over the frame of the entire body in a double layer.
Fletching performance

Sew on feathers
Cut out "petals" of feathers must be fixed on the body, starting from the tail section. Each subsequent row of feathers should slightly overlap the previous one, which allows you to hide the attachment points.
Strong synthetic threads are used for fastening. The plumage of the ends is carried out by attaching single plastic "petals".
For making a swan from plastic bottles with your own hands, see the video:
The swan has always been a symbol of beauty, grace and grace. Making a swan out of plastic bottles with your own hands is easy. Although you need to show perseverance, patience and spend a little time, then a beautiful swan made from simple used plastic bottles will be a great decoration for a garden or cottage.
This article will present a master class on crafts, describe two techniques for making a swan with detailed instructions, which are supported by photos and videos.
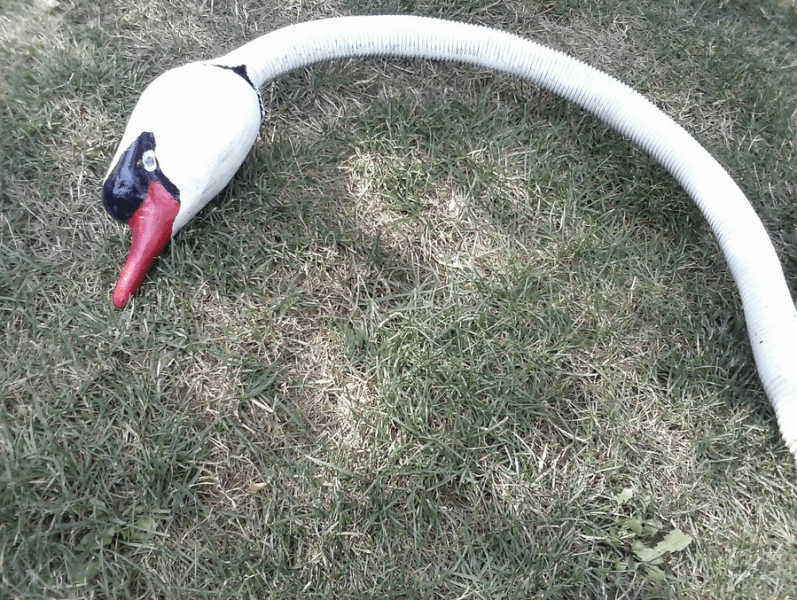
Here are some photos of what a swan should look like:

The stage of creating a composition
First, it is important to choose a place in the garden or in the country in which the swan will stand. Such an original bird is used as a tub for flowers or other plants. The name of this craft is a cache-pot swan. Amazingly effective and functional item.
First technique
For crafts, you will need materials such as:
- Five-liter large plastic bottles;
- 0.6 millimeters of iron wire;
- Metal mesh to make bird wings;
- putty;
- Putty roller;
- White bandage;
- Tassel.
It is necessary to cut the bottle in half, and bend the wire and give it the appearance of the number two, make a hole in the bottle cap and insert the wire. Strengthen the structure with special glue for ceramics, and in order to make the product stronger inside, fill it with stones or broken bricks. Fill the hole with wet sand.

How it works? Under the pressure of the sand, the bottle should become more rounded and take the shape of the body of a bird.

The workplace for working on crafts should be covered with cellophane. At the next stage of work, it is necessary to make a putty solution. To make it easier to sculpt the swan, you need to make the solution thicker. In order to make the bottom of the product, the first layer of putty must be spread directly on the cellophane.

Put the bottle on top of the solution and gently smooth the layers with a spatula.

The next step is to blind the bird's neck. To do this, you need to start coating the wire with putty. Start from the bottom and do it with wet hands.

Similarly, coat the entire bottle with a spatula, a thick layer of two centimeters.

To make the wings of a bird, you need to bend the mesh into the shape of a wing, attach the bottle to the side and press down, fix it with putty. Wait for the solution to set.

When the putty has set, smear the bird's wing with the solution with your hands.

While the wings are drying, you need to coat the bird's neck.

During the working process, wrap with a wet white bandage.

It is required to form the tail of a bird. To do this, bend part of the grid at an angle of 40 degrees and hold it with a solution. Then hold the head and leave the product to dry for 30 minutes.


From the bottom of the tail, make a roundness at the bottom of the tail.

Make the upper part of the tail in several stages.

View of the tail from above.

Side view of the tail.

When the blank for the swan is ready to dry, you need to plaster it, paint it with white paint and varnish it.

A beautiful swan is ready!

Second way

For crafts you will need the following materials:
- White liter plastic bottles exactly 25 pieces and one bottle of 500 milliliters;
- Five-liter transparent bottle;
- One easy-to-bend plastic bottle, volume five liters;
- Three meters of thick wire;
- Women's elastic tights;
- Sintepon and bottle caps;
- Fishing line and wire;
- small pebbles;
- Red fabric for the beak;
- Scotch;
- Buttons for the eyes.
First you need to prepare the bottles. Remove the neck, corks, rings, peel off the labels. Next, you need to cut the bottles, but before cutting, draw clear lines along which to cut.

Cut a half-liter bottle, remove the neck and cork. Make cuts to the cone of the bottle. Make the first cut along the casting seam. Next, make a beak, melt the ends of the clothespins and pin two holes with an awl. With adhesive tape, collect together the two halves of the clothespin. Make the body of a swan from a 5 liter bottle.
Next, you need to assemble the product. Bend a thick wire into two pieces and pass through the wire in the bird's head. Put a synthetic winterizer in the head and string corks alternately with 6-petal parts on the wire.
This is what the neck should look like:

To strengthen the body, you need to pass the neck part of the wire through the bottom of a five-liter bottle and bring it out through the hole in the lid. To stabilize the product, fill the bottle with stones. Make a tail from the ends of the fishing line. Cut and reinforce the feathers with synthetic thread.
The craft of the majestic swan is ready!
Video on the topic of the article
Easy videos on how to make a beautiful bottle swan.


