Installation on the door leaf of a simple device that fully closes the sash autonomously and smoothly is completed. So for the high-quality operation of the device, you need to know how to adjust the door closer.
Features of using the design
In fact, all modern door blocks are equipped with such simple devices as a door closer. Typical special designs allow visitors to get rid of unnecessary anxiety of tightly covering the door leaf behind them, as well as to preserve a comfortable atmosphere behind the autonomously closed door to the premises from the street. When using closers, the sash will not abruptly slam behind the guest, but will smoothly cover itself without unnecessary harsh sounds.
Closers cannot be considered as an excess of luxury, because thanks to its activity, the operational life of the quality work of door hinges and accessories is extended. The closer allows the component elements of the door block to wear out less.
Before purchasing a device that covers the door leaf, the system is selected for certain parameters of the door leaf. When buying, some basic nuances are taken into account:
The method of mounting the device (the main classifications will be disclosed somewhat below);
Reliability of the fabricated product system regarding the calculation of the weight of the web and the patency through the opening;
Cost indicator.
In addition to the condition for the correct installation of the closing mechanism, for the normal functioning of the system, it is worth knowing the intricacies of regulating this very mechanism, so as not to subsequently repair the door closer. The process of adjusting the device for automatic mechanical closing of the sash is not a difficult task. It is permissible to make adjustments on your own without adhering to outside help and calling specialists.
The need to use door closers is dictated by functional and rather practical reasons:
Mechanisms ensure smooth closing of any door leaf, regardless of its weight;
Devices set the speed of opening and closing the sash in different areas;
Closers in a certain way regulate the efforts made by a person to open the door leaf;
The system covering the sash is able to protect the coolness or heat stored in the room;
Locking devices with a built-in hold open function make it possible to fix the door in the open state without placing locking objects under the sash (videos of a typical system are presented on many manufacturers' websites);
Mechanisms with the delay action function make it possible to leave the canvas open for a certain period of time (videos of the closers with a given function are presented on many websites of system manufacturers). After the time has elapsed, the canvas closes on its own in the usual specified mode. A typical function is convenient when using systems on doors in utility rooms, storerooms and other utility rooms, which allows, for example, to take out the load or bring it into the room.
Classification according to the method of installation
Closers can be mounted on weighted entrance door blocks, as well as on lightweight interior structures. This takes into account the width of the canvas and its weight, not forgetting to correctly configure the door closer before starting operation. The larger the door leaf in relation to the weight, the more powerful the cover device, endowed with reliable qualities, is needed. The simplest option for covering the sash is a spring, the activity of which is not adjustable, while being quite noisy and sharp. A typical variant is quite primitive and in modern times there is little where it is used.
In fact, the entire list of closers presented on the retail consumer market can be classified according to the installation method in place:
Top mounted models. Installation of typical devices is carried out exclusively on the wall surface, door frame, door leaf and only the upper part of the location. Installation of typical systems is not at all difficult to do with one's own hands (videos of installation of covering mechanisms are presented on many repair sites and manufacturers' portals).
Concealed models: mounted inside doors;
Floor Mounting Models: Units are designed exclusively for installation on floors or recessed into the floor.
Brush seals for doors
Instructions for adjusting different types
The ideal, simplest option is a system based on a spring, enclosed in a sealed, plastic or metal case with an oil composition. The principle of operation of a typical device is quite simple:
When opening the canvas, a person makes certain efforts;
The applied forces are transferred to the door closer in a simple mechanical way;
When transferring forces, located in the body of the device, a spring is accumulated by compression;
The process of closing the sash is regulated by the return of the spring to its original position.

The principle of regulating a typical system is available for doing the process with your own hands:
The tension force of the main working mechanism - the spring, can be adjusted with your own hands by turning the adjustment valve:
- turning the control valve to the left will facilitate the opening of the canvas;
- turn the valve to the right - it will complicate the opening of the sash, it will take more effort to open it.
It is worth remembering that the valves must not be turned more than a couple of turns. It is not recommended to help close the door with your own hands, as well as to fix the canvas in the open state, if the closing device is not endowed with the hold open function.
The oil flowing from one side to the other during the movement of the web is responsible for the smooth closing of pneumatic devices, which sets the speed of the spring returning to its original position. The intensity of the oil flow rate in modern devices is produced by means of two installed valves (3 valves are installed in expensive systems):
The first valve is responsible for the basic principle of closing speed;
The second is the final speed of closing the sash (at 10 degrees until it is completely closed).
The sash closing mechanism with a sliding toothed lever is adjusted by means of a spring-loaded stopper. When adjusting a frame or floor closer with your own hands, use special protrusions on the axis.
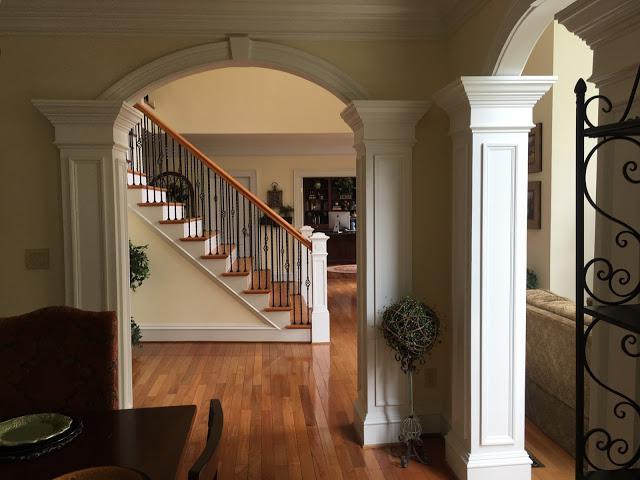
In the era of newfangled building materials and bold design solutions, it is difficult to surprise someone with standard rectangular doors. Therefore, very often, when choosing a design for their apartment, many owners decide to decorate interior openings in. If you show a little imagination, such designs can not only combine the space of several rooms, but also become the most attractive decor element in the entire room. Finishing arches can be performed in a variety of ways, for every taste and budget. With the help of what materials you can decorate an unusual shape and how to do this work with your own hands, we will consider in this article.
Choice of finishing materials
Since arches gained popularity a long time ago, manufacturers of modern finishing materials managed to establish production of products focused specifically on this element of the interior. Today, in specialized markets, you can find ready-made products made of wood and MDF, which can only be inserted into the doorway.
If you do not want to limit yourself to standard solutions, or the passage already has a rounded shape and you just need to decorate it, you can use the following materials:
- wallpaper (any kind);
- decorative plaster;
- cork;
- molding;
- polyurethane;
- mosaic;
- decorative and natural stone.
The decoration of the arches can be carried out by any of the listed options, the main thing is that it goes well with the design of both rooms. In order to assess the complexity of the work, we will dwell on each material separately.
Paper and cork wallpapers
Finishing with arched wallpaper is considered the easiest and most budget option. There is no need to worry about the combination of materials, since most often the walls and the opening are pasted over with the same canvases.

It would seem that such a finish would be mediocre and unattractive, but if you are smart, you can give the arch a very spectacular appearance.
The use of wallpaper "under the brick" will allow you to perform an inexpensive
Bright wallpapers with large patterns will help to bring contrasting notes into the interior. They make out only the vault of the arch, and at the junctions of different canvases they have special protecting corners from erasures.
Recently, the decoration of arches is often carried out with cork wallpaper. Their use helps to decorate and highlight the area of the interior passage against the general background. The material can be used even in places of high humidity, but only in this case it is necessary to choose options that have a wax coating.
Wallpapering technology for arches
Before you begin to glue the wallpaper, the surface of the arch and adjacent walls should be well leveled with putty.
The next step is to prepare the glue. Experienced experts advise kneading a thick adhesive solution. This allows you to achieve excellent adhesion in places of a sharp bend and makes it possible to move the web for better docking.
The first strip is glued to the wall located near the arch. The next one is positioned so that it is half closed. The protruding part of the glued web is cut off, leaving an allowance of 25 mm. Along the entire length of the resulting stock, small cuts are made (at a distance of 20 mm from each other), which, with the help of a roller, are bent to the inside and glued. Thus, the entire opening is glued on both sides.
Then they move to the vault of the arch. A strip is cut out of the wallpaper, the width of which is equal to the depth of the opening itself. Given the location of the elements of the pattern, it is glued to the inner surface of the arch and side walls. To prevent the formation of air bubbles, the wallpaper is smoothed with a clean roller.
Installation of cork wallpaper is no different from working with paper canvases, so we will not dwell on it separately.
Decorative plaster
Finishing can be carried out using an even simpler method - applying decorative plaster.

Before using it, it is necessary to eliminate all flaws on the wall surface. Using putty and a spatula, they smooth out all the bumps, mask the seams and hide the caps of the fasteners. To ensure reliable adhesion of the material to the base, the arch is treated with a primer and left to dry for a day.
When it is completely dry, it can be painted with special paints or simply treated with finishing solutions.
Molding
Often, finishing is carried out by combining various materials, and moldings act as the highlight of such an interior.
By this concept it is customary to mean a wide variety of decorative elements in the form of figured, narrow and long stripes. They can be made of plastic, foam, wood, MDF, metal and other materials.

Moldings go well with all types of wallpaper and decorative plaster. Such strips are installed from both ends of the arch and fastened with liquid nails. For the best combination with the interior, it is recommended to use such elements not only for finishing the opening, but also for decorating the surfaces surrounding it.
Polyurethane products
Recently, very often the decoration of arches is performed using polyurethane. This is a dense and rather flexible material from which white decorative elements in the form of stucco are made.
This finish is attractive in that its cost is much lower than, say, decorating with stone or tiles. Installation of polyurethane is very simple - using a specially designed adhesive. Facing the opening can be done in two versions. In the first, the arch is decorated simultaneously both from the inside and from the outside. In this case, the vertical racks can be designed in the form of rounded or square columns, expanding upwards.
If massive structures do not fit into the surrounding interior, you can only make the edging of the corners from more elegant elements.
Natural and artificial stone
Finishing the arch with decorative stone is the most time-consuming process, but the result is always impressive. Such a cladding looks most impressive when not only the passage is finished, but also part of the walls adjacent to it. Both symmetry and asymmetry are relevant here. If the openings are located close to each other, you can decorate the interior with smoothly passing lining from one arch to another. Regardless of which option is chosen, natural materials always look rich and impressive.

In favor of the stone is also the fact that it does not require a perfectly smooth surface, which eliminates the need for its thorough preparation.
However, there are also difficulties associated with the use of this material.
The first is its weight. Natural stones are not recommended for cladding structures made of drywall, as this can lead to deformation and even destruction of the opening. Here it is better to use a plaster or acrylic imitation, which looks no less elegant.
Also, finishing the arch with stone is very complicated in rounded places. Inexperienced craftsmen have to tinker with it in order to do the job beautifully and efficiently.
Installation of decorative stone
Facing is carried out in several stages:
1. The surface is puttied in order to remove large irregularities.
2. An adhesive is being prepared. Most often, a mixture of lime, cement, sand and glue is used. If light grades or gypsum imitation were chosen for finishing, it can be fixed with ordinary liquid nails.
3. The first stone is laid at the very bottom, at the junction of the wall and the arched opening. It is leveled and pressed tightly against the wall. In order to avoid having to close the corners at the end of the work, the material is overlapped. To do this, the tile of the first row from the floor is attached close to the opening, and the tile of the second row is shifted inward by a distance equal to its own thickness. So, by alternating rows, the entire lining is performed.
4. During the finishing of the arched part of the opening, the material is applied to the arch, the cut line is marked and all unnecessary is removed. Here you can use special wire cutters or an angle grinder.
5. All angular and sharp edges are carefully filed.
6. The resulting seams are filled with a special grout.
Mosaic
Decorative decoration of the arch in places of high humidity (such as a bath, bath, kitchen) is most often performed using mosaics.

In this option, it is possible to use products made of glass, ceramics, metal, concrete or tiles. The material is laid out on a prepared and smoothed surface, where it is attached to a specialized composition. The glue is applied with a notched trowel simultaneously on the wall and tile, after which the product is firmly pressed to the surface. The seams are carefully rubbed with special colored compounds.
Using patterned tiles makes the laying a little more difficult, as the material must be positioned in accordance with the pattern, but the final result is worth the effort.
Conclusion
The modern construction market is so diverse that it is simply impossible to list all the options for facing doorways. Designers to create interiors are increasingly using bamboo, textile, mirror, forged and other elements. We tried to consider the most popular materials with which the arch can be finished. The photos presented in this article will help you get an idea of this or that method of decorating, and maybe they will prompt you to create your own project. We hope that the above recommendations will be of great help to all novice masters.
Arched openings are both constructive and decorative elements of the interior. They make the space warmer, more living and spiritual. Often it is the arch that creates the character of the room, but only where it is assembled correctly and tastefully. And even in this case, a knowledgeable question arises: how to finish the arch? Finishing arches can be extremely diverse:
Arches with wooden trim
Arches with wooden trim make the room more significant. They are ideal for rooms decorated in a classic style. Wooden elements perfectly emphasize the shape of trapezoidal, vaulted arches and interior structures in the form of an ellipse. However, designers do not recommend resorting to wood trim where there are arches of non-standard shapes, as well as in laconic interiors and in wet rooms. Natural wood is an expensive material and the expediency of its use should be carefully weighed.
Arches finished with MDF and chipboard

Such arches are significantly cheaper than their wood-lined counterparts. However, from such plates, with the right approach, even corners and arches of beautiful geometric shapes are obtained. If additional lamination and veneering technologies are used, the material cannot be distinguished from solid wood, but only experienced professionals can accomplish this task.
Arches finished with facing bricks

This option is also not suitable for every interior. This is a rather laborious process, including 2 stages:
- First of all, vertical poles are placed;
- In the second - the vault of the arch is erected.
The arch is made using a template, which must not be removed until the solution has completely solidified. Corners and joints can be decorated with plastic.
Polyurethane finish

Thinking about how to finish the arch stylishly and inexpensively, it is worth remembering polyurethane. The polyurethane finish looks expensive, although it is quite affordable. This durable, but flexible and lightweight material has impressive performance characteristics, therefore it is widely used for the manufacture of stucco, for finishing ceilings, corners, cornices and, of course, interior arches. The undoubted advantage of polyurethane is the ease of its installation - a completely unprepared person can do it with his own hands, with a little effort. In terms of execution, such arched structures are not inferior, and possibly even superior, to arches made of many other materials.
Arch decoration with decorative stone

This finish looks organic only when part of the wall is involved in the stone composition. Moreover, if natural stone is a very difficult material to process, then decorating an arch with a decorative stone does not imply great difficulties - it is very easy to attach it to special glue or ordinary liquid nails.
Plasterboard partitions, and walls made of light blocks, are not designed for heavy loads, so finishing the arch in the apartment will be more successful if you use artificial stone wisely. This material is based on a binder, such as gypsum or cement. In addition, the composition contains expanded clay or perlite, and modern staining technologies make artificial analogues almost indistinguishable from natural stone. A big plus is the infinity of its shades and textures.
Decorative plaster

How to finish the arch without a lot of labor? Finishing arches with your own hands is easiest done by plastering them with decorative plaster. First, the irregularities and visible parts of the fasteners should be puttied, a primer is applied on top. After 4 to 24 hours have passed (the exact time is indicated in the manufacturer's instructions), you can start applying decorative plaster. The range of such a mixture allows you to choose any surface texture. If a relief is expected, it should be applied to a wet composition. In the case of using this method of finishing arches, it would be appropriate to use an arched corner, which will save the plaster from chipping.
Wallpapering the arch

As an option for finishing the arch, wallpapering is suitable. It should be noted that the adhesive mixture should be slightly thicker than for ordinary wall pasting. Corners will help protect the wallpaper from abrasion. You need to take those wallpapers that are stronger and bend better, suitable options:

Mirror tiles

Mirror tiles are a specific facing material that can be used to decorate a wide variety of rooms. In the case of an arch, it will fit in the form of separate inserts from narrow strips. This tile goes well with all other finishing materials (plastic, wood, etc.) and can be used to stylishly separate different textures of finishes, design corners.
Mosaic

How to finish the arch to give a unique look to the room? Mosaic arch decoration is ideal for a stylish interior with character. Mosaic can be:
- From glass;
- Ceramics;
- natural stone;
- Self-adhesive panels, etc.
In any case, fixing it is a delicate and time-consuming process. At the same time, such a finish is performed quite often, as it looks original and unusual. First, an adhesive solution is applied to the wall, all corners are well smeared, and then a mosaic is applied using a level, beacons are inserted between the parts, then they are pulled out, and the seams are processed with decorative putty.

In addition to these methods, finishing the arch in an apartment can be carried out using a mass of other materials that can make the arch unique. For example, it is convenient to use flexible acrylic tiles for decoration, which repeats the appearance of natural stone, but can be of various sizes and colors. Stripes of decorative molding, fixed with “liquid nails”, look very good. There are options with plastic - the use of plastic lining and panels can quickly and easily give the arch a neat and beautiful look. Plastic trim is very inexpensive and practical.
Wall decoration around the arch

A decorative arched corner serves to highlight the arches against the background of the rest of the interior. In addition to the design function, the corner allows you to hide irregularities in the arched doorway. This is especially true for those who make the arch with their own hands. But even an ideal doorway should match the style of the wall on which it is located. The main purpose of such a wall is to emphasize the beauty of the opening. This works well, for example, against the background of decorative embossed plaster. A wall lined with artificial stone looks no less harmonious. As elite finishes - compositions of Venetian plaster on the wall. If the arch is finished with plastic, then the wall section can also be pasted over with plastic. You can also decorate the wall with wood - attach wood panels to part of the wall. Even simple wallpaper, chosen with taste, will emphasize the beauty of the arch on the wall.
Decorative finishing of arches in the house requires great delicacy, at this stage it is easy to make a mistake that will disfigure even the most durable and neat arched structure. And yet, it’s quite realistic to finish the arch without the help of specialists - with your own hands.
When repairing a new apartment, its final appearance occupies a special place, so everything needs to be calculated to the smallest detail. To give an attractive appearance to the apartment, the walls in it should be beautifully finished. Many different materials are used for this, however, the most popular of them is drywall. With it, you can make both smooth and boring walls and ceilings, as well as various shapes on the ceiling and walls. Inside the apartment, a plasterboard arch is popular, which is often installed above the doorway. A plasterboard arch will perfectly decorate a boring acute-angled apartment in a cozy and cheerful, round box, where you can have a great rest from everything and everyone. After finishing the walls with drywall, you will have to brighten it up with something, to give brightness and aesthetic appearance to the material. So, how to finish the drywall arch in order to achieve just such an effect, we will tell you below.
What is this article about
Finish options
As you know, there are two types of arches: rounded and square. The former are well suited for apartments, and the latter for summer cottages or country houses. But it can be the other way around, it just all depends on the style of the interior. For some strict designs, a square arch is perfect, and for relaxed and cheerful styles, a round arch is the best option.
Decorating the arch with your own hands will take a lot of effort and time, but in the end you will get a house where you want to live forever. To do this with drywall is not so difficult, because, as you know, drywall is a versatile material that can be finished in any way used for wall decoration. Moreover, the statistics of the popularity of finishing materials for drywall is the same as that of the walls themselves, but we will only touch on the most popular of them. According to our observations, the consumer is inclined to choose: wallpaper, paint, decorative stone and decorative plaster, as a finishing material for a plasterboard arch.
Wallpaper
About how to paste over the arch with wallpaper below. This option for finishing the arch is the most affordable for the consumer. Another advantage is its wide range of prints and patterns, which makes wallpaper perhaps the most creative variation on your archway. In this case, you can choose one wallpaper for the arch and another for the rest of the room to highlight it, but the main thing here is not to overdo it with highlighting the design, i.e. you can’t choose minimalist wallpaper for the room and, for example, photo wallpapers with the image of the sea. This means that one should flow smoothly into another, i.e. the wallpaper can be different, but with the same design style.
Advice when installing wallpaper on the arch. When decorating the outer part of the arch with wallpaper, you should slightly bend the wallpaper inward and, stepping back from the corner, cut off an unnecessary piece literally a millimeter. Having done this on both outer sides, glue the wallpaper on the inside of the arch. If everything is done following this advice, then the joints on the wallpaper will look a little more natural, because there will be no this random white stripe between the sheets of wallpaper.
It is very important to level the surface on which the wallpaper will be pasted in order to achieve an aesthetic appearance of the pattern on the wallpaper. This is done with ordinary putty. To save the solution, you can putty only the joints of drywall plates, since the rest of this material is often perfectly even.
Let's talk about the disadvantages. Yes, we have washable wallpapers, thick wallpapers that supposedly last a long time, but that doesn't change the fact that the lifespan of any wallpaper, no matter how much they are praised by the manufacturer or seller, is still short. Often, it is about 2-4 years with careful use and proper care.
Dye

So, the second most popular option is painting the arch. Here you can show your individuality and draw your own unique ornament, drawing or inscription with paints, the main thing is to have a good imagination and paint brushes, and don’t forget that the artist’s skills are not the last thing in this matter, and if you don’t own this gift, it is better to call a specialist.
But if you, unfortunately, do not have any of the above, then you can simply stock up on paint and tools, and then paint over every room in monotonous and boring paint. To highlight the arch, and this is important, otherwise why did you do it at all, you can make a beautiful painting on the inside and outside of the arch using a stencil and cans of paint. By choosing a suitable color background for this painting, you can easily stun any guest in your home.
Naturally, painting has its drawbacks. Firstly, this is the price, because a can of good paint can cost good money and there will not be enough money to cover the whole house with such paint or it will cost a tidy sum. Secondly, at this price, these paints can be easily spoiled by children or by you if liquids, colored pencils, pens, paints, etc. accidentally get on it.
Decorative plaster

This material can be used in the design of a plasterboard arch, while it is important to take into account the design of the entire room so that the arch stands out, but not too much, otherwise it will feel like the arch was taken from another apartment and simply transferred to yours. When using decorative plaster, many householders sculpt columns from it. Yes, it’s beautiful, but not always, because these columns in the classical style will not fit into the Art Nouveau style, so you need to correctly weigh the pros and cons before deciding on the columns. After all, their list of applications does not end with them, for example, a small or large ornament that does not go out of fashion can serve as an excellent replacement for the same columns, because the classics cannot become outdated.
One of the disadvantages of such a solution can be brittleness and a tendency to cracking. But this can happen when buying low-quality material or with improper installation. Otherwise, this material is very good: it is durable, not too expensive, suitable for almost all interior styles. Although it is aimed at use in the yard or for exterior decoration of the house.
Decorative rock

For a beautiful decoration of the arch, you can also use decorative stone, which is perfectly attached to any surface with building glue. It is not recommended to use heavy natural stone as a working material, because a drywall construction cannot boast such a high load capacity to hold all the power and beauty of natural decorative stone. Therefore, use its substitutes that mimic it well. They can be made from a variety of materials.
One of the disadvantages of this finishing material is its complexity of installation, because its laying out takes a lot of time and effort, like everyone else, it requires a lot of attention and accurate calculation. Another disadvantage is the price. Decorative stone is truly almost the most expensive of the finishing materials. But the biggest advantage of such a stone is its appearance, because it is not in vain that it costs such money.
Mosaic

Another good option for decorating the arch in the apartment. Practical and unpretentious, also suitable for wet rooms.
What should not be covered with a drywall arch
There are materials that are not recommended for finishing the arch. One of them is decorative plastic panels. They have many shortcomings in relation to the decoration of arches. For example, it is difficult to install from the arch due to the fact that there are a lot of corners in the arch, so you will have to install a huge number of skirting board corners and do not forget about the frame for plastic panels. And besides, plastic always creates a feeling of cheapness, by the way, it is so, because plastic panels are very cheap. But this is not a reason to use them for drywall arches.
Another material that should not be used for decoration is wood paneling. The main reason for the failure is the low flexibility of the wood, because of which it will not be possible to finish the inside of the drywall arch.
Let's talk a little about square arches. From the name it is clear that this type of arch does not have roundness, instead of them there are planks installed at an angle of 45˚. So for this type of arches, you can use both wood and plastic. In addition, all previously used finishing elements (wallpaper, paint, decorative plaster and decorative stone) can be used to decorate a square arch. The only thing we do not recommend is the decoration of the arch with decorative plastic panels.
Arch corners
Such a question is quite natural, because most people, when installing finishing materials, are not used to relying on the master and do everything themselves, they always have to think: “What to do with the corners of the arch?”. But this is not a problem, because you can simply tint the corners in the same color as his surroundings. For example, gray or black color is suitable for decorative stone. For wallpapers, we already gave you advice above in the section about them. When painting the arch, the corners do not need additional processing. And when decorating with plaster, you don’t need to think about corners at all.

Also, there is an option to stick plastic corners on the corners of the arch, after which they can be painted or left white. The corners will protect the arch from damage if you accidentally hit something on it, and there will definitely be such precedents.
Good luck with your repair!
Master of Architecture, graduated from the Samara State University of Architecture and Civil Engineering. 11 years of experience in design and construction.
In an effort to move away from generally accepted standards and give elegance to the interior, the owners of apartments and country houses change their usual doors to arches. This is no longer a new, but to this day a popular design highlight. The arch in the doorway is bought ready-made or made by hand. It comes in a variety of configurations, so it allows you to realize any idea.
Forms of arched openings
Interior door arches are selected not only based on taste preferences, but also depending on certain parameters: ceiling height and. The structures are made of drywall, wood, MDF, PVC. Drywall is the easiest to work with as it is the most flexible material.
Currently, there are a large number of different types of arches, which differ in shape. The most common are:

Arched openings also have different designs and, on the basis of this, are divided into several varieties:

After looking closely at your interior and choosing the right arch model, you can begin the phased work.
Step-by-step instructions for self-production
In order not to spend extra money on finished products, you can do the decoration of the arched opening yourself. To do this, you need to follow a well-established scheme.
Making the necessary measurements
Any construction process requires accuracy, which is achieved by preliminary measurements. You need to start from the opening itself, so first measure its width and height. The size of the span between the walls of the opening is equal to the width of the arch. In order to make a semicircle as accurately as possible, this indicator must be divided by two.
Before making the arch, you need to decide on its future configuration. If you are going to perform it in a classic style, then pre-align the walls. Otherwise, the design will look ugly. You can remove all defects from a vertical surface with putty or plaster using beacons.
Creating a Structural Frame
To make the installation of the frame, you must perform a series of sequential steps:
- A contour of a metal profile is screwed along the lines of the opening with dowels. Vertical guides are set indented from the surface of the interior wall. The size of the indent is equal to the thickness of the drywall sheet and the plaster layer (about 0.2 cm).
- We install two such profiles parallel to each other on each side.
 For the frame device, two profiles are installed in parallel
 - Having finished working with the profiles, we take up the installation of the first sheet of drywall. If its thickness is 1.25 cm, then it is recommended to fasten it with 3.5x35 self-tapping screws. If the GKL thickness is not more than 0.95 cm, use smaller screws.
 Drywall fixed with self-tapping screws
 - Sheathe the second side of the frame with drywall.

- Make a metal profile in the shape of an arc. To do this, cut the side walls of the profile with special scissors every 7 centimeters. As a result of these actions, it is easier for him to give the required shape. For an arched structure, two such blanks are required.
 An arched arc is made from the profile
 - Install and fasten the arcuate profiles to the main part of the frame.
 The arcuate profile is attached to the main part of the frame
 - In order for the arcs to be securely fixed, they are attached with suspensions to a straight guide located on top. The number of hangers depends on the width of the opening. Usually three pairs are enough.

- In increments of 0.4-0.6 m, attach reinforcing crossbars along the perimeter of the frame, fixing them on the guides of the two contours.
- As a result of the above actions, a reliable metal structure in the form of an arch comes out of the profile. In the future, it will be covered with plasterboard or plywood.
If it is assumed that the columns of the arches will not be too large in thickness, then it is permissible to change 2 arcs to a wide profile. Cutting and bending is done in exactly the same way. Only in this case, the installation of crossbars is not required.
Sometimes wooden slats are used instead of a metal profile. The technology of mounting the frame does not change significantly.
Bending drywall sheet
After installing the frame, they are accepted for bending the GKL. Experts recommend using drywall, designed specifically for arched structures. It easily takes the desired shape if the material is washed in the longitudinal direction.
If you decide to use ordinary drywall, then you will have to tinker with it. The installation element is cut to the desired size in the form of a rectangle. Bend it in two ways: wet and dry.
 Scheme for manufacturing a bend
 The wet method takes a lot of time and is not rushed. So that the material does not crack when bent, it is moistened with water and punctures are made. In this form, the drywall sheet is left to lie for some time, and then it is bent on a template of the desired configuration.
The dry method refers to the application of cuts parallel to each other on the wrong side of the GKL. The cut goes deep into the sheet, affecting the outer cardboard layer and gypsum. The cardboard layer on the front side remains intact.
With the dry method, the bend of the installation element takes the correct shape. At the same time, it is important to know that sawing GKL is best done with a jigsaw, and not with a hacksaw. Then the edges will not be torn.
Rough frame trim
If the bend was carried out by the wet method, then first of all it is necessary to wait until the drywall sheet is completely dry. The material is fixed first with adhesive tape, and then with self-tapping screws. The minimum step between them should be from 5 to 6 centimeters.
 Perforated corner prevents edge chipping
 After fixing the sheathing, the edges of the drywall sheet are cleaned. And in order to prevent chipping of the curved edge, a perforated plastic corner is installed on it.
Leveling with putty
To make the surface even, you need to finish the arched structure. To begin with, a primer is applied, and after it dries, putty. Fiberglass mesh is used to reinforce the second layer and strengthen the corners..
 Fiberglass mesh reinforces the corners of the arch
 The last third layer of putty is applied to the grid. After about 10 hours, it dries up, after which you can start cleaning up the bumps with sandpaper. With a quality work done, the surface will be without roughness, irregularities, and the caps of the self-tapping screws will not be visible in it.
Ways to finish arches
Those who wish to finish the arches on their own will have to work hard, cutting out each detail separately. However, many do not look for difficulties and choose a simple path - they acquire factory structures from prefabricated elements.
Ready-made and prefabricated linings
There are two types of factory-made overlay: wooden and foam.
Styrofoam elements
Foam arches are often preferred as an alternative to plaster products. The advantages of such structures are as follows:
- Fast installation. The installation speed is much higher than arched structures made of plywood or plasterboard.
- Low price.
- Easy transportation. Styrofoam is a fairly light material, so you do not need to hire movers to deliver the product to your home.
- Light weight. Arches of this type can be installed even on very weak structures.
- Various forms.
 Foam arches are assembled from prefabricated elements and cut in place to fit the size of the opening
 The negative sides of the arched foam structure are: fragility, toxicity, rapid flammability.
Wood elements
Wooden arched structures do not require advertising. They look rich and rarely do not fit any interior style. However, it should be understood that the word "wooden" does not mean that all components are made of pine, oak or other wood.
 The arch can be made of natural wood, MDF, chipboard or plywood
 Arched elements are also made from inexpensive MDF, laminated chipboard, plywood, veneered. The desired option is selected individually based on the taste and thickness of the wallet.
 Wooden elements are ordered from a catalog and then cut to length before installation.
 Installation of wooden structures is simple. In hardware stores, arches are sold both assembled and disassembled. The first option is considered more reliable, since the work was performed by a specialist.
Decorating with finishing materials
Currently, there are many ways to beautifully and neatly. The decor is selected so that it is in harmony in color, texture, material with the home environment. The most popular options are:
- Simple staining. The arch will look elegant and complete if it is simply painted white, brown or to match the walls. This finish is often supplemented with decorative elements, lighting.
 Monochrome painting looks advantageous in combination with backlighting
 - Wallpapering. This is the fastest, most affordable and easy process. For these purposes, vinyl or non-woven options are best suited.
 Slopes highlighted with wallpaper - a very stylish design move
 - Finishing with wooden, plastic clapboard. The method guarantees not only a beautiful aesthetic appearance, but also ensures the durability of the structure, its protection from moisture and mechanical damage.
 The clapboard option is great for interiors with wall decoration from the same material.
 - Decorative plaster. The surface of the arch is beautiful, embossed and durable. True, such a finish needs to be restored sometimes, and it requires some care.
 This method looks especially advantageous in deep arches.
 - A rock. An arch in a house made of natural or artificial stone is installed only with the help of a professional. Finishing fascinates the eye, makes the interior unusual.
 The ragged edges of the arch can be the highlight of any interior.
 - Cork- it is quite expensive, but environmentally friendly material. It is easily susceptible to mechanical damage, therefore, to extend its service life, it is recommended to cover the cork with wax.
 Cork finish brings a sense of environmental friendliness and comfort to the interior


