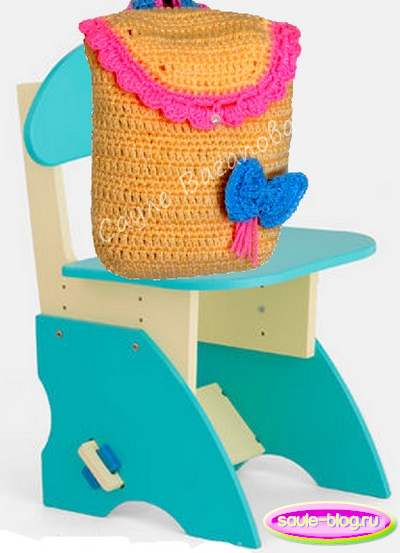
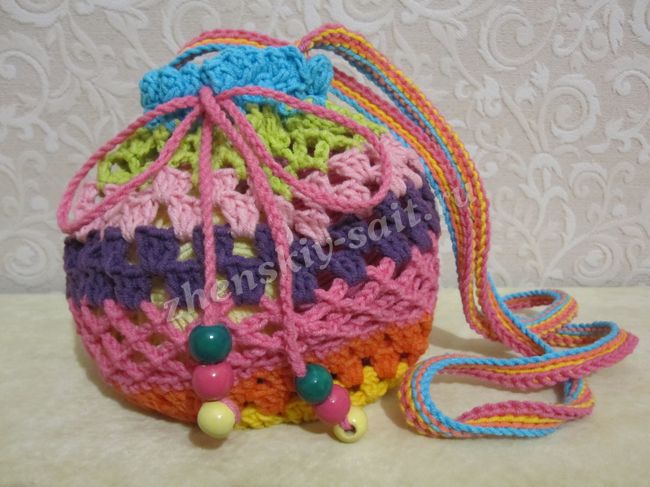
In the summer I want to be bright in everything. And not only to us! Our little fashionistas also want to be original and stylish. Therefore, today we will knit one of the most important women's accessories - a bag! We will knit a handbag for a girl with a very beautiful, but at the same time simple pattern.
To knit a handbag we need:
- Karachay yarn (100% acrylic) red, yellow, green, blue color;
- Hook 3 mm;
- Scissors.
For convenience, the text contains abbreviations:
- RLS - single crochet
- CCH - single crochet
- PSN - half-column with 1 crochet
How to crochet a baby bag
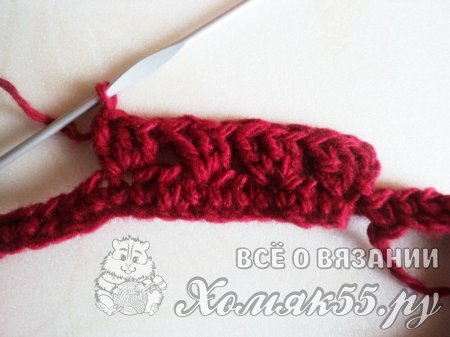
We will start knitting with an air chain. Its length depends on the desired width of the handbag. When the chain is ready, you need to add 1 more air loop. This is the lifting loop for RLS. Therefore, further we knit 1 row of RLS, performing 1 in each loop. We close the chain in a ring by completing 1 SS.
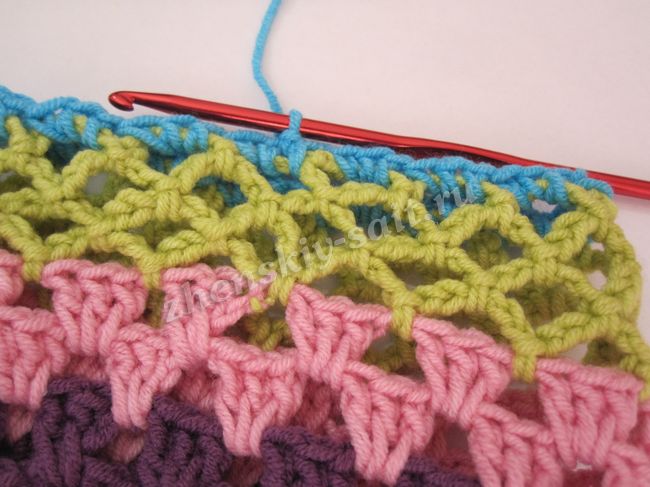
Now, since we are starting to perform the pattern itself, we do not make 1 loop for the rise, but 3. We knit 2 more CCHs at the same point. Next, we skip 2 loops of the base and in the 3rd we knit 3 CCH in a row. Skip 2 loops again and perform the same element. So we will knit the whole row.
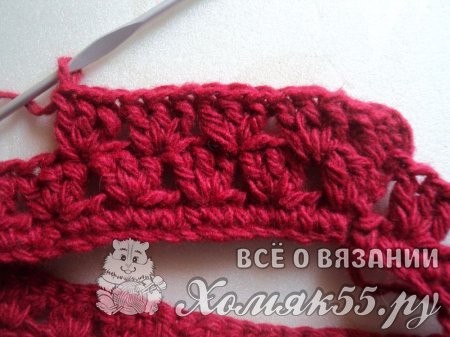
Further, all rows to the handle of the handbag will be the same. We will perform 3 dc between the elements of the bottom row.
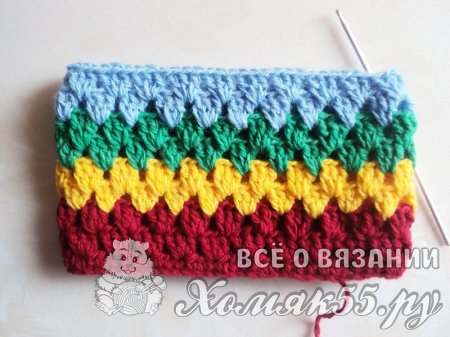
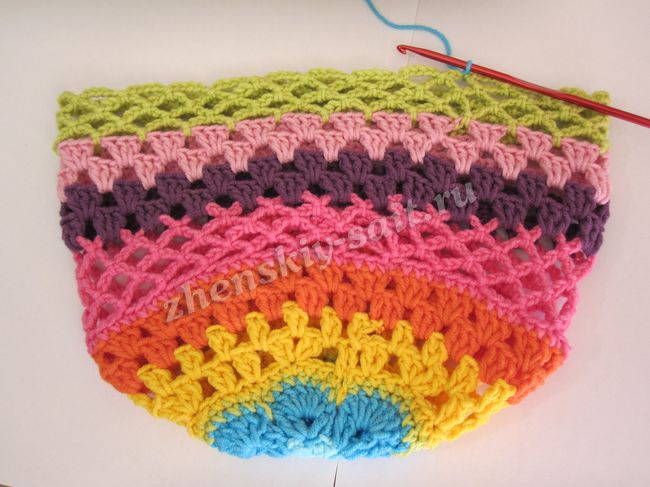
In the new row, we change the thread to yellow and knit 2 rows with it. We change the thread at the moment of connecting the beginning and end of the row.
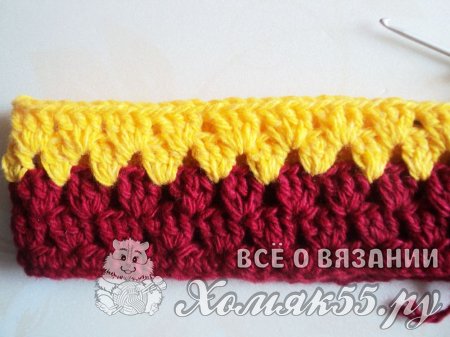
Next, knit 2 rows of green yarn and knit 2 more rows of blue thread.
If the bag is wider, then the number of rows needs to be increased. Again we take the red thread and knit 1 row. Then we make 2 loops on the rise and we knit the whole new row of PSN. Now you need to straighten the bag and divide it into 3 equal parts.
Next, we will knit as before PSN on the 1st part of 3. Next we do the VP. There will be as many as 1 out of 3 parts. In this case, 15 loops. We join RLS in the initial loop of the 3rd part of the bag.
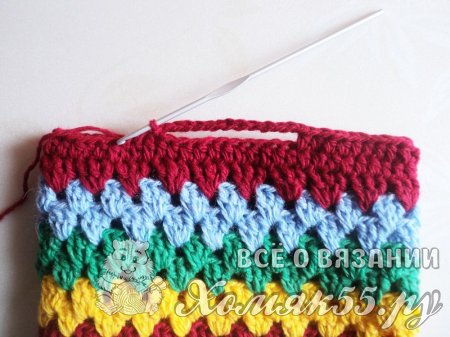
And we continue to knit PSN. Do the same on the other side of the bag. It is important that the chains are exactly opposite each other. And we knit a row. In the new row we continue to knit PSN. Under the chains we knit 15 loops. If the chain is large quantity loops, which means we knit the same number of PSN.
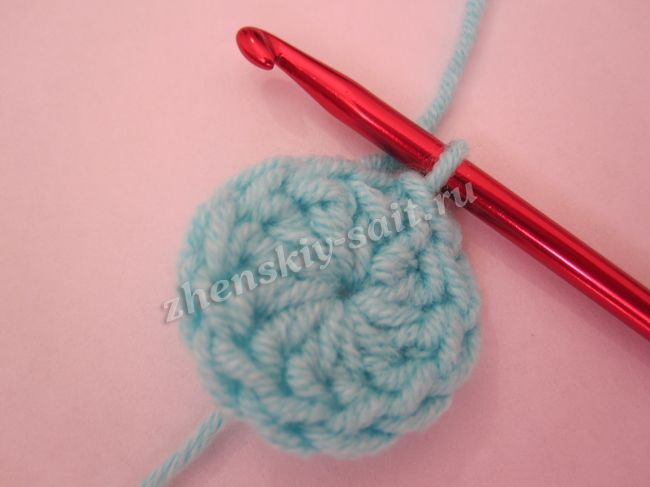
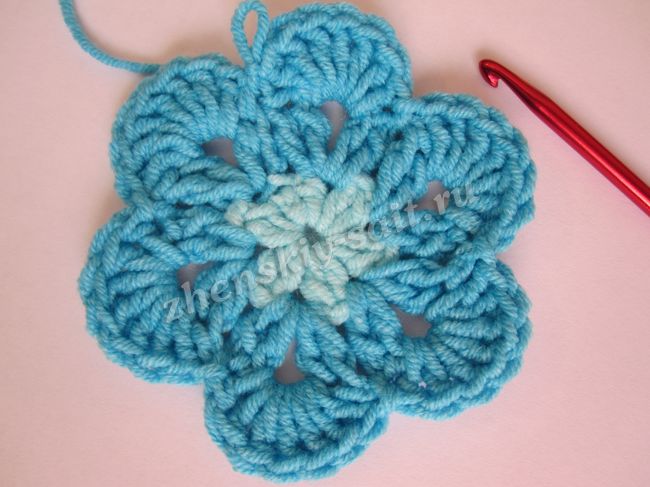
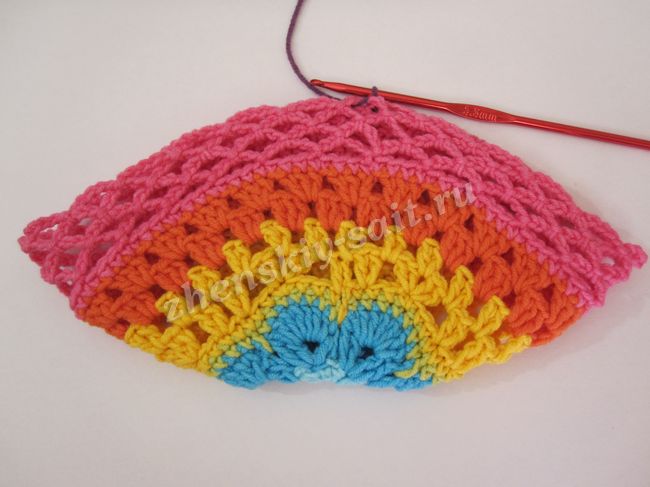
In the amigurumi ring with a blue thread (you can use any other color you wish), we first knit three air loops, then we knit 11 sts with a crochet.
We close the typed columns in the ring with a connecting column. Change the color of the yarn to turquoise. In the process of knitting in each row or after two rows, we change the colors of the yarn.
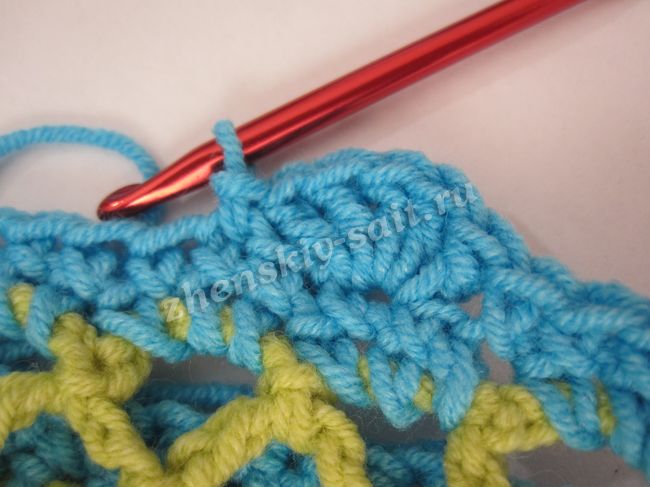
1r. Three lifting loops, three stitches with a crochet in the first loop, (air loop, skip two loops of the bottom row, then 2 stitches with a crochet in the third loop, air loop, 2 stitches with a crochet in the same third loop) x to the end of the row, connecting st-k.
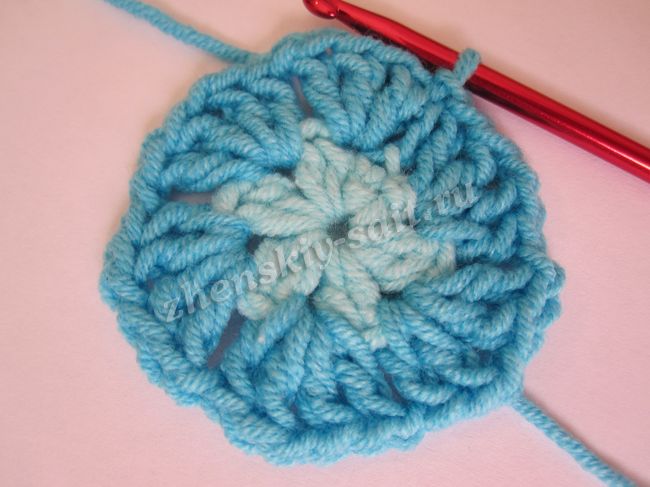
2r. In an arch of 4 stitches with a crochet, we knit 7 stitches with a crochet, a connecting stitch into the arch from an air loop. We continue to the end of the row. We get a flower.
3r. We tie the flower in a circle with st-mi without a crochet.
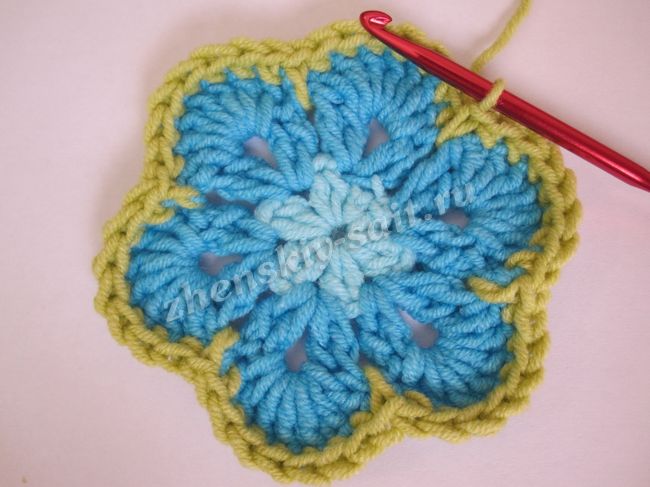
4r. 3 single crochets in each stitch of the previous row, increase in the fourth stitch of 2 single crochets. We tie the whole flower in this way.
5r. Three loops of lifting, (we skip three loops, in the fourth loop we knit 2 sts with a crochet, air loop, 2 sts with a crochet, air loop, skip three loops, 2 sts with a crochet in one loop, air .loop, skip one loop, 2 double crochets in the next loop, air loop) x to the end of the row. We finish knitting with a connecting column.
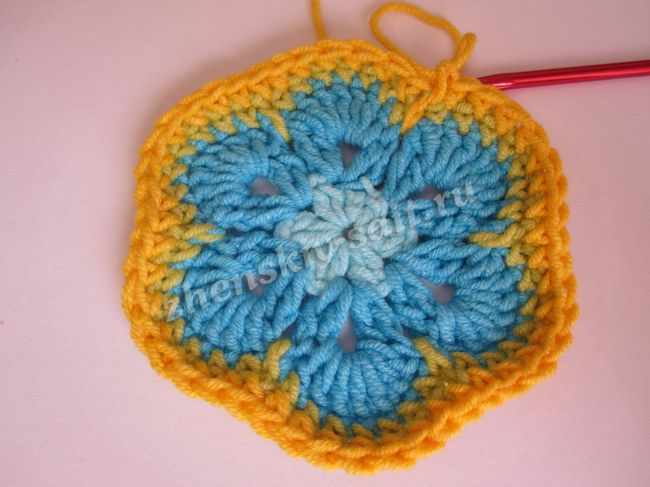
6r. Three lifting loops, st with a crochet to the base, then we knit * 2 sts with a crochet, an air loop * into the arch from the air loops, repeat from * to *. We complete the row with a connecting column.
7-8r. Three lifting loops, 2 double crochets into the base, air loop, * 3 double crochets into the arch from the air loop *. Repeat from * to *. We complete the row with a connecting column.
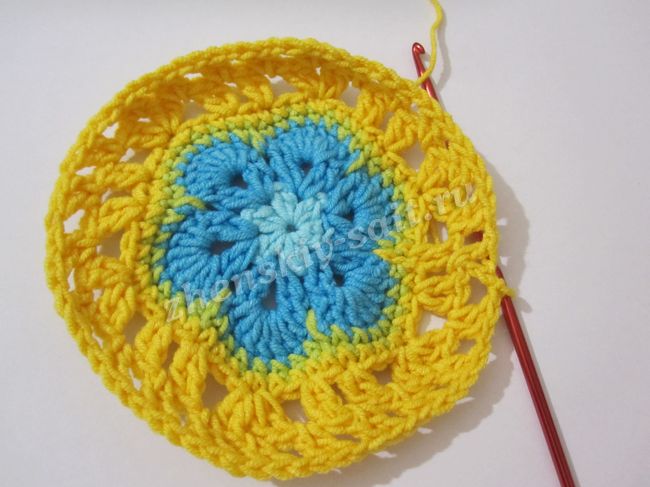
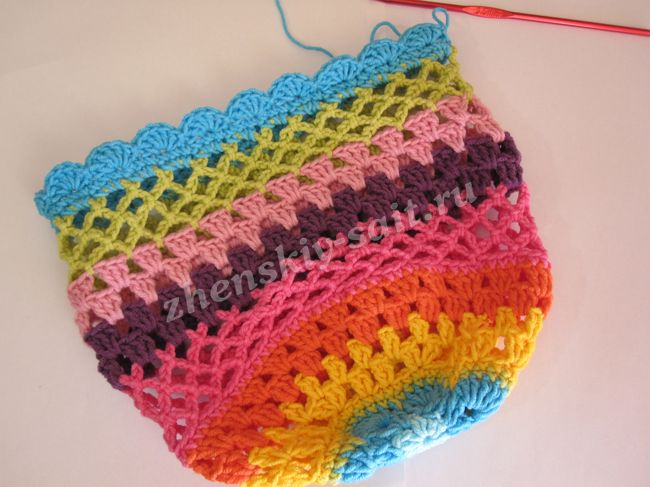
9-12 p. Five air loops, * a connecting post in an arch from an air loop, five air loops *. Repeat until the end of the row from * to *.
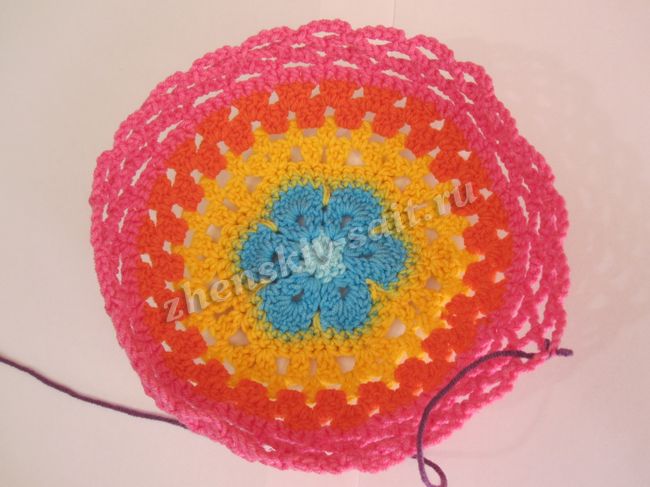
13-16 p. Three lifting loops, 2 double crochets into the arch, * air loop, 3 double crochets into the next arch from the air loops *. Repeat from * to *. We finish knitting with a connecting column.
17-20 rub. We knit in the same way as the 9th row.
21r. In each arch we knit 3 sts without a crochet.
22r. * 7 stitches with a crochet in the second loop from the hook, skip one loop and knit in the next connecting stitch *. Repeat from * to * to the end of the row.
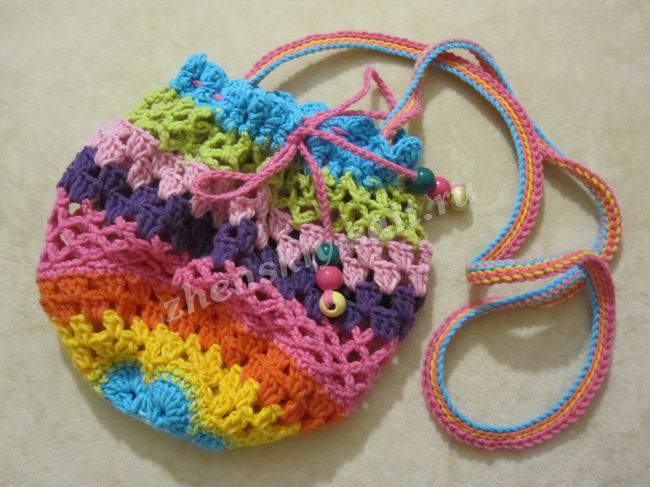
The bag is ready.
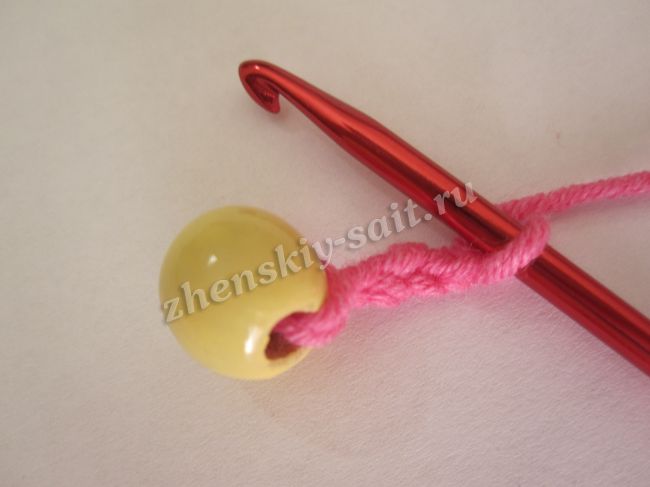
We knit a lace for a handbag so that you can easily tie it.
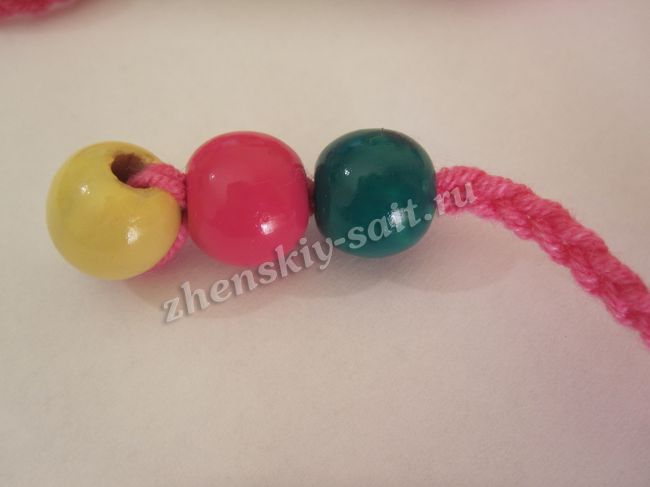
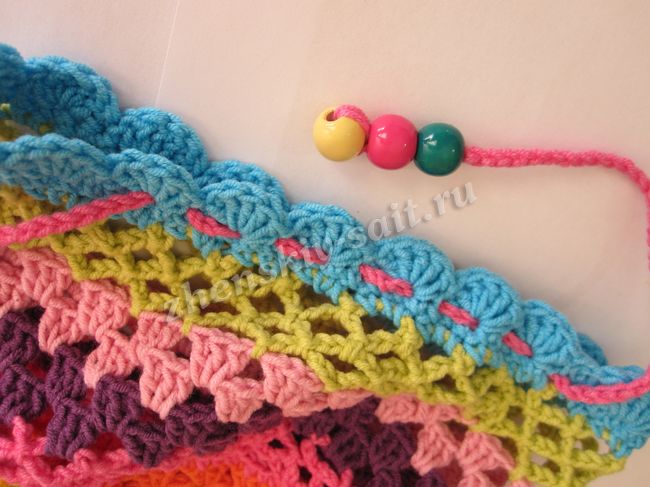
Through wooden bead we thread the hook, grab the thread and knit a chain of 170 air loops. Next, we string two more beads, moving them to the first.
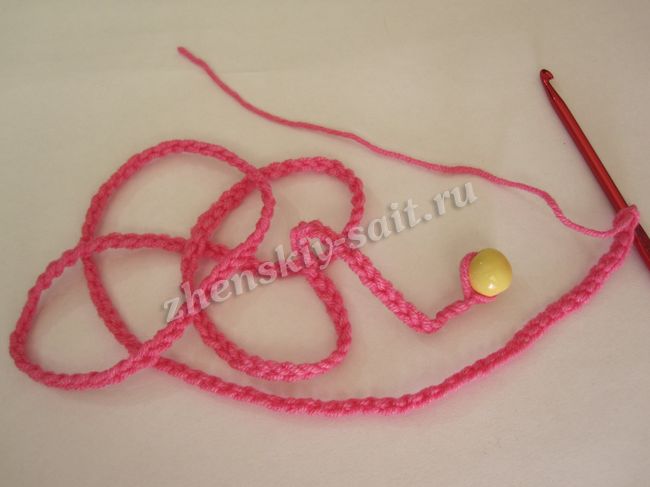
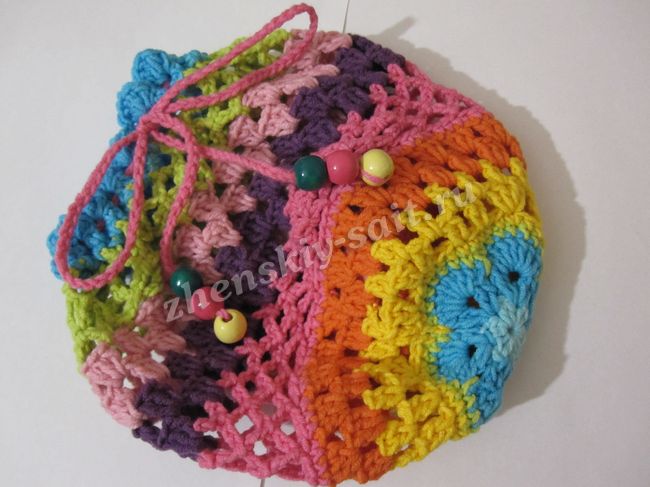
After that, we pass the cord through the holes on the purse.
We string three more beads. We fix the last bead well, and hide the thread.
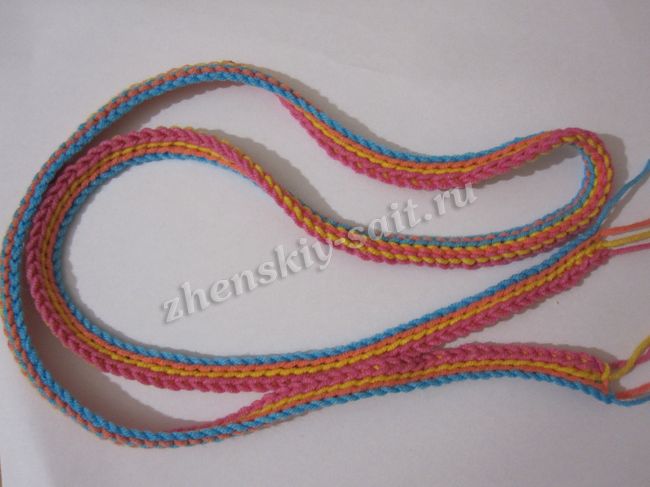
For the handle, we will knit a chain of 210 air loops.
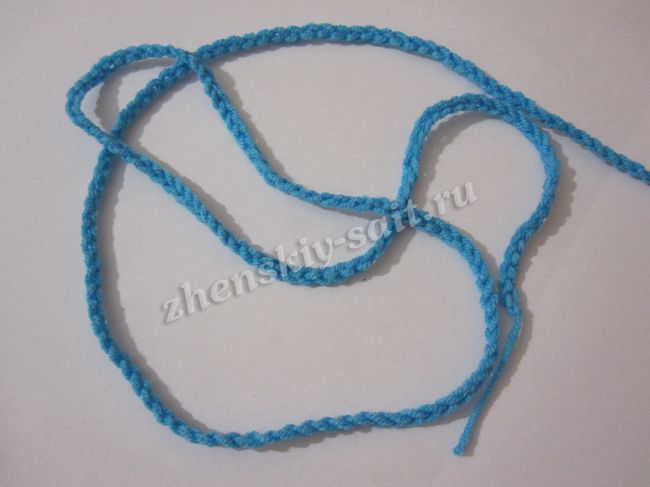
Then we take the second color of yarn and knit in each loop along the connecting column along the entire length of the strap.
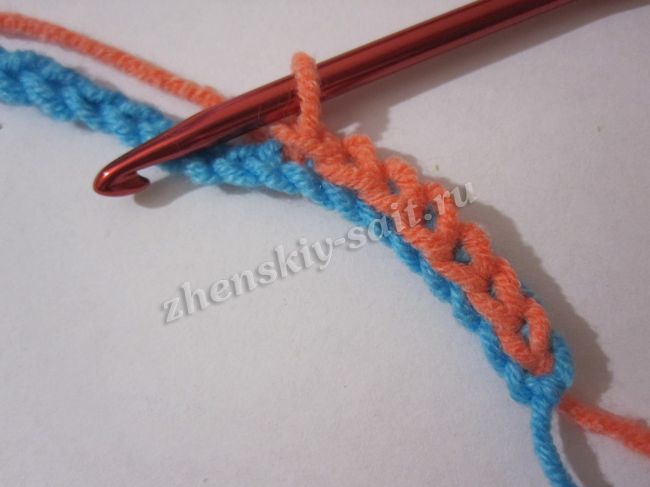
The width of the strap is selected individually, in this case it is knitted from four colors of yarn.
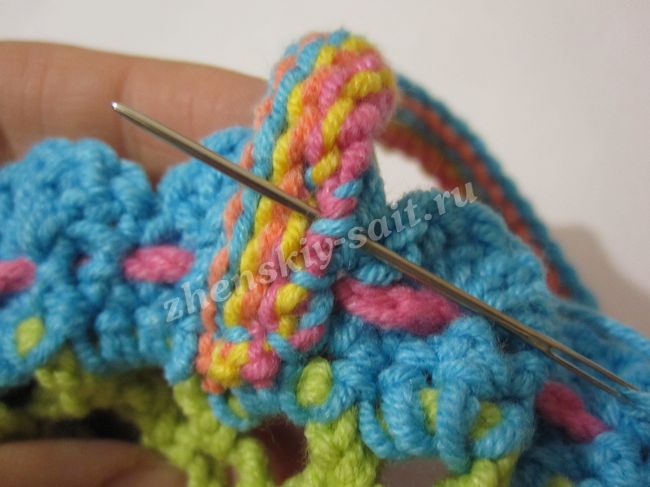
We sew the strap to the purse using a tapestry needle.
baby bag, crocheted, for your fashionista is ready.
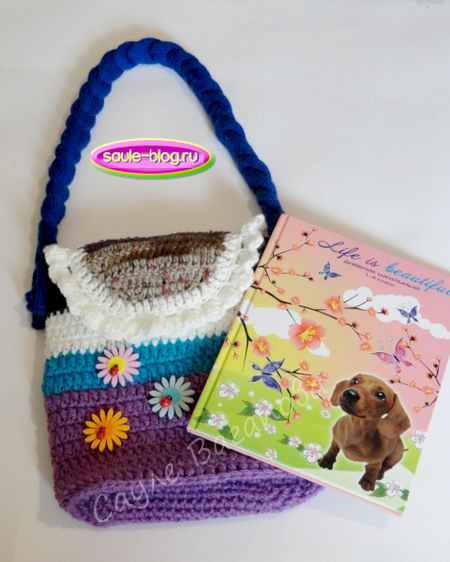
Greetings! At the request of a friend, I contacted a simple handbag for a five-year-old baby. They asked for an uncomplicated handbag, most importantly - striped, tighter and with a flat bottom.
I decided to immediately make a description on knitting - for those who are interested not only in how a small crochet bag fits. But most importantly, how to tie the bottom of the bag at an angle to its walls. I will be glad if you like it and find it useful.
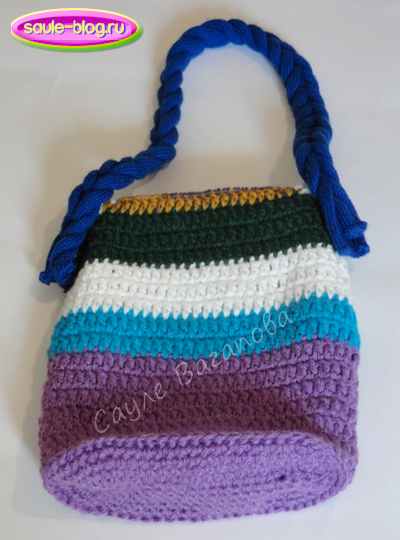
Dimensions: handbag 23 × 23 (without bottom and valve), valve height - 14.5 cm. Handle length 63 cm. In the photo, I specially put a school diary next to the bag to show its dimensions in comparison.
For knitting a handbag I used:
- for a bag - semi-woolen yarn, in skeins of several colors: white (15 g), turquoise (15 g), dark green (15 g), lilac (50 g). I wrote in detail about this, economy-class weight yarn in article.
- for the closing valve: Merino Batik (10 gr), 100gr/280m, p/w from leftovers ( you can see the description of the baktus - the original scarf-shawl knitted with such yarn, it looks very nice, it was quickly bought from me in our store at the Masters Fair);
- the handles are knitted and woven from “Magic” threads, microfiber 100%, 50gr/152 m.
Thread consumption 100 grams (additionally indicated in brackets for each separately).
Hooks No. 4.5 and 3.25
Notation
Loop - p.
Air loop - VP.
Single crochet - RLS.
Double crochet - CCH.
Embossed purl column - RSSN (there is a picture below).
Description of work on knitting a handbag
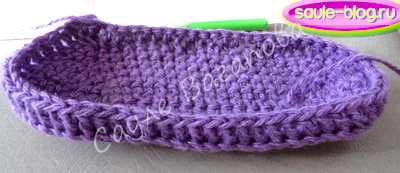
I started from the bottom of the bag according to the scheme.
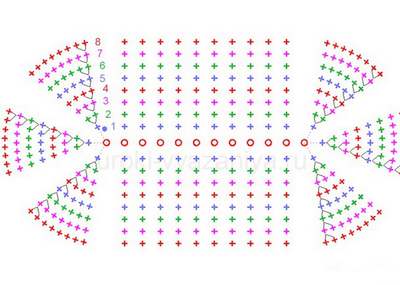
I scored a “chain” of 16 VP + 1 VP lift with a lilac thread. I knitted with single crochets according to the scheme 5 rows = 62 p. The size of the oval-bottom is 20 × 8 cm.
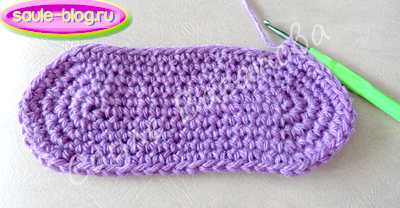
Since the handbag will be strengthened at the bottom with cardboard (you can use plastic), I immediately circled an oval on paper so that later it would be easy to cut out the reinforcement along it.
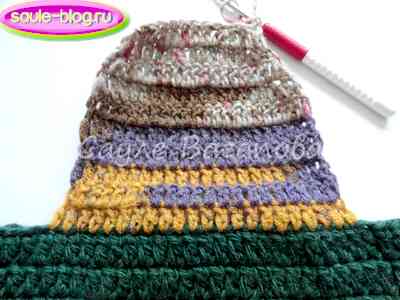
To get the transition from the bottom to the walls of the bag at an angle, the next row was tied with a purl (concave) embossed CCH.
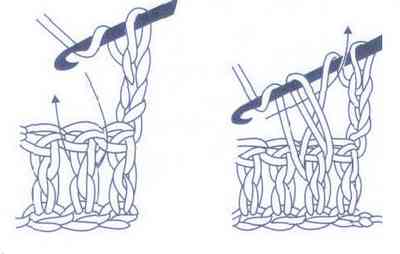
It turned out to be such an end.
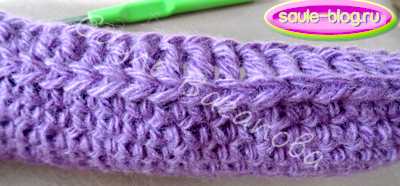
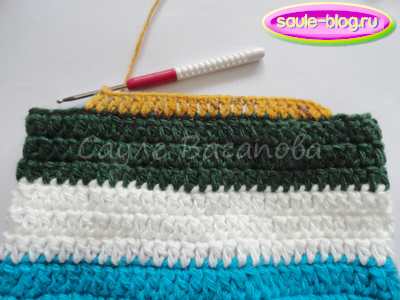
2 - 7 pp: lilac.
8 - 9 pp: turquoise.
10 - 12 rr: white.
13-15 rr: dark green.
The bag is almost ready, it remains to finish the top.
Valve
I start knitting crochet 3.25, melange yarn.
1 p: I scored 22 CCH on the last row of green color, retreating from both sides by 4 loops. By retreating from the edges, she left room for tying the valve with a “shell” pattern.
2 - 6 rr: 2 VP, 22 C CH.
In the following rows for rounding the valve doing contractions.
7 p: reduced by 1 p. on each side = 20 p.
8 p: 18 p.
9 p: 15 p. (reduced along the edges and in the center)
10 p: 11 p. (as in the 9th row)
1 p: tied the valve StSN.
2 r: 3 VP (one of which is a lifting loop), skip one loop, * RLS, 2 VP *
* * to the end of the row. It turned out 22 arches from two loops.
3 r: finished with "shells" - in each arch of the previous row * C bN, 3 C CH, C bN *
Pen
Of course, the handle for such a small handbag, in my opinion, looks a bit thick. But, as soon as the little girl saw the “pigtail”, she “lit up”: “I only want her!” 🙂 So, I had to stop at it.
I already had such a “pigtail-handle” in ready-made. A detailed case for weaving such handles to bags, in two parts, see. I really like them, because they turn out to be durable, keep their shape perfectly, and do not stretch much.
If this version of the handles does not suit you, I think you can easily tie a regular crochet strap.
Strengthening the bottom
I took a previously prepared blank of an oval circled on paper. I cut it out of dense cardboard box bottom seal. I put it in my purse at the very bottom.
It remains to sew a pen and that's it! A simple little bag with a rounded flat bottom is ready.
After that, without stopping, she took up knitting a second bag-backpack - already with a square bottom, with long straps. Description is being prepared.