Laminate is known to us as an efficient and reliable floor covering. But now more and more often you can see that designers use it as a decorative element, insert or for wall cladding.
What attracted them to this material? What are the benefits of using laminate flooring for other purposes? And how to install it correctly? You can find answers to these and many other questions in the article.

Advantages and disadvantages
For most people, the idea of using laminate flooring as wall decoration will seem out of the ordinary. However, if you study this issue in detail, then finishing the walls with a laminate will undoubtedly have a number of advantages.

Aesthetically attractive appearance. The texture of laminate flooring is similar to real wood, which gives the finish a certain charm. In addition, it is an environmentally friendly product and is suitable for lovers of natural materials. Because of this property, the material can be used to decorate the bedroom, children's room or guest room.


Thanks to a special manufacturing technology, the laminate perfectly retains heat in the house and has soundproofing qualities. Reduces the amount of incoming noise and suppresses most of the outgoing.

Durability. The wall under the laminate has a very long service life, resistant to scratches and accidental damage. The material is able to maintain a presentable appearance for a long time.

Easy care is a nice bonus. The main rule is to wipe dry from water. Otherwise, there are no restrictions. On top, the material is covered with a whip, which prevents soap and dirt particles from settling. Thanks to this, the laminate is very easy to put in order in case of pollution.

This wall decoration makes it easy to divide the space of the room into certain zones. The ability to install the material yourself is another undoubted advantage. In addition, laying laminate on the wall will not cost too much. Large selection of colors and shades. There are both woody colors and completely atypical ones.

Like any material, in addition to the positive qualities of the laminate, there are also disadvantages. Be sure to read them before buying and decide if they are important to you.

Although the laminate is protected from moisture and water, it is still not recommended for use in showers and bathrooms. From constant exposure to steam, the material can be deformed.


A way out of the situation can serve as an extract of increased power. It will not allow moisture to accumulate in the room, maintaining the necessary microclimate. This will protect the laminate, allowing it to maintain an attractive appearance and a long service life.

Installing laminate with mounting adhesive requires a perfectly smooth surface. There should be no bumps, bumps and slopes of the wall.

Laminate is not the thinnest material. Keep in mind that after installation on the walls, the size of the room will decrease slightly, which makes it unsuitable for very small rooms.

The material is difficult to tolerate sudden temperature fluctuations. But laminate is one of the few materials that is impregnated with special means in case of fire. It does not burn well and does not produce life-threatening, health-threatening chemicals when exposed to elevated temperatures. In this, it outperforms the whiter, cheaper plastic panels.

Finishing the hallway with laminate
It is not necessary to apply laminate on all walls of the room. To create an interesting design, it is enough to use one wall. This can be a wall opposite the entrance or a part where there will be a dressing room, a good solution would be to finish the front door, etc.

Laminate is a durable material that is easy to clean. Therefore, the entrance hall, with laminate elements on the walls, will be reliably protected and keep the repair in excellent condition.


Using laminate flooring in the bedroom and living room
The ideal place for laminate in the bedroom is the place behind the bed. Using boards of different lengths and widths, you can create a beautiful composition.

In the hall, the laminate is used to highlight different zones. Most often this is the location of the TV, fireplace or soft corner. The color is selected based on the furniture.

But consider which side of the world the room faces. If to the north, then warm shades are needed in the room, and if to the south, then cold ones.


How to sheathe walls with laminate?
There are several ways to fix items on the wall. These include:

Glue mounting. Used in small spaces. For strong fastening, the walls should not contain bumps and bumps. Due to the fact that the laminate is quite rigid and does not bend, in case of irregularities, the glue will not adhere to the sections everywhere and this will lead to the panel falling.

Using a framework. First, a special crate is mounted. After a laminate is installed on them, its joints are impregnated with glue for greater strength and reliability. When attaching a laminate to a wall, the strength of the wall must be taken into account. Calculate in advance whether it can withstand such a load.


If we consider the direction of the laminate, then we can distinguish three types of installation:
- The horizontal way is suitable for a small room. A horizontal strip will visually expand the room. But keep in mind that any horizontal directions visually underestimate the height of the ceiling. What can be seen in the photo of the laminate on the wall.
- The diagonal version is very difficult to perform and requires a certain experience and talent from the master. But the unique effect is worth the effort. The lightweight diagonal direction includes laying in the form of a herringbone.
- Vertical laying, due to the fact that the panels do not press against each other with their weight, this method is considered the most reliable and durable. Vertical details of the interior visually make the ceilings higher.


Color selection
Due to the fact that the laminate on the wall in the interior is used to divide the space into certain zones, it is better to use a color different from the rest of the interior. But despite this, it should successfully approach the general style of the room. For example:
- country style implies a laminate with a pronounced woody pattern;
- to give the room a feeling of warmth and comfort, a laminate under a light tree is suitable;
- high-tech, a laminate is suitable for it, which will imitate a stone texture.

Remember that you also need to consider the color, structure and style of the furniture.

Photo of laminate on the wall


The use of non-standard techniques in design makes the interior unique and interesting, and the textures of wood of various varieties and natural minerals add coziness and warmth to the composition. For such solutions, special materials are needed that combine naturalness and manufacturability. Laminate has gained great popularity as a floor covering, and wall decoration with such panels solves several construction problems at once.
Advantages and disadvantages of using laminate for wall decoration
Wood paneling has been popular for many centuries and does not go out of fashion. It looks harmonious and elegant in any interior. But natural wood costs a lot and requires special care. What about the owners of apartments who do not have time for daily polishing of wooden walls? In this situation, a good solution would be to use a laminate that reliably imitates valuable and rare types of wood and at the same time is practical in operation, as it has a multilayer structure.
Laminate has recognized advantages:
There are also restrictions on the use of laminate for wall cladding:
- it is intended exclusively for internal surfaces, balconies and basements are not finished with this material;
- prolonged exposure to water can damage the panels, do not use in baths.
Which to choose
To use laminate in the kitchen or in the bathroom, it is better to take waterproof brands, their cost is much higher than usual, but they are not afraid of changes in temperature and humidity. Choose a wall for decoration that will not be directly flooded with water from a shower or bath.
In the hallway, the laminate will be a good solution, it is practical and creates an elegant and neat look from the threshold.
The panels differ in wear resistance class, the highest one is designed for floors with heavy loads and the flow of people passing by. On the walls, such material without load will last 50 years, but it is expensive. For wall decoration, low wear resistance is also sufficient, especially when used in a living room or bedroom.
To fasten the panels to each other, two mounting systems have been invented: adhesive and locking. It is more convenient to lay lamellas with locking on the floor, the adhesive method is more often used on the wall, since it does not require the installation of a crate, it is easier to lay.
Laminate on the wall in the interior - design ideas in the photo
If you want to finish the walls with laminate, but it is not clear how best to arrange it so that the interior looks harmonious and fresh, you should consider popular and successful design solutions in various rooms.
In the interior of the living room
The living room is designed for joint relaxation and communication, so the decoration of the room should create an atmosphere of comfort and warmth. Soft caramel tones and original lighting will make this room a favorite place for the whole family.
All possible zones are singled out with a laminate of one type at once: floor, wall and a place for a TV
A popular option is to allocate several zones that can perform different functions.
The space becomes visually unified if you make a beam on the ceiling to match the laminate on the wall and on the floor
An interesting design trick is to decorate a niche, emphasizing it with a laminate in a contrasting color to the rest of the finish.
Most often, with laminate sheathing, designers allocate a niche for a TV in different rooms.
Lay out a free-standing partition completely, making it a solo part of the interior.
If a laminate of the same color and with the same pattern is selected for the wall and floor decoration, this creates a feeling of harmony in space.
A minimalistic spacious hall, cold and austere, becomes lived-in with a sunny-colored laminate wall.
Laminate strip around the perimeter in the living room and bar creates a unified atmosphere
In the bedroom
The bedroom is a place where you can relax and sleep, spend time together and gain strength for new achievements. Peace and tranquility reign here. The decoration of the walls and floor is in harmony and looks eco-friendly and natural.
The head of the bed is traditionally sheathed with laminate. The dark color of the panels and local lighting create an intimate and romantic atmosphere.
Laminate in warm shades of natural wood and gray tones of textiles in the bedroom are the choice of many modern families.
The wall and the bed visually form a single structure.
To get this effect in the bedroom, you need to pre-order a bed in the color of the laminate walls.
The continuation of the decoration on the wall and ceiling creates an interesting effect. Hidden lighting enhances the dullness and naturalness of the lamellas laid out without displacement.
In stores, you can choose a laminate that practically does not differ in appearance from simple boards.
Harmony and tenderness, unity with nature - even in a country house overlooking the forest, the interior can be the embodiment of impeccable style. The laminate on the wall in the interior of the bedroom in the form of an aged board and textiles matched to match emphasize the comfort of the attic.
A colored laminate looks very impressive, reminiscent of the look of old boards.
Who said the bedroom has to be boring! The positive hues and reflections of the sun start on the wall and continue on the ceiling above the bed.
Modern laminate is produced not only in the classic color version, but also in a bright, bold design.
In the kitchen
In the kitchen, the practicality of finishing and emphasized cleanliness play an important role. The whitewashed board looks fresh and neat.
To emphasize the spaciousness and airiness of a modern interior can be a wall decorated with a cold-colored whitewashed board.
The finish of the apron looks stylish and practical, besides, it is easy to care for it.
The ideal solution - countertop and apron in the same style
Modern glossy hi-tech is the soloist in this black kitchen. Why is it so cozy and warm - this laminate is like the sun warms and enlivens a strict ensemble.
The combination of ebony and wood is a great option for a country interior
Bright blue color accents in the furniture are set off by neutral panels of noble gray tone.
If in a small room both the wall and the floor are given for finishing with a laminate, then the space around can be facilitated by using glass in the interior
Juicy and deep colors of the laminated backsplash and snow-white cabinets and walls make an elegant contrast.
An interesting visual effect can be achieved if you use a laminate with a small pattern on the apron.
In the nursery
You can feel the style in the teenage room. For finishing, you can combine contrasting textures and colors of boards to create different patterns and effects. .
In this case, the laminate sheathing fulfills a clear decorative purpose, highlighting the recreation area at the same time.
A fascinating colorful world begins right in the children's room. The combination of textures and shades will dilute the calm interior with bright colors.
Today, the building materials market offers the most unthinkable lamella design options.
On a neutral gray background, the works of small artists and bright pieces of furniture will look great.
A white door can play with color and volume on a wall finished with a contrasting laminate
A non-standard solution would be wall cladding in the area above the beds in combination with a pattern or colored wallpaper.
Blue, colored, metallic, glossy - a decorative wall made of laminated board with original effects in the loft style is complemented by blue curtains and furniture elements.
In this option, the laminate plays an active role, combining all the decorative components of the interior (color, material, textures)
In the bathroom
It is very useful to take bath procedures in a stylish bathroom. Laminate on the wall in the bathroom of warm shades will warm the soul and relax the body after a hard day's work or an intense workout.
Large mirrors visually increase the area of finishing laminate
The complex architecture of the bathroom allows the use of several types of panels with horizontal laying for zoning.
The zones help to highlight not only the wall laminate, but also the decorative wood trim on the ceiling
Smooth rows of boards from the floor go to the bath, and then to the wall, combining them into a decorative element.
The classic cladding option for small bathrooms - floor, screen under the bath and wall in one type of laminate
A combination of black tiles with white grout and a calm walnut laminate gives a bright contrast and division into zones.
In a large bathroom, you can afford to play with zoning due to laminate and tiles
Horizontal laying and a matte surface finish, special cut bevels at the joints give a feeling of the naturalness of the material.
The color of wood in the bathroom never goes out of fashion, and lately it has been at the peak of popularity among designers.
In the corridor (hallway)
Traditionally, laminate wall panels are laid out in the hallway.
An interesting interior solution - wall cladding and niches on the ceiling in the corridor
Finishing of flights of stairs and steps in the same style and color scheme.
In this version, the walls attract attention with non-standard oblique laying of laminate in different colors.
The combined laying of a light laminate and a mirror on the opposite side will help to expand the small space of the corridor.
This option is suitable for lovers of monotony and minimalism in color.
The door and walls are exactly in tone - the perfect ensemble in a modern style.
Sometimes it is necessary to hide the door in the wall - this can be achieved if the door and wall are sheathed with the same material.
The combination of different textures and mirrors is a non-standard option for decorating walls in the hallway.
With this finish, the corridor has become much wider and more functional.
On the balcony
Only an insulated balcony should be finished with laminate, otherwise humidity and temperature changes will destroy the coating over time.
Since the balcony usually has a narrow shape, it can be lined with laminate on all sides.
Even in winter, the loggia seems illuminated, thanks to the light panels and the calm texture of the laminate.
The classic solution is a light laminate in the border of a dark baseboard and window sill
The niche and the wall are in the same style - you can equip an office on the loggia, and the laminated finish will add coziness.
The workplace will visually stand out if it is zoned with sheathing
A small balcony on the shady side of the house is best paneled in white or light gray.
For a balcony, a budget version of a laminate is quite suitable.
Colored laminate with stone imitation is a good solution for a large insulated loggia. Wood and stone are in harmony with indoor plants and wicker furniture.
Textured laminate allows you to solve the problem of the original decoration of the balcony
Do-it-yourself laminate wall decoration
You can entrust the work to a team of professionals if time is short and the budget allows. However, installing laminate on your own is easy and quick, one person does the whole wall from floor to ceiling in 1-2 days. By strictly following all the steps of the instructions and following simple rules, you can enjoy the design.
Laying methods
Depending on the desire and characteristics of the room, choose a vertical or horizontal way of laying panels.
The horizontal installation method is a bit more complicated, every meter of boards requires a plinth to be installed, which closes the joint and prevents the lamellas from folding like an accordion. To solve this problem, the alternation of rows of shorter boards with long ones is also used.
With horizontal laying, the space acquired a sense of movement
The vertical method does not have these difficulties. It is desirable to arrange the panels with an offset of the end parts, randomly.
Vertical laying opens up room height and new possibilities for lighting
Additionally, square modules are produced, with a pattern or imitation of artistic parquet from different types of wood.
With the help of modules, you can create whole pictures on the wall, and it’s easy to lay them out according to the scheme.
Mounting methods
To finish the walls with laminate, two fastening techniques are used.
The 21st-23rd class, which is most suitable for walls, does not have locks and is attached only with glue. The base surface must be prepared, dry and even, otherwise the panels will not adhere to the wall with the entire surface and the joints will become visible, and over time the laminate will move away from the wall. This method is considered easier to perform, since it does not require the installation of a crate for attaching the lamellas.
You can assemble a shield from several boards on the floor and glue the finished shield to the wall
On drywall, which is glued to the walls, the laminate is not attached, it has a lot of weight, together they will create an unacceptable load and the entire structure may collapse.
In the second case, a crate is attached to the wall, on which the laminate will be held. There is no need to prepare a perfectly flat surface for it. This technique creates additional heat and sound insulation in the room. The panels are fastened together with locks, and to the crate with glue or special staples - kleimers. They are fastened with screws or nails to the crate, and on the other hand they have a bracket that fits into the groove of the lamella.
This method of installation helps to make the structure more floating.
The design of laminated panels and battens takes up part of the space of the room, so it is not used in small rooms.
Necessary materials and tools
Laying laminate does not require the purchase of expensive complex equipment, it is enough to prepare the following set of tools:
- electric jigsaw or hacksaw for cutting lamellas;
- hammer and screwdriver, fasteners;
- level, ruler, pencil;
- spatula, block for emphasis;
- plinth, end tape or profile;
- glue (liquid nails or building silicone), gel for lubricating locks.
Before going to the store, you need to calculate the required amount of materials. For a wall with a height of 2.5 m and a length of 3 m, the calculation will be as follows. If the decision is made to finish the entire wall from floor to ceiling, then the surface area for work will be 2.5x3 \u003d 7.5 m². Regardless of the chosen method of laying the lamellas, 10–15% will go to waste and trimmings, this is 0.75 m². So you need to buy 8.25 m² of laminate.
Foundation preparation
Preparatory work varies depending on the method of attachment. It is enough to remove the old wallpaper and lay a crate of wooden or metal planks 2–4 cm wide, which are fastened with self-tapping screws. The distance between the planks of the crate is not more than 30–40 cm.
Planks should be positioned horizontally when laying laminate boards vertically and vice versa
If the adhesive installation method is chosen, then the preparation of the base should be carried out more carefully.
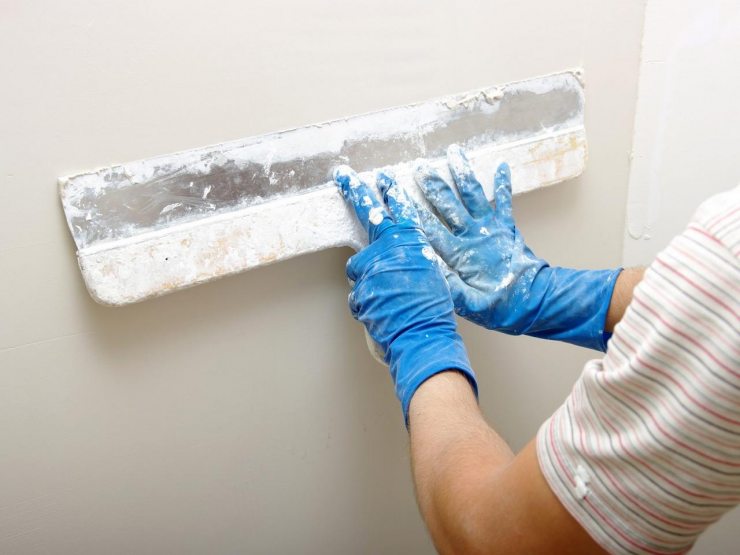
How to put laminate on the wall
The panel mounting technology has the following steps:

Care rules
During operation, the laminate will not cause much trouble to the owners, you just need to follow the simple recommendations for caring for the material:
- even waterproof laminate cannot be exposed to water for a long time. In the bathroom and in the kitchen, when flooding the wall, it is advisable to immediately wipe it with a dry cloth;
- anti-static properties allow the panels to stay clean longer. It is recommended to remove dust from them with a vacuum cleaner or a damp, well-wrung cloth to avoid getting wet;
- once every six months, you can rub the material with a polish;
- do not use abrasive and alkaline detergents and scratching brushes and sponges for cleaning.
Video: how to fix the laminate on the wall
Video: installing an apron in a laminate kitchen
This practical and elegant floor covering is very popular. In modern interiors, more and more often you can find laminate on the walls. This finish looks like natural wood panels of rare and exotic species, but the material is inexpensive, it is mounted quickly and easily, and pleases with a stylish fresh look for many years.
Wall decoration with laminate does not belong to the traditional methods of shaping the interior in city apartments, but, in some cases, this method will help create a unique design of the room. Before proceeding with laying the laminate on the wall, you should understand the positive and negative aspects of this type of surface cladding.
- strength. Laminate boards, designed to work with increased wear, will be able to maintain their original appearance on the wall for 20-30 years;
- environmental Safety. The wooden base is the key to the purity of the material;
- light weight laminate;
- the ability to choose inexpensive models;
- uncomplicated technology. The work can be done by hand.
Minuses:
- gluing lamellas is allowed only on carefully aligned walls. In other cases, it is necessary to assemble the frame;
- material susceptibility to high humidity and temperature fluctuations.
The choice of laminate for wall decoration
When choosing a material for interior wall decoration, consider the following points:
- laminate color. The shades of the coating on the wall should not create a sharp contrast with the overall interior. If you have to decorate a narrow hallway or corridor with a laminate, it is better to choose light colors that will visually expand the space. In spacious halls and living rooms, it is permissible to use darker, heavier colors. In the bedroom, the contrasting finish at the head of the bed looks original;
- the presence of pets can significantly complicate the finishing process, but not in the case of laminate. If necessary, you can always replace worn or worn boards with new ones. In this case, it is better to choose inexpensive lamellas;
- wall panels do not require increased abrasion resistance, therefore, for wall decoration, it is enough to use lamellas of 21 resistance classes, and no more than 34. For kitchens or bathrooms, as well as for summer cottages, moisture-resistant types of laminate boards are selected.
The abundance of colors and textures will allow you to choose the right material. The main thing is to decide on the purpose of the coating and its location.
 Hallway decoration.
  Laminate in the hallway.
 What is the best way to install laminate flooring on walls?
The slats for the future interior of the apartment have been selected, it's time to decide how to attach the laminate to the wall. There are three main ways:
- For glue. For installation, liquid nails or silicone are used. This option is only suitable for perfectly flat walls. On an uneven base, excessive stress occurs at the fixation point, which leads to delamination and violation of the integrity of the structure. Irregularities can be leveled by plastering, but this method is too expensive, usually a frame is used to prepare the base for the laminate.
- Frame. To fix the laminate on a concrete base with differences in height (for example, in old Khrushchev houses), a supporting frame or crate is prepared. Wooden slats are recommended to be attached vertically with a step that ensures reliable fixation of the slats. This mounting option is not simple, but the most reliable. In addition, it allows you to covertly bring out the wiring for installing sockets or switches, and disguise other communications.
 Wooden crate.
  Metal crate.
 - On the clamps. This method of attaching the laminate to the wall is based on the use of metal hangers - kleimers. Kleimers are attached to the base (wooden frame or concrete surfaces) and to the spike of the board. This results in a strong joint that is able to cope perfectly with dimensional fluctuations of the laminate due to changes in humidity and temperature.

Necessary materials and tools
Before you fix the laminate on the wall, you need to take care of purchasing materials and tools.
You will need the following materials:
- laminate in the required volume;
- plinth to cover the ends and sides of the cover;
- wedges to provide a thermal gap;
- mounting foam, silicone glue or liquid nails, if it is decided to glue the coating;
- kleimers, if the boards will be installed using suspended technology;
- slats, dowel-nails and self-tapping screws, if it is intended to assemble the crate.
You will need to prepare the following tools:
- construction goats or stepladder;
- wood saw or electric jigsaw;
- screwdriver;
- mallet for finishing boards;
- tamping bar;
- metal square;
- level;
- pencil.
- Calculate the surface area that is planned to be finished with lamellas. From the total area subtract the area of windows, doors to a balcony or loggia.
- The resulting value is multiplied by 15% if the laminate is planned to be laid horizontally or vertically, and 20% if the boards are placed diagonally.
- The result is divided by 2 and rounded up. We get the number of packs, with a volume of 2 m 2.
The owner can do the calculation of the consumption of other material (glue, kleimers, hardware) himself, focusing on the accompanying instructions.
Preparatory work
Before starting the main work, it is necessary to prepare the foundation. To stick the lamellas, you need a solid and even surface without height differences. Permissible deviation - no more than 3 mm on an area of 1 m 2.
The walls are inspected for pasting, cracks and chips are sealed with a cement-sand mortar, treated with a primer and leveled with a plaster mixture. The use of plaster is permissible with differences in height of not more than 30 mm. With significant differences, under the laminate it is recommended to prepare a frame from rails or a profile.
Smooth concrete surfaces are treated with a primer and putty. The frame for the laminate is erected with significant vertical deviations of the surface. For the device of the base, rails or a profile with a thickness of 20-40 mm are used.
The crate is mounted in two ways:
- Vertically, with a step of 400 mm.
- Horizontally, calculating the pitch in such a way that the joint between the upper and lower lamellas falls on the rail.
It is not recommended to use drywall or OSB for leveling walls, followed by pasting with laminate. Such a base will not withstand the weight of the material.
Ways to install laminate on the wall
There are several ways to lay laminate on the walls in the living room, bedroom or kitchen, but there are general rules that must be followed regardless of the method used:
- laminate flooring needs to acclimatize in the room where the work is to be done. The packages are opened and left in the room for 48 hours;
- laminate boards change their dimensions with high humidity and temperature fluctuations, therefore, in places of contact with walls, ceiling and floor, it is necessary to leave a compensation gap of 10-15 mm;
- at the end of the installation, the expansion gaps are closed with a plinth and corner plates;
- corner joints are closed with a special profile.
 Gap pad.
 click method
When installing laminate boards in a click way, there are several options for fixing the coating to the wall: with glue, with decorative nails, with clamps and with self-tapping screws. The easiest way is to attach the lamellas to the crate with decorative nails with small caps. The attachment point is masked with a wax pencil.
 Gluing laminate to the crate.
 When mounted on clamps, the fixing elements are not visible from the outside. Small galvanized brackets are fixed with one part on the frame rail, and the second on the bottom of the lamella lock.
 Fastening with clamps to the crate.
 Self-tapping screws are used for installation. The last top row is installed on glue.
Self-tapping screws are used to fasten the first row along the bottom of the board and fix the extreme panels in a row. After the installation is completed, the attachment points are masked with a plinth and corner plates.
 Click lock.
 Adhesive method
When sticking lamellas of class 21-23, it is necessary to prepare a perfectly flat surface. These boards are made without a lock, so any unevenness will affect the build quality. When pasting the surface with lamellas, adhere to the following step-by-step algorithm:
- the surface is treated with a primer;
- to ensure the compensation gap, a 15 mm thick rail is laid on the floor. The same rails are installed on the sides if the finish is made across the entire width of the wall;
- glue is applied to the back surface of the lamella in waves, then the board is pressed against the wall and held for 2-3 minutes to set;

 Fixing the panel to the wall.
 - The next row starts with a board cut in half or one third. This is necessary to ensure the dressing of the seams of the lower row with the upper one. Trimming is done with an electric jigsaw or wood saw with a fine tooth;
- only three rows can be laid without interruption, then you should wait at least 2 hours. This time is necessary to achieve reliable adhesion;
- the top row is adjusted in width, taking into account the compensation gap of 10-15 mm;
- at the final stage, a plinth or decorative overlays are mounted around the perimeter.
tongue-and-groove method
Tongue-and-groove lamellas are produced specifically for wall decoration; such products are not placed on the floor.
Tongue-and-groove laminate boards look just like regular floorboards. Instead of a traditional lock, they have a groove and a spike. The lower part of the groove is slightly larger than the upper part, this feature allows you to drive nails to fasten the board.
 Tongue-and-groove connection.
Detailed description of the technology for mounting lamellas with a tongue-and-groove system:
- To comply with the compensation gap, a rail 10-15 mm thick is laid on the floor.
- If the wall is sheathed completely, the same slats are installed vertically on both sides.
- The bottom row of laminate is nailed to the crate.
- The second row is set with a shift of the trimming seam by 1/3 or half the length of the board.
- The subsequent rows are laid in compliance with the dressing of the seams.
- The top row is adjusted in width. Nails are nailed to the upper edge and masked with a wax pencil.
- At the end of the installation, the plinth and side corners are installed.

Other nuances of finishing walls with laminate
Before you put the laminate on the wall, you need to familiarize yourself with some of the secrets of high-quality wall cladding.
From what angle to start installing the laminate on the wall? Finishing the surface with laminate boards starts from the left corner. So it will be convenient for right-handed finishers to work. Lefties, on the contrary, should start from the right corner.
How is the end row attached? The last boards in a row should be fixed with glue. First, they are adjusted to size, and then fixed with liquid nails or silicone.

The battery interferes, what can I do? The slats are wound behind the radiator pipes until they come into contact with the mounting bracket. At the junction of the board and the bracket, a notch is cut out.
How to mask the ends? This problem occurs when a panel is assembled from a laminate that is smaller than the entire wall in the room. In this case, aluminum corners are used, which can be matched to the color of the laminate. Attach the corners with glue.
 End profile.
Many people are used to seeing laminate flooring. But in fact, it is also used for finishing walls and ceilings. Such a solution is considered cost-effective, since, for example, the same MDF panels are more expensive. There is also no doubt about the aesthetics and strength: probably everyone has seen how the laminate looks like as a floor covering, and what loads it carries. Therefore, it makes sense to decorate the walls with them, of course. Another question is how to do it yourself, and whether it is possible to do all the work yourself. All these questions will be considered further.
Advantages and disadvantages
Before choosing a finishing material, you need to weigh all the pros and cons, otherwise you can at least remain dissatisfied, or even overpay. Let's start with the pros:
- easy installation. Even those who have not previously encountered laying laminate can cope with the task;
- affordable cost. So, a parquet board and - even more so - a natural tree are more expensive. In addition, you can save on choosing an option with a lower wear resistance class;
- wear resistance. Laminate was created as a floor material, so it was assumed that it would experience constant mechanical stress;
- durability. Floor finish should last more than one year. On the walls, it will last much longer;
- a wide range of choices. So, on the market there are various collections with a wide range of colors.
Now let's talk about the disadvantages:
- requirement for surface evenness. If it is not observed, you need to mount the crate;
- fear of water. If there is a high level of humidity in the room, or there is a risk of water on the surface, the finish can be seriously damaged. In such cases, you need to choose among moisture-resistant models, but they will cost more.

Types of laminate
Laminate flooring can be divided into types based on many criteria such as strength, material, water resistance, etc. But the main thing is still the type of attachment. This point is very important, because in each case the lamellas require different skills and surface preparation.
- Glue. Panels of this type are attached only with glue. The composition must be applied not only to the wrong side, but also to the ends to ensure reliable fastening. At the same time, excess flows appear on the panel, which must be cleaned with a damp cloth. Such panels are the most difficult to lay on the walls: firstly, they are mounted only on the wall, without the use of a crate; secondly, the surface should be as flat as possible. In addition, such a mount is considered the most unreliable. Therefore, adhesive laminate is almost always bought for laying on the floor.
- sheet piling. This type is much easier to use for wall decoration. And all because there are special connections at the ends of the panels. Therefore, if the tongue and groove laminate is mounted with glue, it is not necessary to coat the joints, which makes them look more aesthetically pleasing. If the walls are not even, you can build a crate. In this case, staples are used instead of glue.
- clicky. In fact, this is the same sheet pile laminate, only improved. Its main difference is the locks that snap into place when connected. Thus, brackets are not required here. Moreover, they are not used at all, since it will not work properly with them to latch the lock.

Wall decoration in the apartment
If you finish the entire apartment with laminate, it is unlikely that it will look aesthetically pleasing. But reasonable use in certain areas will create a rather original interior. So, let's take a closer look at the places in every corner of the apartment, which are most often finished with laminate.

Finishing the balcony (loggia)
The balcony is the coldest room in the apartment. To avoid heat loss, some decide to insulate it. In such cases, laminate flooring can be chosen as a topcoat. This is where full decorating makes sense. True, the material dictates many conditions: for example, the room must be glazed, the gaps must be sealed, and the insulation must be waterproofed. If all conditions are met, the balcony turns into a warm and rather cozy room, in which it is already a pity to store any rubbish. But here you can arrange an additional recreation area.
Laminate installation
As already mentioned, there are two ways to finish the wall with laminate: on glue and on the frame. Each of these methods is good in its own way; so let's look at both.
On glue
Since the laying is carried out directly on the wall, you first need to carry out preparatory work with it. Namely:
- clean and degrease;
- putty;
- primed.
After a day or two, you can proceed to the installation itself. To do this, the panel is smeared with glue (or liquid nails) and applied to the wall. Some brands provide for the subsequent removal of the panel from the wall so that the glue is weathered. If this is not done, then after laying three rows, you need to break to rest, otherwise the upper rows will shift the lower ones.

The first row should be laid at a small distance from the floor. The next one is better to start with a cut lamella to create a “checkerboard pattern”: this way the laminate will look prettier.
A trickier approach is to glue the shields on the floor. If this method is not suitable, you can benefit from it: the assembly on the floor is good because it allows you to see the pattern in advance. Often they resort to it when finishing the sleeping area (at the head of the bed).

On the crate
This method is more time consuming and requires some skills. But with its help, you can hide the irregularities of the wall, and the surface itself does not need to be prepared.

For proper installation, all door and window trim must be removed. It is not worth assembling the frame “by eye”: it is better to apply markings on the wall. Then the crate is assembled. To do this, you can use both wooden bars and a metal profile. As in the case of glue, installation must begin from the lower left corner (for left-handers - from the right). Some people nail the panels to the frame, but it is better, of course, to use clamps. If they interfere with the connection of the lamellas, you can cut the attachment point a little. In this case, you can also mount the laminate in a checkerboard pattern.
Finally
This is how information about laying laminate on the wall looks like in a nutshell. Let's boil it down to a few points:
- floor material is often used for wall and ceiling decoration;
- Laminate has many benefits. It is wear-resistant, durable, inexpensive, easy to fit; they can simulate a variety of surfaces. In addition, do-it-yourself laminate wall decoration is quite real. It is easy to level the disadvantages: for example, for rooms with high humidity, you need to purchase a special moisture-resistant material; for uneven walls, a crate is assembled;
- According to the laying method, there are three types of laminate. One of them has smooth ends, the other two are connected by locks. It is the latter that are used for wall decoration;
- laminate looks good in the kitchen (work apron), in the hallway (area near the doors), in the bedroom (at the headboard), in the living room (near the TV or sofa), on the balcony or loggia;
- for laying with glue, you need to prepare the wall: for example, it needs to be cleaned and leveled;
- adhesive residue is removed with a damp cloth;
- for uneven walls, the frame method is well suited. True, it requires the appropriate skills to assemble it.
As you can see, laminate flooring is a great solution. It is especially good if you have enough skills to carry out all the work yourself, because you do not need to allocate additional funds to specialists. If this is not possible, it is still better to pay extra so that you do not have to redo it. In addition, the laminate lasts for a long time, so if the work is done correctly, it will not have to be changed soon.
Wall decoration with laminate can be done in several ways, both with a horizontal arrangement of panels and with a vertical one. Before proceeding to a description of the intricacies of technology, let's get acquainted with the varieties of laminate suitable for wall decoration.
Which laminate is suitable for walls: adhesive, tongue and groove or click?
- On adhesive laminate the edges are even, without a lock. The adhesive laminate is laid on a flat surface on liquid nails or building silicone: glue is applied to the inside of the panel in a zigzag pattern, the strip is laid, glue is applied to the end, the next one is laid, etc. The streaks of glue that have come out at the joints are immediately removed with a cloth slightly moistened with table vinegar. For laying on the crate, the adhesive laminate is not suitable due to the small area of \u200b\u200bcontact with the underlying surface. The floors are covered with adhesive laminate.
- sheet piling panels equipped with a tongue-and-groove lock. It can be laid with glue without gluing the tongue, so that the joints come out dry and always neat. When laying dry, the strips are fixed into the groove of the tongue like a lining: with small nails (only to a wooden crate) or staples-stamps (to a wooden and metal crate). Sheet piling is suitable for all surfaces of the room: floors, walls, ceilings.
- click laminate- Improvement of sheet piling. The comb in the section has a pear-shaped shape; the groove profile matches it. When laying it, the adjacent panel is tilted at about 20 degrees, the lock comb is inserted into the groove, and, turning to the base, they are pressed - the lock snaps into place. Cladding made of click laminate has increased strength and resistance to buckling. In addition to glue, click-laminate is fixed with nails into the grooves of the lock. Claymers cannot be used - the lock will not snap into place. Click laminate on the walls can be glued to a wooden crate.

Laminate is also called MDF panels of the same size as laminate panels. This is a very good material, but expensive, so it is not considered in this article. But all the working techniques and subtleties for a laminate based on fiberboard and chipboard are also suitable for MDF.
Work tool
For wall cladding with laminate, you will need some tools used when laying floors. It makes no sense to use them on the ceiling, because. everything is done by weight. Click-laminate strips can be precisely adjusted when laying with just a tool. It will not be possible to move them with your hands - the comb sits very tightly in the groove.
Technological subtleties
Where Laminate Doesn't Work
The kitchen is not suitable for finishing with laminate. Fiberboard and chipboard - inexpensive materials; raw materials for them do not undergo complex processing. Therefore, the laminate from excessive moisture and temperature changes swells and warps. In the kitchen, fluctuations in temperature and humidity are not only great, but frequent and sharp.
For the same reason, basements, cellars, closets cannot be finished with laminate. But the hallway - you can. Here, deviations of air parameters from sanitary standards do not last long and occur infrequently.
But for a balcony, even very carefully arranged, a laminate is even less suitable than for a kitchen. The balcony has large seasonal fluctuations in temperature and humidity. Therefore, the balcony must be sheathed with plastic clapboard, eurolining or MDF.
gaps
Due to the tendency of the laminate to swell at high humidity, for any installation method, it must be laid with a gap (indent) from the corners of 15-20 mm around the entire perimeter. It is difficult to withstand it when mounting it on the wall with expansion wedges, especially from below, so it is better to do this: we lay a flat board or rail of the required thickness along the bottom. If the laying goes on glue, we wrap this board or rail with one layer of a thin plastic film. And from the sides it is already possible to use wedges - here they are not loaded with the weight of the skin and will not slip off. The gaps at the end of the sheathing are closed with a plinth on glue.
Glue or crate?
Most often it is recommended to lay the laminate on the crate. At the same time, the strength of the finish is guaranteed on any wall and additional sound and heat insulation can be made. But the artistic possibilities of finishing when laying on the crate are very limited. To obtain a cladding of the original design, the laminate is laid on glue (liquid nails, silicone) on a flat, dry wall without plaster.
Read about the nuances of forming a wooden or metal crate at the link.
Advice: Many flooring manufacturers, knowing the desires of customers, are already releasing special systems for attaching parquet and laminate to the wall. An example of such a solution in the video below:
How to check if the wall is even?
To do this, you need a flat rail the height of the wall without a plinth. Before checking, plaster, skirting boards, door and window trims are removed. The rail is led vertically along the wall; protrusions and depressions are marked with a pencil. The protrusions are scraped off or knocked down with a chisel to a shallow depression. Then all the cavities are filled with starting putty and overwritten.
And how to check the "evenness" of the rail itself? Right on the wall. Having attached the rail flat to the wall, we draw a line along it with a pencil. Then we turn the rail 180 degrees, and attach the ends to the ends of the line. If the line along the entire length already coincides with the edge of the rail, it is even. If a deflection / inflection is noticeable, another one is needed. This method of checking the ruler is described in the school geometry textbook.
Where to start?
Most often, it is recommended to start laying the laminate from the far left corner and work it clockwise. There is nothing to argue here, but you can add: if you are left-handed, then it will be more convenient to start from the far right corner, and go counterclockwise.
Horizontally or vertically?
Laying laminate on the wall is possible both in vertical stripes and horizontal. We will talk about the possibilities of vertical laying later, but for now we will describe the methods of laying horizontal.
Laying with solid strips at first glance is easier and cheaper, but it only seems so. The joints, which are thus obtained in one line, must be closed with skirting boards, and the skirting boards themselves must be attached to the wall with mounting nails (dowel-nails). Fixing holes for nails are drilled directly through the joints of the panels. Even if the cladding goes in solid strips along the length of the wall, all the same, skirting boards must be installed at least every 1.7 m.
Why such complexity and additional costs? The fact is that solid panels will only lock each other in one direction. Without additional reinforcement, such a lining will tend to fold like an accordion. Mechanical stresses on fasteners (glue, nails, adhesives) in some places will be concentrated, and in general the lining will turn out to be unreliable.
For good strength, the lining is laid with a “comb”: the number of strips equal to half the horizontal rows is cut exactly in half. If, for example, 10 rows are laid along the height of the wall, we cut 5 strips. We carry out laying, starting the rows alternately from a whole strip, then from a half. The joints spaced half the length of the strip will evenly distribute the load on the fasteners.

In some cases, it is interesting to lay the laminate diagonally. To do this, it is better to use a coating of two colors. Naturally, for such work you will need certain skills and experience.
Variations of vertical laying
Opportunities to show your creative abilities in wall cladding immeasurably increase if you put the laminate on the wall vertically, glued on a flat, dry surface. The dreary and dusty work of cleaning and leveling the walls is compensated by the cost of the crate.
For examples, we will use panels of only two types: long (or solid, if the height of the room exceeds 3 m) - the main ones, and pieces in the size of the rest of the wall height - complementary. Let's take the main and complementary panels of contrasting tones, say, dark and light. Let's see what can happen:
- We will lay out a strip along the bottom from complementary panels 60-80 cm long; to the ceiling we sew the main ones. Place a plinth on the horizontal joint. Vertical joints at certain intervals (for example, after 3-4 joints) can be additionally fixed with pieces of the same plinth, and it can also be put on the ceiling, also sheathed with laminate. What happened? Romantic, medieval (medieval) room with imitation of ribs and ceiling beams. Instead of torches, linear fluorescent or freon lamps can be installed on the ribs.
- We sew only the bottom with the main panels, and leave a clean bleached strip along the top. What for? And at least as a screen for lighting design with LED strips. Who said that lighting design is possible only on the ceiling? There is no such law, and that's it.
- Let's put a strip of dark complementary panels in the middle of a light wall and decorate it with skirting boards. We will place paintings, photographs, decorative plates, souvenirs, straw applications, macrame, a collection of decorative weapons, etc., on it. Aesthetic and original.

As an option, sheathe the wall at the head of the bed with a laminate that matches the tone of the floor.
- We will cut the complementary strips along the length in a ratio of 1: 3 (cut off in thirds). On the top and bottom we lay them out with a comb, and between them there will be the main ones. It will turn out a light (or dark) surface between two combs - minimal in terms of labor intensity and economical in material, but quite a decent design solution.
- We will buy the main and complementary strips equally and cut them into squares. The idea is clear: walls in the form of a chessboard. It is not so trivial if flat symbols of chess pieces made of dense sheet plastic are pasted onto some squares. You can depict a collection of chess studies.
- We will cut both the main and complementary stripes in a ratio of 1: 2, and lay out a pattern from them, or simply scatter them in an artistic mess. It turned out - complete freedom of expression.
In the latter version, there is a stumbling block: if you lay it down as your soul wanders, then there will not be enough space for some fragment at the top, or a failure will remain. Therefore, the pattern (or artistic mess) must be laid out in advance on the floor just like that, without fixing, and transferred to the wall in pieces.
What if the room is narrow? In this case, you need to simulate the pattern on a computer in any computer design program, at least in the well-known CorelDraw, number the real fragments accordingly and stack them in horizontal order of numbers.
If you have only basic computer skills, then it may be easier to cut pieces of thick multi-colored paper on a scale, lay out an application from them on the table, and transfer the numbering from it to “live” pieces. Of course, you need to apply numbers on their back side.
Conclusion
As you can see, laminate wall cladding is not only possible for almost anyone. Laminate also provides ample opportunities for the manifestation of creative abilities to people who do not have artistic education and skills. Even the cheapest laminate of only two tones allows you to express the individuality of its owner in the design of the apartment.
Video: an example of a complex sheathing of a loggia with a laminate
Despite the fact that in the video the balcony is completely sheathed with laminate, we remind you once again that such a solution should be resorted to only with deep confidence in the good microclimate of the room, or use more serious MDF-based laminated panels.


 in the configuration?")


