In this article I will talk about the design of the automatic curtain drive installed on my balcony. There we grow flowers that are harmful to direct sunlight. In addition, in summer, if the balcony windows are closed, in direct sunlight, the air on the balcony quickly overheats. However, when there is no direct light, it is advisable to open the curtains - the shadow also does not contribute to the growth of flowers. Therefore, in order to maintain acceptable illumination on the balcony, I automated the operation of the curtains.
Mechanics
Curtains were originally already on the balcony. There are two of them, both suspended on a metal cable stretched under the ceiling from one wall of the balcony to the other. It is clear that you need to move both curtains at once, while due to the friction of the curtains on the cable (it is quite rough), the required force must be large enough. In addition, sometimes there may be obstacles in the way of the curtain, for example, an ajar balcony window, which further increases the strength requirements.
Thus, the drive must be powerful enough and reliable - there is often high humidity on the balcony, a rather large temperature difference is possible in winter and summer. Therefore, I made the car window lifter drive the basis of the drive. It has sufficient power, is capable of delivering high torque (a worm gear is built into it) and is very reliable.
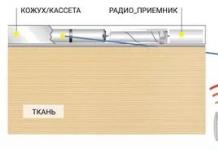
The diagram of the mechanical part of the drive is shown below:
More about the design. A plastic roller with a groove is fixed on the power window drive shaft (on the left in the diagram), on which a coil of rope is wound. The drive is fixed on one of the walls of the balcony. The same roller is attached to the opposite wall, through which the rope is also passed.
After that, the rope is stretched, so that the friction of the rope on the drive roller is enough to move the curtains. The opposite ends of each curtain are attached to a rope so that when the motor rotates, the curtain moves apart or moves.
To test the operation of the drive, I made a reduced model of it. I fixed the power window drive and the independent roller on the board, pulled a rope between them, after which it was possible to check the operation of the electronics and measure the force developed by the drive.
Photo of the drive itself on the layout:
As you can see from the photo, a rather large thin plate is attached to the power window drive (I used textolite). A metal corner with two holes is attached to it, through which a rope is passed. It is needed so that the coil of rope on the roller does not get confused; for this, the holes in the corner are made at different heights relative to the plate.
To the right of the corner - limit switches needed to stop the curtains to the extreme positions. In order to indicate these positions, two plastic tubes are put on the rope (only one of them is visible in the photo next to the lower switch). The tubes are arranged so that when the curtain reaches the extreme position, one of them presses the switch, while for reliable pressing, a metal plate is attached next to each of the switches, which presses the tube to the switch.
Three metal posts attached to the plate are needed to secure the drive cover.
Both rope rollers are made from furniture wheels. Using a drill and a file, you need to make a groove in each of them, two turns of rope should fit in the groove of the drive roller. The drive roller is attached to the shaft by tension, while the hole in it had to be bored to a square, since the drive shaft is square.
The drive is attached to the balcony wall using suitable furniture corners (one of them is visible in the photo on the left). There are enough mounting holes in the power window drive, so there are no problems with fastening.
View of the drive already attached to the wall and closed with a lid:
In order to tension the rope, a special screw with a nut is used, to which the ends of the rope are attached:
Also attached to it is the end of one of the curtains.
Electronics
All my electronics is divided into two parts - power and control. The main task of the power section is to provide power to the drive motor. The power window drive can draw a very large current. To reduce this current, I reduced the drive supply voltage to 5 volts, but even with this, the maximum current consumed by the motor can reach 3A. To provide such a current, I used a power supply from a printer capable of delivering a voltage of about 30V and a current of up to 0.7A, as well as a DC-DC converter up to 5V. By lowering the voltage, DC-DC is quite capable of delivering the desired current.
The motor power supply is controlled by a powerful relay designed to reverse the signal polarity, and a MOSFET that controls the voltage supply to the motor. Through the use of MOSFET it is possible to control the speed of the motor, but at the moment this possibility is not used.
Also, stabilizers are installed on the power section, designed to power the control electronics and the motor power control circuit. Stabilizers are powered by a lower voltage power supply circuit, the voltage there does not exceed 12V.
The control electronics is represented by the STM8S microcontroller. The controller performs quite a lot of functions - measuring illumination, making a decision to start the drive, controlling the position of the curtains by the limit switch, controlling the power supply of the drive, controlling the drive in manual mode - by remote control commands. In addition, a radio module on the NRF24L01 and a 1-Wire bus, through which three temperature sensors are connected, are connected to the controller. Using the radio module, you can control the drive and read the temperature values \u200b\u200bin different points of the balcony and on the street, however, at the moment the second radio module is connected only to the breadboard, so I will not consider this functionality further.
The used power supply from the printer has an input for transferring it to the Stand-by state. I also use it, which reduces the energy consumption of the structure. The program takes into account that the power supply switches to operating mode with a certain delay, and after 30 seconds of drive inactivity, the power supply switches back to Stand-by mode.
Indication of drive operation - with the help of a three-color LED (only blue and red diodes are used). Blue lights up when voltage is applied to the motor, red flashes periodically when there are errors in the drive. The number of flashes allows you to determine the error number.
For sound signaling of some events (for example, when a command is given to close already closed curtains), the drive motor itself is used. A PWM signal with a small duty cycle is applied to it, as a result of which the engine squeaks quite loudly.
A photoresistor attached to the window with a suction cup is used as a light sensor. Since the suction cup can fall off the window, there is a small button next to the photoresistor. While the suction cup is held on the window, the button is pressed against the window. If the suction cup falls off, the automatic operation of the drive stops and the red diode starts flashing. If the sensor is not connected to the connector, this is also detected by the controller.
Type of light sensor:
Since the illumination of the sensor can change dramatically - due to various flashes on the street, variable clouds, the data from the sensor has to be filtered. I have implemented the following processing algorithm: the data from the sensor is digitized at a frequency of 10 Hz and written to the array. Once a second, the value of this array is averaged (first of all, this is necessary to filter out noise and flashes). Further, the obtained values are added to another array with a dimension of 600 elements, after reaching the end of the array, recording starts from its beginning. Also, this array is analyzed every second - the controller calculates what percentage of the array elements is less than a certain threshold (with increasing illumination, the voltage at the output of the photosensor drops). If the values of more than 66% of the elements are less than the specified threshold, then it is considered that the illumination is high enough, and the curtains can be closed. Thus, periodic changes in illumination are filtered out. At the same time, a limitation is also imposed on the frequency of the drive - in automatic mode, the motor turns on no more than once every ten minutes.
As I mentioned above, it is possible to control the curtains from the remote control. Using the remote control, you can fully open and close the curtains, partially open them, start the drive according to the instantaneous value of illumination. When controlled from the remote control, there are no restrictions on the frequency of the drive.
It is also possible to programmatically restart the controller.
When moving the curtains, the controller monitors the state of the limit switches. If, after the start of the movement, the corresponding switch does not work within 20 seconds, the operation of the motor stops. In order to continue the operation of the drive after the fault has been eliminated, the controller must be reset.
All electronics are installed in a standard plastic case:
One of the switches is needed to transfer the electronics to automatic mode of operation, the second allows you to completely turn off the power to the motor.
With the help of Jack 3.5mm jacks, a light sensor, TSOP for receiving data from the remote control, and external thermal sensors are connected to the device.
The LED is covered with a white cap - so it can be seen from any angle.
View of the electronics unit assembled and installed in its place:
Drive operation video (remote control):
Roll-type sun protection systems are often installed in residential areas. They perfectly protect the room from the penetration of sunlight, create an air cushion that traps cold air, while taking up a minimum of space.
The designs look quite aesthetically pleasing and are appropriate in almost any interior. Electric roller blinds are very easy to operate. Their types, features and methods of installation, the article will tell.
By purchasing roller blinds with electric drive, you can:
- Roller control at the push of a button located on the wall unit or on the remote control.
- When installing several roller blind systems in one room, arrange synchronization and centralized management process.
- Use a timer. In this case, the roller blinds can be configured to protect the room from overheating when sunlight enters it.

- Adjust the illumination and save electricity, with bright street lighting.
A roller blind with an electric drive does not fundamentally differ from a conventional roller blind in its design. The electric drive does not violate the appearance of the product and its design.
Features of automatic curtains and their types

Roller blinds are installed in small rooms and spacious rooms of private houses, which is especially convenient when there is no need to spend time manually adjusting many systems. After programming, the device can be controlled in combination with all windows or each one separately.
Such motorized designs have several other advantages:
- The impact on the web, when controlled with the same force, reduces the wear of the material and fasteners.
- The price of installing the system is not too high, especially if you do it yourself.
- Often this option is the only possible option for controlling sun filters mounted in hard-to-reach places: ceiling or roof windows.
- The mass of roller blinds covering the overall windows is quite large. Manual adjustment quickly tires, it is better to initially purchase a design with an electric drive.
- A mini-cassette system has been specially developed for tilt-and-turn plastic windows.
- The box and guide structures are painted or made of laminated aluminium.
- There are no control circuits and other unnecessary details.
- Easy installation, no frame drilling.
- The built-in electric motor is powered by 12V. This is a reliable mechanism with a lithium battery.
- For 5-6 hours, the battery is fully charged from the 220V AC network.
- Modern multi-channel control panel.
Tip: The procedure for adjusting roller blinds with a remote control should be thought out in advance. It is easier to mount a centralized system right away than to add the necessary functions later, which can lead to an increased risk of technical failures of the system.

Automatic roller blinds can be controlled in two ways. Their features are presented in the table:
| Control type | Peculiarities |
|
|
Curtains are controlled through a specially programmed remote control. You can put a timer on it that gives the remote control commands at a specific time. The system works on the same principle as an alarm clock. |
|
|
To close / open the curtains, just press the button installed next to the window, as in the photo. |
Very expensive models of roller blinds with photocells are also made, which are very sensitive to artificial or natural lighting, lowering or rising at the right time.
The principle of operation and control methods of roller blinds with electric drive
All declared functions of automatic curtains are performed by a special engine. It sets in motion a pipe, which serves to wind curtains onto it.

Tip: Before mounting the structure, it is necessary to carefully evaluate the mass of the panel used. If the fabric is too heavy, wound around a small pipe diameter, its walls may be deformed, which will lead to a disruption in the operation of the entire installation.
Models are produced where the motor is installed from the roll to the right or left, this eliminates some of the technical risks.

When you press the stationary button or on the control panel, the motor starts. This provokes winding curtains on the pipe, or lowering the panel.

Tip: If automatic curtains create a lot of noise during operation, this only indicates poor installation quality. Proper assembly of the structure works quietly without disturbing its owner.
The most popular electric roller blind control panels are presented in the table:
| Remote brand | Peculiarities |
| Works in tandem with a chip built into the device. Can transmit a signal through walls, works at a distance within a radius of 35 meters. Has a touch screen. |
|
| The device has traditional buttons. The signal is transmitted to the blinds via radio channels, which can be from 1 to 15, depending on the model of the radio remote control. |
|
|
|
Roller blinds are triggered when such a switch is pressed. In this case, wiring is not required - the automatic blinds are triggered at a distance. |
|
|
This is a classic option for blinds. |
Installation of electric curtains

Before proceeding with the assembly of electric blinds, you should carefully watch the video. Here you can get acquainted not only with the sequence of installation of finished products, but also the procedure for making an electric drive for roller blinds yourself. This will help to avoid unpleasant consequences due to improper installation, and unnecessary expenses.

Instructions for installing ready-made curtains with an electric drive suggest:
- Unpack the blinds, carefully cutting the packaging sleeve so as not to scratch the product.
- Attach the product with brackets for its fastening to the installation site and mark the intended fixing points for the brackets.
- A hole is drilled for one bracket located on the drive side. Dowels are inserted, if necessary. The bracket is screwed on.
- The top tube is inserted into the bracket with the side where the electric drive is located, and aligned horizontally.
- The second bracket is inserted into the pipe and the place of its installation is marked. In this case, it is necessary to ensure a tight fit of the brackets to the pipe.
- The pipe is removed.
- Holes are drilled to fix the second bracket located on the side of the sleeve, dowels are inserted, if necessary.
- The upper part of the bracket is not completely screwed on with one screw.
- The top tube is inserted into the first bracket with the side where the electric drive is located.
- A sleeve is inserted at the opposite end of the pipe into another bracket, slightly turning it relative to the pipe.
- The lower part of the bracket is screwed with a screw.
Do-it-yourself design
The order of work is as follows:
- The dimensions of future curtains are determined and blanks are made. For this:
- The window frame is measured - the length of future curtains should match its dimensions. In this case, the curtains can be large. But no more than 12 cm.
- The width of the blinds must match the width of the frame. And 2 cm should be left for seizures.
- The cutting of the material is carried out on two patterns: one of them will be the front side; the other is the wrong side.
- Patterns are folded inward with the right side and sewn together. The resulting workpiece is turned out. The remaining hole is sewn up in the bag.
Tip: When using ready-made curtains, they should be upgraded by including a plastic rod in the mechanism.
- Blinds are attached to a wooden beam. Their width should be 1 cm more than the length of the beam. Next:
- Material for curtains spreads inside out.
- At the top of the material, an indent of at least 5 cm is made.
- A pre-prepared beam is laid.
- The material is fastened to it tightly with a stapler.
- It is necessary that the rail pull the curtain, for which a small pocket is made: the material must be wrapped by 3 cm; a bar is threaded into the formed pocket.
- The electric drive is purchased in a store or assembled by hand. To do this, you will need: an extension cord for bits, an electric screwdriver powered by three batteries.
- The battery compartment is detached.
- The power wires are extended by 2 or 2.5 meters.
- The gearbox and electric motor are being finalized. This is necessary to install the drive in a confined space. The refinement consists in reducing the body of the mechanism.

- The drive is attached to the blinds. The bit extension is provided in a special gland. The stock cap is removed. At the end of the winding body, an oil seal is installed, quite tightly.
A special bracket is attached to the frame to fix the device. The installation of the curtain is carried out after mounting the engine, in a horizontal position. A reversing switch is mounted on the power supply unit, which controls the operation of the assembled structure.
Tip: If the electric drive is made with a motor and a gearbox, in order to select the right model, it is necessary to take into account the speed and force of rotation of the shaft. The power of the unit must be at least 12 W, and the shaft rotation speed must be more than 15 rpm.
The engine is placed in a plastic box. The cable is being run. Buttons are installed to control the structure.
A few tips from experts for the correct installation of electric curtains:
- Buy an Arduino module. The operation of the device can be controlled by the module after installing a special program on it. This is especially convenient when installing systems on 2 or more windows. Lightly pressing the buttons allows you to set the desired closing / opening speed, raising the curtains in full or in part, and performing other necessary manipulations. In addition, the Arduino module allows you to program additional functions, such as a security mode, which notifies you in a timely manner if the module malfunctions.

- Leave the function of controlling the blind structure manually. This will allow, in case of imbalance, to synchronize the operation of the system or use the curtains when the motor is disconnected, for its replacement or repair.
- It is necessary to protect the mechanical part of the curtains from dust and moisture entering the room through the window or soot and steam for curtains in the kitchen.
- The electric drive requires repair over time, it is impossible to glue the plastic boxes where the moving elements are located. To fasten them together, you need to use staples that can be removed if necessary.

A roller blind with an electric drive is a step towards comfort and coziness in any home. With an electric drive, much less effort and energy is spent than when opening / closing curtains by hand.
In order for the interior of a private house to acquire an attractive appearance, high functionality and practicality, window openings in it need to be decorated using new technologies. Living in such a space is comfortable and cozy. Further in this article, everything about choosing a curtain with an electric drive: types and principle of operation.

Innovations in window design
Today, many unique technologies are used to design the windows of private homes, including electric sliding or roller blinds. Such smart mechanisms, combining innovative technologies and advanced design achievements for window decoration, are presented in the following photo.

At its core, this is not just a textile product for decorating the interior of the house, but advanced equipment with a remote control, with which you can fill the house with comfort and beauty.
Such motorized mechanisms have been invented quite recently. They are designed in such a way that the process of delaying or opening the curtains occurs automatically. And the direct participation of a person in it is not required.
In other words, curtains with electric drive and remote control are not only convenient, but sometimes even vital. For example, if there are many living plants in the house, and the owner himself is absent for a long time. The automatic opening of roller blinds will provide the flowers in the flowerpots with the current level of natural light. And the room itself is filled with a healthy microclimate and an atmosphere of comfort.

Advantages and disadvantages of electric curtains
Electric curtain rod for curtains will certainly appeal to those consumers who care about the comfort of their lives. The main advantages of such structures are the following properties:
- high reliability, durability;
- excellent practicality and functionality. Such structures are part of the "smart home" technology, where the interior is equipped with high-tech equipment;

- comfortable operation and easy remote control. A person can set the current parameters, the system itself will open or close the curtains at the right time;
- variety of forms. Curtains with an electric drive, in addition to a straight shape, can have a curved shape, which allows you to create truly unusual and innovative interiors. Their design is very diverse (pleated blinds, roller blinds, Roman blinds, classic curtains, etc.), which allows decorators to create original interiors in ordinary city apartments and country cottages;

- easy DIY installation on a window of any size and shape. Roman blinds with electric drive may well be mounted independently, without the help of a qualified specialist;
- silent operation. When opening curtains of this nature, there is no excessive noise that interferes with a person’s sleep or rest;
- high aesthetics. You can apply a variety of colors, textures, patterns, which allows a person to transform his home, adding to it an atmosphere of comfort and warmth.

Roman blinds with electric drive also have some disadvantages. The disadvantages of such structures is the need for careful measurements of the window before installing them. An error of half a centimeter can become an obstacle to easy installation of the product.

Features of automatic curtain control
Roller blinds for windows with electric drive are complex mechanisms with remote control and the ability to set different operating programs with your own hands.

Roller blinds can be activated remotely using the remote control, or you can program the system for automatic operation. The motor present in its design is responsible for the functionality of the product, which drives the mechanism for lowering or raising the roller blinds.
Remote control of automated sliding curtain rods does not cause any particular difficulties for the user. They are equipped with an infrared or radio remote control. In addition, the mechanism can be controlled manually by pressing the switch.
Since there is a light sensor in the design of automated Roman blinds, the electric curtain rod can be programmed to close the windows on excessively sunny days or at a specific time of day.

The following video describes in detail how do-it-yourself installation and subsequent remote control of electric sliding curtains are carried out.

Features of the choice of roller curtains with electric drive
Not every consumer knows what to look for when choosing rolled curtains on an automated cornice. These are innovative systems, and many of our compatriots have no experience in choosing them. Therefore, further we will talk about the features of choosing such structures for window openings:
- Drive power. Automated cornices allow you to hang on them almost any textile in weight and design: pleated blinds, Roman blinds, and the like. But we note that for designs with a low-power electric drive, it is better to choose textiles that are light in weight. In other words, before buying such structures on an electric drive, a person must determine what textiles will decorate the automated cornice. For bulky options, you should choose a powerful motor, for a light curtain - a low-power electric drive that is more affordable;
- level of functionality. As already mentioned above, the electric cornice can be controlled manually and remotely, it can be equipped with sensors for light, temperature, humidity level, and the like. And the higher the possibilities of the design, the more functional and, at the same time, expensive it will be;

Excessively cheap models of such equipment for the home should alert. Good units cannot cost a penny, so it is better to immediately refuse to purchase them, so that later you will not encounter frequent breakdowns and the need to repair the motor of the units.
Electric blinds can be made by hand. Initially determine the size of the curtains. To do this, you need to measure the window frame or sashes. The length of the blinds must match the parameters of the frame. It is allowed to increase this indicator for curtains (compared to the frame) by 8-12 cm. You will need to leave 2 cm for allowances. The width of the blinds should be equal to that of the frame.
Main works
Do-it-yourself curtains with an electric drive are made using a fabric, a stapler, a tape measure, a level, an electric screwdriver. The next step involves cutting the fabric. You will need 2 patterns - for the inside and for the front side. The segments are connected inside out and sewn together. The curtain rolls out. The resulting gap is sutured and smoothed. Experts recommend using a fabric of the same color.

Types of blind drive control.
Blinds are mounted on a wooden beam, the length of which should be 1 cm less than the width of the curtain. To do this, the fabric is spread on a flat surface (wrong side up). An indent of 5 cm is made from above. Then the finished beam is laid. The support is wrapped in fabric. Wood and canvas are fixed with a stapler. In order for the rail to pull the curtain, you will need to make a pocket for it. The edge of the canvas is wrapped by 3 cm. The beam is threaded into this pocket.
To raise / lower the blinds, an electric drive is used. You can buy it ready-made or make it yourself. The last method involves the use of an electric screwdriver, a bit, an extension cord for bits. Initially, the screwdriver is disassembled. It is powered by 3 A4 batteries. The battery compartment is disconnected, the power wires are extended by 2-2.5 m. The electric motor and gearbox need to be finalized. This is due to the fact that the main drive will need to be installed in a narrow window space. In this case, the refinement of the device is associated with the shortening of its body.
Back to index
Motor selection rules

The device of rolled curtains with the electric drive.
The drive is easily connected to the curtain with your own hands. A bit extension is provided in the appropriate gland. The first element is installed in the end face of the winding housing of the blinds. Remove the stock cap first. This procedure is performed in such a way that the gland is tightly fixed at the end.
The device is mounted to a construction bracket fixed to the frame. Initially, the electric drive for curtains is fixed with ties. Then the fasteners are replaced with brackets. If the engine is installed, mount the blinds in a horizontal position.
You can control the operation of the structure using a reversing switch located on the power supply.
You can make blinds with an electric drive, presented in the form of a motor with a gearbox. When choosing the last unit, the speed and force of rotation of the shaft are taken into account. Experts recommend buying for this purpose motors with a shaft rotation speed of more than 15 rpm. The voltage of the reversing unit must not be less than 12 W.
Curtains with electric drive and remote control have long ceased to be a luxury. They are found not only in public institutions - cafes, offices, cinemas, where simultaneous control of a large number of windows is necessary, but also in houses and apartments.
In this article, automation for curtains is considered in detail. You will learn what types, how the remote control of the curtain takes place and what advantages and disadvantages such mechanisms have.
General information about curtains with remote control
Curtains on the control panel - products, the adjustment of the position of the panels of which occurs in automatic mode due to the electric drive built into the eaves and the remote control with which the user sends commands to the motor.
The mechanized curtain control system is a functional element that significantly increases the comfort of using a window curtain. Such structures are not necessary when decorating windows in small rooms with standard openings, however, there are cases when electric cornices are necessary. Let's highlight the main ones:
- When designing bay windows and panoramic windows, it is problematic to control the curtain on which manually due to its size;
- With high window openings;
- With difficult access to windows due to furniture or features of the layout of the room.
Electric curtain rods are appropriate in rooms with several windows - they are connected to a common control panel and all curtains are opened by pressing one button. Controlling curtains from a remote control is the hallmark of a smart home, so if you plan to add modern technology to your home, it makes sense to start with installing electric curtain rods.
All electric curtains on the remote control, depending on the design features of the eaves, are divided into two groups - sliding (horizontal) and lifting (vertical).
The group of lifting structures includes the following types of curtains:
- Pleated blinds;
- Roman curtains;
- Roll products.
Standard functionality remote controls have 4 buttons:
- Deployment (opening) of the canvas;
- Collapse (closing);
- Stop moving the curtain;
- A programmable button that allows you to remember the position of the curtain and move it to a predetermined position with one touch.
Many people have a prejudice that such mechanisms break down quickly and have a short service life. In fact, the situation is the opposite - the products are designed taking into account the maximum possible number of cycles of work, with proper operation, they work for 5 years or more.
The advantages of electric curtains include:

httpv://youtu.be/KoCTniq7ZE0
We also note an increase in the service life of curtains equipped with an electric curtain rod - you do not have to touch the fabric with your hands, it will not get dirty and will retain visual appeal for a longer time.
When buying a quality product from a trusted manufacturer, you will not encounter any shortcomings, however, cheap Chinese automatic curtains often “please” their owners with their unwillingness to work normally and unexpected breakdowns.
So when choosing automation, do not save money - give preference to a reliable and high-quality electric cornice and the result will fully satisfy you.


