There are situations when you really need to hang a picture on the wall without nails and drilling: for example, the apartment is rented, you don’t want to spoil the wall with holes, disturb the neighbors, or just your husband is not at home. It was then that very simple and effective ways come to our aid that will help you hang a picture, panel, poster or photograph on the wall without using a drill. Choose which one you like best!
1. How to hang a picture on the wall without drilling the wall: paperclip or clothes hook
If you have wallpaper on your wall, make a small horizontal cut in it, fill it with superglue and place a paperclip bent into the shape of a hook or a regular clothes hook, and then cover the cut with wallpaper. Step-by-step instructions for "implanting" paper clips in wallpaper can be read .
2. Button
This method is similar to the previous one. Here, too, the base itself is “hidden under the wallpaper” and glued, and the protruding part acts as a carnation, on which you can hang a not very heavy picture. In the video below you can see how to effectively hide the base of the button behind the wallpaper.
3. Spider hook
In the hardware store you can buy a special device called a "spider hook": o but it has four pointed ends, which are well fastened to the wall with a hammer and leave practically no marks on it.This hook is secureon any wall, you can hang a picture or a frame weighing up to 2 kg on it.
4. Needle
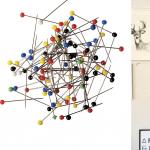
Another way to place light paintings is to stick a sewing needle into the wall. For example, you can gently drive into the wallpaper at an angle a tailor's pin with a head. Another option: break off the eye of a sewing needle with pliers and simply drive it into the wall with a sharp end. Thus, the hole in the wall is small and inconspicuous, unlike nails or screws. At the same time, withama needle, steel and durable, securely holds the frame.

5. Double sided tape
This method is suitable for walls with thin paper wallpaper or drywall partitions. Just stick ordinary double-sided tape on the edges of the frame and attach it to the wall. True, the disadvantage of this method is that the adhesive tape can leave marks on the wall; to prevent this from happening, it is recommended to keep the adhesive tape under Globe 90 degrees in relation to the wall when removing the picture.

6. Velcro Command
The special technology of Command Velcro allows you to glue them on almost any surface and easily hang pictures weighing up to 2 kg on them. The advantage of Velcro of this brand is that they can be easily removed without damaging the walls. They sold as a set of several strips: one strip is glued to the frame, the other to the wall. The more stripes, the heavier the picture can be.

7. Liquid nails
Liquid nails are a special adhesive that securely connects surfaces. Just apply liquid nails to the back of the frame in small dots (if the picture is heavy, you can smear the entire frame). Then press the picture evenly against the wall surface and hold for a few seconds.

8. Polymer adhesive
Polymer glue is convenient in that it does not leave behind greasy marks. The principle is the same as with liquid nails: we glue the heavy picture around the entire perimeter, and the light picture only along the edges. For better adhesion to the surface, the frame must be firmly pressed and even left for a day, propped up with something.
9. Wine cork
The wine cork is cut into circles about 1 cm thick and glued to the wall with quick-drying glue (Moment or BF-2 glue). After the glue dries, a small carnation is stuck into this cork, on which the picture is hung.
Posters and paintings, it's time to decide on the frames and their location on the wall.
HOME PHOTO GALLERY. PHOTO LOCATION
What frames to choose for your gallery? The most win-win option, which guarantees the absence of chaos on the wall, is to choose frames of the same color. Moreover, the size, thickness of the frame and even its shape can be different, this will not violate the overall harmony.
For a room filled with bright colors and textures, thin, light frames, such as silver, are suitable to emphasize photographs and not overload the interior.

For a room in neutrals, you can choose wider black frames that will be the right accent in the room.

Black frames look graphic and strict. White - sophisticated and elegant.

Surely in your house a lot of frames of various colors, sizes and shapes have accumulated. Select the ones that you would like to use in the gallery, evaluate how they look side by side. Once you've decided on a consistent frame color for your photos, you can simply paint the frames that are out of the range in the color you want. Acrylic paint is perfect for this, it fits well and dries quickly.

Frames are ready. It's time to decide on the scheme in accordance with which you organize your gallery. Frames of various sizes and shapes can be placed in any order, this will make the gallery more dynamic, while in the future it will not be a problem to add new photos to your gallery.

Or you can arrange the same frames in accordance with strict geometry, while the photos must also be the same size.

If you want to experiment, you can move away from the square or rectangle shape and choose any other geometric scheme for your gallery.


If your frames are different sizes and shapes, you can arrange them so that the outer borders of your gallery form an even rectangle or square. This will require special attention to the layout of your gallery, but the result will be great!


Or draw a straight line at eye level and center all frames of various sizes around this line. Masking tape pasted on the wall will help to place photos perfectly even.


You can also focus on the centerpiece of your gallery, whether it's the largest photo, poster, painting, or even a mirror, and place the rest of the images around in a random or symmetrical order.


Another original way to organize a family gallery is not to hang each frame, but to place them on shelves.

If desired, you can combine the frames hung and placed on the shelves:


Why limit yourself to frames when organizing your gallery? Place on the wall everything that is dear to you, that reflects your inner world, that has a special meaning for you: paintings, drawings, initials of family members, souvenirs brought from vacation, wall clocks, original sconces, mirrors - in general, everything that bring your composition to life and make it unique and original.


And of course, if you want to make your gallery unusual and original, you can combine frames of different colors and textures. But in this case, you should act carefully so that the originality of the composition does not turn into confusion and chaos. For example, this gallery of black and white frames looks very harmonious due to the monochrome of all photos.

And in this case, the black frames are complemented by light brown ones that match the color of the table, and the silver frame echoes the silver items on the table.

In this composition, everything is interconnected and harmonious: the golden frames are combined with the print on the pillow, the black and white photos and drawings perfectly complement each other, and the shades of the pouffe, vase and pillows echo the color scheme of the paintings.

And such colorful, original compositions will perfectly fit into the interior in, which is rapidly gaining popularity these days.


And finally, a few more options for placing photographs, paintings and drawings on the wall.


Creating your own photo gallery is an opportunity to show your imagination, experiment with composition and color combinations. Let this process give you pleasure, and then an excellent result is guaranteed!

After a summer vacation or any sufficiently significant pleasant event in life, there are always a lot of photos. Most often, we hide them in an album or leave them in the computer's memory. And what if you hang your best photos on the wall in the living room or bedroom so that they bring back pleasant memories and create a good mood even months or even years later? The question remains - how best to hang photos on the wall?
A frame, a nail, and a couple of hammer blows is all it takes to secure a photo frame to the wall. But what if we move away from the standards and show ingenuity? You can hang posters, paintings, children's drawings, heart-pleasing postcards, photographs and even beautiful booklets from the resort in the apartment without a frame. How? Let's tell now!
Hangers for trousers
This method is actively used by modern interior designers. An ordinary trouser hanger, consisting of a hook and a clip (metal or wooden), can withstand even a large and heavy canvas or a whole collage of photographs and bring a playful touch to interior design. A great idea for decorating children's rooms, teenagers' rooms or apartments in the popular art house style.
The hanger does not have to be hung on a regular nail on the wall. You can fix it on a high headboard or chair, cornice, closet door and even on a mirror, and also stretch a cord between two walls and hang a composition of several freely rotating hangers with your photos on it.
This method is unlikely to take root in a classic interior, but for youth experimental styles it is ideal! Most methods will allow you to recreate any arrangement of photos on the wall.
Clothespins
As planned, this method is similar to the previous one. Clothespins, preferably wooden, are well fixed under the nail head.
They can be attached to curtains and the same clothesline, simulating a room where photographers show their work. Also try pulling the rope horizontally along one of the walls - pull it hard to create straight lines or release the tension slightly so that you end up with something like a garland of photo cards (you can also adapt a New Year's garland with light bulbs).

You can also stretch ropes, fishing line or ribbons for attaching photos with clothespins inside a large frame that can be easily removed and hung again, replacing the photos with new ones. Alternatively, you can use a paneled door for the same purpose.

Using this technique, you will get a whole photo gallery by creating two or more parallel rows on the wall. In this case, it is not necessary to pull the rope strictly horizontally - photos on a thread stretched at an angle or even intertwined like a web will look original.

Clips for curtains
Small curtain clips for string cornices can be used in the same way as ordinary clothespins. And if there is a string itself, this is an almost ready-made solution for using photographs in the interior design of an apartment.

stationery stuff
And here there really is a place to roam in order to beautifully hang photos on the wall! Armed with ideas from marketing presentations and inspired by a typical office interior. Such ideas are perfect for decorating home interiors with photos or arranging creative offices.
As you can see, all of the above methods of hanging photos and paintings on the walls are quite budgetary and do not even take much time and effort. So arm yourself with the desire for beauty - and go! And let your photos help you keep the freshness of your pleasant memories for a long time.
Photo collages are a fun way to decorate a large wall space. To create a collage, you need to select several photos in the same or different styles, the same or different sizes and place them on the wall. Everything sounds simple enough, however, more often than not, trying to make a collage of photos on a wall turns that very wall into chaos and makes it look not beautiful and interesting, but messy and tasteless.
There are several rules on how to place photos on the wall so that the whole composition looks original and dignified.
The first step to successful photo placement is choosing a wall. It is better to place the photos on the wall, which can be viewed from afar and thereby appreciate the whole integrity of the composition, and which can be approached close to view the photos in more detail.
It's for this reason that I don't recommend placing photo collages in hallways or above enclosed stairways. It is advisable to place photos on the wall only if the distance to the opposite wall is at least 3.5 meters.

On average, you need 2 meters of free space on the wall to place a collage. This does not mean at all that your exposure should be so large, just that if you follow this rule, the composition of photographs on the wall will look free, and not flattened and crumpled.

Designers do not recommend placing personal photos, that is, images of family members above large pieces of furniture - a bed or a sofa, because your guests will want to take a closer look at the photo. The only design-verified option for placing personal photos above the head of the bed is to use several large photos with a small amount of detail, black and white can also be used.

Now that you've chosen which wall to put your photos on, it's time to plan your collage...
Most often, family photos, or thematic cycles of photographs by modern photographers, are chosen for the composition of photographs. A little less often - photo reproductions of famous paintings or images of nature. All of these options are good if you didn't opt for family photos - start from the style of the room.

Remember, in any successful collage, in addition to semantic unity, there must be a certain visual center - the largest or brightest frame. A photo collage looks very nice, where one or more images are replaced by mirrors.
Now you need to decide if you are going to use photo frames and if so, which ones. If you chose the option with frames, then it is not necessary to buy the same ones. There is a rule: the more similar the images you choose, the more freedom you can afford when choosing frames. Just don't overdo it!

If you feel that the frames you have selected are unique in themselves, then you can do without frames at all.

If you are grouping different types of elements - photos of different styles or photos and mirrors, then the choice of frames should be very conservative: let them be better thin white, black or silver (if there is a mirror in the composition) frames.
Today everything is very simple. There are many ready-made solutions that you can try. To determine the location and size, you can cut out sheets of cardboard or colored paper and place them on the wall in the way you plan to display the photos.
Options for placing photos on the wall.


If you don't like any of the options for placing photos on the wall, you can come up with your own, following the rules:
- A successful collage, as a rule, has one vertical or horizontal axis, along which it is located.
- Follow the rules of symmetry and balance. For example, if you are using a small oval frame (not in the center) in a collage of square and rectangular images, be sure to include a second oval frame of similar proportion. The second oval frame should be placed symmetrically, or flipped vertically.
- The collage should not have more than 3 different shapes or sizes of photos.
- Strange as it may seem, images that are most similar visually or in size should be placed closer to each other, contrasting less similar images with them.
- If you are working with images of different sizes, plan the placement from large to small.
- When placing a collage, use a level - crookedly hung photos will not make the wall more beautiful.
- The center of the collage should be at eye level or slightly higher.

Now you know, how to put pictures on the walls.
Beauty in minimalism! An interesting idea for placing photos on a branch
Well-placed photographs can help fill in empty walls and set the right tone for your home decor. This will help original ideas for their fastening. Indeed, in addition to traditional photo frames, there are a lot of elements that will help to fix photos in the right place.
Photos are attached not only to screws and nails, but also to tapes and ropes with glue or clothespins. Thus, you can create whole original ones that will become reminders of some pleasant events.
If you focus on the style of interior design, then special attention should be paid to the choice of frames. It is from the “packaging” of photographs that its visual perception depends. Photo frames carry not only an aesthetic load, but also a protective function. They create a barrier to the penetration of ultraviolet rays and for a long period of time protect photos from fading.
Modern photo frames are presented in such a variety of colors and sizes that they fit any. The most common option is to put a framed photo on some plane, for example, a table, shelves, cabinets, etc. Volumetric photo frames look original and solid.
When creating an exposition, it should be borne in mind that glass and wooden frames cannot be placed side by side, as this combination looks vulgar. The game with different image sizes looks interesting, but only if the goal is not to create perfect symmetry. Any symmetry on the wall requires symmetry in the interior design of the room.
On the wall, you can draw tree branches or a tree, and place a photo in oval frames as fruits. This technique looks especially impressive when creating a family tree.
You can show your imagination. So the boys in the room look stylish photo frames in the form of a lifebuoy, instead of a porthole on a painted ship, etc. In girls' rooms, photo frames can replace a window in a painted carriage.
The composition "clock" from the photos looks very impressive. Photos on the same subject are placed around the clock mechanism. These can be travel photos, family photos, etc.
You can decorate with photo portraits stylized as paintings. In interior design, popular photo diptychs and photo triptychs look great, the frames in which the photo is divided into several parts and creates a single composition.

Polaroid photos on a rope on the wall of the room look unusual and interesting.

Romantic idea with photos hung on a LED garland

Large photo collage on the wall

Photos on a special wire with clothespins, hung in several rows, look very elegant.

Family photos on stands made of semi-precious stones

Square collage of square photos

You can select part of the wall in the room to create a home photo gallery

A solid composition of family photos in black and white adorned the wall of the office

White on white: a collage photo frame on the table will bring memories of summer every day

Idea for newlyweds: joint photos can be decorated on the wall in the form of a heart

Bright photographs in square frames in the interior of the room

Original composition of photographs on the wall

Garland with photos above the bed in the interior of the bedroom

A very interesting idea with placing photos around a branch in the interior

