You should start right away with the fact that the replacement of the water supply must be carried out completely. Some, due to financial difficulties, are trying to change individual sites. However, this is wrong, and if the decision to replace has already been made, then work will have to be done on the entire water supply system.
So, replacing the plumbing, regardless of the amount of work, requires some tools. In addition, you should carefully consider the choice of material for plumbing. Replacing water supply pipes can be done with pipes made of different materials. However, each has its own scope.
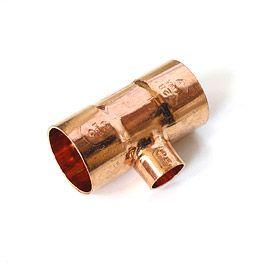
- In the case when the replacement of water pipes is hidden, it is best to use polypropylene pipes, which are reinforced with fiberglass;
- Today, metal-plastic pipes are very widespread, but the metal age is already over. However, the best at the moment of all pipes for hot water supply are polypropylene. They are better than metal-plastic ones in that the latter, with repeated repetition of the change in temperature regime, become unusable;
- As for the connections, they must be made by hand in accessible places, so that in the event of an accident they can be very easily reached and repaired;
- Replacement of water pipes in the apartment should be accompanied by the replacement of valves. You need to choose only those taps that have a ball mechanism;
- As for pipes, only those that are suitable for its characteristics should be used for plumbing. For example, the temperature of the incoming water in the apartment, the quality of this water, the availability of material resources;
- As already mentioned, for hot water supply, polypropylene products are the best option. They are able to withstand media temperatures up to 80 degrees, while being easy to operate and have an optimal price / quality ratio.
Advice! When choosing plastic pipes, special attention should be paid to their marking, since there is a type of product that is intended only for cold water supply systems.
- Replacing the plumbing in the house with your own hands is often done because the old water supply system could not provide consumers with normal pressure. There can be many reasons for this. In order to ensure normal pressure even with very low pressure in the system, a device such as a booster pump is introduced into the new circuit;
- To purify water, it is necessary to install special filters. They can be part of the risers, or displayed separately. I must say that coarse filters are more suitable for risers, which will rid the water of sand, rust and similar impurities. As for thinner filters, they are placed directly under the tap.

In addition to all the listed materials, numerous rubber gaskets will be needed. And you may also need special fasteners for drains and horizontal pipes.
Preparing for the installation of a new plumbing
I must say right away that replacing the plumbing in a house or apartment with your own hands begins with the preparation of a plan.
To do this, a diagram is drawn in which all sizes of risers, all sizes of horizontally laid sections, and the number of connecting elements will be indicated. When specifying risers, it is necessary not to forget about the presence of a filter, if it is planned to install it, and so on.
Advice! When buying, you should not be guided by the figure that turned out during the calculations, but by 5% more.
Indeed, the replacement of water supply risers, as well as the replacement of other parts of the water supply, is always accompanied by some loss of material, so the stock must be mandatory.

When polypropylene pipes are purchased in the right quantity, it is necessary to purchase all additional elements, that is, fittings, couplings, adapters, taps, and so on.
Removing the old plumbing
It is clear that in order to install new water pipes, it is necessary to remove the old ones. If we are talking about a house with an autonomous water supply, then all the elements of the water supply can simply be removed separately.
If we are talking about an apartment building, then first you need to turn off the water.
Especially for this purpose, cranes are installed at the entrance, as a rule, in the design of risers.
They need to be completely covered. Naturally, both taps must be turned off both from the cold water supply system and from the hot one.
After shutting off, check the plumbing system for leaks. You just need to turn on the water. If at least from any tap water continues to drip, then it is necessary to call the plumbing team to change the valves.
In this case, the replacement must be carried out by them, since they have the right to turn off the water in the entire house or in its separate circuit in order to carry out the work.
After the replacement of the shut-off valves has been completed, you can begin to dismantle the old water supply.
It all starts with the dismantling of risers in the apartment. If there are several, then they are removed one by one.

In the case when the old pipeline was made of metal pipes, it is most convenient to install them using a grinder.
In those places where polypropylene pipes will be attached, metal pipes must be unscrewed.
This may require a torch and an adjustable wrench. When all the elements of the old water supply system are cut down, and the remains of the risers are unscrewed, the water pipes can be replaced.
Riser replacement
Installation of water supply risers in an apartment building begins with the fact that they are screwed into the old connector or screwed onto it. If we are talking about a private house, then the replacement of water supply risers is carried out along with the replacement of water supply parts that are outside.
Advice! When choosing pipes for risers, it is better to focus on the diameter of the old ones, since all the necessary holes in the walls or floor have already been made for them in the house.
Rotted old plumbing in the apartment. Perspiration on the pipes, fistula after fistula; turn off the water, and then turn it on again - rust is gushing from the taps. And it is planned to repair the kitchen with a bathroom, and the old pipes are not something to touch or breathe - it's scary to look at them. We need to change, but the work is expensive. Is it possible to replace the apartment plumbing with your own hands? Yes, you can, and without any permits-designs. It will only be necessary to agree with the DEZ locksmith to shut off the water supply to the risers for a maximum of an hour; most likely, it will be possible to manage in 10 minutes. Or warn the neighbors, if not harmful, and block / re-apply yourself.
Replacement procedure
The replacement of the water supply is carried out in a certain sequence. Work "by eye" and "on the go" in non-professional performance often ends in a leak. The work plan is something like this:
- Choice of material for new pipes.
- Choice of hot and cold water distribution scheme.
- Development of a water supply scheme for an apartment.
- Calculation of the diameter of pipes according to the selected material and scheme.
- Preparation of the mounting tool.
- Purchase of materials.
- Assembly of selection and accounting units, their installation on risers and registration.
- Dismantling of old pipes and plumbing fixtures.
- Connection of HMS and aquastop, if provided.
- Connecting a flask filter (with HMS is required).
- Installation of hot and cold water pipes.
- Installation and connection of plumbing, old or new.
- Test water supply; elimination of identified defects.
- Installation and connection of the boiler.
HMS, flask filter and aquastop
HMS, or hydromagnetic system, has long been used in industry to prepare water for filtration. In everyday life, this device, without going into details, converts impurities in water into a fine suspension, which then settles in the filter in the form of sludge and is periodically removed. HMS is absolutely harmless, does not require power supply and maintenance during operation, but it necessarily requires the installation of a water meter in an antimagnetic design (these are more expensive) and, after the water flow, a combined flask filter.
The flask filter consists of three sections connected in series: the first one collects sludge, the second one removes chlorine, and the third one is used for fine purification of water and its softening. The latter (no one has been drinking tap water for a long time) is especially important for the washing machine boiler.

HMS with flasks cost a lot, but they protect well not only equipment, but also health. Complain or not, be indignant - do not be indignant, and drinking water is firmly held in the ten most scarce resources in the world, and there are no global programs that can bring its quality to the level of at least the middle of the last century, and are not foreseen. In general, the salvation of drowning people is the work of the drowning people themselves.
Aquastop is also a useful device, it also does not require power supply and maintenance, but its function is different. With a sharp increase in current (breakthrough) of water, the aquastop is triggered and its valve cuts off the entire apartment from the riser. Aquastops come in different systems, including electrodynamic ones, so an anti-magnetic counter is also needed when installing an aquastop.
Pipe selection
A new plumbing in an apartment begins with the choice of pipes. Steel in everyday life has become obsolete, and you have to choose from metal-plastic, plastic and brazed copper. This stage of work is perhaps the most responsible - the wrong choice will nullify all the efforts, expenses and troubles.
Copper
 One can say about copper water pipes right away: their propagandists do not know what they are talking about. Or they know, but they don’t set themselves. Firstly, copper oxide forms on copper in contact with water - the same verdigris that Tom Sawyer talked about to Huckleberry Finn. Yes, a person needs copper, but in negligible amounts in the form of a microelement, and not as part of a strong poison. As a counterargument, they say that copper forms a protective film with chlorine from water. Absurd for anyone who remembers at least school chemistry.
Secondly, the composition of the solder for copper includes tin. White tin, a soft metal, over time turns into its other, as chemists say, allotropic modification - gray tin, a crumbly powder. That is, by installing copper pipes (very expensive), we thereby 100% guarantee leakage. And the payment for the work of a company specializing in copper pipes, since it is impossible to solder them correctly on your own.
metal-plastic

Metal-plastic pipes are quite expensive, but they can be connected by hand without experience. Metal-plastic plumbing is assembled on special threaded assemblies with gaskets or under crimping - fittings. In addition, metal-plastic pipes can be smoothly bent. Hydrodynamic resistance and pressure loss in metal-plastic are very small.
To insert a pipe into a fitting, you need a pipe cutter, press tongs and a set of reamers (reamers) for the diameter of the pipes. With their help, work goes effortlessly, and with improvised means - a full guarantee of leakage. In addition, the life of gaskets in fittings is limited, and over time, the joint begins to drip. Therefore, bricking metal-plastic into walls is unacceptable, and it is strongly recommended not to hide it in strobes.
It is recommended to conduct water supply with metal-plastic in separate open areas, where the minimum resistance to water flow and the possibility of a simple and quick bulkhead of the joint are important: when connecting a boiler, washing machine, sink, etc. Adapters from metal-plastic to other types of pipes are always on sale.
Plastic
Plastic apartment plumbing has now become the standard, but plastics are different. To make the right choice, you need to know their properties and features.
Polybutylene (PB)
Flexible plastic with good thermal conductivity for plastic. Holds temperatures up to 90 degrees. A properly soldered joint is absolutely reliable. Pretty expensive. Used for underfloor heating.
Polyethylene (PE)
Cheap, but for hot water, polyethylene reinforced pipes are needed; ordinary polyethylene does not hold 60 degrees. It is impossible to bend and glue, the soldered joint reliably holds a pressure of no more than 3.5 atm, and the water pressure in the city water supply can be up to 6 atm (0.6 Mbar) for cold water and 4.5 atm for hot water, so that there is a possibility of a sudden breakthrough. Hydraulic resistance, however, is the smallest of all.
It seems that polyethylene pipes are bad for everyone, but they have an advantage that can be worth all their shortcomings: they are not afraid of freezing. The ice cork bursts them, and when it melts, they shrink again, and do not burst, even if you crack. Therefore, the installation of a polyethylene water supply system is strongly recommended in unheated, seasonal and underground premises. There is no alternative to polyethylene. But with a constantly filled system, an aquastop is needed.
PVC (PVC)
The properties of polyvinyl chloride (PVC) are well known: chemically resistant, inexpensive, heat resistant up to 80 degrees, easy to glue, but not very strong and afraid of ultraviolet radiation. Joints, both soldered and glued, come out more brittle than solid material, so the danger of a breakthrough remains and an aquastop is needed. Replacing individual sections of glued PVC, of course, is more difficult than for collapsible metal-plastic, but easier than for soldered joints: heating the joint with a household hair dryer, the joint can be separated, and then glued again. In general, the option is budgetary or for a novice master with a length of the main branch from the riser to the farthest draw point of no more than 10 m and with no more than 7 sampling points.

Propylene (PP)
Laying an apartment water supply with polyisopropylene pipes (propylene) is now generally accepted. The material is not very expensive, durable, resistant, soldered joints retain all the qualities of the base, heat resistance - up to 130 degrees, properly soldered holds up to 12 atm. The hydraulic resistance is higher than that of PVC, but anyway, the accumulation of plaque in the lumen is minimal, and with HMS it is excluded. There are only two disadvantages when doing it yourself:
- It does not stick, and soldering requires special equipment and strict adherence to technology.
- It has a fairly high coefficient of thermal expansion. Immured in a wall or hidden in a strobe, it can bend and break the tile, therefore, when laying each pipe, you need to put on a stocking made of merylon or synthetic winterizer, which increases the cost of work.
However, the propylene pipeline is by far the only one that can be done once and for all and forgotten. Therefore, we will dwell on the soldering of propylene separately, especially since the soldering of other plastics differs only in a lower temperature (110-130 degrees for polyethylene and about 150 for PVC).
Propylene soldering
Soldering propylene with a handicraft “iron” soldering iron end-to-end (see the figure on the right) is unacceptable:
- Pollution accumulates on the “sausage” inside, and the pipeline assembled in this way is more prone to clogging than steel.
- The pressure of the water, bursting the pipes, tends to break the joint. At 16 degrees in the pipe and 20-25 outside, after about three months the fatigue threshold of the material is surpassed, and the joint flows.

The assembly of the propylene pipeline is carried out on fittings for soldering - straight (for connecting pipe sections), angular, tees, crosses. The pipe heated to softening is inserted into the holder of the also heated fitting, and the joint freezes. In this case, water pressure, on the contrary, presses the pipe against the casing from the inside, providing strength, and only sealing remains for the fused zone. The rather high rigidity of propylene does not allow the clip covering the pipe to expand elastically. It is this design of the connection, combined with the properties of the material, that makes the propylene pipeline suitable for immuring into walls for decades.
Note: a more or less decent soldering iron for propylene costs at least 2000 rubles. and is still unsuitable for something, but does not wear out from work. Therefore, you do not need to buy it, it is better to rent it.
- For hidden wiring in a typical apartment in strobes or monolithic - definitely propylene.
- For branches of great length with a large number of points of water intake - open metal-plastic or in channels with removable covers.
- For country houses, seasonal rental housing, country houses with remote outbuildings, greenhouses, etc. - polyethylene.
- For budget repairs or in areas with a shortage of water, low pressure in the water supply, with poor quality water - PVC.
Wiring diagram

Collectors-combs
There are two schemes for drawing water in the premises: serial and parallel. With a serial scheme, the points of analysis are connected to a common pipe through tees. This scheme is the most economical, but with a long wiring length, a large number of parsing points and / or with low water pressure, it is not suitable, as it greatly reduces pressure.
In this case, the water intake is done in parallel from the “comb” collector, see fig. A comb is an assembly of bypass valves, from each of which there is a solid branch to its point of analysis. The valves regulate the pressure separately by points. The branches to the points are made of metal-plastic or polyethylene: in this case, their low hydraulic resistance plays a role, and when laid in a single piece, they are quite reliable.
Development of a water intake scheme
The water supply scheme in the apartment is needed primarily for oneself, so as not to get confused, not to miscalculate, and then to know exactly where everything is - no special permission is required for this work. But when registering the meter, the water utility inspector may ask you to look at the diagram, so you need to draw it correctly.

A complete scheme according to all the rules is a serious job for a knowledgeable specialist; for example - in the large figure, the water supply scheme of a private house with a summer kitchen, which is necessary for the project to be approved. But to replace the pipes in the apartment, you don’t need to bother like that, it’s enough that the diagram clearly shows and understands:
- Hot and cold water pipes, their type and lumen diameter.
- Metering devices.
- Emergency valves and drains.
- Stop valve.
- Points of analysis with indication of consumers.
- Backup branches and devices.
- Direction of water flow.
To make all this clear not only to yourself, or to yourself a year later, certain rules must be observed when drawing. Let's look at examples, see fig. On the left - more or less okay, but with comments, on the right - wrong:

- The scheme on the right is made in isometry - for beauty, or what? The intersections of the pipes confuse her, and she does not give an idea of \u200b\u200bthe real location of the analysis points: the washing machine with the boiler comes out under the floor.
- There are also too many current arrows where it is already clear where it flows, which also confuses the circuit.
- In the same place, shut-off valves with metering devices are depicted indistinctly and not according to the rules.
- In the same place - the type and diameter of the pipes are not indicated.
- In the same place - who, where and when saw that water was supplied to the boiler from above, and the toilet was flushed through the ebb?
- But in the diagram on the left, it is not even clear to a specialist that the boiler (6) is a backup. The remark will be: “Where is the check valve for hot? Without it, when the supply is stopped, the boiler will drive its own into the hot riser if the valve (10) is not closed. But this is already in essence and with full understanding.

Correct simplified plumbing scheme in the apartment
An example is arbitrarily, not according to the rules for designing design documentation, but completely understandable and without frills, the completed water intake scheme is shown in the following figure. This is also an example of a parallel drawdown; where the combs, of course.
Pipe calculation
Before finally choosing pipes, you need to calculate at least approximately their diameter. This is not necessary for "smartness" - the narrower the pipe, the cheaper it is, on the one hand. On the other hand, a too small diameter pipe for a water supply will cause turbulence in the flow in it. At the same time, the throughput of the pipe drops sharply, and at normal pressure at the inlet from the tap it will barely ooze.
The exact calculation of the pipeline is a matter of highly qualified specialists, but for a city apartment, in order to flow normally, you can figure it out yourself. The initial data is as follows:
- The minimum allowable pressure is 0.3 at.
- Pressure loss per 1 m of a 16 mm propylene pipe - 0.05 at.
- The average pressure loss for apartment wiring per unit of fittings and fittings is 0.15 at.
- Pressure loss in the selection and accounting unit - 0.25 at.
- With normal values of pressure at the inlet to the riser of 1.5-4.5 atm, periodic turbulence is inevitable in a 12 mm pipe, and is not observed in 16 mm pipes.
- The headroom for the farthest point is at least two times.
It remains to find out the pressure (pressure) at the inlet, and you can determine whether, with the serial wiring of such a running pipe, there will be enough pressure for the farthest faucet or you will have to take it wider and more expensive. The pressure at the bottom of the riser can be obtained from the pressure gauge in the basement or from the building operator; then subtract 0.6 atm per floor. You can also estimate for neighbors based on the same 0.6 at / floor: if, say, three floors up from the taps, it still flows, then we have a good 2 at. But in high-rise buildings, such a trick does not work: in order not to overly increase the cost of apartment wiring, they make separate risers for the lower and upper, and even for the lower, middle and upper floors.
Calculation example: the second floor of a nine-story building; the residents of the upper floors do not complain about the water. We have at least 4 at pressure. 11 units of fittings (5 tees, 6 elbows, 1 valve) give 1.65 atm losses. The length of the pipe from the riser to the far wall of the kitchen is 6.5 m, which is another 0.325 atm of loss. In total, with the selection and accounting unit, we have 0.325 + 1.65 + 0.25 = 2.225 atm of losses. Too much, you need to check the pressure with a pressure gauge and, most likely, take the main pipe 20-25 mm, or get divorced in parallel from the comb, otherwise you can stay “dry” in the dry summer.
Note: from this it is clear how important it is to straighten the pipes and how undesirable they are to lengthen and clutter up with fittings.
The dependence of losses in pipes and fittings is non-linear: they depend on the flow velocity, which, in turn, depends on the cross section of the pipe lumen. A slight increase in the diameter of the pipe drastically reduces losses, so the usual 20 mm pipe wiring for apartments with taps to 16 mm points works well in most cases. In difficult cases, an accurate calculation can be made according to SNiP, internal water supply and sewerage of buildings. There are all the necessary formulas and nomograms; the calculation can be done by a person with an engineering education of any profile.
You just need to keep in mind that there are already three SNiPs with the same index: 2.04.01-85, 2.04.01-85 (2000) and 2.04.01-85 * “(Domestic water supply and drainage systems in buildings) ". Correct - SNiP last.
Tools, materials, dismantling of the old
Special tools for assembling apartment pipelines are described above in the course of the presentation. For the purchase of materials, of course, you will need to calculate the footage, nomenclature and quantity in place. Dismantling of old pipes is done in the usual way. It is better to do it after installing and registering the water meter, so as not to turn off the water to the floors for a long time.
We will give only one piece of advice: do not take valves with a lever. It is made of silumin or plastic and tends to break off at the most inopportune moment, just when you need to urgently close it. Take ball valves with a butterfly handle. Round corrugated handles also do not break, but wet or sweaty hands slide on them.
Accounting and control
The selection and accounting unit consists of a shut-off valve, a coarse filter, a water meter and a check valve. Assembled as shown in the picture. Each of the devices indicates the direction of the water flow for it, it must be observed during assembly.

The assembly is assembled with waterproofing of the connections with the FUM tape and is also connected to the riser, having previously blocked the water; Remember to close the shut-off valve before supplying water. This is the only operation, and a short-term one, requiring turning off the water supply to neighbors in the riser.
Separate meter units are needed for cold and hot water. It is highly desirable that the counters and valve handles be highlighted in color. The meter readings should be clearly readable without any additional operations (hatch removal, etc.), so it is often necessary to pre-assemble a part of an integral pipeline, sometimes of a rather bizarre configuration, to connect metering devices to the riser. In addition to pipes and a soldering iron, for this you will need transitional couplings from plastic to metal MPV - a threaded inner coupling. Plastic is connected to metering units using MRN - external threaded couplings.
The meters are sold sealed, but this does not mean that you can immediately call the water utility and pay for water according to consumption. The factory seal is for this (the Russian land is rich in craftsmen) so that no one gets into the meter and twists or files anything there. The factory seal must be protected; without it, the meter is considered unusable, as well as without a certificate for it.
When installing water meters, you need to declare to the water utility and call its inspector. You can use water before he arrives, the inspector does not need zero readings, he will write down the initial ones, seal the meter and filter drain with his seal. Payment for water consumption will go after registration of metering devices.
HMS, aquastop, filter
Although the design of the HMS is non-separable and does not allow stealing water with its help, and this device cannot be sealed, connecting the HMS to the meter is unacceptable: the meter impeller can become clogged with sludge. HMS with a flask filter is connected after metering devices; filter - immediately after HMS. An aquastop can be connected immediately after the filter, but if it is electrodynamic, the magnetic field of the HMS can cause its false operation, but it makes no sense to attribute the aquastop far from the riser: it does not react to a breakthrough before it.
Video: an overview of the layout options for plumbing elements
Pipeline installation
So, now we do the plumbing. The assembly of pipes has already been described, but the installation of the entire system also has non-construction features, such as the arrangement of channels in the screed. The latter should pass no further than 150 mm from the wall and no closer than 200 mm to the furniture. Plumbing fixtures, of course, are removed before starting pipe laying.
First of all, you need to install arcs - plastic strips with MRV squares for mixers. They are attached to the main wall with self-tapping screws in dowels. When attaching, you need to take into account the thickness of the finish: plaster and tile or other decorative coating.
Without a lot of building experience, it is very difficult to achieve the location of the outlet nozzles flush with the wall. It is better to make them PROPERTIES above the finished wall half the width of the side of the decorative mixer caps in advance: if the caps are unregulated, they can be easily adjusted on an emery wheel or manually on an emery bar.

The next moment is the assembly of pipeline sections. The most convenient way is to assemble it on the table and put it entirely in strobes. But then the question arises: how to run pipes through walls? There are no problems with metal-plastic, it is all on detachable fittings, and for brazed pipes, two methods can be offered:
- With the help of MPH / MRV adapters and metal-plastic inserts. In an apartment, this is quite reliable, and in the corners above the strobes, removable hatches can be made for revision and repair of threaded connections.
- Install pipelines locally. This requires a compact soldering iron. This one is more expensive, and you need to work in cotton gloves so as not to accidentally burn yourself.
The fourth point is soldering. One solder takes 15 mm of pipe. That is, if there is exactly 1 m between two fittings, you need to cut 1030 mm; if 0.6 m - 630 mm etc.
The fifth point is the bending of metal-plastic pipes. The minimum allowable bending radius is 5 outer diameters of the pipe. You can come across recommendations: they say, put a spring in there, fill it with sand, and you can generally bend it at an angle, and pull out the spring and pick out the sand with a wire hook. In no case: the coating of the pipe deteriorates, the residual stresses in it are much higher than the permissible ones, and the metal-plastic pipe acquires the properties of a very poor rusted steel.
And finally, . This is a separate production cycle, and it is done after the commissioning of the water supply system. The pipes for the boiler are made in advance, but the valves on them (they are definitely needed on both) are blocked immediately after the pipes are installed, and the pipes are additionally muffled.
Video: an example of a mounted plumbing
Outcome
Now you know how to make plumbing with your own hands. We emphasize that this work is not their difficult or difficult, but it does not tolerate negligence and hack-work.
As you know, the ZhEK is responsible for the external sections of the water supply pipes. However, the residents themselves should deal with the internal sections of the structures (that is, those located near the apartment).
When are pipes replaced? Sometimes this work is necessary for aesthetic purposes: to improve the type of wiring, to bring the structure to the desired finish in the apartment. In addition, pipes become unusable over time, begin to flow, which makes their replacement simply necessary. For example, the service life of metal structures is 30-40 years. In some cases, it is necessary to replace the structures in the apartment prematurely. The reason for this may be incorrect installation or adverse operating conditions.

In order to avoid problems, it is recommended to carry out preventive replacement of structures in a timely manner. Signals for this are a strong drop in pressure, which can be caused by plugs from stratified sludge, as well as the presence of through holes that appear due to corrosion.
System Replacement Instructions
Pipes from what material to choose to replace the plumbing in the apartment? Reinforced polypropylene is almost ideal. It is easy to assemble structures from this material with your own hands, the connections are strong and of high quality. They are affordable in terms of cost, are light in weight, and can withstand high pressure in the plumbing system.

Consider how to properly replace the water supply pipe in the apartment. First you need to dismantle the old system:
- Old risers are disconnected and removed;
- Dismantled old designs. This can be done with the help of an impeller, cutting the structure, starting with the valves;
- Valves are carefully removed. If they are old, it is recommended to first unscrew the lamb head. So you get rid of the need to make a recess in the wall. When unscrewing the head, the valve should be pressed with a gas key.

After dismantling the old pipes, you can start cleaning the system. The design, up to the valve, is often clogged with sand and small debris, which can later turn into growths that are difficult to remove. For this reason, it is essential to carry out a cleaning before installing a new system. You can do this with your own hands, using a steel string or a screwdriver (depending on the design).

If you have chosen a string, a handle should be attached to its end for ease of operation. At the second end you need to fix a small hook. For cleaning, the string is inserted into the pipe and pushed forward. In this case, you should scroll it.
Following this, the water valves are replaced. Which valve to choose? Ideally, it should be spherical in order to turn off the water with one turn of the handle. The valve should be fixed on the old thread. In this case, a winding of special linen, treated with paint, is used. Before doing this, do not forget to put newspaper under the water supply system so as not to splatter the floor with paint.

Then the filter is mounted. In this case, the settling barrel should be located at the bottom so that all sand and debris flow into it. An adapter fitting is installed. The latter should provide a transition from a threaded connection to a polypropylene structure.

Pipe Installation Instructions
First you need to purchase a nozzle for a soldering tool. It must correspond to the dimensions of the installed structure. The outer chamfer is removed from the pipe. The reinforced structure with foil is cleaned. One end of the nozzle is attached to the fitting, the other - to the structure itself.

The polyethylene should melt. The design is placed in the fitting. In a few seconds, they will be securely fastened. You can see how the work is done in the photo. The last step will be to check the system for operability. To do this, partially open the valves and check for leaks in the structure.
Before you start working with your own hands with water supply pipes, we recommend that you view related materials: photos, videos.
Few people think about replacing water pipes in an apartment building until it gets hot: either a small “flood” will occur due to loss of tightness, or normal water circulation will simply become impossible due to the slagging of the system.
There are a lot of troubles that untimely failed pipes and their shutdown in an apartment building can deliver.
Considering that the majority of water communications in apartments and houses were installed at least 30-40 years ago, it is necessary to carefully monitor all elements of the water supply system: from water supply risers and pipes to meters and valves to turn them off.
Because any problem is easier to prevent than to deal with its consequences. This is especially true of risers in an apartment building, which, if they break or fail, will entail serious and very unpleasant consequences.
1 Varieties and properties of modern pipes
First you need to decide what to change the old plumbing. This is a very important point, since the water supply cannot be collected and turned off from anything. It used to be that people had no choice and they were simply forced to use exclusively steel or cast iron pipes.
Steel was the most accessible material, and therefore the most popular. Now the market provides us with a huge variety of products. You just need to choose the best option and make sure that you made the right choice.
To date, 4 main materials are most often used in the installation of risers and pipes for hot and cold water supply, we will briefly consider each of them.
1.1 Metal-plastic pipes
Pipes made of metal-plastic are made in the form of a multilayer structure, which consists of four balls: the inner one is cross-linked polyethylene, resistant to pressure. Next - an aluminum layer 0.4 mm thick, which performs a reinforcing function; the third ball is a layer of glue; the outer part of the pipe is wear-resistant plastic.

Metal-plastic products are known for their versatility. It's about their characteristics. Metal-plastic combines the properties of metal and plastic. Its outer layer does not react to corrosion at all and is very durable. It can be used for many decades.
The internal frame or reinforcing layer makes the pipe strong, ductile and very reliable. Thus, the developers managed to level the problem of plastic, which consists in its possible damage due to excessive pressure or thermal expansion.
- resistance to corrosion;
- ease of installation;
- large variability of fitting fasteners and their shutdown;
- the outer layer of the pipe is a dielectric.
- the need for constant maintenance - pipe tightening.
1.2 Polypropylene pipes
Pipes made of polypropylene are the most practical and utilitarian pipes that have the best cost, and at the same time excellent performance.
Polypropylene is considered the most famous and sought after polymer. Unlike polyvinyl chloride (PVC pipes) or polyethylene, it does not react so seriously to temperature changes. Especially when it comes to low rates. Polypropylene can cope with hot water, but the permissible regime must be observed.

Polypropylene pipes have a smooth surface, are very durable and practically do not deform. The thickness of their walls can reach up to 6-8 mm, and a layer of reinforcement is often arranged inside the walls. In most cases, fiberglass or aluminum sheets are used as a reinforcement layer.
Like all other polymers, polypropylene has a long safe service life and does not react at all to contact with water, use in adverse conditions, etc.
- high throughput;
- the simplest installation of pipes and their shutdown;
- maximum tightness of connections;
- resistance to mechanical damage;
- price.
- non-separable connections;
- limited temperature.
1.3
Copper pipes are a long-standing classic that has excellent characteristics and, at the same time, an unaffordable price for many. Copper has been used to assemble pipelines for a very long time. And there are still houses in which copper water supply systems have stood for hundreds of years.
Is this not an indicator of their quality? Copper is extremely durable. In this parameter, it surpasses even polymer products. It has a huge operating temperature range and good flexibility. In addition to technical characteristics, copper at least looks better.

One of the main disadvantages is its price. It is also worth noting that copper pipes are quite easy to deform. On the one hand, this is good, since they can be bent in any position. But on the other hand, it should be understood that reduced strength affects the entire safety of the site.
- the maximum period of operation of the system;
- unlimited temperature regime (ideal for both cold and hot water supply);
- aesthetic appeal;
- resistance to corrosion.
- price;
- complex installation;
- low mechanical strength.
1.4
Galvanized steel pipes used to be very popular. They have not lost it even now, since this material has a number of important advantages. Galvanized steel resists moisture better, has increased strength and reliability. She came to replace conventional steel products.

- maximum mechanical strength (great for mounting a water supply riser in an apartment);
- resistance to corrosion;
- good throughput (due to the galvanized coating, systems from such pipes are not afraid of the formation of deposits and plaque).
- relatively high cost;
- laborious installation.
2 Stages of work
Replacing the water supply in the apartment and turning it off is a process that requires responsible preparation. The approach to it from the position of "I'll sort it out along the way" is not acceptable, since such repairs often have to be redone within a month after the installation of a new water supply system.
In general, the work plan for replacing the water supply is as follows:
- The choice of material from which new pipes will be made (we recommend copper or galvanized for hot water systems, plastic pipes for cold water).
- Determination of the layout of the distribution of cold and hot water.
- Creation of a water supply scheme for the house.
- Calculation of the diameter of new pipes (depending on their material and scheme).
- Preparing the necessary tools.
For dismantling risers, meters, and old pipes: grinder, crowbar, perforator, pliers, hammer, screwdriver, face mask.

To work with fittings, connecting or disconnecting it, you will need: a pipe cutter, or a grinder, a trimmer, sandpaper, a sharp knife, press tongs, a pipe calibrator, a wrench, a perforator, a welding machine or an electric soldering iron for plastic pipes.
- Purchase of materials.
- Assembly and installation of selection and accounting units (meters for cold and hot water supply) and their subsequent registration.
- Dismantling the old water supply system in the house.
- Installation of new pipes for cold and hot water supply.
- Installation of plumbing fixtures.
- Supply water and check the system for defects and tightness of connections.
The dismantling of the old water supply is carried out in the following sequence:
- Turn off the cold or hot water supply in the house and dump the old water supply risers.
- If the pipes are connected by fittings, we disassemble them, if by a welded seam, we cut them with a grinder. Removal of pipes begins in the area that follows the valves.
- Next, remove the valve itself.
Almost always, the sections of the old pipe that need to be left are clogged from the inside with plaque and mechanical impurities. This is especially true for cold water pipes, where slag turns into hard growths.
Therefore, it is necessary to pre-clean the pipes in the house before installing valves on them and welding with new sections. This can be done with acid, or mechanically (with a string, for example).
After cleaning the pipes, the installation of new shut-off and control valves is carried out. Such devices are mainly installed on fitting connections, so this should not cause any difficulties, the main thing is to make sure that the coupling point is as tight as possible.

Replacing water meters should be done every 4-5 years, so if the resource of the device is almost exhausted, it should be replaced along with the pipes. It is best to entrust the installation of new meters in the house to an authorized representative of the housing department, since the new device must be sealed, entered into the register and filled out with its registration certificate.
However, the installation of meters in the house can be done by hand, as well as the installation of water risers, but before that you need to obtain permission from the housing department in order to avoid possible troubles.
The main difficulty in installing pipes lies in their welding, but since the most common material today is polypropylene, and its connection does not require complex welding, we can say that the installation of new pipes can be done by hand at home. Plastic pipes for cold and hot water supply are connected using a special electric soldering iron.
- The first step is to remove the outer chamfer from the pipe and clean the part to be joined from bumps and burrs.
- We put one side of the soldering iron nozzle on the fitting, insert the pipe into the other side.
- Waiting for the plastic to melt.
- We insert the pipe into the fitting and fix it motionlessly so that they are firmly connected.
Plumbing is one of the most important components of a home, but did you know that it needs to be changed over time? It is easy to change the plumbing in an apartment or a private house on your own, with instructions, a set of plumbing tools and a bright head at hand.
Related articles:

In recent years, there has been a great demand for European-style renovation in the country - covering the apartment with plasterboard, the massive use of plastic and many other miracles of progress. But at the same time, they are increasingly forgetting about the water supply, and in fact in old houses there are often (overgrown with rust and plaque) still Soviet pipes.
Why you need to change old water pipes
In addition to pure H2O, a huge amount of impurities pass through the water supply every second, which tend to settle on the inner surface of the pipes. Over time, the lines become clogged with particles of oxidized metal, which leads to corrosion. In addition, the appearance of old Soviet metal pipes does not harmonize with the modern interior of the apartment at all. Sooner or later, but almost all owners of old apartments come up with one simple thought - pipes need to be changed.
The cost of replacing water pipes with plastic ones
At the moment, the most popular pipes are made of polypropylene, metal-plastic (the so-called "reinforced pipes"), or polyethylene. The price for them differs not only depending on the material, but also depending on the region of residence.
So, the price per meter of a propylene pipe with a diameter of 100 mm will be 500-600 rubles, a reinforced pipe with the same characteristics will cost 1300-1600, and the cost of a polyethylene pipe will be in the region of 300-500 rubles.
To determine the price of a new water supply, take a diagram, calculate the total length of the pipes, add 15% - just in case, add the cost of fittings and fasteners and ... voila - you will have the cost of all elements and installation of the main in your hands.
Benefits of plastic plumbing
Firstly, plastic does not rust, which makes it much more durable and safer than Soviet-era metal plumbing.
Secondly, it does not have a fragile internal coating, which again prolongs its service life and keeps the water clean even after a couple of decades of operation.
Thirdly, it is more reliable, as it is easy to solder and resistant to temperature extremes. So, if you do not know what to choose - metal or plastic - feel free to buy a polymer.
The frequency of replacing water pipes
There is no unequivocal answer to this question, but the result of a statistical survey was obtained “once in 30-40 years if it is plastic and once in 20 years if it is metal”. Due to the high wear rate of the latter, the water supply system becomes unusable faster. On the other hand, if the pipes are outwardly in good condition, and the pressure and purity of the water in them correspond to your understanding of the norm, you can postpone the replacement.
As the saying goes, "don't break what still works." But if troubles appear ahead of time, you need to change it, and quite urgently, since problems with pipes can have disastrous consequences. In addition, it is recommended to immediately change the entire system - simply because the method of joining plastic to metal is still not as reliable as joining two identical materials that can be securely fixed in many different ways.
Decide on the choice of material
Before you plunge into the work, decide on some questions. And the first of them is what kind of material to use in the apartment. The three most popular options have already been presented, so now let's look at their pros and cons.

Polypropylene plumbing
Until recently, polypropylene pipes were the absolute champion in the choice of material for plumbing. They are almost not subject to wear, are relatively easy to install, do not conduct electricity, are thermally stable, and reliable. But there are also disadvantages - for example, the connections cannot be disconnected, since the only really reliable method of connecting one pipe to another is welding, and the only way to fix bad soldering is a pipe cutter.
Metal-plastic and reinforced pipes
An older version from the 90s. It was then that the country was hit by a plastic boom and reinforced polymer was almost everywhere, including plumbing. On the other hand, since polypropylene simply did not exist then, metal-plastic was indeed the best option, especially in comparison with galvanized (or even non-galvanized) Soviet steel pipes. Metal-plastic holds physical impacts well, wears out slightly and looks great, but it also has disadvantages - it is much more expensive than its competitors and is extremely negative about temperature changes, which is why it starts to flow after 2-3 seasons. On the other hand, it is even easier to install than polypropylene, so if you are doing plumbing in a country house or other place where there is no electricity for welding yet, metal-plastic will be the best choice.
HDPE pipes (polyethylene)
A relative newcomer to the market, so it will be difficult to say exactly how good they are, but in theory everything looks just fine - polyethylene pipes are not only strong, but also flexible, which allows them to be used even where a construction made of polypropylene or metal-plastic would be too bulky. In addition, they can freely change geometry, which provides a high level of protection against physical impact. On the other hand, heat resistance raises some doubts, but for water pipes this is still not so important, especially considering that the price of these pipes is lower than that of polypropylene counterparts. Alas, they also share a minus with polypropylene - the only truly durable connection method is welding.
Choosing a mounting method
There are two ways of normal installation of plastic pipes - welding and press fitting. Welding is divided into two types - cold (using epoxy glue) and hot (with a welding machine).
cold method
Cold welding is not only a method, but also the name of the main consumable when using it. These days, almost every hardware store sells a fast-curing, reliable adhesive that allows you to tightly connect plastic pipes together. This method is more resource-intensive than hot welding, but does not require an expensive welding machine. It will also take a little more time - the glue needs to harden, and money, since the material, although inexpensive, needs a lot of it.
On the other hand, it prevents the appearance of sagging inside the pipes, which increases their normal service life. We recommend using this method, as durability and reliability are more important than immediate savings in time and money.
Welding
The classic method of joining pipes, not only plastic, but also metal. Requires a powerful power source, as well as a set of equipment - a welding machine, a protective mask, etc. This method is faster than cold welding and traditionally considered more reliable. But, as studies show, cold welding is not inferior to hot welding in terms of speed and reliability. On the other hand, improper use of hot welding can lead to the formation of sagging on the pipes, which is guaranteed to lead to clogging of the pipes in the next few years.

Press fittings
Another option for connecting pipes, this time - purely mechanical. This method is characterized by the use of fittings made of plastic material, which, after installing pipes in them, are pressed with force by a special press machine. This leads to their deformation and fixation of the joints. The result is a strong connection.
Do-it-yourself plumbing installation in an apartment
Preparing for plumbing installation
Dismantling old pipes and installing new ones is easy, so you can do it all yourself. It is better to do the work with at least one assistant. What to do first:
- Locate the inlet valve and close. Make sure you wrap it up completely - even if the remaining trickle is as thick as a match, a lot of water can leak out. Be careful not to break the valve.
- Disconnect all plumbing fixtures. Do not forget about the heating boiler, if any, as well as the washing machine and dishwasher.
- Dismantle old pipes. If they are steel or cast iron, wear goggles and a respirator. Cast iron tends to crumble, which makes it easy to break, but small particles can get into the eyes or windpipe. Cover your ears, wear thick gloves.
- Cut the pipes according to the diagram. This is done with a pipe cutter, regardless of the type and material of the pipes. You can try an ordinary grinder, but the cut should be perfectly even. When cutting, consider the depth - that is, add half the depth of the fitting to each end of the pipe that will enter it.
- Align the pipes with a gauge. This will eliminate the ovality and make them round.
- Clean the pipes of any contaminants, and also remove bumps at the ends, if any, remain after the pipe cutter has been used.
Then everything depends on the chosen method of fastening. If hot welding - warm up the welding machine, if the press fitting - prepare the press machine and the fittings themselves, if cold welding - no preparation is required, unless you forgot to buy glue.

How to glue pipes with cold welding
The simplest option, requiring only high accuracy in the execution of instructions:
- Chamfer the end of the pipe. The angle is 15 degrees. The tool is a beveler, bought at any hardware store. The procedure is quite complicated, since barbs must be avoided as much as possible. In general, we advise you to practice first and start installing pipes only after you are completely confident in your abilities.
- Clean the fitting sockets of dirt, dust and moisture manually or using a special CPVC cleaner. Better than the last - it's more reliable.
- Apply glue with a brush, manually, carefully. As tightly as possible both on the surface of the pipe and on the inner surface of the socket. In this case, it is better to spend more glue than you need than to think about how to patch the current connection.
- Insert the pipe into the socket. Do it as soon as possible, ideally immediately after applying the glue.
- Rotate the pipe 90 degrees around the fitting. Or vice versa - rotate the fitting relative to the pipe. This is done in order to distribute the glue as evenly as possible.
- Hold the pipe and fitting together for 20-30 seconds. Need absolute fixation, scrolling or changing the depth of the pipe entering the fitting - not recommended.
- Check for an even layer of adhesive around the circumference. After the fixing period has ended, inspect the pipe from all sides and make sure that excess adhesive has come out of the fitting. If there is too much, remove with a soft cloth.
- Continue installing other pipes, but remember that it will take a long time before the final solidification of the glue.

We connect pipes with hot welding
Hot welding can be different - polyethylene pipes can also be welded by the butt method, but polypropylene will have to be processed with a socket. And there is also electrofusion, which will also have to be taken into account. So first decide on the method that you will use, and then proceed to the appropriate procedures.
Yulia Petrichenko, expert
Butt method
Due to the high flexibility and ductility of polyethylene pipes, they are welded directly without the use of fittings. For this you need:
- Center the pipes.
- Make sure they are as close to each other as possible. This is important because reflow cannot correct really large defects (greater than 1/5 of the pipe wall thickness).
- Separate them again and insert a heated heating element between them. Then press them against him again.
- Wait until the ends melt - you will know this by the amount of burr squeezed out under the influence of mechanical pressure. The height of the burr must be indicated on the welding table that came with the pipe or with the welding machine.
- When the ends have melted, release the pressing force and wait for the deep heating of the ends. This takes the time indicated in the welding table.
- Now remove the heating element and firmly press the ends of the pipes together for a while, gradually increasing the pressure. This must be done as quickly as possible. The phase is relatively short and should never be exceeded, so it would be better to interrupt the “settlement of the seam” procedure a little earlier than ruin the whole work from excess diligence.
- Maintain the compression force of the pipes for some more time, but just do not increase it! This will help the pipes not "play" back during the cooling.
Socket welding
This process requires the use of fittings. Ideal for polypropylene pipes. It is carried out with a welding machine according to the relevant instructions, but since we work “with our own hands”, we will show the installation using an ordinary blowtorch with a special nozzle consisting of a mandrel and a sleeve.
- Warm up the welding machine to the desired temperature.
- Put the fitting on the mandrel (this will require effort), and insert the pipe into the sleeve. This must be done as quickly as possible.
- In the process of heating, increase the pressing force of the pipes to the mandrel and the coupling. This must be done until they are completely inserted into the nozzle for welding. After that, stop the pressure.
- When the parts are hot enough, quickly remove them from the nozzle and press them together. After that, you get a one-piece construction of two parts.
- Weld a plug or the next pipe into the other end of the fitting.

Electrofusion welding
This type of welding is used in the installation of gas pipelines, as it is expensive, but reliable. If you want "only the best", you can use it when installing the plumbing. It will require a special electrical fitting - a polyethylene fitting with a built-in heating element. The method is only suitable for round polypropylene pipes.
- Prepare the welding machine.
- Degrease and clean the contact surfaces of the pipe and fitting.
- Put a mark on the pipe, indicating the boundary of its entry into the fitting.
- Firmly fix the pipe and fitting. The fitting can push it out due to thermal expansion, and your task is to prevent this.
- Connect the welding machine to the fitting and press the "Start" button on it. It will turn off automatically.
- Leave the parts and fitting alone for at least an hour. Before the expiration of this time, the connection cannot be used!
Press fittings
A press fitting is used in cases where the pipe does not tolerate welding well and is the main method of fastening metal-plastic pipes, although polypropylene can also be fastened this way. This is the simplest method of all listed, but the least reliable.
- Slide the compression fitting onto the pipe.
- Insert the fitting with o-rings into the pipe.
- Crimp the coupling with special press tongs. It is advisable to use electric tongs, as they provide more force and high reliability.
Using the selected technology, replace all water pipes with new ones. The sewerage system is installed in much the same way (it is shown in more detail in the video below), and preferably at the same time as the water supply system, so as not to stop the riser again later. It is very important to do everything according to the scheme, but even after the end of the process, do not rush to turn on the water. First you need to test the system with a pressure pump.
Video lesson: Replacing water pipes with plastic ones
Pipe pressure testing
Pressure testing of pipes is an increase in pressure in one of the sections of the network in order to identify leaks or structural weaknesses in it. This is done using a special pressure test pump.
- Hermetically cut off the pipe section from the rest of the network. This is done either by elevator valves or pneumatic plugs.
- Connect a pipe pressure pump to the site and pump cold water into the site.
- Give the pipe a pressure that exceeds the standard by 10-20%. For heating, plumbing and sewerage, this is 6-8 kgf / m2.
If the site passes the test, move on to the next one. If not, think about how to replace it or at least strengthen it.

TOP-5 mistakes when installing a plastic water pipe
In this section, we have collected the most offensive and popular mistakes when installing plastic pipes.
- Incorrectly marked boundary of the pipe entry into the electrical fitting. It will force you to lose one fitting and two pipes, but in general - nothing fatal.
- Too much butt welding force. Again, there are two pipes in the list of losses, but you lost them not because of inattention, but because of your own diligence.
- Loose bevels in cold welding. The result will be a fragile connection that will only hold on to the glue.
- Uncleaned pipes from dust and grease during welding. The result is a fragile connection that will simply crumble after a few years.
- Incorrectly measured fitting size before pipe cutting. Forced to spoil all the material. There is no solution, and the process itself is characterized by large financial and time losses, for which this error gets the first place. As the saying goes: "Measure seven times, cut once."
Expertise - sewerage, water supply
Ask an expert
Do-it-yourself replacement of water pipes in an apartment with plastic ones: cost, video instruction - print version


")


