Wiring diagram for a wired switch with 2 places. Do you know all the advantages and disadvantages of this electrical circuit? 3 important nuances of connection
TEST:
If you decide to implement the electrical circuit described in the article, it will be useful for you to take a little test to make sure that you are ready to go.How many contacts does the PV have?
- One;
Explanation: PV contains three contacts. One of them is “common”, and the other two are connected to the next PV.
There is no light in the room. First, the button of the first SP was pressed, then the second, and after that the first one again. Will the light stay on after these actions?
Explanation: Yes, because after the third action, the phase voltage will reach the bulb.
Can an PV circuit be implemented to operate with two lamps?
Explanation: Yes, two-button PVs are used for this.
electric lighting- an indispensable companion of any modern apartment. Light control is carried out using switches: one light source (an ordinary light bulb, or several lamps) has one switch. But this does not always suit the owners of the premises for some reason. That is why the question arises, how to make it possible to turn on the light bulb from two or more places at once? In this material, we will give a detailed answer to this question, as well as give a diagram of such an inclusion, and tell you how it works. PV scheme.
Why might you need a PV light circuit for 2 switches?
Situations when the implementation of such a scheme is necessary in a room or other room pass-through switch, are very diverse. For example, a large bedroom. It is very convenient to place a light switch by each bed so that each tenant has control over the lighting. In addition, you do not have to get to your sleeping place in the dark. When you enter the room, you turn on the light, and after you have taken your place in the bed, you turn it off.
It is also beneficial to use a similar scheme in small houses, the size 3-5 floors. If you make a light switch in the front room for each floor separately, this will result in the need to assemble extra control circuits.
When using a walk-through switch from two places, the tenant of the house will turn on the light when entering the entrance, and turn it off when he is on his floor.
Another example is a large office for several workplaces. The ability to turn off / turn on the light from two or more points at once makes such an office much more comfortable.
What does a walk-through switch with 2 or more places look like?
Pass-Through Circuit Breakers
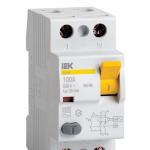
It is impossible to distinguish externally a switch connected to a similar circuit on the outside. This is an ordinary one-button switch / switch. There is a two or more button version, which is used when the lighting is more complex, and each button turns on a specific lamp. Instead of a push button switch, and sensory, but the principle of operation remains the same.
Advantages and disadvantages of the PV scheme from 2 places
Such scheme inclusion has advantages and disadvantages. They follow from the very essence of the operation of such a switch. The benefits include:
- Increasing the level of comfort. From the above examples, it is assumed that the use of the scheme allows you to get rid of the inconveniences that arise in everyday life;
- Ease of execution. This wiring diagram is very simple in execution, and does not require the use of any additional specific equipment;
The disadvantage of such an implementation of lighting control is called only excessive consumption of electricity. Recall the above example about the entrance. Having entered it, a person turns on the light, and having already risen to his floor, turns it off. Lighting will continue to work on all floors until the occupant presses the switch. Such an expense cannot be impressive, and when it comes to small rooms, it is completely absent.
Scheme of a pass-through switch from two places
The figure shows the simplest lighting control circuit from two places using walk-through switches. Under the numbers 1 and 2 are the switches themselves. The phase wire is highlighted in red - that is, the wire through which the voltage flows. In the diagram, a single lamp is simplified as a light source, but more complex lighting is allowed in its place.
The figure shows how it works PV scheme: pressing any of the switches will turn off / on the light bulb. If the first switch transmitted voltage to the lamp, then pressing the second switch will turn off the light - at this point the phase wire will “break”. The reverse is also true. The diagram shows the situation when both switches are off. The light bulb will not be active in any button positions. But what happens in other situations? Let's consider each of the possible options.

In this diagram, the first switch was pressed in succession, and then the second. The green arrow shows how contact, after pressing the second button. It cuts off the flow of electric current, so the bulb becomes inactive.

Following this, the first switch was turned on again. The light bulb will light up again - the phase voltage will reach the light source. After pressing the first button, the light will turn off.
This is how the electrical circuit of the pass-through switch works from two places to one lamp. Its mechanism is quite simple and clear, it is briefly described as follows:
- If both switches are on, the light source is active;
- If one of the switches is on, the light source is active.
- Both switches are off - the light source is inactive.
How to connect a pass switch
Application of the switching circuit from 2 places
Each of switches has two terminals. To put the above scheme into practice, it is necessary to find in each of them that contact terminal, where the contact is fixed on one side. Such a terminal is called "general". In one of the switches, phase voltage is connected to it, and in the other, a wire from a light source.
The remaining terminals are connected to each other. Any connection sequence. The neutral wire is indicated in blue in the diagram. It is conducted directly to the light source from the junction box.
There are five wire connections in the junction box.
3 safety nuances
When implementing the electrical circuit in life, you should remember 3 nuances:
- In order to determine which wire is phase - use a special probe.
- Do not use wires from different metals when connecting them "twisted". Due to the potential difference, ignition is provoked;
- Use thick rubber gloves when working.
How to avoid 2 major connection mistakes
- PV not set to zero. It is always connected to the phase conductor. Otherwise, if it is necessary to carry out repair work, even if the electricity is turned off, PV will not be de-energized, which will cause a dangerous situation;
- PV It does not have an "Off" or "On" position. The button position only indicates one of two possible states.
Simple wiring diagram from four places
The principle of operation remains the same. But the circuit also includes two additional cross switches, necessary in order to ensure the connection of all contacts.

Job cross switches are independent of others. They can transmit voltage to the light source even if the pushbutton switches are in the inactive position. The schematic image shows that if the light is on, then pressing any of the buttons will turn it off. The reverse is also true.
This scheme expands to any number of lighting control points. But the main principle is preserved: at the beginning and end of the path (to the light bulb) of the phase wire there are two through switches. Between them are cross. Their number is equal to the number of desired lighting control points.
The five most frequently asked questions
Is it possible to make control of several light sources from two places using PV?
Yes, such implementation is possible. The double PV circuit for two bulbs will differ only in that each switch will have not one button, but several (by the number of lamps). Each button will only control the operation of the light bulb corresponding to it and will not affect the operation of the others.
Is it possible to make a light bulb control from three or more places using PV?
It is impossible to bring such a scheme to life using only pass-through switches. To solve this problem, parallel switches are additionally implemented, which allow you to increase the number of lighting control points to any desired number.
What is the difference between a pass switch and a normal switch?
The principle of operation of a conventional switch is quite simple - when you press the button, it either interrupts the electrical circuit, or, on the contrary, transfers the electric current further. PV works harder. Pressing the button switches between different contacts. The end result (whether the bulb will be activated or not) depends on the position of the other switches.
What is the difference between a through switch and a parallel switch?
A parallel switch, unlike a pass-through switch, contains as many as 5 contacts, which provide a more complex lighting control scheme that has a much larger number of options. There are only three contacts in the PV, one is common, and the other two serve to transmit voltage or break the electrical circuit - this depends on the position of the button.
What should you pay attention to when choosing a PV?
When choosing a PV, close attention should be paid to the specific type of device. They can differ in their characteristics, as well as in shape. Allocate PV open (for connection with open wiring) and closed type (For connection with wiring going inside the walls). The contacts of the device are designed for a specific electric current, so when choosing a model, you should focus on the expected load.
How to connect 4 PV?
Four PVs are connected using cross switches as described above.
Conclusion
In the article, we examined all the frequently asked questions on the topic of connecting pass-through switches. Using this material and passing the self-test test, you can easily bring the above electrical circuit to life.
Situations where one switch controls two lighting fixtures at once are quite common. The only difference is that sometimes it is necessary to act simultaneously on both lamps with one switch, and in other cases it is necessary that each lamp lights up separately. And this means that in the first case we need a single-key switch, and in the second case we will have to install a device with two keys. Let's talk about each of them separately and consider in detail how to connect two light bulbs to one switch.
The ability to connect two light bulbs to one switching device at once allows you to save materials, time and effort, because you do not have to install a second switch, lay extra wires, hammer additional holes and strobes in the walls.
Preparatory work
No matter how many keys your switch has (one, two or three), the preparatory work will be the same.

To begin with, in the room it is necessary to mount a common junction box and a mounting box for a switching device, it is also called a socket box in another way:
- If the walls in your room are made of PVC, plasterboard, wood or MDF panels, install a special bit with serrated edges on the drill and make a hole. Insert the mounting box into it and fix it to the wall with self-tapping screws.
- In the case of concrete or brick walls, make a hole with a hammer drill or drill with a nozzle that works with concrete surfaces. But in this case, the mounting boxes must also be fixed with a plaster or alabaster mortar.

As a rule, the installation of holes is carried out simultaneously with the laying of the strobe. This is done purely for aesthetic reasons, there is a lot of dirt from such construction work, and it’s better to spray and clean it once. Gates are such grooves in the wall surface, into which the connecting wires will then be laid. They can be done using various tools:
- Hammer and chisel. This is an old grandfather's method, its advantage is the complete absence of the cost of acquiring a tool (every man has a hammer and a chisel). The disadvantage of this method of gating is that it takes a lot of time and effort.
- Bulgarian. This tool is often referred to as the worst of the best. It is convenient that strobes can be made quickly and without much effort. But it is from the grinder that there is a lot of noise and dust, besides, it is not possible to make strobes of the same depth along the entire length, and it is almost impossible to work as a grinder in the corners of the room. So choose such a power tool as a last resort.
- Perforator. All that is required is to purchase a special nozzle for it - a strobe or a spatula. In all other respects, there are no shortcomings, quickly, conveniently, the grooves are more or less even.
- Wall chaser. For this type of work, this is the perfect tool. Works efficiently, safely and quickly. The strobes are smooth, there is no dust, as the chasing cutter is connected to a construction vacuum cleaner. It is convenient for them to work, the tool does not make much noise. The only downside is the high price. But there are services where you can rent a wall chaser.
Briefly about wall chasing using the tools listed above is described in this video:
It is necessary to lay two-core wires into the strobes made and fix them with cement or alabaster mortar.
So, the preparatory work is over, the boxes are mounted, the wires are laid, you can connect the light bulbs and the switch.
Switch device
Before connecting two light bulbs to one switch, let's take a closer look at the design of this switching device. It is simple, and having dealt with the design, you can easily cope with the connection diagram later.

The main component of the whole mechanism is the working part, which is directly installed in the socket. It looks like a metal structure, a drive is fixed on it, with the help of which the device is switched on and off. If we consider in detail, then the drive, in fact, is a moving contact, which, changing its position, closes or opens the circuit between two fixed contacts.
One of these fixed contacts is called the incoming one and must be connected to the phase wire from the mains. The second contact is called outgoing, it is connected to the phase wire going to the light bulbs. With the correct position of the switch, these two fixed contacts must be open to each other, the device is considered disconnected, there is no circuit between the mains supply and the lamp, the lamp does not light. As soon as you press the switch key, the movable contact closes two fixed contacts between themselves, through the closed circuit formed from the mains, voltage is supplied to the lamp, and the lamp is on.

For safety, the working part of the switch is placed in a housing made of dielectric material (porcelain or plastic).
The second component of the switches is protection, this is a frame and keys, usually they are made of plastic. The key is fixed on the drive of the working part, with its help a person presses, thereby changing the position of the movable contact, and thus controls the lighting. The frame performs the function of protection against accidental contact of a person with the contact part of the switch, which is energized. It closes and isolates it all, that is, there is no possibility of touching the working parts. The frame is fixed with plastic clips or screws.
The difference between the 2-key switch is only that it has two outgoing contacts. Each of them must be connected to the phase wire of one of the two bulbs.
Scheme with a two-gang switch
Before you connect the wires to the circuit, you must have installed:
- Two lamps for one bulb. For example, one in the kitchen, the second in the hallway.
- Junction box under the ceiling (below the ceiling level by 15-30 cm). If there is already a junction box in the room, you can use it. The main thing is that there is not a lot of switching and that it is convenient for you to work.
- Socket for a two-gang switch. As a rule, it is installed at a distance of 90-100 cm from the floor level.
- Between all these elements, wires in strobes must be laid. Please note that in the case of a two-gang switch from the junction box, a three-wire wire must be connected to it.
Now we need to electrically connect all this so that voltage comes from the power source to the light bulbs.

Two cores of wire from the mains come to the junction box - zero and phase. Using an indicator screwdriver, determine the phase core. Touch the screwdriver in turn to both cores. If you touch zero, the indicator window will not light up. If the window lights up, then you have found a phase core. Carefully mark it with electrical tape.
Now, to make connections, de-energize your workplace. It is necessary to turn off the machine, which is supplied with voltage. Now, in many houses and apartments, entire shields are being installed, in which automatic machines are located that turn off each room, respectively. If you don’t have one yet, then you will have to turn off the water machine for the apartment. Check the absence of voltage and get to work.
There are three wires in the socket. Strip the insulating layer on them by 1 cm (this is done with a knife). Connect one core to the incoming contact of the switch, connect its other end in the junction box to the phase wire of the mains supply. Connect the other two wires to the two outgoing contacts of the switch. Accordingly, connect their second ends in a junction box with phase conductors from one and the second lamp.

Now you can place the working part of the switch in the socket, fix it, install the protective frame and keys.
There will be one more connection in the junction box, connect the zero wires coming from the fixtures to zero from the mains.
There are two contacts in the lampholders - one side for connecting the zero core, and the central one, the phase is connected to it. Make these connections.
Check that all contacts are reliable, but we advise you to insulate the places of twists after you make sure that the switch is working correctly. To check the assembled circuit, apply voltage to the apartment (that is, turn on the introductory machine). Both keys of the switching device are in the off position, the lights in the kitchen and in the corridor are off. Press one key - the light in the kitchen came on, turn on the second - there was light in the corridor. Also turn off the first and second keys in turn, the light went out first in the kitchen, then in the corridor. Everything is working correctly.
Turn off the input machine again and insulate the twist points in the junction box with an insulating tape, you can also put PVC tubes on top.
The double switch circuit is discussed in detail in this video:
Scheme with a single-gang switch
Everything is absolutely the same, only in this case four two-wire wires come to the junction box - one from the mains, the second from a single-gang switch, and two from light bulbs.

The following connections are made in the box:
- the zero core of the network wire is connected to the zero cores of incandescent lamps;
- the phase conductor of the network wire is connected to the conductor going to the input of the switch;
- the conductor from the output contact of the switch is connected to two phase conductors of the light bulbs.
This scheme is used when incandescent lamps are installed in different directions. If in one direction, then to save wires, the second bulb can be connected from the cartridge of the first.
As you can see, there is nothing complicated. If you are more or less familiar with electrical engineering and physics, then you will be able to independently connect two light bulbs to one switch.
Long gone are the days when all circuits for switching on electrical appliances were adjusted to the switching that was available. However, sometimes switches and sockets were difficult to get. But today is a completely different time, there are many functional and technically advanced devices on sale. You can wire so that it will be as convenient as possible to turn on and off electrical appliances. In this article, we will look at how to connect two switches to two light bulbs, and most importantly, we will decide in which cases it is reasonable to use such a circuit.
Benefits and Uses of Two-Switch Control Schemes
Surely everyone knows the classic scheme, according to which one lamp is connected. This requires the presence of one switch, which must be located in a convenient and accessible place. It will turn on and off the lights in the rooms. This is sometimes inconvenient, as the room may be too long, and you will walk most of the way in the dark.
The article will look at how to connect two switches to two light bulbs and control them from two or even three places at the same time. The main options for using control with two switches:
- In rooms and as well as in buildings with two entrances. It can be a barn, garages, outbuildings for animals or birds. If you install a switch at each entrance, you won't have to walk in the dark every time to turn the light on or off. After all, sometimes it happens that you enter through one door and exit through the opposite. Therefore, you need to consider how to connect two switches to two light bulbs and control them from different places.
- This scheme will be very useful if you have long galleries, corridors, alleys and paths in the garden. You can use lighting while moving in almost any direction. You can turn it off immediately after you pass the site.
- Even in apartment buildings, you can install such a wiring. For example, in the entrance between the floors of a two-story house. In this case, the use of two switches will be both economical and convenient. But before you make two switches, you need to consult with your neighbors.
- The use of two switches in the bedroom will be very handy. Put one switch at the entrance, and place the second near the bed. In this case, you will not need to get out of bed to turn the light on or off. This will be appreciated by the owners of houses whose bedroom is quite large.
Features of using two switches

As can be seen from the connection diagram of the two switches given in the article, no matter what position they are in, power is supplied to the lighting devices, and it is possible to turn it off. With conventional switches it is impossible to implement this circuit. You will have to purchase walk-throughs that have recently appeared on the market.
Cross switches
Conventional switches that are used in most homes cannot be connected in such a way that they work as we need. You can, of course, cheat and switch.
There are cross switches, but they are much more complex and can be used in conjunction with feed-through switches to control electrical appliances from multiple locations. They can be installed instead of a pass-through type switch, but they are more expensive.
Through switches
Outwardly, it differs little from ordinary ones. It has a case, three terminals for connecting wires, 1 or 2 keys. As for the cross switches, they have 4 terminals for connecting electrical wires. If you need to control two groups of lamps on one luminaire, use only pass-through switches with two keys.

Connecting a two-gang switch to two light bulbs is not difficult. Such devices have 6 terminals for wiring. As for conventional switches, they have only 3 terminals. Cross have 8 terminals for connecting wires.

As for the internal design features, a circuit consisting of two lines is connected to the pass switch. Regardless of the position of the key, one line will always be closed and the other open. It turns out that when a two-gang switch is connected to two light bulbs, the circuit that passes through it does not open. This can be seen in the diagram in the article.
Connecting Switches
It is possible to connect two pass-through switches in order to switch two electrical appliances in only one way, so you cannot make a mistake. But if you do not know, it is better to refer to the scheme - there are certain difficulties in it. Further in the article is a diagram by which you can connect one lamp.

This is a typical diagram, which shows that the feed-through switches are connected in series to break the power circuit, and the feed-through switches are connected with one two-wire wire. If you look closely at the circuit, you can see that the power can be opened and closed at any position of the switches.
Circuit Assembly

The assembly of such schemes is not difficult. The switches have an input for 0 or phase on one side of the case, and two outputs on the other, so you can safely connect two outputs, the order does not matter. With the switches connected, it is necessary to bring the rest of the wiring and connect the lamp. Be sure to use a device to automatically turn off the electricity - this will protect the circuits from short circuits.
There can be many situations when you need to connect two lamps to the same power supply using just one switch. Most often, single-key and two-key switches are used, less often - cross switches. If, as a rule, there are no difficulties with connecting one light bulb, then the presence of 2 light sources makes home craftsmen think about their correct connection to the network. However, I would like to list all of the possible ways, based not only on the type of switch, but also on the types of light bulbs and how they are connected. Next, we will detail how to connect two light bulbs to one switch, providing all the necessary wiring diagrams.
Types of lamps and switches
Before proceeding directly to the installation, you need to clearly understand that there are several types of light bulbs that are connected to the network both directly and through ballast or rectifier-step-down equipment. In any case, each of them has its own operating voltage and power, on which the current also depends, respectively.
Types of artificial light sources often used in everyday life:
- Incandescent and halogen, the principle of operation is the same, only in some there is a vacuum, and in others there are special halogen vapors that increase the service life.
- Luminescent, as well as their variety, the so-called housekeeper and sodium.
- LED, working on LED systems and on the features of a semiconductor diode to emit a luminous flux.
The main ones designed to control lighting can be divided into:
- Single-key, two-key, three-key, etc.
- Passage and cross.
Each type of lamp has its own characteristics and connection patterns, even if they are connected to the same switch.
The difference between parallel and series connection of lamps
If any light bulbs are connected in parallel to each other and, accordingly, in series with the switch, then the voltage on each of them will be equal and in this way it is possible to connect light sources of different power. The main condition is that the operating voltage at which they normally operate must be equal to the voltage of the power source. If a step-down device with a rectifier system is used in this case, then the NC contact must disconnect the circuit before the converter, as shown in the figure.
In this case, it does not matter whether two or three light sources will be turned on. Most often, these are halogen and LED lamps, designed for a reduced voltage of 12 or 24 Volts.
With a serial connection, the situation changes dramatically. The supply voltage will be divided by the number of light bulbs, that is, if the network is 220 Volts, then on two artificial light sources connected in a serial circuit, the voltage will be approximately 110 Volts. This must be taken into account when choosing and buying them. Another nuance with such a connection is related to the power of each of them. It should be the same or as close as possible to each other, because with such a connection, the current is the same in all parts of the circuit. If one lamp is 500 W and the other 50 W, then in a light bulb with a lower power connected by one wire to each other, a larger current will still flow, corresponding to the most powerful load. A light bulb with less power will burn out instantly. This rule applies to all types of lamp sources, from incandescent to LED.
If you need to connect an LED light source from the network or from sockets, then often it consists of a so-called driver installed inside the light bulb housing. It performs several functions at once: rectifier and step-down. For serial connection, these lighting fixtures are not intended, only for parallel.
For fluorescent daylight sources, both with an electronic starter and with a starter, series connection is most often found in raster fixtures, as it allows one or two starters to ensure stable operation. In this case, the starter itself is selected for 127 V with the calculation of the operating voltage of a standard network of 220 Volts. The switch in this circuit uses a conventional single-key switch and also breaks the phase wire with its contact.

As for the parallel connection of several fluorescent lamps or compact lamps, the operation of which is based on the glow of a phosphor applied on a glass tube, in this situation it is possible to connect any number to one switch, both single-key and two-key. The main thing is to take into account the power of all light sources, on which the current in their circuit directly depends. For any switch, it is limited and indicated in the technical data sheet, on the packaging or on the case. If, for example, a current of 5 A is indicated, then it is not worth exceeding its value, since this will very quickly render the NC contact itself unusable.
To fully understand the serial and parallel connection of light bulbs, we recommend watching the video:
Wiring diagram for two light bulbs
Single key switch
Connecting two incandescent bulbs to one switch is carried out according to the standard scheme, the only difference is how the light sources themselves are connected. With a single-button switching device, it is possible to simultaneously control two lighting fixtures at once, no matter how they are connected to each other, in parallel or in series.


The main thing to remember is that it is recommended to put the NC contact on the phase, and the wire connected to the light bulb directly to zero. In the opposite case, of course, the circuit will also work, but then when replacing a burned-out light source, it becomes necessary to turn off the entire power supply of the room or area, since it is the potential passing through the phase conductor that affects the human body. easily with a conventional indicator screwdriver or tester.
Two-gang switch
If everything is clear with connecting two light bulbs to a single-key switch, consider a switch with two keys and its features of operation and connection. It has one common contact and two outgoing, going to a separate load. In this case, all installation must be carried out through the junction box, this will further simplify the connection of new lighting fixtures or troubleshooting. Wiring to the switch is carried out with a three-wire wire, and wiring for fixtures and input of the supply voltage with two-wire.

A double switching device can be used to separately control two light sources, of any type, the main thing, again, is not to forget about limiting the current in the circuit. It is according to the strength of the current flowing in the lighting circuit that you need to choose the switch itself and the wire section.
The video below clearly shows how to connect two lamps to a double switch:
Through switches
Connecting two light bulbs to a pass-through switch is used when lighting long corridors and tunnels, and for this they must be used in pairs, otherwise the meaning of their use is lost. Here is a schematic diagram for such a connection. All installation must also be done through the junction box.
There are several ways to control lighting from different locations. I already wrote about some of them in one of my own. Today I want to consider the easiest way to control lighting from two places, which you can easily apply at home.

Let's imagine that you have a long corridor or passage room without natural light. In such cases, it is best to provide lighting control from two places. At the entrance, near each door, you must put one switch.
In the simplest case, I advise you to use the following lighting control scheme from two places:

The most interesting thing is that for this circuit you will not need to buy any additional pass-through switches or impulse relays.
To implement the proposed scheme for controlling a luminaire from two places, you will need two conventional switches, a terminal box and connecting cables (three-core and two-core). I don't think it should be difficult to assemble this circuit.

In this case, we lay a two-core cable from the second switch to the chandelier. In the chandelier, we disconnect one of the attached wires, in this case the N wire is taken in the picture. We connect one end of the cable from the switch to the chandelier, and the other to the N wire.
This is how it is quite simple and at no extra cost to make lighting control from two places.
A prerequisite for the operation of the proposed circuit is to find one of the switches in the on state.
After I wrote the article, I realized that I made a small mistake in these diagrams. Found? Let it be your homework

