An inspection hole in the garage helps out many motorists, with the help of which you can carry out minor repairs and maintenance, make a detailed inspection of the lower part of the car, and diagnose the chassis. But in order to properly make a hole, it is necessary to fulfill certain conditions, to follow a certain order of work.
If the inspection pit (SP) is not done according to the rules, it will be inconvenient to use, it can be flooded with water, and it is unlikely to last long. In the article, we will consider what criteria should be followed when creating a SA, the procedure, the necessary materials, tools, existing construction technologies.
Where to start making a viewing hole
Any structure always begins with calculations, before proceeding with digging a pit, it is necessary to determine in advance:
- dimensions;
- the place where the pit will be located;
- materials used (brick or concrete).
It should be said that it is easier to make a SA when there is no garage, and it is only in the project, especially in cases where groundwater is at a depth higher underground than 2.5 m, since in this case drainage work is required. If the water runs too high under the finished garage, you may have to abandon the viewing hole, since drainage will be very problematic.
So let's start with the dimensions:
- length - usually taken about one meter more than a standard car. If the garage is intended for the repair and maintenance of passenger cars, a typical size of 4.5 m is implied, which means that the length of the pit should be approximately 5.5 meters;
- width - should not be too small, it is necessary that an adult can fit comfortably in the SA, it cannot be wide, otherwise not every passenger car will be able to drive into the pit without the risk of falling down, having left the track. Usually the width is taken 0.75-0.8 m, this is the most typical size;
- depth - calculated taking into account the height of an adult male (170-180 cm) plus a margin for convenient inspection and repair (15-20 cm), a typical pit depth is 1.85-2.00 m.
In general, builders always try to dig a little deeper - to reduce the depth quite easily with the help of stands, laying an additional layer of material at the bottom. But it is difficult to deepen the pit, since it is necessary to destroy the lower layer, re-lay out the floor, carry out hydro and thermal insulation.

With your own hands, you can make a pit of various designs:
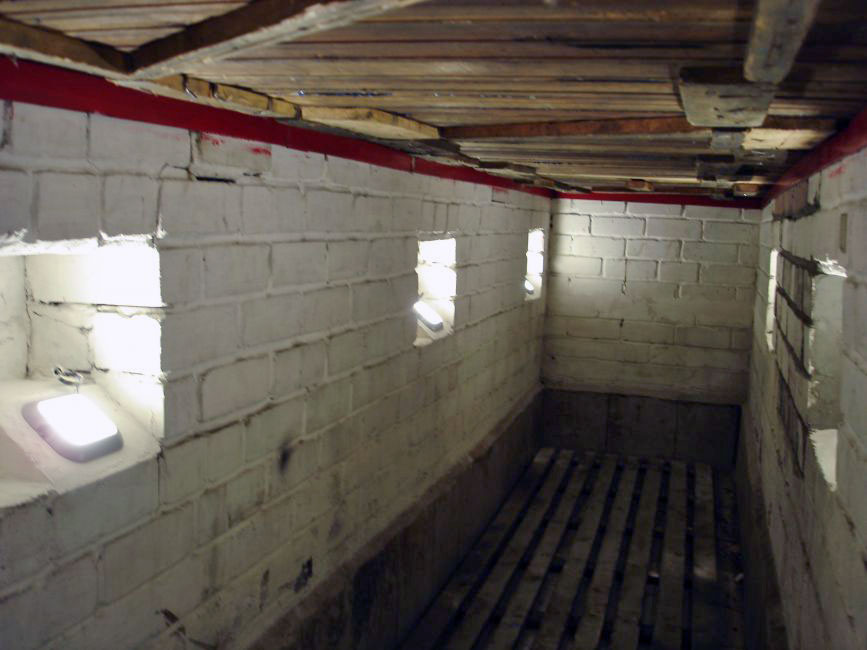
- ordinary, with a floor and reinforced walls;
- with niches in which it will be possible to lay out the tool, small parts removed from the machine;
- with a cellar for economic or domestic needs.
The pit is always dug with a margin not only in depth, but also in width and height, since it is necessary to expect that all surfaces will be reinforced with concrete or brick, waterproofing will have to be done, ideally it would be nice to provide for thermal insulation.
How to make a floor in a garage pit
Having made a drawing of a hole, you can start digging it, but if a concrete floor has already been laid out in the garage, it will have to be cut and partially removed, for this you will need a circular saw with stone discs, a jackhammer, in extreme cases, you can use a perforator with a chisel. The future pit is marked with chalk, a corner is used to create straight lines.
When digging a hole of the required size, we use a building indicator or a plumb line, it is necessary that the walls are even, and the earth should be taken out immediately outside the garage. Then we are closely engaged in the floor in the pit of the garage, at the bottom we create a pillow support:
- lay out an even layer of rubble (approximately 5-10 cm thick);
- ramming, pouring a layer of sand;
- on top of the “layer cake” we cover with clay, we lay roofing material;
- for strength, we place reinforcement on top;
- pour the resulting structure with concrete mortar, let it dry.
Concrete can be made from various components and in different proportions, the most classic composition of the mixture is three parts building sand and one part dry cement. A layer of waterproofing is laid out on top of the concrete, all sorts of options are also possible here, there are several recipes. After the waterproofing layer, it will not be superfluous to take care of thermal insulation; sheet foam is usually used for this purpose. Then the whole structure is re-poured with concrete (layer 15-20 mm), after laying it is necessary that the solution is thoroughly dry.

Laying out the walls of the pit
When forming the side surfaces of the SA, clay is applied to the walls with the first layer, then a polyethylene film is fixed on it, and roofing material is spread. As in the version with the floor, a waterproofing coating is also provided here, the material can be single-layer or multi-layer polymer plates, bitumen, liquid rubber, mineral mixtures, and so on. If thermal insulation is needed, we lay foam, it is important to carefully process all joints and seams during hydro- and thermal insulation, it is necessary to ensure tightness. When laying walls with concrete, it is necessary:
- make formwork, it is made of wooden blocks, plywood or edged boards;
- before pouring, reinforce with a steel mesh with a rod diameter of 10-12 mm;
- pour the concrete solution, after it has completely dried, remove the formwork;
- if necessary, make niches in the walls.
If lighting is provided in the pit, care must be taken to lay internal wiring, the wires should be hidden in the corrugation, and they are usually fixed to a reinforced mesh before pouring with concrete (for example, with plastic ties). The solution is not poured all at once, but in several stages from the bottom up in sections of 0.3-0.4 m, each layer must be allowed to dry (concreting can take from two to three days). Also, the walls can be laid out of brick, but here a slightly different technology is already required.

How to lay out the walls in a brick pit
Before laying out the walls with bricks, just as when working with concrete, the side surfaces are first smeared with red clay, a plastic film, roofing felt, hydro- and heat-insulating layer are laid. Laying is carried out subject to the following conditions:
- bricks are placed in a checkerboard pattern;
- masonry is carried out in one layer along the width of the brick;
- the seams are carefully rubbed, and the corners are made in a reliable bundle;
- the upper brick row should protrude about 5-10 cm above the surface of the structure. This is done so that the car cannot fall into the pit, and also so that the tool does not slip into it.
When laying out a brick pit, one must not forget about niches; for convenience, formwork can be built (but not necessary). Immediately after the work is done, it is impossible to use the pit, it is necessary to wait about five days for the mortar to set well and dry out, and the masonry to settle.

How to properly waterproof a pit in a garage
Waterproofing protection is a very important component of the inspection hole, especially when the groundwater runs high enough in the ground. At high humidity:
- the pit can be heated by water;
- the bottom of the car, constantly located on the SA, begins to rust;
- with insufficiently high-quality insulation, the excavated pit gradually collapses and becomes unusable.
In order for the inspection pit to serve for a long time, it is necessary to make the waterproofing of the pit in the garage very high quality, to use materials that could provide waterproof protection for many years. As waterproofing materials are usually used:
- various types of roofing materials;
- bituminous mixture (designed for 10-15 years of building service);
- polymer film (geotextile, can serve for more than a dozen years);
- mineral dry mixes, diluted with water before direct use;
- latex-based liquid rubber, its service life is from 20 years or more;
- a mixture of petroleum products with liquid clay (for the initial treatment of walls and floors).

If groundwater passes high enough, even high-quality waterproofing does not guarantee reliable protection against moisture, only a well-executed drainage system with water drainage into a natural or artificial reservoir will help here.
Construction of a pit in the garage according to all the rules
To competently make a hole in accordance with all the rules, it is not enough just to dig a foundation pit, strengthen the walls and floor, it is also necessary:
- install natural and forced ventilation;
- install electric lights;
- build a shelter (mortgage frame), it will protect against accidental falling into a pit;
- think over the descent system (build a removable ladder or lay steps in the pit).
An even more “advanced” option is to make a cellar in a viewing hole, in which case it will be possible to store pickles for the winter, fresh vegetables in the garage.
How to make a vegetable pit in the garage
If there is already an inspection hole in the garage, the cellar is made separately, at the other end of the room or next to it, usually it is located at a small distance from the wall, about half a meter, and unlike the CL, it has slightly different dimensions:
- length - 2.5-3 m;
- width - 2-2.5 m;
- depth - about 1.7 m.
The dimensions of the cellar may differ from the above dimensions, it all depends on the size of the garage itself. In this building, a hermetic manhole cover, a ladder (it is better to make it from wood) must be provided. The cellar should include:
- moisture protection;
- ventilation;
- sleepy sinus.
The vegetable pit is supplemented with electricity and thermal insulation at will; before construction, it is important to foresee two points:
- you need to make sure that power wires do not pass under the future cellar, there is no water supply or gas pipeline;
- groundwater must pass below the foundation level of the proposed vegetable pit.
As in the case of creating a SA for the cellar, we also first dig a foundation pit, then:
- sprinkle on the bottom and tamp a layer of rubble, about 10-12 cm;
- we lay the next layer - building sand (about 15 cm), careful tamping is also required here;
- we fill the bottom of the pit with bitumen or other similar composition, if waterproofing is necessary, roofing material is installed (other similar material can also be used);
- we fill it with concrete, for structural strength it is desirable to reinforce it;
- we give the concrete mortar a good grip and dry, then we strengthen the walls - we fill it with concrete or lay it out with bricks (the latter option is most preferable).
The standard wall thickness is one and a half bricks; for strength and better waterproofing, we coat the masonry with bituminous mortar. The walls of the pit must be very strong, because the car can be placed anywhere in the garage, and it is undesirable to leave it for storage in a viewing hole.

The ceiling in the cellar is made in the form of a vault, in order to hold the ceiling bricks during construction, they are laid out on a plank template. The upper part of the cellar can be made of concrete, as long as it is strong, and the hole is usually made in the middle. In a vegetable pit, the ceiling is often insulated, foam and expanded clay are used as materials to fix the insulation layer, it is poured with hot bitumen. Also, glass wool, sawdust with cement are used for insulation, thermal insulation can not be used in mild and warm climates.
In the cellar, it is necessary to make shelves for food supplies, containers for storing vegetables. Shelves are usually made of boards and beams, the ventilation of the room is mainly provided by natural ventilation. Forced ventilation provides more efficient air circulation, but also requires more significant financial costs. Usually, an electric fan is used for forced exhaust, it is mounted directly in the ventilation pipe.
Pit thermal insulation
In a fairly cold climate, thermal insulation in the garage is of considerable importance; adding a thermal insulation layer allows you to save on heating and provide a more comfortable indoor temperature. As a heat-insulating material, extruded polystyrene, polystyrene is mainly used, and an expanded clay pillow also helps to keep warm.
Typically, the foam is laid on top of the vapor barrier film, then poured with concrete. Expanded clay is laid on the bottom of the inspection hole, playing the role of not only a heater, but also a stabilizer of the floor of the building.

The location of the cellar and pit for the car
The inspection hole in the garage can have a different location, placed both in the center and closer to the edge. Being in the center is convenient if the garage is narrow enough, and it does not have or at least a minimum of workbenches, tables, other furniture, there is no separate room. When a small auto repair shop is organized in garage conditions, it is more convenient to move the pit to one edge, but so that a car can safely and freely enter it. The cellar can be located anywhere, of course, if there is no viewing hole in the garage. When a pit is available, it is advisable to place the cellar at the end of the garage room, behind the SA.
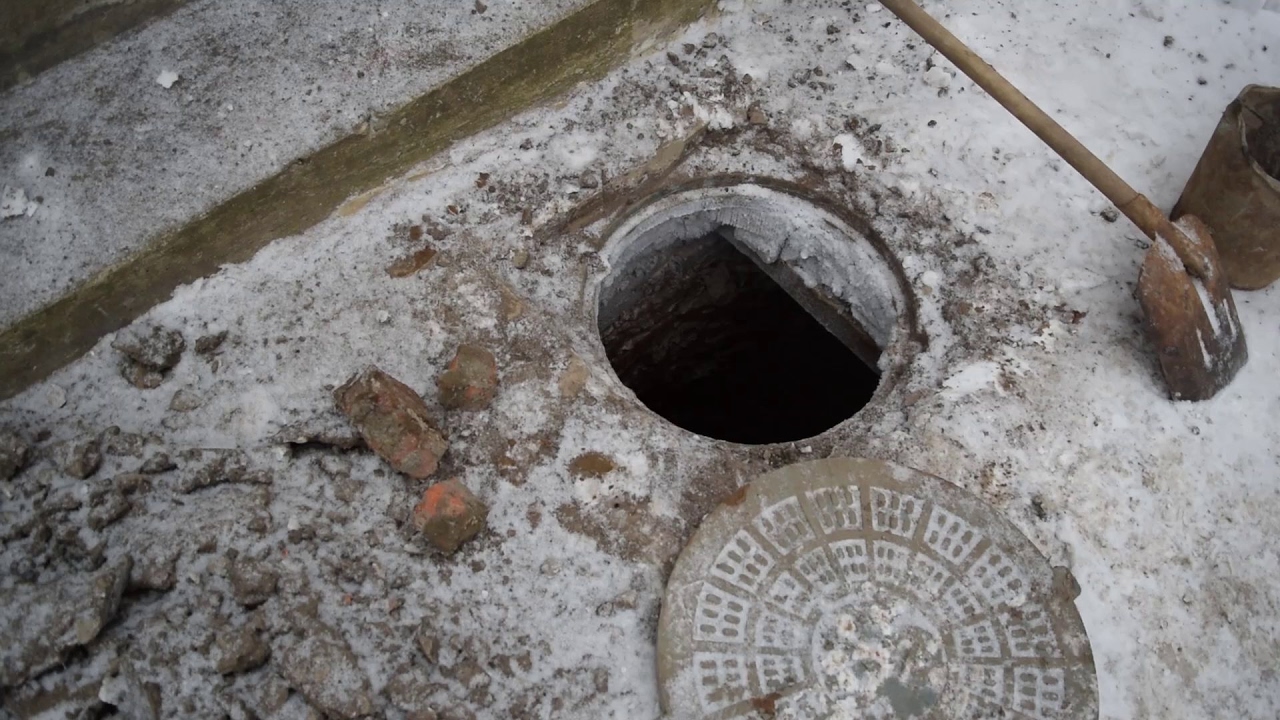
Garage drainage system
A water drainage system is necessary in case of a high level of groundwater, high soil moisture. Drainage can be made according to various schemes, but there are basic rules for its construction:
- the drainage trench is dug deep to the level of the foundation of the pit;
- ditches should be located outside the garage, somewhere at a distance of half a meter from the building along its perimeter;
- a drainage well is required for drainage;
- drainage pipes are a single closed system with water drainage.
To prevent damage to the drainage system, a sand and gravel cushion is laid from below in the trench with a layer of about 10 cm, then the pipeline is covered with a geotextile film. A ravine can serve as a drainage well, if there are no natural recesses near the garage, any suitable container must be used, observing the conditions:
- the well should be located lower than 20 cm from the level of the lowest point of the pipeline;
- the outlet pipe of the drainage system must be suitable for the tank;
- as a water storage tank, a plastic container is mainly used, an iron vessel is prone to rust, will fail much faster and will not be able to work as intended.
A sand and gravel cushion is also made on top of the drainage pipes, the soil should be compacted over the drainage carefully, trying not to damage the pipeline, water from the garage should be drained to a distance of at least 5 meters.

Pit lighting
Lamps in the inspection pit provide comfortable working conditions, as lighting devices are usually used:
- stationary lamps in plafonds, designed for a voltage of 36 or 220 volts;
- carrying, it is better if it is with a long wire;
- low-power 12-volt lamps;
- LED lights;
- Rechargeable LED lamps.
36-volt lighting fixtures are the most popular auto repair fixtures, usually waterproof and safe to use. Quite often, 220 Volt lamps are also installed in the garage, since they do not require a step-down transformer, but here you have to take care of reliable grounding, and it is necessary to work with such lamps, observing safety precautions.
Rechargeable lighting devices are quite expensive, difficult to repair, but sometimes you can’t do without them, for example, if there is no stationary power in the garage. As an option, you can arrange the transfer by taking a voltage of 12 V from a car battery, but in this case the light will be rather dim.

Pit closing
The cover covering the pit can be made of various materials:
- welded metal bars;
- edged board;
- plastic.
It can also be made from composite materials. The two most important qualities of a pit shelter are strength and light weight, the design should be easy to move away and support the weight of a person. If the car is often or for a long time left in the pit, it is advisable to make a tight cover, for example, from a forty board / bars, in this case, moisture will practically not settle on the bottom of the car.
The wooden shield should be sanded, impregnated with varnish, and the metal sanded and painted, such a frame will last a long time, will not rust or rot. For ease of removal and installation, the cover should be supplemented with one or two handles; a folding mechanism can also be provided in the design.

Pit ventilation in the garage
The type of ventilation largely depends on the size of the garage; for sufficiently large garage structures, you can limit yourself to natural ventilation; for small rooms, forced ventilation is necessary. The exhaust opening is almost always made from above, near the ceiling, in the room it is closed with a metal or plastic grate, the supply ventilation is installed at the bottom, no higher than 0.5 m from the floor.
They try to make an exhaust hole for natural ventilation on the leeward side, usually it is protected from rain and snow by a garage roof from the outside. Power for the electric fan is taken from the local power supply or battery, the direction of movement of the blades is selected empirically.

Pit making tools
The number of tools used when digging a viewing hole depends on the complexity of the installation, at least you will need:
- measuring tape;
- chalk for marking;
- bayonet / shovels;
- containers for diluting solutions (buckets, barrels);
- building level or plumb;
- pick;
- electric drill;
- a hammer;
- large ruler, measuring corner;
- surface treatment materials - sandpaper, floats, etc.
If you need to heat up the bitumen, you will need a gas burner, it is easier and faster to prepare a cement mortar with a concrete mixer. Also additionally most often required:
- welding machine;
- angle grinder;
- knife or scissors for cutting materials;
- bitumen roller.
If you have to dismantle the concrete floor, you can not do without a concrete cutter, a jackhammer or a powerful puncher. When cutting a concrete slab, it should be taken into account that steel reinforcement is located under the concrete layer (at a depth of about 50-100 mm), it will have to be cut with a circular saw.

Materials used
Almost any normally equipped inspection pit will require concrete, it can be:
- cement-sand mortar in the ratio of cement / sand 1:3 or 1:4;
- a mixture of cement, building sand and crushed stone in a ratio of 1/3/4.5 (rough concrete).
Also for the manufacture of walls and floors will need:
- crushed stone, gravel;
- expanded clay;
- slurry;
- waterproofing materials (roofing material, bituminous mastic and resin);
- vapor barrier film;
- steel corner / channel;
- boards and wooden beams;
- thermal insulation materials (polystyrene, polypropylene, glass wool, etc.);
- steel bars or finished reinforced grating;
- nails;
- brick (in case of brickwork).
If a drainage system is provided, PVC pipes, fittings, possibly a reservoir for a manhole will be needed. To give an aesthetic appearance, the inspection pit can be decorated outside with tiles or other decorative materials.

The service life of the SA to a large extent depends on the quality of the materials used, the accuracy of the workers, the thoroughness of the waterproofing, and compliance with all construction rules. A well-made inspection pit will last for more than a dozen years, it will be very useful when carrying out repairs, car maintenance, for example, with its help it is very convenient to change the oil in the engine, gearbox, and repair the chassis.
It would seem that building a viewing hole + in the garage is as easy as shelling pears. However, this event is associated with a lot of various subtleties, ignorance of which often leads to disastrous consequences, for example, corrosion of the bottom of the car. To avoid unpleasant surprises, it is worthwhile to carefully approach both the planning stage, preparatory work, and direct construction.
Pit planning
Strange as it may seem, but before building a viewing hole, it is necessary to consider a number of details that have a significant impact on the comfort of the conditions for inspecting or repairing a car.
pit dimensions
An inspection pit, the dimensions of which do not allow you to straighten up to your full height or move freely even when inspecting a car, is of no value, since repair work can take quite a long time, and the lack of the minimum necessary comfort will entail frequent breaks for rest, or contacting a car service. Based on this, the dimensions of the pit must correspond to the following parameters:
- The depth of the inspection hole consists of the growth of the car owner + 15-20 cm;
- Width - depends on the brand of the car, therefore, to determine it, it is necessary to measure the distance between the front or rear wheels. At the same time, the width of the pit should be slightly less than the value obtained in order to safely drive into the pit without fear of falling into it. In addition, you should not discard the fact of a possible change of car to another model. Based on these considerations, the optimal width of the viewing hole is 70-75 cm;
- Length - calculated from the length of the car + 1 m for free descent into and out of the pit. At the same time, it is not worth making the length of the pit less than 2 m.
During the construction of the pit, the obtained data must be increased by the amount of allowances, including the width of the waterproofing and heat-insulating layer, as well as the thickness of the concrete layer or brickwork. On average, the size of the allowance varies between 20-30 cm.
waterproofing
The variety of waterproofing materials differs both in the method of laying, the operational period, and in cost. In addition, the thickness of various types of waterproofing is not the same, so it is necessary to choose a waterproofing material at the planning stage in order to leave the necessary allowance when determining the size of the pit.
The following materials can be used as waterproofing for a viewing hole:
- Bituminous, represented by roofing material, euroroofing material, rubemast, etc. In this case, the material is laid on bituminous mastic in 2 layers. In this case, the joints are overlapped by 20-25 cm and glued with hot bitumen. The service life of this category of waterproofing is 10-15 years;
- Polymer single-layer or multi-layer membranes have a longer service life, exceeding 50 years. Laying membranes requires a reinforced frame with 10x10cm cells, covered with geotextile. In this case, the membranes are overlapped by 10 cm, if there is a self-adhesive base, or by 30 cm if it is not available. The resulting joints are subject to mandatory gluing using special equipment. Relatively recently, polymeric geomembranes have appeared on the market, which already include a geotextile layer;
- Penetrating compositions are represented by dry mixtures diluted with water before direct use. They are applied over the concrete layer, penetrating deep into its structure and blocking water seepage to the surface. However, this method is more often used as an additional waterproofing layer;
- A mixture of oily clay in combination with oil refining waste as an independent waterproofing agent is used quite rarely against the background of modern materials that significantly exceed the clay mixture both in terms of the operational period and the degree of tightness. However, it is often found in combination with other types of waterproofing.
thermal insulation
To insulate the inspection pit, polystyrene is an ideal heat insulator, since it has excellent thermal insulation characteristics and a minimum water absorption rate. At the same time, humid conditions in no way affect the decrease in the level of thermal insulation properties.

niches in the wall of the pit
Inspection and especially car repair is accompanied by the use of various types of tools. So that each time you don’t have to go up to the garage for the required fixture or stumble over the tools scattered at the bottom of the pit, you can equip niches of various sizes around the entire perimeter of the pit or in some places, where the necessary fixtures and parts for repairs will be located. Thus, the presence of niches contributes to the speed and convenience of repair work.
lighting
If a portable lamp is used for lighting, then planning in this case is eliminated. However, lighting a viewing pit with stationary lighting fixtures requires wires to be brought into the pit and a recess in the wall for installing an outlet, so here it is worth deciding on the location of the light fixture and its power source.
ventilation
Even a heated garage will not save the viewing hole from condensation. In addition to creating a certain microclimate in the pit, ventilation contributes to the inflow of fresh air and the outflow of essential oils and other chemicals used in car repairs. The easiest way to build ventilation for a viewing hole is to bring a flexible air duct of small diameter out of it to a height of 25-30 cm from the garage floor. At the same time, the removed end of the ventilation must be closed with a mesh and a lid to prevent various debris from entering it.

Based on the foregoing, a preliminary account of even the smallest details will significantly save time and financial resources.
Inspection pit construction technology
After the details of the future structure are thought out and the necessary materials are purchased, you can proceed to the implementation of the plan, observing the following work order.
pit preparation
- We mark on the surface of the floor or ground the area intended for the viewing hole.
- We take out the soil to the required depth and level the bottom of the pit according to the level.
- In the wall or along the perimeter of the walls we take out the ground for niches.
- We tamp the bottom of the pit.
floor arrangement
- We lay a layer of crushed stone, which is 10 cm, on the earthen soil and compact it.
- On top of the rubble we fall asleep a layer of sand of 5 cm and also tamp.
- We apply oily clay with a thickness of 20-30 cm.
- We lay the reinforced mesh.
- We mix the concrete mortar from sand with cement, observing the ratio of 3: 1 and fill the floor with a thickness of 6-7 cm.
- After the concrete has hardened, we apply a layer of bituminous mastic and lay the roofing material, not forgetting to glue the joints with hot bitumen.
- Lay down a layer of foam.
- Fill with concrete mortar 10-15 cm thick and let dry completely.
wall arrangement
- We cover the walls with greasy clay and cover with polyethylene.
- On top of the film we impose roofing material and glue its joints with hot bitumen.
- We fix the foam to the walls with an adhesive.
- We erect formwork from boards or plywood at a distance of 6-7 cm from the wall.
- We reinforce the walls around the perimeter.
- We fill the walls with concrete mortar gradually, pouring the mixture daily to a height of 15-20 cm.
- After the concrete has completely hardened, the formwork is removed.
niche arrangement
We reinforce the top, bottom and walls of the niches with wire and coat them with clay, after which the niches can be lined with bricks or ceramic tiles after drying.
security
We make an inspection hole protected from accidental collision by a car by installing a T-shaped iron rail at the level of the main floor of the garage. In addition, this rail will serve as a frame when covering the pit during the idle period with separate boards or you can immediately put together a cover from the boards.
So, the inspection pit + with your own hands is ready. It remains only to arrange ventilation, conduct light and lower the stairs into the pit. In addition, a month after the last concrete pouring, it will be possible to line the inspection pit with ceramic tiles, bricks, or other finishing materials.
Reading time ≈ 4 minutes
The presence of a viewing hole in the garage provides the possibility of self-repair of your own car. You can make it with minimal knowledge in the field of construction and the presence of detailed instructions. Using a step-by-step master class, it will not be difficult to accurately and efficiently complete the preparation and self-construction of the pit, regardless of the size and layout of the garage.
Determination of the optimal dimensions and shape of the inspection pit
The finished inspection pit should be both safe and convenient to use. Therefore, before starting work, it is recommended to study the geological survey data on the state of the soil and the location of groundwater under the garage. This will determine the optimal depth of the pit. If the groundwater is quite deep, then the recommended height from the floor to the "ceiling" may be about 2 m or less (owner's height + 20-30 cm). Please refer to the drawing for dimensions.

An inspection pit is made in the garage with your own hands after drawing up a project plan for the facility. Its width is determined according to the wheelbase of the car: it should be smaller, ensuring the safe arrival of the car. The length should be at least 1 meter longer than the length of the car: this will allow you to work comfortably in the pit.

Allows the device of a viewing hole the presence of small niches. They can be used to store parts, convenient location of tools. They should not be made too deep. The sizes of niches are recommended to be determined according to the available number of auto tools and spare parts.
Laying walls and niches in the viewing hole
After digging a foundation pit with predetermined dimensions, you should begin to strengthen the walls, protect them and then lay the bricks. The use of bricks is optimal due to the ease of working with it and ease of purchase. How to build a viewing hole in the garage from the most affordable building materials can be found in the following instructions:
1. First you need to make the floor of the inspection hole in the garage: level the bottom of the pit, lay roofing material (with a swim on the walls of about 0.5 m for each of them). Concreting is carried out with the M-200 brand, the floor thickness should be about 10 cm. The size of the length and width of the floor should include the sum of the thickness of the two walls, the length / width of the pit itself and an increase of 10 cm. After pouring, leave the concrete to harden for 4 days.

2. The withdrawal of the walls begins with the laying of 4 rows and the subsequent waterproofing of the inspection pit from the outside using bituminous mastic. This will eliminate the destruction of the walls due to moisture from the ground cover adjacent to the brick. After laying out the walls, you need to fill in the remaining indent from the ground to the brick.

3. The final stage of work will be the installation of a metal frame around the entrance to the pit. It should protrude slightly above the floor level of the garage box.

Niche frames should also be made of a metal corner. This will prevent subsidence of bricks or their destruction.
Features of the ventilation device and the choice of stairs
High-quality ventilation in the inspection hole of the garage will prevent the appearance of mold and the gradual destruction of the walls. It can be made exclusively exhaust or supply and exhaust. In the first case, when laying out the last rows of bricks, it is necessary to install a pipe that will allow air to be removed from the pit through the garage box upwards (it will go to the garage ventilation pipe or be taken directly to the street). In the second case, an additional pipe is installed, which is diverted to the outside. Its end should be located at a distance of 15 cm from the floor.

You can make a comfortable ladder for a viewing hole from wood, metal corners. For a small block, a repositionable ladder will be much more convenient. On the attached photos you can also see examples of pits in which the steps were laid out of brick or concreted.
Summing up lighting
In the process of laying niches, it is necessary to bring a wire to 36V in an insulating rubber hose. This will allow you to connect the light in the pit and conveniently carry out car lighting during repairs. It is advisable, when performing these stages of work, to invite a qualified electrician who will help to correctly determine the optimal location of the wire and guarantee its protection, and will correctly connect it to the power supply. When doing the work yourself, you should study the auxiliary video tutorials on creating the right lighting in the viewing hole.
Do-it-yourself video of building a viewing hole in the garage
Every motorist sooner or later faced with the issue of repairing his "iron horse". In case of serious damage, the car has to be driven to a service station. In the event of a minor breakdown, everything can be done by yourself. But in this case, you will have to work hard to find a place where you can get to all the hard-to-reach parts of your car. In solving this issue, your own inspection pit will help, allowing you to carry out all the repair work with your own hands, without spending a penny on renting a ramp. In addition, by doing everything yourself, you will save on expensive construction teams.
Before proceeding with the direct construction of a garage pit, we suggest paying attention to all the main features of this object. Consider all the advantages and disadvantages of inspection pits. Select for yourself the purpose that this auxiliary room will serve you. Any stage of the construction of monolithic structures provides for one or another technology of work. The service life of the garage pit depends on how accurately everything will be done.
Purpose of viewing holes
Sometimes incidents of various kinds happen during the movement. When driving on a rough dirt road, you can hear an unpleasant sound, and even worse, feel the impact. The dimensions of the car do not always allow access to its bottom. In addition, after every suspicion you will not go to a familiar car mechanic, but rather inspect everything yourself. If your car has a low landing, then access to open parts is limited. If there is simply no time to install a jack, then a viewing hole will help you.
The inspection garage pit is designed to help the car owner solve the following problems:
- gain access to damaged parts of the body;
- dismantle or install parts (silencer, gearbox, cardan shaft, engine, fuel tank, crankcase protection, etc.);
- replace consumables (drain oil, change fuel and air filters, etc.);
- carry out anti-corrosion work on the bottom of the car;
- increase access to mechanisms and parts in case of joint repair work.

As you can see, you can use the garage pit in different ways. An important feature of this room is convenience. If you decide to equip the garage with a viewing hole, then any minor repairs are not terrible for you. In addition, all work will be done much faster, since you do not need to resort to using additional mechanisms that allow you to access the bottom of your car.
Advantages of viewing holes
In addition to their useful purpose, inspection pits have a number of advantages that allow motorists to save on calling a car mechanic.

The advantages of garage pits include the following:
- The pit facilitates self-repair of the car, as it increases access to parts located in “difficult” places.
- By building a hole with the letter "G", you can allocate a small usable space. In it, you can equip a warehouse for tools and consumables, or use it as a cellar for home spins.
- Since the room is located below ground level, the temperature in it practically does not change all year round. This makes it easier to work in hot weather.
- A garage containing a viewing hole significantly increases the value of the building, thereby paying off all construction activities in case you decide to sell it.
- With skillful use and location in the garage, you can equip your own service station. If it is located on a site near the house, it will help save a lot. In this case, you will not spend money on travel to work, and you will not pay a penny for renting a room.
By equipping your own parking space with a viewing hole, you will not only save on repairs that you will have to pay for others, but also free up a small space that is always so lacking in the garage.
Inspection hole size
Before starting construction work, the arrangement of the pit in the garage begins with setting its dimensions. It often happens that the garage turns for the most part into a warehouse of unnecessary things that cover all the usable space so much that there is very little space left for the car.
To properly plan the dimensions of the future pit, we advise you to pay attention to the following parameters:
- the size of the pit (consider this value, which should be 300-350 mm larger than the width of the finished pit);
- the depth of the pit (this figure varies depending on the height of the owner of the garage. But it is better to take this value with a margin of 10-20 cm. The main thing is that, standing on the floor of the pit, you can freely reach any part located at the bottom of the car. In in which case, the height can be compensated by installing small wooden floors on the floor);
- pit width (should be 20 cm less than the distance between the inner parts of the slopes of your car. This is a safety requirement that reduces the possibility of a wheel running directly into the pit);
- the length of the pit (to calculate this parameter, it is enough to add at least 1 m to the length of the car. But keep in mind that the garage does not always allow you to equip the pit of the desired length. In addition, the shape of the base of the car can block access to the pit. In any case, it should be so long that you can go down into it, with a car parked in the garage.Consider this parameter if you plan to equip two parking spaces at once);
- the proximity of groundwater (it’s better to know about it right away than to get an unpleasant surprise later in the form of a flooded pit. If they are close, the dimensions will have to be changed, and sometimes this idea should be completely abandoned).

When calculating the length of the pit, take into account the size of the ladder along which you will descend. While inside, the width should not restrict your movements, and your head should not touch the bottom of the car. Also pay attention to the size of the pit, which may vary depending on the material of the walls. Equipping the pit, keep in mind that it must be increased depending on the material of the wall surface.
Consider these indicators for different types of building materials, namely:
- concrete wall (the width of the pit increases by 12-15 cm in each direction);
- a wall of gas silicate blocks (the pit is increased by 20 cm).
In addition, consider drainage and a waterproofing layer. In this case, the width of the pit increases by another 15-17 cm. It is also convenient to equip small niches in the walls of the inspection pit. When carrying out repairs, it will be convenient for you to put the tool there. If the level of drainage water is higher than 2.5 m, then you will have to additionally install a drainage system that will drain excess water into the sewer. On the preliminary drawing, be sure to mark all the additional details that you would like to see in your pit, then you will get an excellent result.
Do-it-yourself inspection hole in the garage. Preparatory work
Starting the construction of a pit in the garage, you need to thoroughly prepare. This process is quite delicate, moreover, it requires the correct sequence of actions to be followed. To facilitate all the work, it is better to immediately acquire everything you need, then the result will be to your joy.
Tools and materials
Almost any type of construction work requires additional assistance. To facilitate the whole process, we advise you to immediately get an assistant with whom things will go twice as fast. The right choice of building materials and auxiliary tools is the key to a quality result.
- concrete mixer, jackhammer, perforator, grinder;
- welding machine, screwdriver, concrete vibrator, rammer;
- pliers, crochet hook, hammer, set of keys, construction knife;
- shovels, metal buckets, bath, spatula, ladle, grater, trowel;
- level, rule, roulette.

In addition to the above tools, you will need the following materials:
- sand, cement, crushed stone;
- timber 30x30 mm or 40x40 mm, inch board or moisture-resistant plywood 10-15 mm thick, planed board 40-45 mm;
- reinforcement 10-12 mm, wire rod 6-8 mm, knitting wire 1.8-3 mm, metal corner 50x50 mm, professional pipe 50 mm;
- primer, anti-frost plasticizer, waterproofing material (film, roofing felt or mastic), bituminous tape, metal primer;
- maklovitsa, fly brush, ph2 bit, wood screws, nails, studs, drills, wood discs;
- PVC pipes d=100 mm, elbows and connectors for the ventilation system;
- cable, corrugated pipe, terminals, tin, rosin, lighting elements, electrical fittings;
- plaster, tile adhesive, jointing.

If you take our advice and get everything you need, you will significantly speed up the construction process. It will not be superfluous to also take care of an extra pair of hands, since some installation processes cannot be carried out alone.
Pit planning
Ideally, it is better to build a pit before the installation of the walls of the garage. This is done at the same time as the arrangement of the foundation, having previously planned everything. Building a viewing hole in a finished room complicates the whole process a little, but this option is also possible. But we still advise you to take care of everything in advance. Starting the construction of the garage with the arrangement of the pit, you will make your work easier.
For digging a pit in an open area, you can use the services of construction equipment, such as a tractor or hydraulic hammer. In case you started digging a hole in a finished structure, then you will have to do everything yourself. In addition, if the garage is on hard rocks, you will have to carve a hole of the required size in the rock for a long time. Sometimes it is better to move a building a short distance than to agonize over digging a hole for a long time.

This will require strong physical strength, besides, it can quickly disable a jackhammer, which is already expensive. To remove a few cubes of soil, you will have to carry out a huge number of walkers with buckets that will contain heavy soil. When planning to dig a pit, be sure to consider the presence of groundwater. With this question it is better to contact local surveyors. Otherwise, your building may simply sag or collapse.
Pit marking
Work at this stage involves marking both inside the finished garage and immediately before the start of its construction. Starting the marking of the inspection hole, pay attention to the peculiarity of such work for each case. When arranging a pit in a built garage, keep in mind that its contour must be at least 1 m from each of the edges of the building. In this case, the markup is carried out with the help of chalk, which is used to apply future dimensions to the garage floor. This will help you imagine the future dimensions of the pit.

In the case of outdoor work, you can use the services of heavy construction equipment. In addition, there are cases when a hole has to be dug in difficult soil, then calling a pneumatic hammer cannot be avoided. Please also note that during work it may rain, which will flood your hole. Then you have to wait until the water seeps into the soil, and the hole is completely dry. To mark the garage pit directly on the site, proceed in the same way as in similar work with the foundation. It is enough to have several metal bars, which are installed at the corners of the future pit, after which the thread is pulled.
In any case, when starting work of this kind, it is better to consult with surveyors. Check with them for nearby soils. Ask about the properties of the soil. Sometimes it happens that digging a hole in some areas is not possible.
Do-it-yourself observation hole. Step-by-step instruction
When all the preparatory work has been completed, you can proceed to the main stage of building a garage pit. We advise you to ask specialists in advance about the quality and nature of the soil. Do not forget to also get all the necessary tools and materials so as not to slow down the workflow. It is worth noting that help will also not hurt you, so worry about an assistant in advance, or better, two.
Pit arrangement
After you have marked the pit, you can start digging trenches. This process is the most time-consuming and difficult, as it will require strong physical strength. Depending on the size of the hole, you will have to dig and move between 6 and 12 cubes of soil. If the soil allows you to dig a pit with your own hands, then you can save on calling special equipment. But keep in mind that in this case, the duration of earthmoving will increase several times.
Useful advice: if digging a pit, you find a layer of clay, then do not rush to throw it into the general pile. It is better to store it separately, it is perfect for sealing the outer sinuses around the walls of the pit.

To properly equip the pit for the future pit, proceed as follows:
- Compact the bottom of the pit with a hand rammer.
- Pour gravel around the perimeter of the pit to a layer of at least 10 cm.
- Now add sand. A layer of 5 cm will be enough.
- Compact the previous layer, then add gravel again. The better each layer is compacted, the more reliable the base of the garage will be.
- Cover the pit with waterproofing. It should completely cover the entire surface of the floor and walls. If you use a dense polyethylene film (200 microns), then please note that the material should not be stretched.
- Now you need to mount the ventilation system. Fix one channel at a height of 10-15 cm from the floor. Bring the second to the upper edge of the pit to a height of 100-150 mm so that it is located near the future wall.
- From reinforcement 6-8 mm and knitting wire, tie an armored belt. It should cover the entire surface of the bottom of the pit. It is located at a height of 5-7 cm from the bottom. To do this, you can lay it on several pieces of brick, they just have a thickness of 6 cm.
- Mix the cement-sand mortar with the addition of gravel in a ratio of 2:2:1. We recommend adding a special plasticizer to the solution with each batch. It will give plasticity to the mass, and will perfectly protect concrete from cracks during frost.
- Pour the reinforcing screed to a height of 10-12 cm (taking into account the height of the "brick + grate" layer). It is better to pour the first layer 7-8 cm and let it harden. After that, you can pour the solution to the remaining height.
- Let the screed harden. This will take 2-4 days, depending on weather conditions.

If you plan to install a ventilation system in the pit, then it is better to take care of it right away. In the case when it will pass under the foundation, and then output through the wall, it is necessary to dig a separate trench for the pipes. You can read more about the arrangement of ventilation in the next paragraph.
Arrangement of ventilation
Over time, an unpleasant musty smell will appear in the pit. Unfortunately, this cannot be avoided, no matter how hard you try. Moreover, at the bottom of the pit there will always be stains from oil, fuel and other liquids, which, when evaporated, emit harmful substances. Ventilation is best done if groundwater flows near the garage, increasing the humidity of the inspection hole.
In any case, work on laying ventilation pipes must be carried out before the construction of walls and pouring concrete. You can make both a standalone version and combined with the general ventilation of the garage. Pipes can be placed in the formwork, or embedded in the wall.

The location of the pipes is determined by the size and shape of the garage. For ventilation, a pipe with a diameter of 100 mm is perfect. But it is important to know that the supply pipe must be raised about 0.5 m above the ground, and then closed with a grate to avoid large objects from entering. The exhaust pipe is raised by 2-2.5 m, and subsequently a "fungus" is mounted that protects the ventilation from moisture and debris. To test the effectiveness of the system, hold a lit candle close to the air inlet. If the flame began to suck in, or it went out completely, then you did everything right.
Arrangement of lighting
In order to be comfortable inside the pit, it is better to immediately take care of its lighting. For some, a headlamp or other lighting device is enough, but we would advise making a stationary lighting system. Electrical installation is a delicate matter, as it requires certain skills and knowledge. If you have never worked with electricity, then it is better to entrust this issue to a specialist.

To check the correctness of the electrical work in the inspection pit, use the following indicators:
- the use of a voltage of 220 V is unacceptable for arranging pits. In this case, a voltage of 36 V is used;
- all electrical fittings should be located outside the pit;
- the cable must be laid in a special corrugated metal sleeve;
- it is better to use low-voltage lamps (12 V or 36 V) as lighting elements. An installation of this kind is carried out in tandem with an automatic machine of the required denomination, which should be located in a separate shield;
- it is better to drown lighting fixtures in the wall, then they will not interfere with the work process;
- use waterproof version of sockets and switches.
You can also use some trick. By placing the lighting elements evenly, you will achieve brighter lighting. In addition, light-colored tiles can be used as a finishing material; they perfectly reflect light, making the pit even brighter. It's a good idea to use fluorescent lamps, which allow you to identify a breakdown faster and more accurately.
To better understand the issue of arranging a garage with a viewing hole, we recommend watching the following video, which will help you do everything yourself:
Do-it-yourself inspection pit for a concrete garage
So we come to the last question related to the arrangement of the garage pit. If you completed the work at the preliminary stage correctly: the floor did not crack, the waterproofing was carried out correctly, the ventilation is functioning, the wiring is divorced and protected, then you can proceed to the construction of the walls of the pit. As a material, both concrete and piece material can be used. We would advise equipping the pit with concrete, since it is more reliable and durable.

To build a viewing hole at the final stage, you must perform the following steps:

If you have mounted a metal corner around the perimeter, then it can be used as a template for the pit cover. Having made a wooden shield, it can be placed on a metal base, thereby protecting the car from accidental entry into the pit. In the case of laying a professional pipe around the perimeter of the inspection hole, you will get an excellent wheel bumper.
Now that our viewing hole is ready, we can start finishing the surface. We advise you to equip the pit with tiles. Be sure to prime the surface before laying the tiles. Do not forget to also carefully embroider the seams, then the inspection pit will serve you for decades.
Do-it-yourself inspection hole in the garage, photo


Quality car maintenance requires sufficient space for various operations. In order not to lie on your back, you should equip a viewing hole. To build such a structure, you will need to learn the basic principles for the construction of such structures. Wiring must be installed before the walls are installed. Do-it-yourself inspection pit is done quite quickly. The time of work depends on the technology of wall construction. To better understand the process, it is worth looking at the photo of the finished inspection pits.
Inspection hole dimensions
The dimensions of the inspection hole are often chosen for reasons of ease of movement and repair of the vehicle. The main parameters that are taken into account are your own height and car dimensions.
The dimensions of the inspection hole are selected based on the following considerations:
- The standard width of the viewing hole is 80 cm. This indicator takes into account the freedom of movement of the car owner in the viewing hole, as well as the maneuver for the wheels of the car.
- The length of the inspection hole is affected by the length of the car. 1 m should be added to this indicator. Such dimensions of the inspection pit are enough for the work to be carried out as comfortably as possible.
- The depth of the inspection hole is calculated based on growth. About 15 cm must be added to this indicator. If you follow the depth of the pit according to this recommendation, you can not think about a possible hit with your head on various parts of the machine.
The drawing of the viewing hole is quite simple. It indicates the width, depths and length of the structure.
During the execution of the inspection hole, the clearance of the car should be taken into account. For some motorists, deep pits seem very uncomfortable, so they are performed in their own height. The usual depth of the inspection hole, which many motorists are guided by, is 1.5 m.
The length of the inspection hole can also be carried out not according to the rules. If there is not enough space, you can make it half the length of the car. If repairs are necessary, you can drive the car backwards or forwards over the inspection hole. This solution is more economical and practical.
The inspection hole in the garage is usually located closer to one wall. This is necessary to free up space for equipment and spare parts. To the nearest wall from the edge of the inspection hole, a distance of 1 m or more should be made. When digging a pit, the thickness of the walls and the height of the floor screed are taken into account. For greater accuracy of work, a drawing of a viewing hole should be created.
Necessary materials
The inspection pit is usually laid out with concrete blocks or bricks. Often the walls are poured with monolithic concrete. When choosing a brick for building a viewing hole, you should pay attention to ceramic. Such products are not afraid of high humidity. The walls of the viewing pit are built in half a brick. With a sufficient amount of material, they can be laid in a brick. In this case, the walls can have a thickness of 12 or 25 cm. Such parameters should be taken into account when marking the pit. For ease of work, an accurate design drawing should be made.
The walls of the inspection pit are made of brick only at a low level of groundwater. Such products are perfectly combined with dense soils. If the groundwater rises quite high, you will need to create concrete walls reinforced with rods.

Building blocks are also selected only if they meet certain characteristics. For example, such products are not afraid of moisture. This applies to concrete blocks. For other products, external type waterproofing should be used. This will ensure their safety in case of rising groundwater.
When constructing a concrete inspection pit, all work is carried out much easier. Such material is not afraid of moisture. To create a quality solution, M250 concrete should be used. When constructing a floor, M200 is usually used. This is explained quite simply - in the process of winter heaving, most of the load falls not on the floor, but on wall structures. A certain margin of safety is required so that they do not deform under load. For this, the concrete is reinforced. It is possible to exclude heaving of the soil under the garage when creating a blind area. In this case, the water will go to the side, and not soak into the soil under the garage.

Wall structures made of concrete reinforced with steel bars usually have a thickness of 15 cm or more. A mesh is used for reinforcement, which has a bar thickness of 6 mm. The step between the rods should be 15 cm. The reinforcement frame can be knitted from rods with a diameter of 10 mm. In this case, the step between the bars is 20 cm. To make the structure more durable, it is possible to mount some bars both in the walls and in the floor screed. To do this, they will need to be bent in 2 places.
Waterproofing
There are several ways to waterproof a viewing hole in a garage. Each of them has certain advantages. For example, external waterproofing of a viewing hole is created only at the construction stage. The internal one can be mounted even after creating a full-fledged inspection hole. Before work, it is better to create a full-fledged drawing, which will indicate all the materials from which the structure is made.

Protection of the viewing hole from the outside
If, at the site of the construction of the garage, the soil waters lie very deep, for example, below 2.5 m, the waterproofing of the inspection pit can be omitted. It is important to check the soil water level in spring. Even if during the flood it does not rise above the specified indicator, you can not worry about waterproofing.
However, the geological setting may change. In a dry place, water can easily appear after a few years. With an existing inspection pit, it should be equipped from the inside. For this, special impregnations are used. They penetrate deep into the structure of the stone and perfectly protect the viewing hole from water penetration.

A variety of films are used for external waterproofing of the inspection pit. The pit is covered with such products from one crack to another. In this case, it is necessary to make a release of 15 cm on each side. It is necessary to lay the panels with an overlap. Joints are connected with double-sided tape. The film must adhere well to the walls. To do this, it must be straightened. During installation work, you need to carefully monitor the preservation of the integrity of the film.
Internal waterproofing of the inspection pit
Special impregnation is used as an internal waterproofing of the inspection pit. Such waterproofing is called coating. The inspection hole in the garage can be coated with a special composition for pools. When using such a material, a waterproof film appears on the surface of the walls, which, in terms of external parameters and characteristics, resembles rubber. It is usually dyed blue and after hardening it washes well. When using such a composition, processing should be carried out at least 2 times.

Another option to protect the viewing hole from water is to use a primer based on cement. It contains polymer particles that can reliably block small channels that allow moisture to pass through. When performing one of these measures, the hygroscopicity of the walls is significantly reduced. If water constantly appears in the pit, treatment should be carried out 2 times.
The device of the caisson in the inspection hole
In order for the inspection hole in the garage to be reliably protected from moisture, a caisson can be made. To do this, a box is welded from metal sheets and installed in a pit. It must be treated with anti-corrosion agents. With hermetically sealed welds, water will not penetrate into the pit. If there is too much water, the caisson may "float".

To exclude such a situation, corners should be welded to the caisson, extending 1.5 m into the ground. In order not to carry out large-scale earthworks, it is necessary to hammer the corners into the ground before installing the caisson, and leave their ends outside. They are welded to the caisson after it is placed in the pit. In this case, the pit will have to be made large. The advantage of this solution is that the corners will be driven into denser soil and the caisson will hold better.
There is another way to avoid raising the caisson in the inspection hole under the influence of groundwater. At a certain height it is necessary to make a hole. Through it, water will flow into the caisson as it rises. Subsequently, it is pumped out. Such a viewing hole can stand for more than 20 years, until the metal rusts.

Pit for the catchment in the inspection hole
If there is a ready-made pit, water can still penetrate into it. Coating waterproofing sometimes does not save from this. In this case, you will have to build a drainage system. It can be located around the entire garage. You can also make a special hole in which excess moisture will collect. A pit is being made in the corner of the pit. The accumulated water is subsequently pumped out of the pit by a pump. The system can work automatically. To do this, a water level sensor is installed in the pit.
Formwork should be made under the pit, and then concrete should be poured into it. After that, it is necessary to waterproof the pit. It is usually carried out together with waterproofing work performed throughout the inspection hole.
With such waterproofing, it is impossible to completely get rid of dampness, so boards are laid on the floor. It will be possible to protect them from decay with the help of special processing. You can buy a special impregnation for wood that is in contact with the ground.
Insulation of a viewing hole
If a lot of time is spent in the garage, it usually has a heating system. For faster heating, the inspection pit should be insulated. For this purpose, extruded polystyrene foam is most suitable. Such material does an excellent job of insulating the inspection hole and the garage as a whole. It is not affected by moisture, bacteria and fungi. In addition, expanded polystyrene is able to withstand significant loads.

To create high-quality insulation, you will need to lay polystyrene foam 5 cm thick. It must be laid between the wall of the pit and the ground. First, waterproofing is laid on the ground, then polystyrene foam, and then the wall is mounted.
Expanded polystyrene can be laid under the screed. On top of it, a reinforcement mesh is usually laid. Then the concrete is poured.
Building a viewing hole
When all calculations are completed, you can start marking the viewing hole. To do this, stakes are driven in at its corners, and a rope is pulled between them. According to the markup, it is necessary to start digging the pit. The earth is usually taken out and stored in front of the entrance to the garage. The width and depth of the inspection hole should be determined before digging the pit.
Brick walls
When digging a pit for a viewing hole, it is necessary to monitor the level of humidity. The design depth takes into account the thickness of the floor screed. If it is reached, and water is not yet expected, you can not perform waterproofing. However, in order not to risk, you should immediately cover the inspection hole with a waterproofing film.

Then you should align the walls. It is necessary to remove pits and earthen humps. The bottom should also be leveled and tamped. The soil must be well compacted. Crushed stone should be poured at the bottom, and sand (5 cm) should be poured on top. Sand during tamping must be moistened. Ramming is carried out to a state of high density of the material. The foot after the step should not be imprinted in it. Then the inspection hole is covered with a waterproofing film.
The material is carefully leveled, tucked into the corners. The panels should be laid with an overlap of 15 cm. They are glued with double-sided tape. To prevent rolling of the edges, they should be pressed with improvised means.

At the bottom of the inspection hole, it is necessary to mount a heater, and on top - a reinforcement mesh. Concrete M200 is poured from above. Its minimum thickness should be 5 cm. For easier orientation, special marks are applied to the film during installation. When using cement M400, it is necessary to follow the following proportions:
- 5 parts of crushed stone - it should be small or medium;
- 3 parts sand;
- 1 part cement.
After that, you need to wait a few days until the concrete acquires 50% strength. A more accurate date can be determined taking into account the temperature. With an indicator of about +20 degrees, you need to wait about 6 days. If the temperature is +17 degrees, you will have to leave the concrete for 2 weeks.

After the floor has hardened, you can proceed to the construction of the walls of the inspection pit. Many car owners decide to make them in half a brick. Up to the level of the elbow, you can use the circular styling method. When the masonry of the walls of the inspection pit reaches a level of 1.2 m, a niche should be made for various tools. Its height is equal to 3 rows of bricks. A processed board is laid on top of the recess.
Then the walls are chased to the level of the garage floor. Steel corners are placed on top of the walls, it is better to choose a thickness of 5 mm. The corner must be turned in such a way that one of its shelves hangs down, and the second covers the top of the brick. You can eliminate the collapse of the walls by welding mortgages to the corner, which are connected to the reinforcement belt.

Concrete walls
To cast high-quality concrete walls of the viewing hole, you will need to build a solid formwork. It is usually built from plywood with a moisture resistant structure. The thickness of the sheet material should be 16 mm. OSB panels can be used. Shields of the required dimensions should be knocked together and reinforced from the outside with bars. This is necessary so that they do not sag under the action of concrete.
After that, you need to install internal shields. The thickness of the concrete walls of the inspection pit must be at least 15 cm. To prevent deformation of the formwork panels, it is necessary to strengthen them with spacers. Filling should be done at a time. The filled space must be bayoneted. For a better expulsion of air from the solution, a deep vibrator should be used. The formwork is removed 3 weeks after the mortar has been poured. Then you can start installing the floor.

findings
The inspection hole in the garage is quite simple. To create a comfortable space under the car, you will need to accurately calculate its depth and width. Before work, a detailed drawing is made. This allows you to quickly and accurately build a hole with your own hands, without making mistakes.

Before erecting walls and floors, you should take care of competent waterproofing. It will protect the structure from excess moisture. For insulation, it is better to use expanded polystyrene. It is able not only to prevent the penetration of cold into the room, but also to exclude the development of fungi and bacteria.
Walls can be made of materials such as solid concrete, concrete blocks and bricks. In the latter case, less cost will be required. When making walls from solid concrete, you should correctly approach the creation of formwork and the preparation of mortar.


