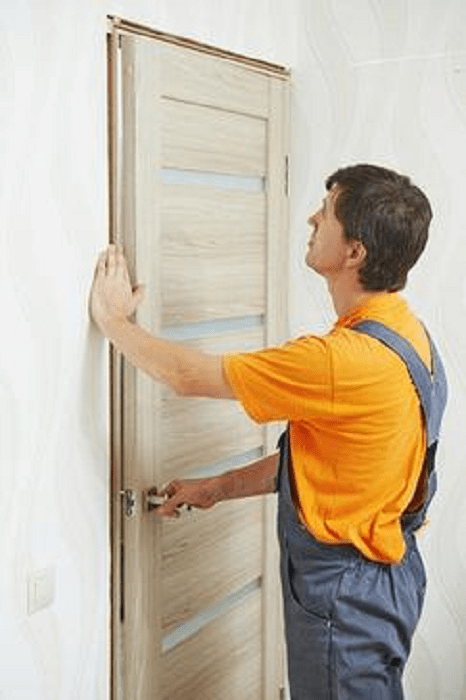
The ability to handle carpentry and measuring tools is already a reason to try to solve such a difficult task as installing interior doors with your own hands. The work is simple, but tricky in its own way. It will take scrupulousness, and even tediousness in marking and adjustment, otherwise it will not work to install the interior door with the box correctly.
Features of installing interior doors
At first glance, nothing complicated, but this is only a superficial impression. We are talking about not just installing the frame and the door leaf in the interior opening, but doing it beautifully, without distortions, scratches and sagging hinges. If this is the first experience, then it is best to make detailed step-by-step instructions for installing interior doors with your own hands before starting work. It's not embarrassing for newbies. Even experienced craftsmen often make notes with their own hands - what not to forget and what to look for when installing a door frame on a specific interior partition.
During the installation process, you will need to solve the two most difficult tasks with your own hands:
- Correctly assemble and install the frame of interior doors, align and fix it so that the frame does not sag under the weight of the door leaf;
- With your own hands, mark and cut out the mounting grooves on the vertical rack of the box and on the end of the interior door leaf.
An experienced craftsman takes 2-3 hours to install an interior door, a beginner will need at least a day to fully install the frame and hang the door leaf.
Advice! It is not necessary to stupidly follow the instructions for installing interior doors, which recommend consistently inserting lock fittings, attaching hinges, and only at the very end to solve problems with hanging interior doors. The main thing is to install the box and the door leaf with a fresh head with your own hands, and the platbands, locks and handles with platbands can be postponed for the next day.
You will have to measure and cut a lot. All cuts are made by hand with a hand saw, therefore, in addition to fresh forces, you will need to stock up on high-quality tools.

Tools for installing interior doors
A day or two before the start of work, it will be necessary to assemble a working arsenal for working with lumber. It can be collected from friends or rented. Why two days before installation? Because ahead of time before the start of work, you will need to check with your own hands the serviceability and performance of each tool:
- Building levels - small, 70-100 cm, and large, 150 - 200 cm, with a working bubble indicator. Usually, they do not pay attention to the condition of the camera and the beacon, considering them to be in good condition, but at the box office, it happens that there are bent and even broken specimens, this is the most important tool in installing interior doors;
- Marking tool - a carpentry corner with a ruler, a tape measure and a meter metal ruler. We check the presence of marks of angles of 90 o and 45 o;
- Screwdriver or electric drill with a bit nozzle for cross heads of self-tapping screws. We check with our own hands how the cartridge holds, and the serviceability of the wiring - batteries;
- A cutting tool, you can cut the timber of interior doors with an electric jigsaw, but it is best to stock up on a pair of hacksaws - carpentry and metal. The first is used for cutting the details of the box, the second is used for thin cutting of the platbands.
In addition to the tool, you will need a hammer, a clamp, a carpenter's chisel, mounting foam in a can, adhesive tape and gloves. When installing interior doors, there is little dust and waste, but you still have to periodically clean it with your own hands so as not to spread it throughout the apartment.
In addition, it would be right to have a puncher with a spatula-bayonet in stock, because when installing the interior door frame, there may be problems with the doorway in the wall. Ideally, the gap between the racks of the box and the ends of the opening should remain 10-20 mm, for normal alignment and foaming of the slots. In reality, the opening may be uneven, and you will need to use your own hands, a puncher or a hammer with a chisel, to knock down part of the concrete or stone.
How to assemble an interior door frame
The best option would be to buy a ready-made door kit, which usually includes:

In this case, the entire process of mounting the box of the interior frame comes down to transferring the second parts of the hinges to the frame parts with your own hands, assembling the loot with self-tapping screws and installing it in the opening.
The entire job will take less than two hours. One of the options for installing interior doors with your own hands on video
The only drawback of the above scheme is that not all manufacturers of modern models of interior doors produce their products in kits designed for do-it-yourself installation. Most often, the customer buys a door leaf, and platbands and frame parts are purchased in order to install an interior door with a frame on their own.

How to install an interior door with your own hands
First of all, it is necessary to lay out the door leaf on a flat area. Next, the selected pair of beams is laid to the left and right ends of the sash. With a tape measure, we measure the width and estimated height of the future carrier frame. Then, with the help of a building level and a tape measure, the dimensions of the interior passage are checked.
Important! This is done in order to determine whether the platbands will close the edges of the gap in the wall, and how thick the additional elements should be used.

If you “miss” with the height or width of the frame, you will have to redo the trim with your own hands or, even worse, you will need to raise the interior door in height.
We assemble the frame of the door frame of arbitrary size
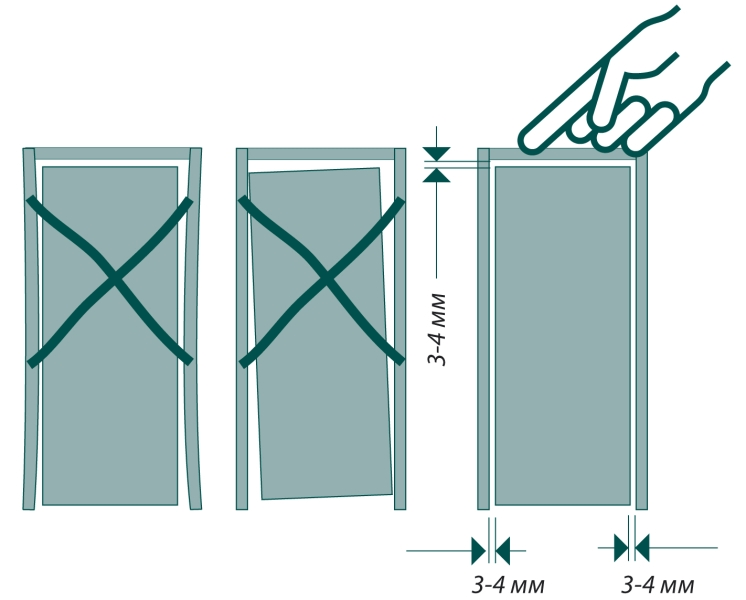
In order for the installation of the interior door to turn out without distortions, it is important to choose the right distance between the left and right pillars so that the door leaf enters the frame with a small gap, no more than 2 mm per side. In this case, the door will open freely without wedging in the loot.

The easiest way is to assemble the frame with your own hands using a clamp, a saw and two blanks. Vertical racks, as in the case of preparation, are attached to the ends, aligned and fixed with clamps.

From the side of the upper and lower edges of the web, an allowance equal to the thickness of the beam is left on the blanks. At the same time, a cut line is applied to the left allowance with their own hands at an angle of 45 ° for further docking with the horizontal crossbars of the frame. Without disassembling the structure, they apply markings for cutting grooves for awnings, locks and handles.
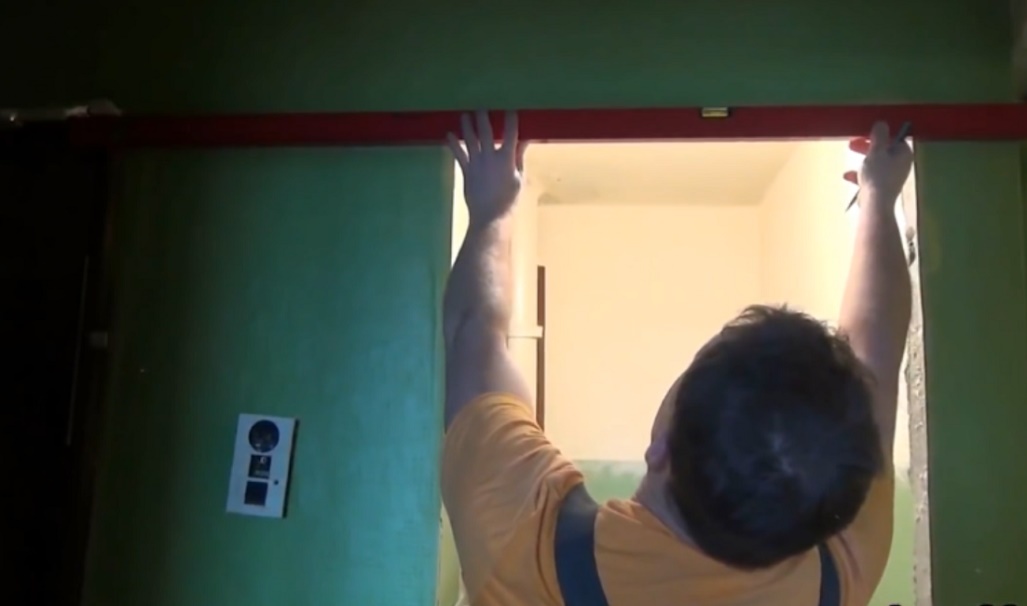
If the interior door is too wide or has a complex shape, then usually at this stage the conformity of the frame configuration with the door to the shape of the interior opening is checked. To do this, a pair of nails is hammered onto a wooden plank at a distance from each other equal to the outer width of the frame. The bar must be fixed above the opening, and a couple of construction plumb lines are hung on the nails. If the gap between the frame and the wall is 10-15 mm, then the calculation is correct.
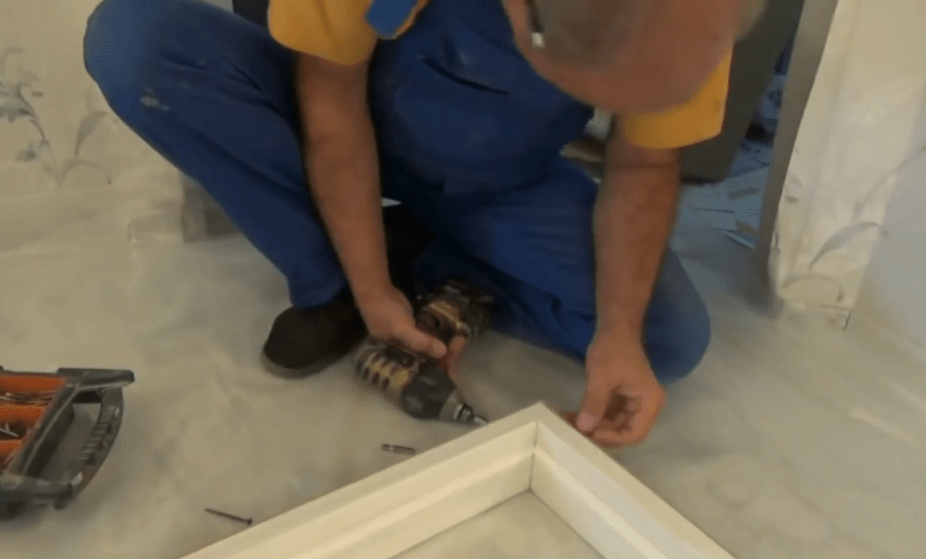
Installing hinges on an interior door
After all the checks have been completed, it is necessary to cut mounting grooves for the canopies in the canvas with a chisel or a carpenter's knife and a hammer. The easiest way is to mill a niche with a manual router, but, as practice shows, you can do the work yourself and without expensive power tools.
If this operation is difficult, then overhead hinges or models for drilling can be used for interior doors. For installation, you only need to drill holes for screwing fasteners.
Fasten the frame in the doorway
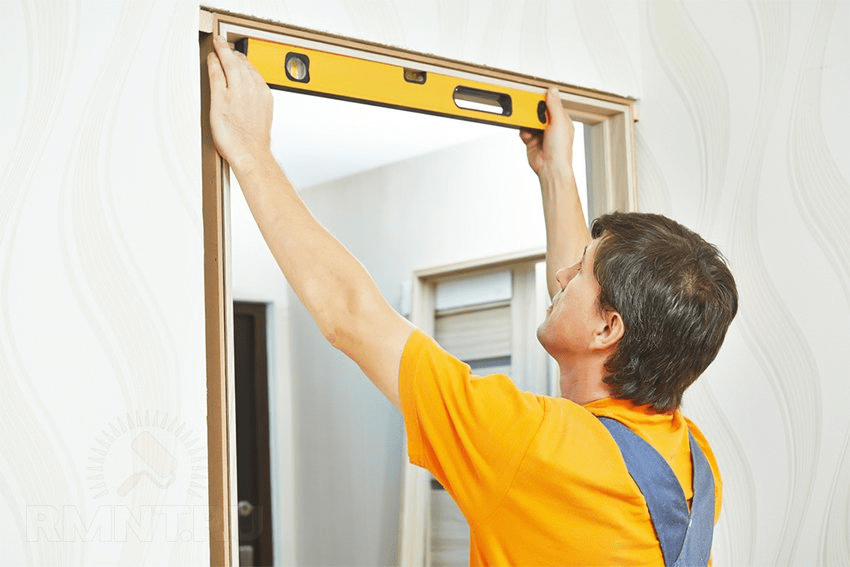
- We mark with a marker on the steppe the level of the upper horizontal cross member of the frame, this will help to perform the correct installation horizontally and vertically;
- With the help of wedges and a building level, we align the frame vertically and horizontally with our own hands. We fix the position of the frame in the opening with wooden plugs and wedges.

Advice! If the frame and door leaf are light, then the frame can be fixed with mounting perforated petals to the wall of the interior partition.

Next, it is necessary to blow out the space between the frame and the wall with mounting foam, while installation on the PPU is being carried out, it is necessary to check again and, if necessary, finally align it vertically using a long building level. We apply a small building level to the upper mark and, if necessary, knock the frame to the desired height.

Door leaf installation
After the loot is firmly fixed with hardened foam, it is necessary to install the mating parts of the canopies. To do this, initially the door leaf is lifted with wedges so that a gap of 1-2 mm is obtained between the threshold and the lower edge.
It remains only to install the sash on the awnings, and you can proceed to the decorative trim of interior doors.
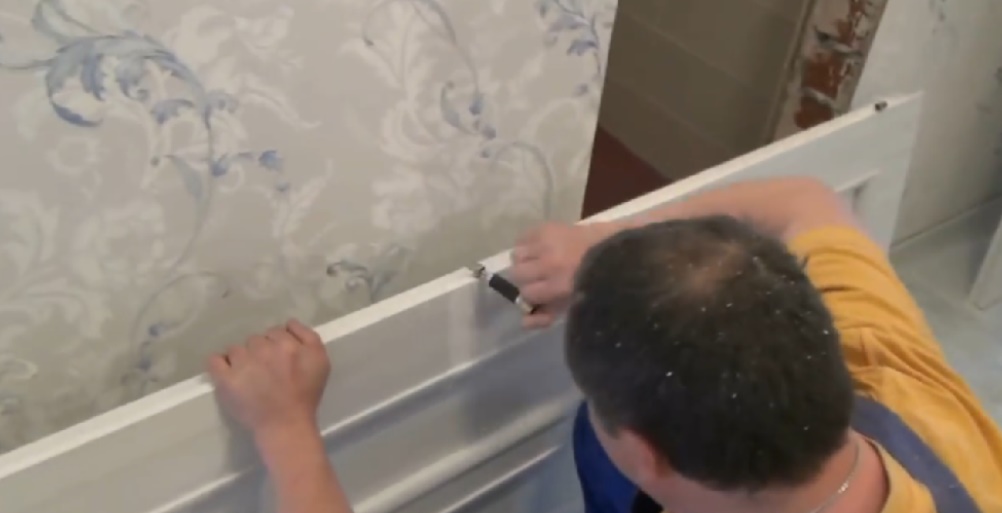
Installation of platbands on the interior door
Facing the frame with platbands is not particularly difficult. First of all, install the vertical strips of the platbands. The height of the bar is measured according to the mark made earlier, after which the casing is applied to the frame and the line is washed down at an angle of 45 °.
Advice! It is best to make an undercut with your own hands using a thin hacksaw blade for metal. Preliminarily, adhesive tape is glued to the cut line. The bar is nailed with wallpaper nails or put on glue.

In a similar way, install the second vertical platband. After the vertical parts have been installed, you can mark the cut line on the horizontal bar, and install it on the door frame in the same way.
What are the sizes of extensions for interior doors
Additional strips are used as an additional element to increase the width or thickness of the door frame. Most often, the installation of extensions on interior doors is required in a situation where the wall is much thicker than the canvas, and there is a gap between them that needs to be closed.

The width of the additional rails ranges from 10 mm to 200 mm, for interior structures, the most common size is 10-20 mm, and often, due to the non-standard profile of the slot, the extensions have to be ordered or cut out with your own hands from the trim strips.

How to install extensions on an interior door
If, after installing the box, the unpleasant fact is revealed that the vertical plane of the frame is recessed into the space of the interior opening relative to the wall surface, then the only way to correct the situation is to use additional strips.
It is first necessary to determine the size of the extension, for this the building level is applied to the wall and the distance to the front edge of the box is measured with a ruler. Thin planks are nailed with wallpaper nails, wide extensions are glued to the frame.
Professional advice on how to install interior doors
Among the features of installing home doors, the following problem areas can be noted.
Before mounting the platbands, you need to make sure that the frame or additional plank is located in the same plane with the surface of the interior wall. Otherwise, even if you make the edges washed down with your own hands perfectly, a gap will definitely appear between the platbands.
The second problem that one has to face is the sagging of the doors when installed incorrectly. To correct the situation, it is necessary to remove the canvas, put washers, or cut the edge and install the door in place.
Conclusion
Do-it-yourself installation of interior doors will require a little practice in installing canopies and extensions, but in general the work is simple, and with proper skill, the canvas can be hung in a few hours. Masters claim that with each installation, the quality of work with their own hands doubles.
The installation instructions for interior doors allow you to install such structures on your own without much difficulty. You just need to strictly follow its points.
Thank you for your help in creating the article of our partners: Porta prima interior doors factory - www.portaprima.ru
Door structures between rooms in an apartment or a private house cannot be called very complex technical systems. However, their assembly and installation require knowledge of a number of nuances. Firstly, a self-installed door should not spontaneously open. Secondly, it must close without excessive effort. Thirdly, door structures must have a certain strength and not fall apart in cases where they are mounted in the dwellings of "lovers" to slam the doors.
Do-it-yourself installation is carried out in several stages:
- Assembly of the supporting structural element - the box.
- Installation of the canvas, and then the box beam (a handle, hinges and other fittings are attached to it).
- Aligning the box in the door and fixing it securely.
- Canvas hanging.
- Finishing of doors with platbands.
Types of interior doors
A conventional door block consists of two elements - a leaf and a box. The latter is made of hinged and feigned timber, as well as lintels. If you will be installing doors with a threshold, the box is complemented by a special bottom bar. The door leaf in most cases is hung on two hinges. There are systems with three loops, but they are used extremely rarely. The set of door blocks, as a rule, includes platbands. If the manufacturer does not provide any, you will need to purchase them separately.
In situations where the door frame is smaller in width than the door opening, you need to purchase extensions or trim the walls with flashings or slopes that are more elegant in terms of design. Here you need to know that professionals do not advise plastering slopes if you do the installation of structures made of wood materials (for example, MDF) with your own hands. Such doors are simply deformed after applying a plaster composition to them.
An excessively wide opening is often reduced with a wooden beam. Its dimensions should correspond to the "extra" width. Such a beam is installed from the side of the door pillar, where its hinges are located. The beam is attached to the rack with small cross-section universal self-tapping screws, and it is connected to the wall with anchors. Do-it-yourself installation of interior structures with your own hands is recommended after pre-finishing the premises (it is understood that you have leveled the walls, carefully and accurately puttyed them, and then plastered them).

Reducing the doorway with a wooden beam
In other words, the assembly and installation of doors is carried out after the completion of all, without exception, "wet" finishing work.
Otherwise, there is a high probability that the system may "float" from high humidity. Be sure to equip the rough flooring, as well as determine the thickness and type of finish floor that you will do. Without this, you will not be able to accurately mount the door frame to the height of the threshold. If you just decide to change the interior doors in a room where no repairs are being carried out, the latest recommendations do not matter.
It is very important to install the racks correctly. A door frame is attached to them. If you install it on crooked racks, the operational functionality of such a door will be minimal. Rack preparation is carried out as follows:
- The upper parts of the racks must be cut with a hacksaw (it is better to take a saw with small teeth) and a miter box. This operation is easier to do if you have a miter saw.
- On the inside of the rack, measure the required length (it consists of the bottom gap, the height of the door leaf and the top gap). The lower gap is usually taken about 1 cm, the upper one - no more than 0.4 cm. Prepare the second rack in the same way.
- Now you start processing the lintel. Measure the desired length on the inside. The required length will include the width of the leaf, a small (about 0.4 cm) gap on the side where you will put the lock on the door, and another gap on the side of the hinges. Get the length (internal) of the lintel. Note - absolutely accurate.

Installation of interior door racks
Now you can saw off the ends of the lintel with your own hands (again, with a miter saw or a miter box). This procedure is done at a 45° angle. Next up are the door hinges. Their installation should be done as carefully as possible. It is important to determine the exact value of their depth and the distance between the lower and upper edges of the door leaf. The scheme of work is as follows:
- We measure on the rack (on the inside) from the top edge a distance of 20 cm.
- We apply the loop to the selected area, outline its contour (use a regular pencil).
- When folded, the hinge leaves a free space (gap) from the rack to the canvas of 0.4 cm. We calculate the installation depth of the fitting element, taking into account its thickness.
- With a chisel (or better with a milling cutter) we make a platform for the loop.
- Similarly, we determine the size and location of the installation of the lower hinge. But in this case, the value of the lower gap (1 cm) must be added to 20 cm.
- Having installed the hinges on the rack, we apply this design to the canvas and make marks about the areas where the hinges are located.
- It remains to make seats for the loop elements.
You have accomplished a difficult task on your own. Now you can deal with the box and platbands. More on this later.
Do-it-yourself door frame assembly and installation
Installing the box yourself will be quite simple if you follow the following workflow. You need:
- Attach (strictly perpendicular) with a stand to the lintel. If you are installing an interior product made of MDF, in order to avoid cracking it, you must first make holes with a drill and only then install self-tapping screws. Important! Holes are made of a smaller section than the diameter of the hardware used.
- Put the box in the opening, and then fix it securely using spacers and wedges.
- Take the building level and align it along the horizontal and vertical plane of the structure. After that, feel free to use self-tapping screws.
- Hang the door on the hinges. It can be inconvenient to perform such a procedure on your own, so call an assistant. After hanging, check the quality of installation, eliminate certain installation defects, if any.
- Close the interior door, install spacers of suitable sizes between the uprights and the canvas. They will save the box from squeezing out when blowing foam.
The last step is to fill the gap between the wall and the door frame. When the foam hardens, the spacers will need to be removed. You just have to install the platbands with your own hands. Everything is simple here - you file an angle of 45 ° and mount the elements in their place. Fastening of installed platbands is recommended: self-tapping screws; special nails (they are called finishing); on glue.
It is advisable to cover the tops of the self-tapping screws with decorative plastic caps. And nail heads are usually overwritten. Congratulations, you installed interior doors on your own, saving a lot of money on the services of specialists!
Technological progress has replaced the once cumbersome entry gates used by our ancestors with convenient, practical doors. The need to constantly move stones and other heavy objects back and forth many times during the day in order to block the opening and protect it from the weather disappeared with the invention of canopies.
Modern doors tend to be installed for decades. How to assemble and install them correctly is an important question after all the parts are bought and laid out on the floor!

The order of work for the home master
The door is not just a plank blocking the entry hole. It is also not an archaic design. Nevertheless, after assembly and installation, it must meet a number of requirements:
- Open - close without significant effort, creak and rattle;
- Do not fall apart when slammed after nervous breakdowns;
- Do not open on its own;
- Not to be so thin, fragile that even a child will pierce it with a pen when he decides to draw on it.
We fasten the canvas to the canopies. Let's see what happened. We check the absence of distortions in the gaps. We glue the entire installed structure around the perimeter with construction tape.
We foam the free cavities between the wall and the box in several passes, first in several places (at 4-6 points of the internal gaps of the structure) we place pieces of cardboard so that the door does not jam and it can open freely.

We are waiting for complete drying, we do nothing more yet. We do not open, we do not check.

We upholster platbands along the contour of the door, hiding unaesthetic seams.


Thus, an interior door was installed with their own hands. Gained experience that can now be used to refine other doorways.

Photo of the process of installing interior doors with your own hands


Installing interior doors is a very important process in the repair of an apartment or a private house. It is quite simple and does not require special skills, but still it is worth recognizing that making doors strong, reliable and durable is a very important job that should be approached as responsibly as possible.
At what stage of the repair are the doors inserted in the apartment?
Of course, before you start installing interior doors, their owners have a lot of different questions: how to do it, which doors are better, how to make them more durable and reliable? Probably one of the most basic and very first - at what stage of the repair are the doors inserted in the apartment?

There are actually several options here:
- The first option is best considered when it is planned to expand the doorway in the future. In this case, the process of installing the door should be done before finishing the room. This is done with the aim that during such an action as installing a door, a very large amount of dust settles on various pieces of furniture, and it, like ceilings with walls, cannot remain clean.
- The second option should be considered when the door already exactly fits the size of the doorway. In this case, it would be best to install the doors after the ceilings and walls are finished. Then the new door will not be damaged during the repair work.


- And, finally, the last case, the third, - after wallpapering, as well as processing and washing ceilings, floors and walls. This will also help keep all furniture, doors and the room itself clean.
What is better to insert and from what material?
The second question that arises among the owners of apartments being renovated before installing doors concerns the material of manufacture and the very type of door. In fact, there is no single correct answer to this question, since something individual will suit each person and each apartment. But in this article we will try to weigh the pros and cons of each door option from each material.

The choice of such an item in an apartment or house as a door depends on several parameters:
- The first is, of course, the price. It varies from each company, the quality of the material and the product itself. For example, the cheapest and most affordable option is a honeycomb door, which usually costs around a thousand rubles. The most expensive and "elite" option is a solid array and a door made from it, it costs about 20 thousand rubles, which is quite expensive. Of course, there are also intermediate price categories: for example, a leaf door costs in most cases 4,500 rubles, which is quite acceptable.
- The second parameter follows from the first parameter - the material of the product. About honeycomb material, solid array and leafy canvas has already been mentioned above. The first one is the most low-quality because of its cheapness, the second one is of very high quality, reliable and durable, while the average quality is possessed by sheet (or type-setting) canvas, MDF, chipboard, and also glued wood. The middle price category also includes a door with metal and glass.


There are also doors classified by material, such as: glass, eco-veneer:
- The choice of door also depends on its design and color. Naturally, classic, very simple designs will cost less and fit into the vast majority of interior styles, but they will not have a special personality and will not become a decoration for a house or apartment. So it's a smart option to invest in a beautiful, distinctive door design, as it can make your home feel even more inviting and enjoyable. Do not forget that the combination of this product with the interior and style of the apartment is very important, and its incorrect selection can spoil the appearance of the house.
- The next parameter is, of course, the design. Naturally, for the most part, the door has a classic, standard rectangular shape and an average thickness, but it, like the shape, may vary. It is necessary to focus on the width, height and other dimensions of the doorway, as well as, as in other cases, on the interior of the home. By design, there are also doors: double, sliding, sliding, double-leaf, hidden, hinged, folding, single-rail, on rollers, as well as telescopic and soundproof.


- In the end, we come to the last but not least parameter: company manufacturer. A lot can also depend on it, since different companies offer a different assortment and quality, and also differ in price and sometimes very much. The best door manufacturing companies are Vladimir Door Factory, Verda, Alvero, Bravo and others.


What tools and materials will be needed?
Naturally, for such a process as installing an interior door, you will need a variety of special tools and materials. They must be purchased before this action. So, we will need:
- a hammer;
- chisels (20 and 15-16 mm);
- roulette;
- level and scrap;
- screwdriver and screwdriver;
- a hacksaw designed for woodworking;
- miter box;
- perforator;


- drill;
- milling machine (milling cutter) and circular (if possible);
- mounting kit;
- installation accessories;
- planks;
- Miter saw;
- vacuum cleaner (for cleaning the room).

As for the materials for installation, we will need:
- door leaf;
- door frame and fittings (it includes locks, hinges, handles);
- mounting foam;
- wedges;
- nails, dowels and a few screws.


We take measurements
Step by step, we approached, directly, the work itself. And the first step on the way to the result will be measurements - a very important step.
So we need a few measurements. The first, as you might guess, is the width of the doorway: it determines the size of the door itself. If the doorway itself has yet to be built, it is imperative to take into account what size furniture will have to be carried through it in the future. An error in choosing the size can make it very difficult to repair and rearrange furniture in the future. although sometimes custom sizes are acceptable and possible.

Next is the next step. First you need to process the door block with a primer, before that, clean it with sandpaper. Before the next step, you should try on the future door in the opening to check its size, as well as the direction in which it opens. In addition, we need a level: with its help, we will need to measure and check the level of verticality and horizontality and, by measuring the diagonals, make sure that all right angles in the structure are observed.
After all these installation measurements, you can proceed directly to the work itself.

We are preparing an opening
The preparation of the doorway is one of the most important stages in this work. The following details how to produce it carefully and correctly:
- First, you should evaluate the door leaf. In other words, it is necessary to initially remove the old door from its hinges, if there is one, but if not, then this stage, of course, is not required.
- It is necessary to remove all door frames, and those voids that were formed between the opening and the door frame and filled with insulating material should be disposed of.
- After all these actions, cuts are usually made in the places of the side parts of the door frame, while moving from top to bottom. The next step is the destruction of the lower, and then the upper elements of this very box. Then do the same with the upper and lower bars.


- Among other things, the preparation of the opening includes fitting to the dimensions of the door itself, which is very important for its reliability. Enlarging the opening usually does not cause any particular difficulties, while expansion will require the use of devices such as a puncher and a grinder.
- In the event that it is required to reduce our opening and quite significantly, a brick is required. With a slight decrease in size (up to about 50 mm), you just need to install a frame in it. It can be made from both metal and ordinary corner.
- This structure then needs to be leveled, gaps filled in it, treated with a cement mortar, if necessary.
- There may be such a problem that the opening loses its appearance during processing. Then it should be leveled and plastered again. In any case, it is always worth checking the condition of the doorway, its evenness and other parameters very carefully.


How to assemble the product yourself?
When we purchase furniture in a hardware or furniture store, the purchase most often does not represent a construction that is completely ready for installation, but a set of many large elements that we need to work with later on our own. For beginners unprepared in this matter, at first the question often arises of how to assemble the product yourself?
The main problem of this work is this: the cuts and connections of the door components are often unusual and have a specific structure, which can greatly complicate the whole process. But even this problem has a solution.

This article presents the simplest possible scheme for assembling an interior door:
- The first step is to place on the floor (or on another necessarily flat surface) the beam of the door frame, spreading it around the canvas.
- Next, you should form a gap between the door and this very canvas, then you need cardboard from the packaging. After that, it is necessary to attach the blanks of the upper crossbar to the upper ends of the bars of the box, to measure the parameters of the lintel very accurately.
- The next step is to create cuts. They are best made with a hacksaw, which has fine teeth and is specially designed for carving metal surfaces.


- At the next, already fourth stage, you need to attach the upper part of the structure to the bars, lay cardboard to form a gap. Next, we cut off the profile, if it prevents the connection of the elements, we screw the screws into the places for them.
- The last stage - we leave a gap (approximately 0.8-2 cm in size). By analogy, we create the necessary threshold.
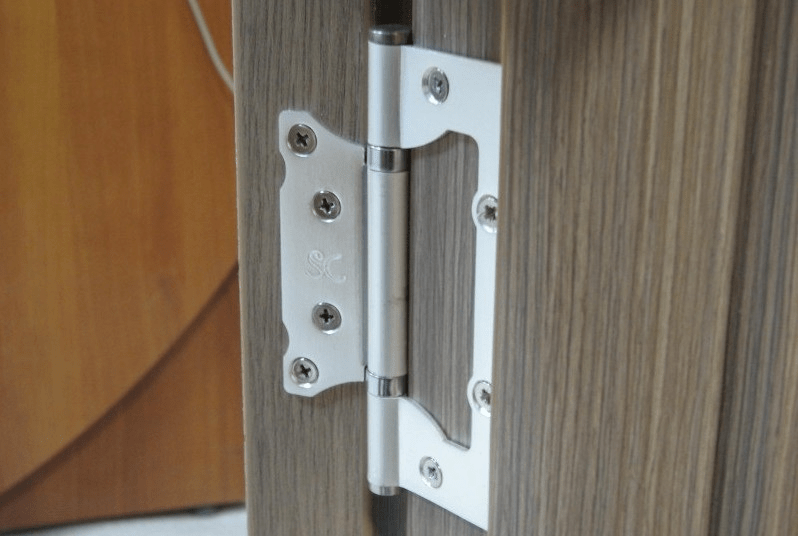
How to put the loops right?
Installing hinges on an interior door is an important stage, which has many individual subtleties and nuances. Before this work, which includes such subtleties as tie-in, installation of overhead hinges (as well as non-separable, non-mortise and simple canopies), you should also familiarize yourself with the correct installation instructions for the hinges so that the future design is reliable, serves the owner for a long time and faithfully.
This article describes one way to install hinges, it is called the artisanal method. It is medium in its complexity, while being very reliable and promising durability of the product, besides, it allows you to conveniently adjust the height of the hinges:
- So, first you need to mark the groove. To do this, you need to attach a canopy to the end of the full (or box) and circle it with a simple pencil, there is no difficulty in this.
- Second step: edging with a hammer and chisel. A border should be made along the entire groove, and very evenly and efficiently.


- The last stage: sampling the groove with a chisel. This process requires utmost care and accuracy, because even a slight careless movement of the hand can spoil the appearance of the door surface. There are other, alternative ways to install hinges. For example, a professional method that only professional workers can usually bring to life with their own hands, but the quality of this method is worth it.
As for what you can create with your own hands, there are several ways. Firstly, this is the installation of loops without tie-in. Secondly, non-standard, but very convenient trunnion loops. Thirdly, screw hinges, although they do not have the most aesthetic appearance.
Mounting options
Ease of use depends on many different nuances. One of them is the method of fixing the door and There are several such ways:
- The first known option for fastening a door is the so-called frame system. Its essence is that the door is placed in a steel frame and it can be moved by installing a groove on the wheels.
- The second option is a rail system, which differs from the first one in that instead of wheels or rollers, special rails are used here. They are very reliable and easy to use.


- There are also other ways and options. These include the well-known hinged installation, as well as such unusual methods as the option without self-tapping screws or also without anchors. There are a large number of options for fastening doors, and each person will be able to choose something to his taste.
Do-it-yourself installation: step by step instructions
Do-it-yourself door installation includes its own technology, scheme, installation procedure in accordance with GOST. It has its own standards and nuances that you need to know and follow, regardless of whether it is the installation of a box, a sheathing without additional elements or with them, and so on.
Box installation
So, this process has already been discussed in detail above. It is only worth mentioning that this type of repair installation work is one of the most important in the installation and installation of any door, because it can actually be considered the basis of the structure. It is very important to accurately make all the necessary measurements, perform work carefully and observe safety precautions.
Correct installation of the box is the key to a reliable, sturdy construction.


How to insert with extensions?
Dobors are called two vertical racks and 1 horizontal bar, the purpose of which is to increase the size of the so-called box coverage area. That is, they simply expand it.
Usually such products are made from solid wood, as well as from materials such as MDF and fiberboard.
The sequence of work is not very complicated, but such an operation can help in many cases, for example, to install awnings:
- So, first of all, it is necessary to make a groove in the timber with the help of a milling machine along the entire door frame, along its perimeter.
- Next, false slopes need to be attached with glue, and then strengthen this structure with self-tapping screws.


- The next step is to attach the false slopes to the beam, and put the panel at the top on the remaining vertical elements.
- In the middle of the work, you need to match the already enlarged box, install it in the already made opening, for this we use self-tapping screws, as well as spacer wedges.
- Finally, the wedges need to be placed around the perimeter of our door. The distance between the door frame and the door itself must be filled with special foam, cut off the excess. Ready!
Self-set threshold
There are two ways to install such a detail for a door as a threshold. The first is called open, the second, respectively, closed. The first method is quite simple, but still does not look very aesthetically pleasing:
- In this method, first of all, a hole is drilled openly, in which fasteners are then fixed.
- Then the threshold itself is laid, fixed at several points at once with the help of self-tapping screws.


Although the first method is many times faster, the result after the second one looks much prettier and more aesthetic:
- First of all, we fasten the first part of the threshold to the floor with the help of several self-tapping screws.
- The next step is the decoration, we insert the bottom bar into the resulting grooves.
- Another option - a decorative bar is attached to ordinary glue. This completes the threshold setting.
How to align?
Correcting mistakes, such as unevenness in the design, is very important. After the assessment of irregularities is carried out, the door is removed and re-measured in all respects, you need to get straight to work:
- If there are gaps between the floor and the door itself, first of all it is necessary to apply a level approximately 1.2-1.4 meters wide across the door opening. This will help level the surface.
- Also, sometimes in this case, the alignment of the carpet, if present, can help.
- At the end of the work, it is necessary to hang the door again and check its condition.


How to fill gaps?
The gaps between the door and the frame are a common problem that many owners of apartments and houses have to deal with. You can cope with it with the help of ordinary mounting foam, but it is better to choose a better and more expensive one in order to maintain the quality of the work performed longer.


There are also options such as the most common foam rubber and even moss! Another way: heaters sold in any hardware store.
Mounting nuances
Mounting the door, like any other repair work related to furniture, has many different nuances that you should definitely pay attention to the owners of the door:
- For example, to install a door in a deep or very large opening, you need to either purchase additional extensions, or also install the design of the second door. Also in this case, it is worth considering the option of buying and installing heavier doors.
- In order to correctly, reliably and efficiently install the door at the corner of the room, you need to take into account that the box must be installed at a special required angle, you should also pay special attention to cutting bricks into a brick opening and fastening the structure of this very box, since this may cause some Problems.
- With different wall thicknesses, it is necessary either to make all measurements very accurately, or to align them before installing the door or mounting.


- In a panel house, when choosing materials and structures for the work itself, it is worth paying special attention to wall internal expanded clay concrete panels.
- To equip a door in the opening of a load-bearing wall is a very difficult task, and in this process one should not forget these important points: the material used to build a house or create an apartment, the layout of the room and the apartment or the house as a whole, the condition of the floors, as well as the thickness and other parameters of the wall .
Installation in some cases is a very difficult type of work, but following these tips, you can handle everything perfectly and without much difficulty.
Finishing
Finishing is a very simple, practical and convenient way to decorate and transform an interior door or even the entire interior of an apartment, house or cottage. There are several main types of interior door finishing: installation of such a structure as slopes, decoration and installation of a door frame or door leaf, installation of platbands and, finally, laminate finishing.
Finishing slopes is not the most difficult, but the dirtiest and most unpleasant type of design. For it, you will need a primer, different types of putty (starting and finishing), corners, a mesh for plasters. With the help of these tools, you need to putty and clean the door, its slopes.


Designs that can decorate and transform a door beyond recognition are a door frame, platbands, a door leaf. These options, as a rule, do not take much time and effort, but still require extreme accuracy, patience and compliance with special rules.
How to check if the installation is correct?
In order to check the correct installation of the door, you need to perform several simple, but at the same time very important actions for its further operation:
- In no case should the door creak, the hinges should move easily and stand firmly, opening the door should not present any difficulties.
- When opening the structure at an angle of any size, it should stand straight, not stagger, not deviate.
- It is necessary to conduct a very careful external inspection of the door, check it in operation, carefully consider every detail of the structure.

Beautiful interiors
There are a lot of different interior options for interior doors. For example, a door in a white, light, neutral color is perfect for bright rooms or apartments with a minimalist design. Bright, for example, red doors will perfectly fit into non-standard interiors.
This material will discuss the most important points that you should pay attention to when installing interior doors. How to install an interior door yourself, which interior doors to install - this question is asked by novice builders.
It should be noted that with a great desire, minimal skills and a set of simple tools, this is quite realistic. Which interior doors to install is already an individual matter, which depends on taste and financial capabilities.
Before you install interior doors with your own hands, you need the following tools:
- impact drill and concrete drills;
- chisel;
- a hammer;
- hacksaw;
- building level;
- nail puller;
- axe;
- construction miter box;
- tape measure and pencil;
- goniometer
Dismantling the old door
Before installing interior doors, you need to dismantle the old door (see). To do this, you need to use a nail puller. Raise the door and remove it from the hinges.
It is advisable to do this work with two people, as it is safer and easier. To remove old platbands, you can use a nail puller or an ax. Thus, we dismantle the old box.
Size matters
Before you put the interior door yourself, you need to decide on the width of the doorway. The standard width of the door leaf becomes 600, 700, 800 and 900 mm.
You need to think carefully before you want to reduce it. After all, through it you will still have to bring in or take out furniture.
If narrowing the doorway is necessary, then you need to prepare a wooden beam in advance. The width of the beam should be equal to the width of the box. You need to insert it between the box and the wall, securing it with dowels.
Installation steps
Box measurement
To insert an interior door, you need to start by measuring the box on the doors.
- First, attach the top cross member to the top of the door. Measure the distance to be cut.
- Next, we also do with two longitudinal crossbars. We fasten them together with self-tapping screws.
- Two self-tapping screws in each attachment point will be enough. In this process, the main thing to remember is that there should be a gap of 4-5 mm between the box and the doors, so that the door can freely enter the box and there would be no rubbing.
Important. The distance between the floor and the door should be within 10-15 mm, and between the frame and the doors - 4-5 mm.
The next step, how to put interior doors, will be the insert of the hinges. It is easier to do this when the box is already assembled.

So:
- First of all, we cut the hinges into the door leaf. To do this, measure 200 mm from the top and bottom of the door.
- We apply a loop to the door and direct the contour.
- Further along the contour, using a chisel and a hammer, we make a notch depth equal to the thickness of the loops.
- Attaching the doors to the box and draw a contour on the box with further cutting out the notch.
- We fasten the hinges (see) to the doors and the box using self-tapping screws by pre-drilling holes in them. This is done so that the canvas does not split.
- If we put interior doors, then it should be remembered that the loops are left-handed and right-handed.
Important. You need to understand from which side of the door and frame to insert hinges so that the interior door opens in the direction you need. The legs of the screws must be lubricated with machine oil or a special graphite grease.
Installation of the interior door frame
The further essence of how to install an interior door is to install and strengthen the box in the doorway.

So:
- To do this, put the box in the opening and carefully align and center it. This is a very important and responsible moment.
- We fix the box with wedges at the top and bottom. Using a drill, we make three holes in each rack of the box. As a result, six marks will remain on the wall, along which we will make holes for attaching the box.
- We take out the wedges and remove the box.
- According to the marks on the wall with an impact drill with a drill for concrete, we make six holes for the dowels. Next, insert the dowels into the holes.
- We install the box and again center it and align it with a level.
- We fix the box with long self-tapping screws, which, in turn, are closed with special caps to match the color of the door.


