The concrete surface does not always have to be even and smooth, but such a need arises quite often, especially if the concrete mortar is used to pour the floor or other horizontal surface. Leveling and smoothing liquid concrete with short spatulas and mats is a long and thankless task, since the seams (traces from the edges of the spatula) will remain on the entire work surface. Therefore, a do-it-yourself concrete trowel is useful here, which has a large width of the working surface and a long handle to control the movement.
How to make a concrete floor smooth - homemade fixtures
Working with such a tool gives the following effects: in addition to the uniform distribution of the concrete solution, the trowels expel the liquid cement that has separated from the mixture (the so-called cement milk) and push the high-quality mortar into the voids. When working in the private sector, expensive industrial machines for smoothing concrete surfaces are not needed, so craftsmen make fixtures with their own hands, and a smooth floor is obtained with the same quality as with mechanized processing.
The simplest fixture will come from a wooden lath or a common building rule - it is fixed on a long handle, and the wide and smooth surface of the tool serves as a leveling device. The name of the instrument is an interpretation of the word "correctly", that is, evenly and smoothly. The general device of the rule: this is a narrow and even wooden or metal ruler, which is used to quickly level large areas of mortar. 
Also, the rule for concrete is used for plastering and leveling tiles and ceilings. But it is most convenient to work with the rule when leveling the concrete floor surface - the rail can be taken so wide that it captures the entire work surface. Thus, it is enough to stretch the trowel over the concrete once so that the surface becomes even and smooth, without seams and air bubbles.
Industrial hand-held trowels are produced 1-3 meters long with a length gradation of 0.5 m, and a blade width of 8-10 cm. The thickness of the metal (usually duralumin - to facilitate construction) is 0.8-1.1 mm. A home-made trowel for concrete made of wood is an almost disposable tool, since after getting wet in the solution, the tree will definitely warp when it dries, and you will not be able to use such a trowel again. True, there is not an ideal, but quite reliable way to increase the service life of a wooden float - soak it with drying oil and paint it. But this is also not for long, although it will be possible to work with such a tool 10-15 times for sure.
But a responsible craftsman will always pay attention to a metal trowel, or make it with his own hands - from a rule or a suitable metal plate (slat). Duralumin is not only a light metal - it also does not rust, which is why duralumin rules are so popular with builders. Industrial hand-held concrete screeders can be provided with low stiffeners along the entire length of the inner working surface. To constantly control the horizontal level of the liquid concrete leveling process, a building level is often attached to the trowel. 
For a novice builder: To get a smooth concrete surface when working with a trowel alone, it is necessary that its width be no more than 1.5 meters. Smoothing concrete with a wider tool requires two workers, and this operation requires a certain amount of experience.
You can make a wooden rule in 30 minutes - take a planed wooden beam, attach it to a shovel or rake holder, reinforce the fastening with diagonal slats, and the trowel is ready. It is possible to level the working surface of the beam empirically - by running a wooden tool over dry sand or other bulk material, and marking those places after which irregularities remain. Level the bar by planing or jointing. To lighten the total weight of the structure in the beam, holes Ø 30-40 mm can be drilled in increments of 70-90 cm, after which the surface should be sanded with fine sandpaper.
But it is easier and easier to work with duralumin trowels (industrial or homemade). And if two people work, then the length of the handle can be increased to 12 meters, that is, almost any area can be smoothed without seams and bubbles. The width of the working surface of the metal bar for such tools can reach 3-4 meters. These devices are conditionally divided into the following varieties:
- Metal channel trowel, with which you can smooth out the concrete even some time after it is poured, but even before it sets;
- A scraper device can also level an already hardening concrete mixture, but at the same time as leveling, the scraper draws out excess water from the surface of the concrete, and excess cement laitance.

When making the tool yourself, you must follow two rules - the working smoothing surface must be even and smooth, and the handle of the device must be of such length that all corners and areas of the room can be smoothed out.
Preparatory work before pouring concrete on the floor
Before the concrete can be made smooth, the mixture must be poured onto a clean surface, so if the new floor is on top of the old surface, it must be cleaned of paint, plaster, and other construction debris. Cracks must first be filled with cement and wait until the mortar hardens - after that you can fill in a new layer.
Floor preparation:
- First, a “zero level” is noted in all rooms where the pouring and smoothing of the concrete floor will be carried out. To do this, it is necessary to mark the height at the level of 1 meter from the bottom of the door, and mark this height with a laser level in all working rooms. A cord is pulled along this height, and then a horizontal strip 1 meter lower is marked from it - and so on for all rooms in which there will be a new floor. At this zero level, a concrete screed will be poured;
- The surface of the old floor is leveled and, if necessary, rammed manually or mechanically (with a slab);
- A layer of crushed stone or gravel of medium size (fraction) is poured onto a flat surface, the height of the layer is up to 5-7 cm. The crushed stone is moistened and compacted;
- A 10-centimeter layer of sand is poured onto the rubble, which is also moistened and compacted;
- A 10-cm layer of crushed stone (gravel) is poured onto this layer of sand, moistened and compacted;
- Where the surface has irregularities, portions of sand are poured.

Important: It is possible to achieve the required smoothness if the thickness of the concrete screed does not exceed 70 mm - such a layer will not crack and will not begin to peel off when the concrete dries.
Further work is as follows:
- A layer of waterproofing is laid on the floor surface (best of all - polyethylene);
- Warming is laid on top. It can be polystyrene, mineral wool, cork - whatever the owner chooses;
- A polymer, metal or fiberglass reinforcing fine mesh is attached to the thermal insulation;
- Before you make a concrete floor, a wooden formwork is assembled to pour the mortar.
Pouring solution
Building dry mix for leveling the floor can be purchased ready-made, but you can cook it on your own. Self-preparation of the solution will be cheaper, but you will have to work hard, as well as prepare the following tools and materials:
- Manual or electric concrete mixer, or container for mixing mortar;
- Trench tool (bayonet and shovel);
- Gravel or crushed stone of medium fraction;
- Purified or river sand;
- Portland cement grade ≥ 400.

Proportions of components: 1 volume part of cement (for example, a 5-liter bucket), 2 parts of sand, 4 parts of gravel or crushed stone, ½ part of clean water. Everything is thoroughly mixed in a dry form, and closed with water. The density of the solution is liquid sour cream.
To make it easier to pour the solution in portions, the floor surface is divided into sections up to 1 m wide using metal perforated beacons, which are attached to the floor on gypsum or alabaster. A solution is poured between the beacons, and leveled with a home-made or industrial trowel. Filling and leveling the mixture starts from the farthest corner of the room. 
When using a standard rule without a hand to smooth the solution, the beacons are attached at a distance that will be 30-40 mm narrower than the rule itself. If the leveling of concrete is carried out with the help of a trowel, then it will be more efficient and faster to work with two devices at once. Movements are made in different directions, but with a common vector - towards the exit.
The leveled floor should set within 72 hours, and all this time the concrete should be moistened every 5-7 hours so that microcracks do not appear. On the 4th day, the floor is covered with polyethylene (roofing material), and left to gain strength for another 28 days. 
Then a screed is poured onto the concrete:
- Liquid mortar or self-leveling mixture is poured in a layer of 1-1.5 cm;
- 3-4 days the surface is wetted with water.
After the screed has hardened, the floor surface is rubbed and a decorative floor covering is laid.
The concrete trowel is designed to smooth the cement composition on the surface of the wall, floor and ceiling. It allows you to make a flat plane in a matter of minutes. In addition to leveling walls, it is often used in the process of pouring flooring and laying mortar.
Varieties of construction tools
There are the following types of building trowels. Each model has characteristic differences and scope in the course of finishing work. These include:
- channel (toothed);
- scraper (plaster);
- trowel (plastic).


The toothed trowel has small protrusions in the form of teeth on the inside. It provides a uniform distribution of the concrete composition on the plane of the wall. This type is intended for finishing bathrooms and bathrooms.

In addition to the cement composition, construction glue is applied with such a trowel. The equipment is made of high-strength metal alloys. The teeth are made of stainless steel.

The plaster trowel is intended to create a decorative surface. It is made from metal. On the inside, there are multiple protrusions and grooves that mimic the irregularities on the surface of the walls and ceiling. The length of the handle reaches 5 m. The design has a swivel mechanism. It provides the desired angle of inclination during operation.

Plastic trowels are used to level the cement layer. They are made from thick plastic. It provides the minimum weight and maneuverability of the tool in the course of work. The width of such equipment reaches from 50 to 150 cm. The set includes interchangeable handles with adjustable height.

Putty trowels are made for dense steel. On the outside of the equipment there is a wide handle. This type of finishing tool is light in weight.

The trowel is able to penetrate into the most remote corners of the stone plane. It evenly distributes the composition on the surface of the walls and ceiling. The size of the product reaches from 50 to 200 cm.

How to work with an ironer?
Before proceeding with the alignment process, it is recommended that the following criteria be met. They include a strict frequency of actions. These include:
Choosing the right tool. To do this, it is necessary to pay special attention to the material from which the base of the construction equipment is made. The photo of the trowel shows modern models of construction tools.

The metal base must not bend under mechanical stress. The denser the base, the smoother the plane will be. The height of the handle should have several levels. This will ensure the quality of the finishing process.


Grater size. In the selection process, you need to pay attention to the width and length of the tool. The base should be slightly larger than the cultivated area. This will help reduce the size of the joints when leveling drywall walls.

Serpyanka fixing. This element is intended for sealing seams and joints. It is a plastic tape with many through holes. It provides even corners in space and tight fixation of the seams between drywall sheets.

In order to fix it on the plane of the wall, it is necessary to measure the required distance at which this material will be fixed in the future. Next, the sickle is cut off and fixed with the help of a building compound.

Excess mixture is polished with a plastic trowel. It removes the remnants of putty, thereby forming the desired angle.

Sealing the received seams. When the sickle is completely dry, they proceed to the finishing of the seams and joints. Here you will need a putty trowel. It has a compact size and has good maneuverability in the process of movement.


A small amount of building composition is applied to a metal spatula. The applied layer is carefully polished with a trowel until a smooth surface is obtained.


If small flaws have formed on the plane, it is leveled to the desired result. It is necessary to work with the putty mixture quickly. It freezes in minutes. You can remove the superimposed layer by soaking. To do this, the inside of the trowel is abundantly moistened with water.

Photo trowels for concrete


The technical characteristics of concrete floors must meet the requirements of SNiP 2.03.13-88 and the recommendations of the manual in the development of existing rules and regulations. Unfortunately, not all builders perform their work with high quality; during the laying of the finish coating, you have to deal with the correction of the admitted marriage.
Concrete floors can be leveled with self-levelling mortars, cement mortar screeds or ceramic tile adhesives. Under linoleum and carpet, the leveling of concrete floors is considered a mandatory operation; under ceramic or stone tiles, the decision is made based on the actual state of the supporting base. All floors installed on logs can be laid without prior leveling of concrete bases.

In the article we will consider several examples of leveling using various materials, taking into account the actual condition of the floors.
The composition of modern materials for leveling concrete floors includes several components, along with high mechanical strength of the mixture, they have good spreadability, ease of use, low shrinkage, resistance to various chemical compounds, manufacturability and relatively low cost.

Most of the existing brands meet the requirements of consumers, during the selection, the main attention should be paid to the following factors:
- which floor should be leveled. There are options for in-situ concrete, industrial reinforced concrete slab, base cement screed, self-leveling floor, underfloor heating system, etc.;
- fill thickness. Depends on the maximum roughness values and the type of alignment. Alignment can be preliminary or final. There are no strict requirements for the horizontal surface to the preliminary, it is used for finishing floor coverings along the logs. During installation, the position of the lag is controlled, if necessary, with the help of wedges or other linings, they are aligned;
- floor finish type. The softer the flooring, the more accurate and stronger the alignment should be, the better the material should be purchased.
After all the questions have been answered, you can begin work on leveling the concrete floor. To perform the work, you will need a suitable self-leveling floor, a primer, a construction mixer for preparing the mixture, a mortar container, a powerful (preferably industrial) vacuum cleaner, needle and paint rollers, a wide stainless steel spatula, a laser or water level, dowels for beacons, damper tape, tape measure, ordinary bubble level or rule.

Step 1. Count the amount of materials. To do this, first find out the maximum difference in height of the concrete floor. When checking its status, you need to use a long level or rule. Apply tools around the perimeter of the room, in the center and diagonally, keep the level in a horizontal position. The clearance is determined by eye or with a tape measure. The more lines that are tested, the more accurate the final results.
The minimum thickness of the leveling layer should be within 2-3 mm, add the maximum height of the irregularities to this value. The thickness of the liquid screed should be 2–3 mm greater than the height of the maximum irregularities.
Practical advice. In order to save expensive material, it is recommended to cut down the highest ledges. Preliminary mechanical alignment saves 25-30% of the material.
Step 2 Foundation preparation. The branded strength of the material for the leveling layer should not exceed the strength of the concrete base by more than 50 kg/m2. You can check the strength of the base with an ordinary coin. Draw two perpendicular lines on the concrete with the edge of a coin at an angle of about 30 ° to the surface, if the lines are even and without chips, then the base has sufficient strength for leveling work. The presence of a deep furrow, the appearance of chips at the intersection of the lines indicates that the strength of the base does not meet current standards. In this case, it is impossible to simply level the concrete floor, it is necessary to fill in one more layer according to SNiP. If the floor height does not allow this, then the old layer will have to be completely removed. It is very long and expensive.


Why is foundation strength so important? If the leveling layer is much stronger, then during shrinkage it will tear the weak base, the filling will peel off. There is a way out - to do the alignment with a weak solution. But it can only be used under hard topcoats, this option cannot be used for soft ones.


Removing the old screed is the best solution
Step 3 Clean the concrete floor. You need to remove dust, dirt, all loose elements of the concrete floor. Remember that the cleaner the base, the higher the adhesion of the leveling layer.

Step 4 Seal large gaps a day before leveling. Clean them from the remnants of old material, remove dust and moisten a little. Cracks can be sealed with the same mortar that is used to level the concrete. Clog them tightly, do not leave air pockets. You can level with a trowel or a small spatula.

Step 5 Prime the surface. The primer should be for concrete surfaces only. Due to it, not only the adhesion of the two materials improves, but also the indicators of hydroprotection improve, which is very important for floors in residential premises. It is necessary to prime with a roller, in hard-to-reach places use a paint brush. If the primer is absorbed very quickly, then the operation will have to be repeated. The second layer of primer is applied only after the first has completely dried, the time depends on the brand of material, temperature and humidity in the room.

Step 6 Glue foam polyethylene damper tape around the perimeter of walls, columns, interior partitions. It compensates for thermal expansion, prevents swelling and cracking of the leveling layer.

Important. If the room has a large area, then shrinkage seams should be made. They are located at a distance of about three meters, the lines should be parallel, at the intersection the angle is only a straight line. Damper joints can be made in advance using metal profiles or cut through the next day after pouring the solution. Remember that the second option is accompanied by a lot of noise and dust.
Step 7 Find the horizon level on the wall. It is much easier and faster to do this with a laser level, if you don’t have one, then use a water level. Set the laser level in the center of the room, bring a horizontal beam to the walls. Using a tape measure, mark at the desired height from the concrete floor surface.

Step 8 Screw self-tapping screws into the concrete floor to control the height of the leveling layer. Beacons should be in the corners and along the lines of the room, the step between the rows is approximately one meter. First, fix the dowels against the walls, the height is set according to the marks. Then, between the extreme opposites, pull the rope and install all the other dowels along it. If you do not have strict requirements for the horizontal fill, then you can not install beacons.


Step 9 Prepare a solution. The proportions are indicated by the manufacturer on the packaging, follow his recommendations. Water is always poured into the container first, and then the dry mixture is added. It is advisable to pour the mixture with the mixer on, this will help minimize the number of lumps and allow you to constantly control the consistency of the solution. Mix the material thoroughly and leave it for 5-10 minutes. for insistence. During this time, all the smallest lumps of cement are completely saturated with water. At the same time, chemical curing reactions are started. After infusion, stir the mixture again a little.

Important. Do not allow an overdose of water, this significantly reduces the strength indicators. One more thing. Accurately calculate the volume of the solution with your performance, consider the recommended use time. Keep in mind that once the solidification process has begun, it is impossible to stop it, and adding water to the thickened mass only exacerbates the situation. On average, a freshly prepared mixture should be used within half an hour.
Step 10 Start pouring the solution. Start pouring from the far wall of the room and move towards the exit. Pour the solution from a height of 20-30 cm, avoid large splashes. Move the bucket in a zigzag manner, do not leave large gaps. The width of the strip is approximately 40 cm, you should easily level it with a spatula. Each subsequent portion of the material should overlap the previous one by about five centimeters. Constantly monitor the marks on the wall and the markers from the dowels, if necessary, increase the thickness of the mass or disperse the excess over the free area.


Step 11 As the flooded area expands, roll it with a spiked roller. It removes air bubbles and improves the adhesion of the mass to the concrete base. The length of the needles of the roller should be several millimeters greater than the maximum thickness of the application of the solution. Keep this in mind when purchasing the instrument.

Practical advice. To increase the strength of the leveling layer, it is necessary to prevent direct sunlight from entering the room, close windows and doors to prevent drafts. If this is not done, then some areas will lose moisture much faster than is necessary for optimal conditions for chemical reactions to occur. In these places, the strength of the layer becomes significantly lower than expected.

After complete hardening, the floor surface can be covered with any soft coatings or pasted over with ceramic tiles. But it should be borne in mind that leveling with bulk materials according to the technology described above will always have deviations from horizontal within ± 1.5–2 mm. Is it possible to level concrete floors with perfect precision? It is possible, but for this you should use a different technology for the production of work.
Prices for self-leveling floor compounds
self-levelling floor compounds
Alignment of the concrete floor on the lighthouses
This method takes a little longer, but guarantees a perfectly horizontal surface. The most difficult thing is the creation of lighthouses. For this process, we will give detailed instructions. For work, only a laser level is needed, ordinary water levels cannot achieve such a result.

From the tools you will need a large rule, wide and narrow spatulas, a trowel and a folding wooden meter. Roulette is not good, it is too soft.

Lighthouses can be made from any cement or gypsum mixtures, but we recommend using Fugenfüller putty. It has high physical strength, excellent adhesion to all mixtures made on the basis of cement with or without the addition of innovative fillers. In addition, the hardening time of the putty is approximately 30 minutes, which is quite enough for the manufacture of lighthouses at an average pace. After the preparation of the last lighthouse is completed, it is already possible to work on the first ones.

Another plus of the leveling beacons offered by us is that they make it possible to save building materials. The height of metal profiles is at least one centimeter, which means that the minimum thickness of the fill will be the same. The minimum height of our beacons is equal to the thickness of plastic crosses and is only a few millimeters. The difference in the volume of filling due to the height for large rooms is significant.
Step 1. Set the laser level, check the condition of the floor, determine the minimum thickness of the leveling layer. Remove construction debris from the surface, vacuum it.

Step 2 Prepare putty. Accurately observe the proportions indicated by the manufacturer, do not experiment, they will not lead to anything good.
Step 3. Start installing beacons against the wall, the rule will be used instead of a tape measure to measure the distances between the beacons. Lay out the first pile of putty at a distance of about 15-20 cm from the wall, trim it a little.

Install a plastic cross for ceramic tiles in the center.

Put a meter on it and, taking into account the location of the laser beam, drown it in the solution. Make sure that the cross is lying horizontally, check its position in several places.

Carefully remove excess putty. You can not clean up near the cross, it will then be cut off with a spatula. If you touch the unhardened putty, then you can violate the position of the cross, you will have to redo everything again.
Step 4 Lay a rule on the floor, the distance between the beacons should be 15–20 cm shorter than the length of the rule. In the same way, the width between the lines of beacons will be determined. Install all beacons in the room.

Step 5 After the point beacons have hardened, clean the surface of the crosses from putty, pay attention that it is even. Put the rule on two adjacent points on top, put the solution with a spatula into the gap formed between it and the concrete floor. From the first time it is difficult to guess the thickness, in the future practical experience will appear and the work will go much faster.


Step 6 Rule carefully align the surface of the shaft made. If there are unfilled places, then add a little putty to them and again level the surface with the rule. Remove excess mass immediately in a container, mix the mass periodically.


It is possible to level the floor only after the beacons have completely solidified. It is allowed to use a self-leveling floor mortar, a cement-sand mixture or an adhesive for ceramic tiles. Decide for yourself which one, but there are general recommendations.
- The cost is the cheapest cement-sand mortar. If you have large areas or a significant thickness of floor leveling, then it is better to use this material. Per cubic meter of solution, significant financial savings are obtained.
- In terms of physical strength, tile adhesive is in first place. But it is difficult to work with him, you need to have practical experience.
- Self-leveling floors serve as additional waterproofing, in some cases this property allows you to speed up construction work.
As for time, there is almost no difference. It is not necessary to believe that bulk materials can significantly reduce the time for leveling the floor. An experienced builder will make exactly the same footage with the help of beacons and rules.
Step 7 Pour the mass between the beacons, align it as a rule. The tool must be pulled towards you and at the same time perform small movements to the left and right in amplitude. There are gaps - add the solution and repeat the leveling.


Practical advice. For inexperienced builders, after leveling the rule, small waves may remain on the floor surface. This is not a problem, do not scrape off the frozen mass. It is much better, easier and faster to repeat the leveling of the floor in a direction perpendicular to the first one. No more beacons. Just pour a thin layer of the solution on the floor and, as a rule, pull off the excess, make the mass a little thinner. It will fill all the waves and perfectly level the floor.

Leveling a concrete floor with tile adhesive according to a simplified scheme
This method is great for ceramic tiles, the time of work is significantly reduced, and the quality completely satisfies the tilers. It is rather difficult to level the floor during tiling by changing the thickness of the adhesive; only highly professional tilers can do this. And even then, most of them prefer to level the concrete base on their own and lay tiles on the finished surface, especially if the height difference is 1 cm or more. The end result is time savings.
Step 1. Cut down large mounds, clean the surface from construction dust and debris. If the concrete is very dry, it is recommended to moisten it with plenty of water. Water should not be immediately drawn out of the adhesive, it is needed for the optimal flow of chemical reactions. The lack of the required amount of liquid critically reduces the strength of the adhesive leveling layer.
Step 2 Prepare the tile adhesive. There is a caveat here, the glue should be a little thinner than the manufacturer recommends. It will be difficult to work with thick, in addition, in places with a small thickness, water is quickly absorbed by concrete, which causes a decrease in physical strength indicators. We have already mentioned this. The consistency of the solution should resemble ordinary sour cream or heavy cream and spread a little over the surface.


Step 3 Pour the adhesive in portions onto the floor surface and, as a rule, pull off the excess. The towering sections of concrete serve as beacons, the glue fills only the depressions.
Important. Before starting work, you need to determine in which direction to pull the tool. This can be done after a careful inspection of the concrete floor. You should find the beacons by which it flooded. Then use a bubble level or rule to find out the location of the recesses.
Professional builders during this alignment after the first screed make a few more additional diagonal or circular movements as a rule. At the same time, the pressing force is minimal, the quality of alignment largely depends on practical experience.


If after the first pass the height differences are still large, then draw the rule in a perpendicular direction to the first pass. Once again we warn you, on the second pass, reduce the pressing force. You do not need to achieve ideal performance, differences in height within ± 5 mm for laying tiles are not a problem.


In order to improve the adhesion of the adhesive to concrete, after pouring, it is recommended to carefully rub it into the floor with a spatula or trowel. The recesses found after stretching the rule must be immediately covered with glue and re-leveled. The work does not take much time, the only drawback is that tiles can only be laid the next day. But a professional builder does not waste time, there is always a small amount of previously deferred or preparatory work at the facility.
Video - Leveling the concrete floor with bulk mixtures
Concreting the base is a rather laborious process. The quality of the final result is measured not only by the strength of the coating, but also by the evenness of the surface. Various tools are used to ensure this. At the initial stage, the mixture is leveled with a rule. But after it, ridges may remain. Therefore, at the final stage of leveling, a concrete trowel is used. This is a simple, but extremely necessary tool in the builder's work. It is quite possible to do it yourself. Before starting work, you need to delve into this issue.
General characteristics of the process
The process of pouring concrete bases is not the same for different rooms. If you need to create a floor in a large production hall, hand tools will be almost useless. In this case, equipment with various nozzles is used (rollers, discs, skis, etc.).
In a small room, it is easier to level with other tools. First, wooden beacons are laid on the surface of the base. They will serve as guides for the rule. Concrete is laid between the lighthouses. It is led by the rule, distributing the mixture in an even layer along the level of the guides. This is the initial stage of filling.
Further, a more precise smoothing of the mixture is carried out. Here you will need a concrete trowel. This is a special manual device that can be used both in the process of removing the mixture by the rule, and after arranging the entire base.
Varieties
The presented tool can be manual or have an electric or gasoline drive. For a small room, the first variety is ideal. When leveling large areas, it is better to use mechanized devices. The most commonly used aluminum or magnesium trowel for concrete. Its length is more than 1 meter. For ease of use, the profile is attached to a long handle. Because of this, the tool is somewhat reminiscent of a mop.

There is a division into channel and scraper trowels. The first variety is intended for leveling still plastic, not hardened concrete. At the same time, "cement milk" is formed on the surface. This is a mixture of cement, water and sand in a small amount. The scraper type of trowels is applicable for already hardening mortar. Such tools contribute to the removal of "cement milk" from concrete.
Blades also vary in size. For a small room, small-sized inventory with a width of 13 cm and a length of 28-68 cm is suitable. The step of increasing the size is 10 cm. The corners of the working plane should be rounded so as not to leave scratches.
Device and features
The hand trowel for concrete has a number of features in application. It is moved along the solidifying mixture back and forth, as well as from side to side. To maintain the original layer of concrete, it is necessary to move the tool in directions perpendicular to each other. Otherwise, depressions and bumps will appear. The trowel must not be immersed in concrete. It just skims over the surface.

During movement, the angle of inclination of its profile surface changes. If you push the iron away from you, the far edge will rise, and vice versa. The gearbox is responsible for this movement. The plasticity of the mixture also affects the angle of elevation. It can reach almost 60 degrees. The handle of the tool can be from 3 to 12 m long. Working planes must have deflection stabilizers. Capture width is from 1 to 5 meters. The reducer has the form of a cable. It connects the blade and the handle.
DIY tool
In the conditions of private construction or repair, a home-made tool is quite applicable. Ironing for is quite simple. If you are not going to use it more than 1-2 times, you should not spend money on buying new equipment.
If you have a little free time, and there is also the ability to handle wood, creating a do-it-yourself trowel and leveling concrete with it is not difficult. To do this, you will need to prepare boards, hand tools and fasteners. Usually, all the necessary tools for such work are in the arsenal of the home master. If they are not, the tool and material can always be obtained. For ease of use, it is better to give preference to soft woods. Most often, such a tool is made from such materials.
Work surface technique
When wondering how to make a concrete trowel with your own hands, you should consider the advice of experienced builders. When preparing softwood beams, attention must be paid to their processing.

The side of the trowel that will be in contact with the concrete must be perfectly smooth. It is pre-sanded. Then the working surface is treated with a special water-repellent solution. This will keep the tool until the end of the concrete base. The smoothness of sliding will be as easy as possible. The standard dimensions of the timber for the work surface are selected depending on the area of the room. The width of this product should be about 30 cm, and the length can be from 1 to 2 m.
Making a pen
The handle is an integral element of such a product as a concrete trowel. The telescopic handle is used in purchased tools. But for homemade varieties, you just have to make a long rail. For infrequent or one-time use, this will be enough. The handle should be selected according to the length of the room. Usually this element of the trowel is from 3 to 5 m. This option is even suitable for smoothing the mortar along the upper cut of the lighthouses or between the brickwork.

With the help of a triangular spacer made of wooden slats, the handle is rigidly attached to the working area. If the grip of the working surface is large, it is difficult to guide the tool with one handle. Therefore, for the convenience of carrying out work, it is better in such cases to make two holders at once.
scraper trowel
A homemade concrete trowel most often involves leveling concrete that has not yet hardened. On sale there are special nozzles that make a scraper from a channel tool. Although most often they are simply included in the set of purchased trowels.
Scraper working surfaces, most likely, cannot be made independently. But if necessary, you can buy them. This tool will remove excess from the surface of the concrete. The blade is made from durable aluminum alloys. This will eliminate bumps and irregularities, fill in the recesses on the surface of the base. This tool helps to finally level the surface.
Concreting the base is a rather laborious process. The quality of the final result is measured not only by the strength of the coating, but also by the evenness of the surface. Various tools are used to ensure this. At the initial stage, the mixture is leveled with a rule. But after it, ridges may remain. Therefore, at the final stage of leveling, a concrete trowel is used. This is a simple, but extremely necessary tool in the builder's work. It is quite possible to do it yourself. Before starting work, you need to delve into this issue.
General characteristics of the process
The process of pouring concrete bases is not the same for different rooms. If you need to create a floor in a large production hall, hand tools will be almost useless. In this case, equipment with various nozzles is used (rollers, discs, skis, etc.).
In a small room, it is easier to level with other tools. First, wooden beacons are laid on the surface of the base. They will serve as guides for the rule. Concrete is laid between the lighthouses. It is led by the rule, distributing the mixture in an even layer along the level of the guides. This is the initial stage of filling.
Further, a more precise smoothing of the mixture is carried out. Here you will need a concrete trowel. This is a special manual device that can be used both in the process of removing the mixture by the rule, and after arranging the entire base.
Varieties
The presented tool can be manual or have an electric or gasoline drive. For a small room, the first variety is ideal. When leveling large areas, it is better to use mechanized devices. The most commonly used aluminum or magnesium trowel for concrete. Its length is more than 1 meter. For ease of use, the profile is attached to a long handle. Because of this, the tool is somewhat reminiscent of a mop.

There is a division into channel and scraper trowels. The first variety is intended for leveling still plastic, not hardened concrete. At the same time, "cement milk" is formed on the surface. This is a mixture of cement, water and sand in a small amount. The scraper type of trowels is applicable for already hardening mortar. Such tools contribute to the removal of "cement milk" from concrete.
Blades also vary in size. For a small room, small-sized inventory with a width of 13 cm and a length of 28-68 cm is suitable. The step of increasing the size is 10 cm. The corners of the working plane should be rounded so as not to leave scratches.
Device and features
The hand trowel for concrete has a number of features in application. It is moved along the solidifying mixture back and forth, as well as from side to side. To maintain the original layer of concrete, it is necessary to move the tool in directions perpendicular to each other. Otherwise, depressions and bumps will appear. The trowel must not be immersed in concrete. It just skims over the surface. 
During movement, the angle of inclination of its profile surface changes. If you push the iron away from you, the far edge will rise, and vice versa. The gearbox is responsible for this movement. The plasticity of the mixture also affects the angle of elevation. It can reach almost 60 degrees. The handle of the tool can be from 3 to 12 m long. Working planes must have deflection stabilizers. Capture width is from 1 to 5 meters. The reducer has the form of a cable. It connects the blade and the handle.
DIY tool
In the conditions of private construction or repair, a home-made tool is quite applicable. Do-it-yourself concrete trowel is quite simple. If you are not going to use it more than 1-2 times, you should not spend money on buying new equipment.
If you have a little free time, and there is also the ability to handle wood, creating a do-it-yourself trowel and leveling concrete with it is not difficult. To do this, you will need to prepare wooden slats, boards, hand tools and fasteners. Usually, all the necessary tools for such work are in the arsenal of the home master. If they are not, the tool and material can always be obtained. For ease of use, it is better to give preference to soft woods. Most often, such a tool is made from such materials.
Work surface technique
When wondering how to make a concrete trowel with your own hands, you should consider the advice of experienced builders. When preparing softwood beams, attention must be paid to their processing.

The side of the trowel that will be in contact with the concrete must be perfectly smooth. It is pre-sanded. Then the working surface is treated with a special water-repellent solution. This will keep the tool until the end of the concrete base. The smoothness of sliding will be as easy as possible. The standard dimensions of the timber for the work surface are selected depending on the area of the room. The width of this product should be about 30 cm, and the length can be from 1 to 2 m.
Making a pen
The handle is an integral element of such a product as a concrete trowel. The telescopic handle is used in purchased tools. But for homemade varieties, you just have to make a long rail. For infrequent or one-time use, this will be enough. The handle should be selected according to the length of the room. Usually this element of the trowel is from 3 to 5 m. This option is even suitable for smoothing the mortar along the upper cut of the lighthouses or between the brickwork.

With the help of a triangular spacer made of wooden slats, the handle is rigidly attached to the working area. If the grip of the working surface is large, it is difficult to guide the tool with one handle. Therefore, for the convenience of carrying out work, it is better in such cases to make two holders at once.
scraper trowel
A homemade concrete trowel most often involves leveling concrete that has not yet hardened. On sale there are special nozzles that make a scraper from a channel tool. Although most often they are simply included in the set of purchased trowels.
Scraper working surfaces, most likely, cannot be made independently. But if necessary, you can buy them. This tool will remove excess from the surface of the concrete. The blade is made from durable aluminum alloys. This will eliminate bumps and irregularities, fill in the recesses on the surface of the base. This tool helps to finally level the surface.
Expert reviews

Since such products are made from an extruded alloy, they are very light and maneuverable, unlike homemade ones. At the same time, these tools are characterized by high strength. The whole design contributes to a smooth change in the angle of inclination of the surface during operation.
According to expert reviews, purchased trowels have only one drawback - they are quite expensive. In addition, it is better to purchase such irons from good, proven manufacturers. Cheap products do not justify the money invested in them. Therefore, for infrequent use, it is still better to make a home-made design. Especially if you plan to use it no more than two or three times.
How to use a spatula
A properly made concrete trowel allows you to level fairly large areas. Due to the wide working surface, large areas are quickly processed. Even with a homemade trowel, you can qualitatively align the bumps and depressions.
Home-made varieties of the tool should be used only for rooms with a length of no more than 6 m. Otherwise, purchased varieties will have to be used. They have a telescopic handle that can reach 12 m.

After the first leveling, "cement milk" may appear on the surface of the concrete. It should be removed with a scraper with a special blade. If during the surface treatment it is planned to process it with various grinders, this stage is mandatory. Large humps and depressions must be removed before the cement sets.
Having considered such a tool as a concrete trowel, you can correctly use it in construction or repair. Under certain conditions, it is more appropriate to use homemade varieties. They can be easily made by hand. But for large rooms it is better to use a purchased tool. It usually has a telescopic handle. Also, these trowels have a set of special blades. But for infrequent use, it is recommended to make a trowel yourself, which will level the surface almost perfectly.
hochyvseznat.ru
Types of concrete trowels
In order for the floor surface of the ceilings to allow any finishing work, it must be perfectly flat and meet all the necessary technical requirements.

The smoother is used for leveling by adjusting the smoothing angle.
All this is very often impossible to achieve without additional installation work. In order for the surface of the floor slab to become suitable for further work, it is necessary to make a screed over it and properly level it.
This requires specially made by hand or ready-to-use mixtures that can be bought at hardware stores. But, in order to achieve what you want, these mixtures alone will not be enough - you also need special equipment, a trowel.
Stroking device

The scraper trowel is designed to remove excess water after vibration treatment of the surface.
The so-called do-it-yourself trowel for leveling can be of different types. Such equipment is used for minor floor correction - leveling, by adjusting the smoothing angle. The trowel for private use is suitable for work in rooms up to seven meters long. This device is made of lightweight and durable aluminum alloy, which is why it is very practical to use.
A conventional trowel has rounded edges, with which you can smoothly change the angle of inclination, and this allows you to leave a minimum amount of roughness on the surface. The equipment has a long handle, which, if necessary, can change its length, remove and add additional sections, which makes it sociable and easy to use.
Leveling the surface with your own hands is sometimes impossible without first using a special scraper trowel or, as it is also called, a scraper trowel. It is she who allows you to remove excess water and concrete milk from the surface. Usually such scrapers with blades come with a trowel. And this dual equipment allows, ultimately, with proper use, to achieve the desired result and make the coating as even as possible. In addition, you need to remove excess liquid from the surface, it is very important to clean it of residues and other construction debris.
See also: using a grinder
smoothing

Alignment scheme.
Concrete can be leveled in various ways, even when the mortar has set. But in this case, it will take much more time and effort than with the timely leveling of the solution that has not yet solidified, when it is poured. It is for these cases that it is recommended to use hand-held compact equipment made of lightweight material specifically for working with freshly laid mortar.
This equipment is used only after vibration treatment has been carried out. The control rail will help to remove and smooth out all the bumps on the still plastic surface. And the corrective rail will help not only to correct the deformation, but also to fill in the depressions with high quality. This device, even at the stage of fresh concrete, will allow you to get results that will greatly speed up the process of completely leveling the surface with special tools.
The concrete trowel is an aluminum profile one and a half to two meters long with a handle attached to it, which, if necessary, is extended up to 12 meters. This profile has a tilt angle adjuster relative to the surface. The angle of inclination varies depending on the direction of movement and the plasticity of the mixture.
Features of smoothing

Smoothing scheme
The hand trowel moves over the surface at the required distance. To vibrate the profile, the handle of the device is shaken in short jerks. The speed of movement of this device and the intensity of vibration depend on the mobility of the mixture and on its composition. With a high mobility of the mixture between the trowel and the surface, adhesion occurs. It increases if fine silica is added to the concrete, in which case too much adhesion can cause the laid concrete to move, which is unacceptable, as it can lead to a change in the established coating height. To prevent this and to achieve the most even surface, smoothing is carried out in two directions at right angles to each other.
Smoothers can be used for do-it-yourself leveling with varying degrees of mobility, but in any case, it should be such that the smoother does not sink into concrete. Despite the small radius of action, they can successfully process a large area. When using plasticizers in a mixture, one must not forget that the mobility of the mixture in this case changes rapidly when their action ceases.
http://youtu.be/HutnKAV5VvA
Concrete trowels can be powered by a gasoline or electric engine. The angle of inclination on such models is set by turning the knob, and it is much easier to work with them, since the mechanized machine sets automatic vibration with stepless frequency control. Cleaning and carrying such irons after work is also quite easy. If necessary, ironing machines can be rented, which will be much cheaper than buying it.
Page 2
- Reinforcement
- Manufacturing
- Instruments
- Mounting
- Calculation
- Repair
1pobetonu.ru
Do I need a concrete trowel when pouring the floor
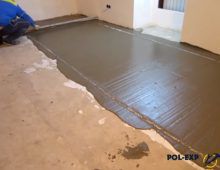
To proceed to the finishing work, the floor surface should preferably be smooth. Smoothing of the concrete is carried out immediately after the mortar is poured, distributed over the formwork and thoroughly vibrocompacted. In our article, we will talk about the smoothing process, and how to achieve the best result.

In the photo, a person does not wash the floor, but is engaged in smoothing it
First meeting
It must be understood that for large and small areas there are different methods for forming smooth surfaces.
In the factory, the open surfaces of newly formed products are smoothed with the help of special machines, the equipment is equipped with various nozzles in the form of:
- Valikov.
- "Skis" that reciprocate in a direction perpendicular to the movement of the machine.
- Rotating discs used for finishing the surface.
As for the conditions in closed areas, other devices are used for this purpose.
Concrete smoothing agents
Depending on the volume and method of concrete work, as well as on the requirements for floors, there are several options for smoothing:
- Primary smoothing is performed directly in the process of laying the mixture into the concrete floor structure.
- Smoothing the surface of the freshly laid mixture.
- Smoothing cement-sand or quick-drying leveling screed, made on a concrete base.
Smoothing concrete at the same time as laying
Private developers doing DIY work in a small area are thinking about how to make a smooth concrete floor in sync with the laying of the mixture. To, so to speak, not to waste time, and the result was good.
In this case, the instructions for flooring are as follows:
- Along the longest wall in the room at a distance of 1000-1200 mm from each other and indented from the walls by 200-250 mm, beacons from wooden slats (metal profiles) are arranged. These structures are fixed with small amounts of cement mortar. They simultaneously fulfill their intended purpose, and the role of guides for the rule. As a rule, a perfectly flat bar or board, or an acquired aluminum tool, is used.

Approximately as shown in the figure
- The laying of the concrete mixture should be carried out along the grips between the beacons. In this case, the supplied concrete is distributed and at the same time smoothed out by “ironing” the rule, which is pulled along the guides. The rule must be pulled towards you, making a vibrating movement from side to side with a small amplitude.
- If everything went right, you can perform the final smoothing of the concrete surface with a trowel (we will talk about it a little lower).

A hand tool that allows you to smooth out hard-to-reach places
Someone smoothes the concrete surface upon completion of laying in full, others immediately follow the rule. But they all use special devices for this purpose.
Concrete trowel
The so-called concrete trowels can be branded or do-it-yourself. The main thing for this improvised tool is to have a smooth, and preferably a glossy surface.

Some try to build an ironing board from improvised materials
Smoothers complete concrete work by causing the formation of "cement milk" - a mixture of water, cement and a small amount of sand - on the smoothed concrete surface. Due to this, the layer, freed from large aggregates (crushed stone, gravel, etc.), after hardening and gaining brand strength of concrete, can be sanded if necessary.
On large areas of industrial floors, factory-made trowels are used. They can be manually operated or run on an electric or gasoline engine.
Advice! To achieve the most even surface without violating the established thickness of the concrete layer, you can work with a trowel alternately in two directions perpendicular to each other.
In the process of work, make sure that the tool is not immersed in the mixture.
Hand tools are like a large mop with a wide working bar and a very long handle (the length is usually adjustable). The construction is made of aluminum or other extruded alloy and is therefore quite light, maneuverable.

Take care of the horizontal guide, any defect renders the tool unusable
To create ultra-smooth floors, various models of smoothers are available, aimed at specific tasks:
- Smoothing slats are used to smooth concrete that is subject to vibration compaction.
- Reiki control, responsible for leveling the bumps formed on the still plastic solution.
- Corrective devices perform cutting of bumps and filling with this mixture of depressions on the surface of the concrete left after preliminary grouting.

Such equipment is used for large rooms. For example, to smooth the concrete floor in parking lots
The high price of an electric or petrol-driven trowel compared to a manual trowel is compensated by more efficient work due to measured vibration. It is noteworthy that mechanized trowels can be rented, saving several thousand rubles.
Conclusion
A clear advantage, of course, belongs to an automatic tool that allows you to achieve the best result. On the other hand, one hundred percent smoothness is not always required, for example, for a garage room, it is enough to visually create the illusion that the concrete surface is even and smooth.
In general, it's up to you, we just helped find the answer to the question - how to make concrete smooth. In the video we presented in this article, you will find additional information on this topic.
rusbetonplus.ru
Concrete trowel: types and applications in pouring concrete
Equipment for smoothing concreteA concrete trowel is a tool for smoothing the surface of a freshly laid monolithic concrete floor in order to obtain an even and smooth base. The smoothing of the concrete surface is carried out only after leveling and thorough vibrocompaction of the concrete solution.
How to make concrete smooth, and what tools are needed to produce this type of work, will be discussed in detail in this article.
Tools for smoothing concrete
The most important technological requirements for concrete surfaces when laying a concrete mixture in molds or monolithic structures are a strict horizontal level of the laid base and a smooth, flawless surface. Achieving such quality indicators as smooth concrete is provided by a whole range of special tools.
The most effective devices for performing this type of work are concrete trowels, presented in various modifications:
- channel;
- scraper;
- grinding machines.
Channel trowel for correcting the surface of freshly laid concrete
The channel type is used for smoothing and simple correction of the surface with the coordination of the smoothing angle up to 30 ° and the optimal width of the corrected coating up to 3 m. The length of the rod (with extension) is up to 6 m.

As a separate option, it can be equipped with a deformation joint former (toothed nozzle) for dividing the surface of the laid mixture into sections (cards). As you can see, the device of expansion joints is carried out simultaneously with the smoothing of the solution, which significantly reduces the complexity and cost of work.
Usually, seams are cut on dry material using power tools with expensive diamond discs. In this case, the wages of workers and the price of diamond blades are removed from the cost of works on the construction of expansion joints.
Channel devices are made of aluminum alloy or special stainless steel. The blades have a smooth mirror surface and are highly resistant to corrosion.
Scraper trowel for smoothing the concrete mix
The scraper type is designed to collect cement laitance, fill depressions and remove tubercles from the surface of the laid coatings, and also serves to control the horizontal level of the floor. It can be used for work on large areas.

The width of the processed coating is up to 6 m. The maximum length of the handle (rod) is 6 m. The design provides for a smooth increase or decrease in the angle of inclination of the working blade by turning the handle, which facilitates work at the time of operation.
Advantages:
- wide selection of blades;
- low weight due to blade material (aluminum alloy);
- strong and durable construction;
- thanks to the long handle (up to 6 m), a large area can be used.
Trowels - mechanized concrete trowels
To smooth large areas, mechanized types of devices for a freshly laid screed are used - paddle trowels. Depending on the design of the drive, the machines are divided into electric and gasoline.
For work in the interior of a relatively small area, and especially on sites of a complex shape, electric single-rotor bladed units with a working disk diameter of 600–1200 mm are used.

The electromechanical unit kit includes the following equipment (see photo):
- electric motor;
- reducer;
- rolling wheels;
- batch switch;
- handle;
- disk.
 Electromechanical machine diagram
 Gasoline-powered machines are used to carry out work in open areas.
Depending on the power and design of the gasoline unit, there are two types of gasoline-powered machines:
- Manual machines, which are controlled by a handle. Ideal for processing coatings on narrow and small areas of the floor.
 Manual petrol driven machine
 - Self-propelled twin-rotor trowels equipped with hydraulics for autonomous operation.
 Double-rotor petrol plant
 Use of manual slatted trowels for concrete placement
For small areas of the treated surface, small-sized manual trowels are used. The corners of their blades are rounded, and the handle of the tool is attached to the working plane.
 Concrete smoothing equipment
 The volume of processed coverages determines the size of the work area. Materials for manufacturing are light aluminum alloys. The working surface (blades) is characterized by a mirror finish.
Hand trowels are equipped with a cable reducer, with the help of which, when moving forward and backward, you can change the angle of the blade. The angle of inclination of the blade depends on the mobility of the mixture and can reach 60°.

Tools of this type are equipped with a telescopic rod (handle) with a maximum length of up to 12 m. The maximum effect when smoothing the concrete mixture is achieved by moving the unit along the concrete surface in directions perpendicular to each other - forward-backward, left-right.
Hints: When working on smoothing concrete, it is not recommended to immerse the blade in the material being processed.
Making a concrete trowel at a construction site
A factory tool is usually used for smoothing coatings on large objects, but for individual construction and disposable small volumes, you can make a do-it-yourself trowel.
To perform the work, you will need the following tools and materials:
- dry edged board 100–130 mm wide;
- beam size 50x50 mm;
- moisture resistant impregnation for wood;
- abrasive skin of medium grain;
- screws;
- plane;
- screwdriver;
- hacksaw.
 DIY manufacturing
 Instructions for making your own hands (see the video in this article):
- We cut the board of the desired size and process it with a planer.
- We cover the finished blank for the working part, cleaned with sandpaper, with moisture-resistant impregnation and set aside to dry.
- From a bar of 50x50 mm we make a handle. The optimal length of the handle is from 3 to 6 m.
- We make two struts for firmly attaching the handle to the base of the blade.
- Using screws and a screwdriver, we connect the handle to the blade and strengthen this connection with struts (struts). The ironing board is ready.
Hints: Instead of attaching the handle with struts, you can choose a ready-made factory-made swivel mount.
Concrete Trowel Applications
The technology for smoothing freshly laid concrete mix consists of three stages:
- The first stage is carried out using a trowel disc with a diameter of 600–1220 mm. When rotating, the smoothing disc eliminates all primary roughness and unevenness of the concrete surface.
- Then, smoothing blades with rounded edges are attached to the rotor. The tilt angle of the rotating blades can be adjusted from 0° to 30°. First, the blades are set to a horizontal position. Then, as the concrete mixture dries, the angle of inclination is increased.
 Trowel blades with round edges
 - When finishing the concrete surface, the finishing blades of a rectangular shape are attached to the rotor of the trowel and the maximum angle of inclination of the rotating blades of the trowel is set.
 Blades for finishing concrete surfaces
 Despite the simplicity of the work of trowels, you still need to follow some rules:
- Before starting concrete work on smoothing concrete, for electromechanical drives, it is necessary to check the electrical cable and the earth connection to the trowel. For gasoline vehicles, check for fuel or oil leaks and open the fuel supply valve.
- Install the disc or blades, adjust the desired angle of inclination.
- Upon completion of work: clean all parts of the unit, check the lubrication.

A clear advantage, when processing concrete surfaces, is behind an automated tool that makes it possible to achieve the best performance. However, in individual construction, a perfect surface is not always required. For example, in a garage, when carrying out concrete work, you can do a great job with a homemade tool.
However, it is up to you to decide which tool to use and on which objects. The purpose of this article was the actual question - how to make concrete smooth. For more information on this topic, watch the video in this article.


