The statistics are merciless: every Russian family has encountered breakdowns of a toilet flush tank at least once. Moreover, in most cases, you can repair or eliminate a leak with your own hands in a couple of minutes.
This article will help you understand the structure of this most important element in the house.
Content:
- Drainage tank device;
- How to adjust the water level in a toilet tank;
- Major breakdowns and their repair;
- Water is constantly flowing - we correct the situation;
- Shut-off valve repair;
- Leak at the junction of the tank and the toilet.
The toilet is a plumbing device that no city apartment (and most country houses) can do without.
It is used constantly, and therefore any problem, let alone breakdown, causes serious inconvenience. In most cases, it is possible to set up and repair a toilet tank without the help of a specialist.
You just need to understand how it works, what the individual elements in the drain tank are responsible for - and then it immediately becomes clear what the cause of possible problems is.
Tank drain device
Roughly speaking, the toilet consists of two parts - a bowl with a sewer hole and a tank for draining water.
It is in the flush cistern that the entire toilet mechanism is located, all the elements that drive it. By pressing a button or using a lever, we make a simple mechanical system inside the tank work.
As a result, water flows into the bowl and all waste is washed down the drain.
Toilets come in different sizes and flush types.
In some models, when you press a lever or button, the entire tank is emptied, splashing out all the water. In other tanks there are two buttons: depending on your needs, you can drain more or less water. There are low-lying cisterns that are attached directly to the toilet, others are hung on the wall and connected to the bowl with a flush pipe, and others are mounted into the wall (this saves space in the restroom).

The flushing system may also vary: some toilets supply water in a constant direction, while others change direction when flushing.
The second option is considered more convenient and hygienic, although there is more noise from such a device.
But nevertheless, the internal structure of tanks of any type is approximately the same. And, having understood the operating principles of one, if necessary, you can inspect and repair any other toilet tank.
The internal structure of the cistern consists of several elements:
- flush button;
- filling valve with float;
- drain fittings for the toilet cistern.

When you press a button in the cistern, the valve opens and water is emptied into the bowl, flushing the contents of the toilet.
At the same time, the liquid level in the tank becomes lower - and the float reacts to this, falling down along with the water. Reacting to the “readings” of the float, the filling system is activated - and water is again poured into the tank to the desired level.
The toilet tank leaks quite often, this is mainly due to poor-quality fittings (internals), dried out seals and other minor troubles.
Water level in the tank: how to adjust?
One of the most common problems with the flush cistern is the constant flow of water into the toilet.
This means that the water level is too high - the system has to continuously release excess liquid.
The opposite also happens: the drain is inconvenient to use because there is always too little water in the tank.
As a rule, the problem lies in the float - perhaps it is simply skewed.
In this case, the problem can be solved quickly and easily - the float needs to be corrected.

The float in the cistern usually comes in two varieties: on a brass lever and on a plastic lever with a special screw. To adjust the float on the brass lever, you simply need to gently lift it up and down a few times until it is clear in which position the mechanism will work optimally.
Raising the float increases the water level, lowering it lowers it.
As for the plastic lever, the level is adjusted by turning the screw (or using a plastic ratchet, with which the lever is set to the correct position).
Repair of the cistern: main breakdowns and their elimination
However, the malfunction of the drain system does not always depend on the position of the float.
Sometimes you have to understand the problem in more detail - but you can still carry out the simplest repair of the internal mechanism of the tank with your own hands.
The most common problems with the drainage system are:
- the tank leaks at the junction with the toilet bowl (does not hold water and is constantly filling);
- Water constantly flows into the toilet from the tank.
As a rule, the causes of the problem are the following:
- float failure;
- shut-off valve failure;
- poor sealing of pipes.
The toilet tank is leaking: what to do?
If water is constantly seeping into the toilet bowl from the tank, first you need to make sure that the problem is not solved by simply adjusting the float.
If you tried to move and adjust the lever, the tank still does not hold water, then you need to inspect the float itself: there is probably a hole in it or a special membrane has become unusable.

The simplest thing you can do if you find a hole in a float is to simply cover it with a plastic “patch” or wrap the float in a bag.
Water will stop getting inside, and the problem will be resolved for some time. However, it is better to replace the float at the first opportunity - such a makeshift repair is unlikely to last long.
How to change the float?
- first of all, it is necessary to shut off the water flowing into the toilet tank, and then completely empty the tank;
- after this, the pipe through which water entered the tank is removed, and the damaged float is removed, and a new one is put in its place;
- the float is installed in the desired position, after which you can replace the pipe, start the water supply again and make sure that the problem is solved.
Stop Valve Repair
There are two ways to fix a broken shut-off device (toilet valve) in the tank: replace only the membrane inside the mechanism or change the valve completely.
To change the membrane, you also need to remove all water from the tank, disassemble the shut-off valve, remove the protective cap and pull out the membrane itself.
Theoretically, you can simply wash it. However, experts recommend replacement, since the membrane is generally the “weak point” of the drain system, and the first malfunction will certainly be followed by others.
If the shut-off valve needs to be replaced entirely, the water supply to the toilet tank will also be cut off first.
After this, the remaining liquid in it is poured out of the tank, the lever is first disconnected from the mechanism, and then the valve itself, secured with fastening nuts, is unscrewed from the water pipe.
A new fitting for the tank is installed in its place, after which the water is turned on, the toilet tank is refilled and the float is installed in the correct position.
The tank is leaking at the junction with the toilet
If water oozes from the place where the tank connects to the toilet bowl, then most likely the problem is a poor seal.
As a rule, in this case, it is enough to tighten the bolts that secure the tank to the toilet more tightly, or change the rubber gaskets - they may have dried out.
It happens that the gasket at the point where the tank is attached to the toilet comes across a manufacturing defect. This is not very good news - however, you can simply coat it with a sealing compound, and the leak will be eliminated.

Condensation on the toilet cistern causes many problems - but you can get rid of it only by properly organizing the air movement in the toilet, i.e.
check the ventilation openings.
To summarize, we can say that a toilet tank is a simple device that works according to the simplest laws of mechanics. All malfunctions that arise in its operation are eliminated quickly and easily, and it is not always necessary to buy new parts.
Thus, having understood the operation of your cistern, you can no longer waste money and time on plumbers, solving all problems yourself.
How a flush tank with a button works: principle of operation and device
Since the times of Ancient Rome, the presence of plumbing fixtures in the house was considered a sign of civilization. A special place was occupied by the sewerage system and the “latrine”, which today successfully replaces the toilet with a comfortable toilet. We are so accustomed to comfort that the slightest change in the operation of the toilet and its cistern leads to confusion and anxiety.
Therefore, when choosing a model for your home, we choose the most reliable designs, which include toilets with push-button flush tanks.

Toilet cistern device with a button: design features
The device of the flush tank with a button of all models has common features.
They differ only in the material of manufacture, price, quality and features of the working parts. The tanks operate on the same principle; the only differences are in the mechanism, which can be:
- one-button;
- two-button;
- with a dual-mode device.
The most modern model is a two-button system, which allows you to save water when flushing.
Pressing one button - a complete flush, during which all the water contained in it flows out of the tank. Pressing two buttons drains only part of the water volume.
Models may also differ in flushing features. In some, the water, when flushed into the toilet, comes directly from the flush cistern, moving in one direction.
In others, the water flow is divided, flushing is carried out from different sides. Such tanks are considered the most effective, as they cover the largest flush area, but are also noisier.
When purchasing this device, you need to have an idea of how a toilet flush cistern with a button works, and to know what its structure consists of.
The mechanism of operation of any model is quite simple and consists of drawing a certain volume of water from the water supply and flushing it into the sewer through the toilet.

The operating principle of a toilet cistern with a button is a water seal system, which consists of a float, levers and a seal.
Pressing the button on the lid activates the water drainage mechanism, which is the main purpose of this plumbing fixture.
Operating principle of the drain mechanism
By pressing the button on the lid, we force the tank system to start working.
The device of a toilet cistern with a button, the diagram of which is presented in picture below, is directly related to the filling of the container. Before starting work, the tank is in standby mode.
The container already contains the required volume of water, which is limited by the level of the float. The water in the tank is kept from flowing out by a special bulb, which is made of elastic and durable rubber.
Do-it-yourself toilet cistern repair with a button
Pressing the button puts pressure on the pull lever, which pushes the bulb away, thereby opening the drain.

When we release the button, the pear gradually begins to return to its place.
When assembling the internal filling of a sanitary device, this feature of the functioning of the pear should be taken into account. Its abrupt return to its original position results in a short-term and incomplete drain. When properly assembled and adjusted, the process of lowering the bulb is slow, it is completely hollow inside.
As the tank fills with water, the lifting force of this bulb decreases, and in the end it takes its original position, sticking to the saddle.
Tank flush mechanism with button
The cistern functions through the operation of two systems: one that collects water and one that drains it.
The first is called inlet, and its mechanism of action is quite simple. It lets water into the tank at the moment when there is no liquid in it. Filling proceeds to a certain level, which is set by adjusting the reinforcement.
The fittings may have different types, but their operating principle is the same - float. By adjusting the float level, you can adjust the degree of filling of the tank.

Outlet fittings, the purpose of which is to drain water, help to maintain control over the drainage process.
Its design can occupy several positions during operation. In some models, the outlet fittings can operate in two modes: economical and standard.
In addition, the outlet valve mechanism has an emergency drain function, which can be used in emergency situations.
If some exhaust components stop working in the required mode, then the entire fittings have to be replaced.
Problems in the operation of toilets mainly arise due to malfunctions of the inlet and outlet systems. Therefore, in order to troubleshoot, you need to find out which of the systems has stopped working, either by replacing individual components or using a complete set.
The most common breakdowns
- Water enters the tank very slowly.
The problem is caused by a clogged membrane, the fix is to clear the inlet of debris and dirt. But to do this, it is necessary to carefully dismantle the reinforcement, and then also carefully return it to its original position.
- There is too much liquid in the tank, to the point of overflowing.
The reason lies in the incorrect setting of the float level. The solution to the problem is to adjust the float fittings to such an extent that the float drops.
- Float levers are broken. The reason is the wear of the mechanism; such a malfunction cannot be repaired, so the solution is to replace the fittings.
Drain tanks with a button are the most common and easy-to-use plumbing fixtures. Knowledge of the design and operating principle of waste cisterns will allow you to choose the most convenient and reliable models for your home.
How to fix a leaking toilet with a button on the cistern
If a broken tank lets water through, it not only causes inconvenience in the operation of the structure.
An additional cost item will be a large volume of leaking water. In more serious cases, such problems lead to a flood in the apartment.
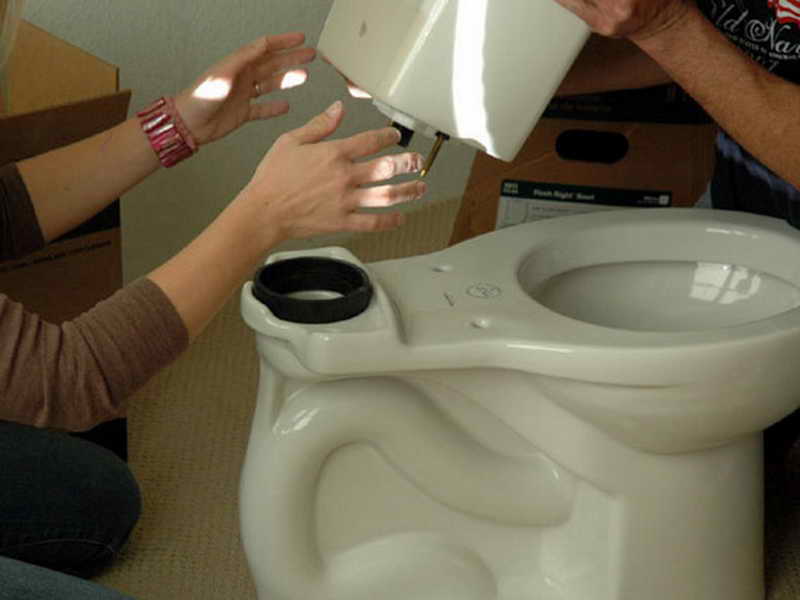
Plumbing fixture installation
Before you fix a leaking toilet with a button, you need to understand the entire device.
The design of a conventional household toilet consists of a bowl and a cistern. The latter device can be attached to the toilet step, mounted separately on the wall or embedded on a special frame.
The cistern works according to this principle:
- when the drain button is pressed, the shut-off valve rises;
- water receives free flow into the cavity of the toilet bowl;
- through evenly distributed holes under the rim of the bowl, the water flow washes the entire cavity along the perimeter;
- when all the water has left the tank, another valve opens, allowing pressure from the cold water supply pipe to the apartment;
- The level of collected water in the tank is regulated using a float.
Under the tank lid there is the fittings of the entire device: a float to control the level of collected water, seals and levers for supplying and cutting off the water flow.

The shut-off valve is responsible for the water supply.
It is attached to the path of connecting the hose for supplying water to the tank. Its operating system includes a float and a membrane.
Tanks with economical water consumption require the presence of two buttons in their device - for small and large drainage. The operating mechanism is no different from standard tanks.
Preparing plumbing for repairs
At the first stage, the tap supplying water to the container is turned off.
Depending on the installed taps, you can deprive the entire apartment of water or turn off the flow only to the tank. If the water shut-off mechanism is damaged, there is a risk of causing a flood in the apartment.
At the second stage, open the tank lid. Here you need to carefully consider the available latches. If the structure is broken by force, it will be difficult to find a similar cover (plumbing stores sell completely assembled kits, not individual components).
Before you start repairing a leaking toilet with a flush button yourself, you need to prepare the necessary tools:
open-end wrenches of several sizes;
- screwdriver;
- pliers;
- tape with adhesive backing for insulation.
Eliminating persistent leaks
Any model of tank is equipped with a system that collects water and a drainage device.
If the container is not filled to the required level, water constantly flows into the bowl or even overflows from the top, then the problem lies in the water accumulation or drainage systems.

A possible problem lies in the bulb, which does not fit tightly enough to the drain hole. In this case, a small load is hung on the pear.
Water does not flow into the tank container
This problem occurs when debris gets into the narrow part of the valve device.
First you will need to drain all the water from the tank. Remove the valve with lever and float completely.
Toilet cistern repair - faults and their elimination
Then you can see the clogged hole. Through this passage, water is drawn into the reservoir. You can clean out the debris with a thin wire or a sewing needle.
The valve on the inlet fitting is slightly unscrewed and the inside is washed with a stream of water. If, after removing the blockage, water flows without obstacles, then you can screw the clamp back and reassemble the entire mechanism.
Troubleshooting a flush tank with a push-button mechanism
The tank button is responsible for draining water into the bowl itself. After the draining process is completed, the float remains at the bottom of the device.
The shut-off valve also comes to this position, opening a hole for water to enter. As water enters the tank, it raises the float.
Under this action, the lever also begins to move.
Rising to the desired level, the lever and the float device occupy a certain position. In this case, the shut-off valve tightly covers the through hole of the pipe and water stops flowing.
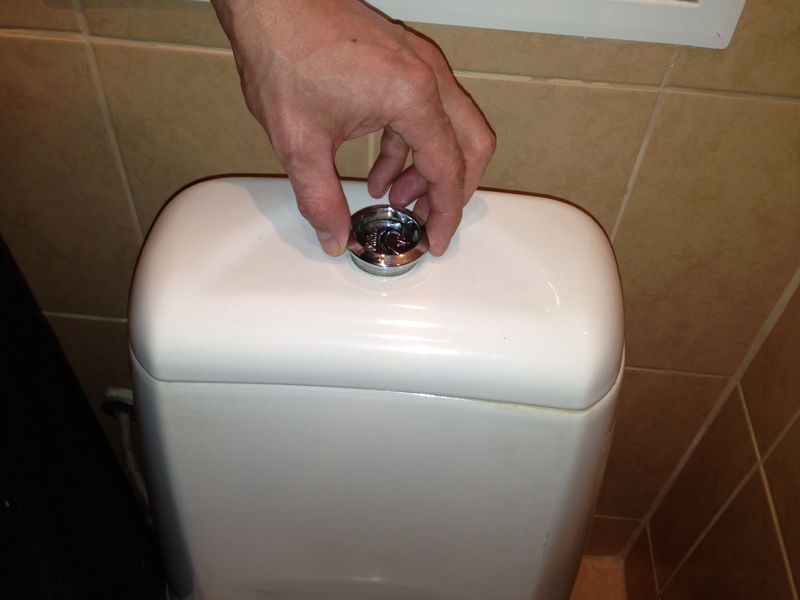
If a toilet tank with a flush button on the lid is leaking, then you need to do the following:
- Find the retaining ring located around the drain button.
- Press the button all the way and unscrew the plastic stopper.
- Remove the cover and begin repairs.
The button locking devices are made of plastic.
Excessive mechanical stress on this element can lead to damage to the device.
Water can flow in a continuous stream and constantly flows from the installed tank onto the toilet step with a button. In this case, you need to check the position of the float. To do this, open the tank lid and level the floating element.
In another case, water may constantly leak into the bowl due to an open hole in the drain pipe.
You can check the version by clicking on the pear. If the jet stops, the reason has been clarified. The problem is solved by weighing the pear - by hanging additional weight.
If the rubber bulb in the shut-off valve device fails, the tightness of the entire tank structure is compromised.
The solution to the problem is to replace the damaged element. To do this, the float is brought to the upper position and fixed in this state. Unscrew the connecting nut from the container and remove the mechanism. Remove the worn bulb from the valve and install a new one.
The new pear should be chosen as softly as possible.
In this case, the dimensions of the products must match.
Check the fixing bolts for the bulb.
If they also become unusable, then you should purchase new ones and install them:
- water is completely removed from the tank;
- between the valve near the float and the liner there is a union nut that needs to be unscrewed and removed;
- the ear-shaped clamps of the tank to the toilet shelf are unscrewed;
- slightly tilting the tank back, carefully remove the rubber connecting layer between the container and the installed toilet bowl;
- damaged bolts are removed;
- the area of earthenware under the pear is well cleaned of accumulated plaque and dirt; the shelf and top of the tank are also washed;
- if an old pear is installed back, then silicone must be applied to its surface for a tighter connection with the hole;
- all elements of the tank are installed in their place, and fixed with bolts;
- the connecting cuff is installed in its place;
- water is pumped into the tank several times in a row to fully check the result of the work.

If only one fixing bolt has become unusable, then you still need to buy both.
These elements must be the same in structure and length.
Overflow problem
If a water leak is detected in the tank through the overflow hole, and restoring the position of the lever does not help, then check the condition of the fixing pins. The unusable element can be replaced with a piece of copper wire. The thickness of the broken and new elements must match.
If the hole where the pin was placed is no longer round, then the valve will have to be replaced.
It is important to purchase a completely similar new item.
Toilet flush column: types, tank configuration, types of mechanisms, installation instructions, problems
It is now impossible to imagine any apartment or house without a bathroom. Soviet toilet models most often had metal components; they served for a long time and efficiently. In modern models, most parts are made of plastic. The toilet flush column is an integral part of it.
Despite the simplicity of the device, it fails quite often.
If you study the structure of the drain tank at least a little, then installing or repairing it yourself will not be particularly difficult.
Types of drain columns
The range of this equipment in plumbing stores is quite large.
To purchase a high-quality model that will serve you for a long time, you need to have a good understanding and know how they differ from each other.
The very first thing that immediately catches your eye is the material from which the tanks are made; they come in:
- Cast iron.
- Plastic.
- Earthenware.
Plastic drain column
Cast iron models are very reliable, but they cannot boast of their attractiveness.
Plastic speakers are very easy to install, but they also fail quickly. Faience cisterns are the most represented; they combine several qualities at once: reliability, ease of installation, a wide selection of shapes and even colors.
One toilet flush column differs from another in its flush valve. There are two of them:
If the release device is located at the top of the tank, then there is also a special button.
Those speakers that are attached at a certain height have a lateral trigger mechanism. Everyone has probably seen a rope or chain attached.
The trigger mechanism for both types is mechanical and manual.
If the mechanism is manual, then you can always adjust the amount of water used.
Complete set of the cistern
Despite the wide variety of drain columns, there is no fundamental difference in the device; each one necessarily has:
- Valve responsible for water supply.
- Drain design.
- Overflow.
Complete set of drain column
The main function of the filling valve is to let water into the column in a dosed manner.
In most designs, the water level indicator is a float. In older models, this mechanism was made of brass, and quite often this is what they are made of now.
Technology does not stand still, so now the designs are different, but the general mechanism of operation has not changed.
The name itself already makes clear the purpose of the drain mechanism. It can be implemented in different ways, be it pressing a button or pulling a string. Recently, tanks have become widespread that have an economical drain, when after pressing, not all the water is poured out, but only half of it.
Overflow must be mandatory to protect against accidental overfilling of the tank. It is usually combined with a drain mechanism.
Types of drain mechanism
The drain mechanism of the tank can be of several varieties:
- Bell.
- Corrugation.
- Pear.
The first variety is considered the oldest and can currently be found in tanks that are mounted high and made of cast iron.
A chain or rope is attached to such tanks, we pull it and with this lever we lift the bell, which is represented by a cork with a gasket.

Draining water
Water passes through the drain into the pipe.
Then the bell lowers, creating a rarefied space that sucks out the remaining water. What’s interesting is that such designs are very reliable; periodically you only need to change the gasket, and this can be done with your own hands.
A drain mechanism in the form of a corrugation can be found much less often.
The reason is that it has little strength, so it becomes unusable very quickly.
The latter pear-shaped variety was previously often located on the wall, but now such flush mechanisms have migrated along with the tanks to the toilet itself. The mechanism of operation of such a device is quite clear: a rubber bulb clogs the drain hole until you move it by pulling the string.
Modern models have a radically changed pear-shaped mechanism, but the principle of operation remains virtually the same.
Installation and appearance have also changed significantly.
The process of installing a drain column
If we consider this process, then installing a tank consists of several stages:
Tank installation methods
It turns out that the drain column can be installed in different ways. Installation instructions vary depending on the location of the tank.
The first option provides for the location of the tank almost under the ceiling.
It will be connected to the toilet through a long pipe. Such designs are not very common at present, but they provide maximum water pressure when draining.
The second method is what we see most often.
This is what is used in almost every apartment. In this case, the tank is located on the toilet itself. The convenience of this location is that everything is within easy reach. If necessary, you can easily dismantle or replace worn parts.
In the third option, the tank is built into the wall itself. This design has a significant drawback - if the tank breaks, you will have to practically dismantle the wall.
But there are no minuses without pluses, this will be especially noticeable if such a tank is located in a combined bathroom. Due to the built-in design, free space is freed up.
Damage to the cistern
If you open the cover of the drain column, you will be able to see everything that is main in this entire structure.
When a breakdown occurs, it is this fitting that fails.
A common problem that almost everyone encounters after some time of operation of the drain column is the flow of water into the tank without interruption. This can happen for several reasons:
- The float lever is a little skewed. It will be enough to place the lever in a horizontal position and everything will return to normal.
- The float is damaged.
There is nothing left to do but change the float.
- The valve has failed. If repair is impossible, then you need to buy and install a new one.
Sometimes it happens that water constantly flows into the tank.
We can conclude that the siphon membrane is damaged, and it must be replaced to eliminate this problem.
If the levers become unusable, it is almost impossible to repair them yourself, since most often they are made of plastic.
You just have to buy a new kit and install it.
If water leaks through the valve, then this problem can be caused by two reasons:
- It is necessary to replace the rubber membrane, which has become unusable. You need to remove the part on which the gasket is located, to do this, turn it counterclockwise.
- If a lot of debris accumulates under the valve, this will also cause problems in operation.
During repair work, it is necessary to turn off the water so that it does not interfere with the repair of the breakdown.
After all repair procedures are completed, you need to make sure that the overflow device is installed correctly.
Toilet cistern button: principle of operation, replacement, repair
In tanks with a side-mounted shut-off valve, for convenience, it is possible to mount it on both sides. There are two holes in the tank: one is free, and the locking mechanism is inserted into the other. If it becomes unusable, water will begin to flow directly onto the floor.
Dispensers with top water supply are characterized by loud noise during the process of filling the tank.
But this problem can also be overcome. To do this, you can put a piece of rubber tube on the stop valve nozzle so that it reaches the very bottom. If you have a little time, desire, and skills, then it is possible to ensure the efficient and uninterrupted functioning of the bathroom on your own.
Previously, when you pressed the button on the drain tank fittings, the button sunk all the way and the entire volume of water in the tank was drained. Now the water is partially drained, only for the period of forced pressing and holding the drain button. To completely drain the water from the tank, you need to hold down the drain button for a few seconds. How is the normal mode of water drainage and the one described above regulated or established?
Sergey
Expert answer
Good afternoon, Sergey!
To eliminate the cause of the malfunction, you will have to remove the tank cap. Most often, it does not have additional fasteners and is kept from moving only by one button, which must be unscrewed counterclockwise. After accessing the interior, carefully inspect the drain drive. Unfortunately, you did not indicate its type, so we will try to describe a way to fix the problem using one of the common designs (see figure below).
Very often the malfunction you described occurs due to spontaneous displacement of the pressing rod. In the picture it is represented by a red detail. In addition, excessive force when pressing the button could cause the locking ring to move (the blue round part). Less commonly, this type of trouble occurs when moving the tongue of the drain mode switch (indicated by an arrow).
Repairing the drain mechanism in this case is simple - just fix the rod one or two notches higher, install the stopper in the recess on the body of the internal pipe, and return the tongue to its place.
If the malfunction is caused by damage to parts of the drain fittings, then you can try to restore them using epoxy resin or replace the entire assembly. Fortunately, the drain mechanism has a low cost, and you can find it in any construction market.
Most modern toilets are equipped with push-button flush mechanisms. They are easy to use and quite practical.
However, during intensive use, any mechanism can fail and begin to work incorrectly.
As a rule, this is expressed in the form of constant leaks (the shutter stops holding water in the tank) and jamming/sticking of the flush button. There can be two reasons for such troubles.
- Firstly, some elements of the drain mechanism wear out and become unusable.
- Secondly, during the operation of the toilet, the settings of the flush tank fittings may become confused, which is why the entire mechanism begins to work intermittently.
If, after pressing the toilet cistern button, the flush valve does not always go into place, this does not mean that you will have to call a plumber or buy a new set of fittings.
In most cases, the problem is resolved in 5 minutes with a simple adjustment.
We will tell you in detail how to repair a toilet flush system yourself in this review.
To begin with, we will briefly talk about the structure of the “filling” of the flush cistern of any modern toilet - the so-called fittings.
Construction of a modern toilet cistern system
The design, regardless of the brand and country of manufacture, has three main structural elements: a water supply/receipt mechanism, a drain mechanism and overflow protection.
- The tank filling system itself can be with a bottom or side feed (the most common option), but in any case, the mechanism works on the principle of a float valve: when the water in the tank rises to a predetermined level, the float closes the valve and the water supply stops.
- When you press the button, the drain valve rises, opening the drain hole.
- If for some reason the float gets stuck, the overflow system will help prevent a flood - excess water will flow through the tube into the toilet.
Instructions - how to fix a stuck toilet button
To eliminate the cause of the malfunction you must:
- Remove the reservoir cap. In most cases, it does not have additional fasteners and is held directly by the plastic housing of the flush button, which must be unscrewed (counterclockwise). To unscrew the toilet cistern flush button no special key is needed - this is done by hand.
- Carry out an inspection. Having gained access to the “filling” of the tank, you should carefully inspect the drain mechanism drive for damage and distortions.. Often the problem with a button sticking occurs due to accidental displacement of the pressing rod. Excessive force when pressing the button can also provoke a shift in the adjustment mechanism.
- Adjust the drain mechanism. If tank button failed, the height of the drainage device (flush valve) may need to be adjusted. Many modern models of push-button toilets use a two-level flush system - in this case, it is necessary to adjust the low and full flush. To do this, you need to move the lock on the rod several positions up or down (this is determined logically depending on the specific model of the valve).
- Often the cause of drain failure is rust and other mechanical suspensions, which are deposited over time on the working parts of the fittings, complicating its normal functioning. In this case the problem can be eliminated by simply cleaning the working units from these deposits.
 Removable toilet flush buttons
If the malfunction is caused by mechanical damage (breakage) of parts of the drain fittings, the simplest and surest solution would be to completely replace the fittings (it is unlikely that it will be possible to glue plastic parts together).
Replacing the drain mechanism is not difficult, since it has a standard design and is sold assembled, moreover, it is already adjusted.
The main thing is to choose the right method of supplying water (bottom supply or side supply). If any questions arise during the replacement process, then just refer to the instructions that are included in each kit. You should not buy cheap Chinese drain mechanisms; a high-quality set costs from 600 rubles.
VIDEO INSTRUCTIONS
The answer to a frequently asked question: why are two buttons needed on the toilet cistern?
The toilet flush cistern is one of the most active consumers of water in the house. When you press the button each time, all the water accumulated in the tank goes down the drain.
In order to save money, manufacturers of plumbing equipment have developed two-button drain fittings, which are designed to minimize water consumption. This system involves two drainage options: small and large.
When you press one (small) button, part of the water from the tank is drained (the volume of water supply is adjustable), when you press the second button, all the water is released.
The bathroom is one of the most frequently visited places in the house. Contrary to popular belief, the toilet is not the dirtiest place if it is properly cared for. But one of the unpleasant situations that can happen to it is a tank leak. This leads to the formation of plaque on the inner walls of the toilet, which is not so easy to remove. It also increases water supply costs, which can add up to a hefty sum over the course of a year. Therefore, it is important to know how to fix common problems. The article is precisely devoted to their elimination.
How the tank works
Before you repair something, you need to find out how the mechanism functions. This rule also applies to push-button toilets. It is important to understand how shut-off and storage valves work. The main task of the drain tank is to supply the required amount of liquid into the bowl for washing it. The material used to make the tank can be ceramic, plastic or metal. In some cases, stainless steel is used, which lasts a very long time. There are actually two mechanisms in the toilet cistern. One of them is responsible for ensuring that water flows into the tank itself from the supply system. Another system regulates the release of accumulated water into the toilet base.

When the water level in the tank reaches the required level, the supply is stopped due to the float switch. It rises to a certain height and blocks the hole from which the liquid flows. The flush mechanism on push-button toilets can be of two types. The first is called siphon. It is most often used in plastic containers with a button that protrudes above the lid. The essence of the operation is that when you press a button on the toilet cistern, a small vacuum is created. It causes the flow to move towards the bowl. The second type of mechanism is also called a pear. The essence of its functioning is that a small rubber bulb closes the drain hole. As soon as the key is pressed, the locking mechanism opens the hole slightly and the water flows out.
Additionally, an overflow mechanism is provided. If the water level in the tank exceeds the permissible level, excess water is discharged into the toilet. On most modern toilets you can see two buttons. One of them is slightly larger than the second. When pressed, different volumes of water are supplied, which allows you to save consumption while meeting different needs.
Common problems
Experience shows that tank failures concern the same components, so it is easy to distinguish several categories. They are:
- constant flow of water through the overflow;
- button failure;
- insufficient tightness of the shutter;
- tank distortion;
If the problem is discovered immediately after installing the toilet, then most likely an error was made during the process. If a leak or other malfunction is detected after several months of normal operation, then one of the components may have failed. Each of the special cases will be discussed below.
Continuous supply of water

Some users observe continuous and prolonged filling of the toilet tank, which is accompanied by water leakage. This indicates that the container is overfilled. One of the reasons for this problem may be a leaky gasket on the intake valve. If it bursts or loses its shape, then it is unable to firmly close the hole and filling occurs through it. The gasket may be in excellent condition, but the problem is still observed. The reason for a poor fit may lie in the curvature of the float support or its incorrect adjustment. If the float mounting bar is metal, then it may fail due to corrosion. The valve itself may also fail. This often happens when assembling products with plastic fittings. It is very easy to damage it by excessive force when tightening the nut.
How to fix
The first step is to carefully examine the external condition of the entire mechanism. To do this, carefully remove the lid. If we are talking about modern toilets, then you may have to first unscrew the button that locks the lid in place. Now you need to slightly raise the rod on which the float is located. Usually a little effort is enough to do this. If after this the water stops filling the tank, then the problem is the incorrect position of the lever. To solve this situation, just bend the lever a little so that the float is lower. Most mechanisms have a special lever that allows you to do this.

If the leak does not stop after the above actions, you need to take a closer look at the place where the lever connects to the valve, which should close the inflow. The problem may be with the locking pin. If this is the case, then it is enough to replace it with ordinary copper wire. But she may be fine, so it makes sense to inspect the hole through which the influx occurs. Perhaps it is clogged and prevents the rod from closing it completely. If the structure is made of plastic, then deformation is possible, which bends the hole and the rod cannot move freely in it. If loosening cannot eliminate the deformation, then the valve will have to be replaced.

The cause of the leak may be a leaky gasket. This can be checked by pressing the rod harder against the hole. If the leak has stopped, then it makes sense to replace the gasket with a new one. In some versions of modern locking mechanisms, the valve is located in a plastic casing, so it cannot be easily inspected. This can be done by completely dismantling the unit. To test it according to the above scheme, just hold it over the tank with the hose connected.
Loosening Bolts

In modern toilets, the tank is located directly on the bowl; there is no pipe between them that connects them. The exception is those options in which the tank is mounted in a false wall. The tank is fixed to the bowl using bolts. Over time, they can weaken or fail due to rust. In this case, the tightness of the junction unit is broken, and water can leak onto the floor through the gap. Such a leak can be difficult to notice, because water flows out in small portions.
What to do with bolts

To resolve the issue that arises due to the bolts, you must first turn off the water supply. You should not immediately empty the tank; you need to carefully inspect the place where the leak is observed. After this, the tank is emptied and a complete set of bolts is purchased. There is no point in changing only one, because after a short time others may be damaged. The bolts are unscrewed. You should be extremely careful not to damage the bowl and tank, especially if they are made of ceramic. If the bolts are metal, then they can be pre-treated with a special compound that will remove rust and allow you to unscrew the nuts without much difficulty.
The head of the bolt is inside the tank, so you will have to remove the shutoff valve to get to them. You need to hold the head with one key to prevent it from turning. The tank is removed from its place and the junction unit is cleaned of rust. Carefully inspect the elastic band, if there is one. When assembling the tank, it is advisable to coat it with silicone sealant. The rubber gaskets that are located under the bolt heads are also replaced with new ones. The tank must be positioned absolutely level so that misalignment does not cause problems. The bolts are tightened with special care so that they do not split the toilet bowl and the tank itself.
Pay attention! The problem may not be in the bolts themselves that secure the tank to the toilet, but in the rubber seal that is located at the junction. Therefore, it is advisable to replace the rubber together with the bolts, and vice versa.
Stopper bulb

The shut-off valve that allows water to flow into the tank may be fine, but sometimes water still leaks out. The problem may lie in the bulb, which is located on the shut-off hole between the tank and the toilet bowl. Over time, exposure to water may cause the pear to lose its elasticity and become too hard. It is no longer able to take the shape of the hole and leakage occurs. It is not possible to restore such an element, so it is better to completely replace it. When buying, it is better to take one that has a little rigidity. It is she who will last in the tank longer than others. Usually the bulb has a thread, thanks to which it is screwed onto the stem. Sometimes it can be sold complete with a stem. If at the moment it is not possible to buy a bulb for the toilet tank, you can use a trick and tie a small weight to the rod, which will put pressure on it, increasing the area of contact with the opening of the tank.
Pull, locking mechanism

One of the troubles that can arise with a modern toilet is that the flush key cannot be pressed. This is usually due to the fact that the traction is damaged. Often the locking mechanism itself fails. They cannot be restored, so you will have to replace part or all of the locking mechanism. Before you buy a ready-made one in a store, you need to know exactly which one was used, since there are many types. It is necessary to turn off the power to the toilet tank, drain the water from it and remove it by unscrewing the bolts. The supply hose is unscrewed, as well as the nut that secures the hose pipe. There is a plastic nut at the bottom of the tank that holds the locking mechanism in place. It must be unscrewed and all components of the locking mechanism removed.
It will serve as a sample for purchasing a similar one. It's better to take it with you to the store to check all the details. Often the new mechanism may be slightly longer than the previous one and will not fit into the tank. Some universal kits have special adjustment bars that make it possible to increase or decrease the distance from the release key to the base of the locking mechanism for the tank. When assembling, it is important to install all gaskets in their place and, if necessary, treat the joints with silicone.
Other possible breakdowns

The cause of a leak from the tank may be cracks in the body of the tank. They appear when used incorrectly. For example, you can push the cistern back a lot while sitting on the toilet. Damage occurs when the tank and toilet are tightly tightened with bolts. If such a problem occurs, then it is necessary to dismantle the tank, clean it well and dry it. After this, all cracks in the tank are sealed with high-quality sealant. After it hardens, you can install the container on the toilet. If the leak is no longer observed, then it can be used. The tank may need to be replaced.
The tank needs to be serviced periodically to ensure it lasts longer. It is important to regularly remove rust and plaque from it, which accumulate due to poor-quality tap water. To do this, you can use special cleaning products. But you should be careful, because some of them have a negative effect on the rubber components of the locking mechanism. It is important that there are no sudden drops in temperature in the toilet room, during which the water in the tank and toilet will freeze. This can lead to damage not only to the mechanism, but also to the toilet bowl. For more tips on tank repair, watch the video below.
Conclusion
If in the process of repairing a tank with a button the entire mechanism needs to be replaced, then for premium toilets the price per set can reach 4 thousand rubles. You should be prepared for this when purchasing expensive plumbing fixtures. The article lists several main reasons that lead to leaks. Most often, you can eliminate them yourself using improvised means. When using wire for the tank, select samples made of non-ferrous metals, not steel. Since the latter will become an additional source of rust in the tank.
Modern plumbing fixtures are quite reliable equipment. But, like any technical devices, sooner or later they can also fail. And often this happens at the most inopportune moment. For example, when you come home from work in the evening, you suddenly discover that the toilet tank is leaking.
What to do? It's too late to call a plumber. And usually there is no need, because most of the malfunctions that lead to tank leaks can be dealt with on your own, saving on the labor costs of a technician.
But first you need to carry out diagnostics and determine the causes of the problem. First of all, to do this, you need to remove the lid from the toilet's storage tank.
The most common modern design is the “compact”, which involves installing the tank directly on the toilet. Control mechanisms were initially produced in two types: a ball attached to a retractable rod attached to - a rubber plug that covers the drain hole and a lever located on the side of the container.
Today, almost all manufacturers have switched to producing push-button models of tanks. There are two main types of these modifications:
- with one button;
- with two buttons or one button divided into segments.
The second variation involves a slightly more complex design of valves for controlling drainage processes, but pays off quite quickly due to the possibility of choosing one of the modes:
- when you press one button, the tank is completely emptied;
- when the second is activated, it is partial, which allows you to significantly save on water consumption.
You can learn more about the principle of operation from the materials on our website.
How to open (remove the cover)?
Modifications are currently being made that allow the cover to be removed without any additional operations. The buttons are equipped with rods, transmitting force to the control elements of the tank fittings.
But most plumbing manufacturers continue to produce models that require some manipulations to remove the cover.
To remove the cover in one-button modifications you need to apply moderate pressure on the ring surrounding the button and turn it in the direction opposite to the clockwise movement.
If this operation does not succeed immediately, you should drop a couple of drops of any liquid oil or use a screwdriver, pressing its tip onto the ring and turning it. Once the ring comes off, it can usually be easily unscrewed by hand.
Next, you should carefully move the cover to a position perpendicular to its normal position, and carefully release the button block from the plastic clothespins. After this you can remove the lid from the tank and set aside.
How to disassemble (open) a toilet cistern with a button for subsequent repairs with your own hands - learn from a short video:
To dismantle a cover equipped with a two-button block, it is usually just press any button, after which the technological groove on the adjacent button will become available. All that remains is to pick out this button and remove it, and then dismantle the second one. Then unscrew the fixing screw and remove the cover.
Basic breakdowns and repair methods
Before repairing a toilet with a button, it is important to figure out what exactly the problem is. Regardless of the type of toilet flush tank, There are three main problems with the operation of this plumbing equipment:
- into the sewer system or indoors;
- inability to control the drain mechanism.
These malfunctions can occur for various reasons, depending on which it is decided how to repair a toilet cistern with a button:

- Loose fit of the bulb (plug) to the drain hole. You can minimize the likelihood of such a situation occurring by initially purchasing reliable plumbing fixtures from well-known manufacturers.
Diagnostics is carried out as follows: after removing the cover, additional force is applied to the plug rod, pressing it against the drain hole. If the leak is fixed, the situation can be corrected by making the plug slightly heavier by hanging additional weight on the stem in the form of stainless metal nuts, for example.
If the leak does not stop, you should replace the plug or clean the surface of the drain hole from deposits problems that arise during operation (especially when using too hard water).
- It's also possible malfunction of the mechanism regulating the supply of water to the container. In this case, the constantly incoming water is discharged into the sewer system through the overflow pipe.
In this case it is necessary pay attention to the integrity of the reinforcement structural elements: rods, fasteners, float, inlet valve and, if necessary, replace/repair them. Or simply adjust the position of the float, and then securely fix it.
- Leaking indoors is caused by two reasons: violation of the integrity of the tank itself or a loose fit at the place of threaded connections - at the junction of the tank with the toilet or the outlet of the overflow tube.
Sometimes it is enough to tighten a loose connection, but more often it appears need to replace rubber gaskets.
- Lack or insufficient water pressure at the inlet to the tank usually caused by a clogged intake valve. To avoid this situation, it is necessary to install a water filter before the connection point to the water supply system.
If such a problem occurs, you should unscrew the valve, first releasing all the water from the container and closing the inlet valve. After which clean the valve inlet a ton of wire or a sewing needle and rinse under running water.
Specific malfunctions of two-button models
To implement the principle of full/partial drainage, the fittings in two-button tank models are equipped with a diaphragm valve. When you press the economy flush button the lever prevents the valve cover from moving to the bottom position, which ensures partial emptying of the tank.
The main malfunctions of two-button tanks are:

- Constant water flow. Occurs as a result of wear of the locking membrane. To fix this problem, you need to replace the membrane itself.
- Recession of control buttons in the drain tank, which is the most common defect, usually appearing after a certain period of equipment operation due to wear and tear. To avoid this situation, do not use excessive force when pressing the buttons. The problem can be resolved by removing the lid from the tank and returning the buttons to their normal position.
- When the buttons are activated, nothing happens, that is, the water remains in the container. The cause of this problem is usually the breakdown of the elements of the lever mechanism or their separation. How to repair a flush tank with a button in this case? You can correct the situation by securing the hooks in the correct position or replacing broken parts.
How to regulate the water supply yourself?
The filling level of the toilet tank is regulated the same in all modifications - by setting the correct float position. Its correct position is considered to be one in which the flow of water into the container completely stops upon reaching a level that is a few centimeters short of the edge of the tank.
Depending on the design of the fittings, adjustment is carried out by bending the brass rod, sliding the float along the plastic guide, followed by fastening (if it is horizontal) or rotating the adjusting screw clockwise (if necessary, reduce the filling level) or against (if you need to reduce the maximum level) - for modifications with a vertical float layout.
The filling level of the container is also influenced by overflow tube position. Its upper edge should be located one to two centimeters above the water level in a completely filled tank.
To adjust the height of the flush valve in single-button models of toilet tanks, after dismantling the control button and removing the cover, move the control rod to the desired position and then securely fasten it.
In two-button modifications there are two such rods. To adjust the flush cistern of a toilet with two buttons, remember that one is responsible for performing a complete flush, the second activates the partial flush mechanism.
How to adjust the flush tank with a button - watch the video:
How to put everything back?
To put the toilet tank back together, the following operations must be performed:
- secure the fittings responsible for filling/draining water, using rubber gaskets where necessary;
- adjust the position of the float and drain valve;
- cover the tank with a lid;
- screw the push-button glass (in models with one button) or tighten the fastening screw and latch the control buttons - in two-button versions.
As can be seen from the above, There is nothing complicated about self-installation, repair and adjustment of flush cisterns for toilets with a button. And for most people with at least some technical skills, it will not be difficult to carry out these procedures on their own, saving on calling a plumber.


