It is interesting that a person who has money did everything with his own hands ..
And I got great results..
This kitchen was not made by a professional furniture maker or cabinet maker,
Everything about Blum products is great. Use the proprietary Blum Dynalog program - it will do everything for you and, as a result, you will receive drawings with all the markings necessary for installing fittings:
I will describe the design details below, using the example of photographs of finished products.
Purchase of kitchen appliances
I recommend that you do not leave this step to the end. At a minimum, it is desirable, if not to buy, then at least to clearly define what you will buy later and download all the documentation for these products. Oven, stove, sink - although they are made according to some kitchen standards, they may have structural features. Making a kitchen without even imagining what kind of equipment you will put there is wrong, you are tormented. For example, I didn’t take everything into account with the oven - therefore, instead of the facade under the oven, you still see a hole (you need to slightly mill the facade until you master it).
I bought a Gorenje oven and induction hob, an Eleyus hood, a Franke Java sink, a faucet with a Grohe Blue filtration system (the first in Ukraine in this design, by the way). 3200$
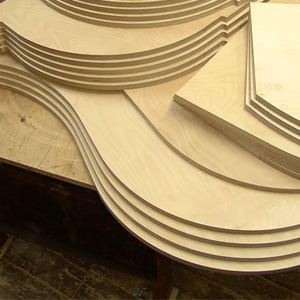
firewood order(chipboard, fiberboard, facades)
Previously, I sincerely believed that the production of furniture meant large workshops, expensive machines, dozens of people. It happens, of course, and so, but many work in garages. In order to produce furniture, you do not need to cut chipboard and make facades - this is exactly what dozens of people do in large workshops on expensive machines. We are on our way there.
The result of the design should be an Excel file containing a list of all the panels we need. Here's one:
With regard to slab materials, my choice was as follows:
Chipboard Egger Cappuccino 18mm as body material
Chipboard Egger Platinum White 16mm as drawer material
Fiberboard Egger for cabinet backs
Painted MDF as facades
Now look, what a nuance. The company we are going to has a warehouse program for chipboard - these are the thicknesses and colors that they constantly keep in stock in large quantities. If the chipboard that you need is in the warehouse program, everything is OK, you will pay for as many square meters as you need. But if it is not included, you will have to buy chipboard sheets. One sheet, in the case of chipboard Egger, is 5.8 sq.m. And if you need 6.3 sq.m. still have to buy two sheets.
Companies that are engaged in cutting and edging chipboard, the production of facades, today can be found in almost any regional center of the country. You give them blueprints and money. They are for you - all your firewood in a packaged form with delivery even to an apartment.
Cutting and edging chipboard, fiberboard, facades, delivery - all this cost me $ 650.
Hardware order(handles, legs, tandem boxes, etc.)
No problem. But it’s better not to scour all sorts of Leroy Marlins, since there are mostly unworthy mass markets. It is better to find a decent furniture fitting company with a large assortment and buy everything there.
I bought:
12 sets for Blum Tandembox Intivo full extension drawers
2 hinges + bluemotion for under-washbasin door
1 roll-out grid with a closer under the oven
All this cost $1200
Purchasing a tool
In general, any handy kid already has some tools.
I had to buy a Makita screwdriver, a Bosch jigsaw, clamps and a Wolfcraft welder.
I will immediately warn you - there is nothing to do without a screwdriver in assembling furniture. There are a lot of screws in there. And Chinese disposable crafts for 40 bucks will not help you. A screwdriver for a man is like a dildo for a woman. Don't be stingy. Please yourself. Come in handy.
So, at the beginning of the process we have:
First of all, we will take the firewood to the balcony and sort it into cabinets. Fortunately, each item has a sticker corresponding to the part number in the above parts list:
Well, let's start assembling. Almost all Italian cabinet furniture is assembled on dowels (chopiki) - the advantage of this method is that no parts of the fasteners climb out, the disadvantage is that furniture assembled on dowels is non-separable. For such purposes, furniture makers prefer confirmation - it is much less demanding in terms of tolerances.
The connection on the dowels requires an accuracy of fitting the reciprocal holes of 0.5 millimeters. This result is achievable without the use of a special tool, but with huge hemorrhoids. So I bought this tool:
We drill the first holes in the side of the cabinet:
So, our task is to assemble the first cabinet and understand whether our hands are growing from the ass, or still from the shoulders.
We take the sidewall, we will make holes that will be connected to the bottom with dowels. Pay attention to the drilling depth gauge on the drill. What it is for, I hope it is not necessary to explain. Bzzzin:
Here's what we got:
Holes on the sides - 40 mm. from the edges, center in the middle. Sidewall width (it matters, I'll tell you later) - 560 mm. The welder works in the mode of both drilling reciprocal holes and copying. Copy to the second side. This is the principle of operation of the filler for drilling reciprocal holes, I show on the example of the drawer:
Let me remind you that when connecting to dowels, the accuracy of drilling the reciprocal holes (plus or minus half a millimeter) is important. With these tools, I have never had a problem with this - the parts fit into each other (groaning) with little effort. This device costs nothing - 40 bucks. It will greatly save your time - for the sake of interest, I tried to make manual markup on test pieces of chipboard - this is many times more time and a much higher probability of error.
Here is the bottom of the box with counter holes already drilled for the sidewalls:
We drilled 20 holes and voila, our hands do not grow out of the ass:
Okay, let's move on. Now we need to equip the cabinet with closers, legs and a back wall made of fiberboard.
There is nothing complicated in mounting closers - all in the same Blum Dynalog program, you get the exact dimensions of the points where the guides will be attached. One rule applies here - measure seven times, cut one:
Just like two and two. If you make a mistake within 3 millimeters, everything will still work fine. This is a wonderful technique.
Mounting the legs is also not difficult. The main thing is to set yourself a standard for their location and follow it on all pedestals:
Another pedestal (the widest, 80 cm) is ripe. It already has guides and legs.
You should not worry at all due to some fragility of the product - as soon as the back wall is mounted - the cabinet will be filled with pleasant strength. This shows the initial stage of fastening the backdrop - the bottom is fastened with two screws on the sides, the diagonals and angles are measured, the top is fastened with a clamp to the side. Now you can safely peel the screws (after making a preliminary drilling with a two-millimeter drill):
Well, as if there is already progress:
Preparing facades. On the left side of the façade is a drilling jig (the same Wolfcraft), to the right is a hand drill:
Here a jigsaw came into play - I sawed holes for sockets with it, after which I asked for an open cut. Well, I hung the filter control unit and the holder of the filter itself:
When all the cabinets were ready, it was time to reunite them. At this stage, it is important, by adjusting the legs, to bring them into level - that is, the top of the cabinets should lie in the same plane. We clamp the cabinets together with clamps, and be sure to make a “lining” - a wooden block into which the drill will come out. If this is not done, there will be serious chips at the exit hole.
I brought a countertop, Luxeform Boston 38 mm. I asked to make cutouts, they did, but look how original (did I put the commas correctly, in general?):
Basically, they are right. Transporting a massive table with a full cutout is a risk - it can break. I had to work with a jigsaw. The cut must be covered with silicone - the open end of the chipboard will quickly swell if this is not done. Well, here you can also see how the issue with an obtuse angle was resolved - everything is very simply leveled. Naturally, I previously made a drawing with geometry calculation.

Blanks from furniture boards
It happens that the choice in furniture stores is large, the price range is varied, but it’s impossible to choose a kitchen set! Either the color is not the same, or the quality is not satisfactory, or the dimensions are not suitable for a particular apartment. Then there is only one way out! Make a dream kitchen with your own hands from furniture panels - high-quality, grateful and responsive material.

Do-it-yourself kitchen set from furniture panels
Benefits of a furniture board
This environmentally friendly material is often used for the manufacture of stairs and furniture; it is also in demand in decorative works. The furniture board is a wooden board, but the board is glued and pressed, where the strength of the connection of individual parts is the highest.

Types of lamination of furniture boards
Furniture panels are made from oak, birch, pine wood. Such material is durable and easy to process. It securely fastens nails, screws and other fasteners.

The process of assembling a kitchen from furniture panels
Furniture panels are used for the manufacture of kitchen sets for a number of reasons:
- Durability and practicality. Such furniture can last more than one year. And during operation, it is not subjected to deformation and distortion.
- Environmental friendliness. The basis of the shield is wood. And during gluing, PVA glue is mainly used - a safe material that, after hardening, does not emit harmful substances.
- Aesthetics. The appearance of shield products is not very different from solid wood furniture.
- Low cost. Furniture panels belong to economy class materials, but the price-quality ratio is the best here.
- Large size range. Thanks to this, you can make furniture of different sizes, as well as significantly save on material.

Kitchen from furniture boards with an island zone
Work design
Before starting work on creating a kitchen set, it is worth updating the entire room. Check the condition of the windows, if you do not have double-glazed windows, then you can think about installing them. Pay attention to the ceiling, how long have you plastered it. If the walls require new wallpaper, apply it before installing the furniture. You also need to check the plumbing equipment. Changing or repairing it after installing furniture will be quite inconvenient.

Drawing of a kitchen set from furniture panels
In parallel with these works, you can come up with a plan for placing kitchen furniture. It is best to make your own drawing or sketch with the dimensions of the future furniture. It must necessarily find a display of the dimensions of the kitchen, communication and ventilation schemes.

Kitchen set from furniture boards
Its functionality and practicality in use depend on the arrangement of furniture. Typically, a kitchen set is installed in several ways:
- Linear, along one wall;
- In the form of letters G or P;
- With the addition of an island.

Corner kitchen from furniture boards with a dining area
Before sketching, try to imagine what kind of kitchen you want. Consider the places for built-in appliances: hob, oven, microwave, as well as the placement of other electrical appliances and lighting. The classic triangle: sink, stove, refrigerator are usually located close to each other.
note! Sockets and a gas shut-off valve must be located in an accessible place.

The location of sockets in the kitchen from furniture panels, assembled by hand
In the do-it-yourself kitchen drawings, five mandatory sections are distinguished from furniture panels:
- Work table;
- Gas or electric stove;
- Washing;
- Place for dishes;
- Product area.

Kitchen from furniture boards with a bar counter according to your own project
Furniture set calculations
All communications are applied to the drawing, which is desirable to scale. Naturally, washing should be done next to the drainage and water supply. There should be no more than 2 meters between the stove and the gas pipe.

Wooden kitchen with geyser
When designing kitchen furniture, the height of the hostess must be taken into account, because it is she who will spend a lot of time cooking. In addition, the sketch should reflect:
- Places for installing sockets;
- Location of switches and fixtures;
- Height of working surfaces;
- Finding a sink.

Making a sink in the kitchen from furniture boards
Carefully calculate each element of furniture, shelves, drawers. There are also free computer programs that will help you correctly make calculations, based on the location of the built-in appliances, and choose the right dimensions of furniture, taking into account specific wishes.

Do-it-yourself upper kitchen cabinet from furniture panels
Necessary tools and materials
Usually, if a man knows how to do some housework: change sockets, repair plumbing, screw shelves, then the family has the necessary tools.

Do-it-yourself door installation
You can check if it's available:
- Hacksaw for wood or electric jigsaw;
- Plane;
- Drill;
- grinder;
- Angle clamps;
- Screwdrivers (screwdriver), hammer, nails;
- Construction level, tape measure, square;
- Chisel.
Each master can add something of his own to this list.
When purchasing furniture panels, be aware that they can be of different thicknesses: 15 mm are suitable for the back walls of furniture, 20 mm for the rest of the cabinets, 25 mm are used to make complex decors.

The process of gluing furniture panels
Furniture panels are cut according to the drawings. This must be done carefully with a jigsaw, inaccuracies can lead to a skew of the entire headset. For a beginner, it makes sense to order cutting material at the place of purchase.

Screwing door mechanisms with a screwdriver
After cutting, you should have parts for each cabinet, doors, shelves, countertops, sinks, accessories. Check the number of door hinges, handles, ball guides, furniture legs and other components. If you planned a countertop made of the same material, then for protection it is worth covering it with furniture oil in several layers, and silicone the ends and cuts.

Kitchen set from furniture boards in the process of assembly
Note! So that the doors of the cabinets do not touch the neighboring ones, they are made smaller by a few millimeters in height and width.
Assembly of cabinets
The prepared and numbered parts of each module are laid out where it is planned to be installed. Such actions will save you from confusion and loss of some parts.

Kitchen layout from furniture boards
The assembly order includes the following:
- Details from the furniture board are pre-sanded, polished and varnished. If you decide to make the facades yourself, you can apply a simple pattern to the front of the doors using a manual milling cutter. Such work is best done on the street or in a special room, because there is a lot of dust and chips.
- The assembly of the lower tier of furniture begins. First, the legs are marked and screwed with screws to the bottom of the cabinets.
- Let's move on to the sides. If soft-closing drawers are planned, then the guides are marked and screwed. Usually for such boxes there are detailed installation diagrams. The boxes are assembled and inserted into the grooves. Where there will be ordinary shelves, special corners are attached.
- The sides are attached to the bottom panel with angled clamps. Screws are screwed in. To avoid through holes, do not rush to work with a drill. The top cover is attached in the same way.
- Plywood, cut to the size of the cabinet, is screwed on the back side. Facades are mounted last. Set them open. The doors are fixed at 95 ° and the attachment points are marked with a pencil. They put the facades on hinges, attaching them to the sides with self-tapping screws.
- In conclusion, handles are attached, and then the modules are filled with shelves, drawers, nets. Also collect the rest of the cabinets.

Ready-made kitchen set in the interior of the kitchen
Installation of a kitchen set
The whole set is assembled already in the renovated kitchen with flat floors and dry walls.
- You need to put the furniture in place from the outer cabinet. The lower modules are leveled at the building level. If the horizontal turns out to be uneven, problems may arise when laying the countertop. After installation and alignment, the sections are interconnected with ties. To do this, drill a hole, insert the part and tighten it.
- A countertop is laid on top of the cabinets and fastened to self-tapping screws. A place for a stove and a sink is marked with a pencil, the holes for which are cut out with a jigsaw.
- The next step in creating a kitchen with your own hands from furniture panels will be the installation of the upper tier. Unlike the bottom line, hinged modules are mounted on the walls. It is necessary to carefully calculate the weight of each cabinet with shelves and fasteners. Usually they are hung with the help of special loops attached to the back walls from above.
- The standard distance between the lower and upper cabinets is approximately 65 cm. This is the height of a traditional backsplash. We add to it the size of the cabinet minus a few cm for the mount. The resulting number will be the height of the attachment of the upper tier.
- In conclusion, they mount the hood, sink, hob. Glass and mirror elements of facades are inserted.

Kitchen interior from furniture boards
Making a kitchen with your own hands from furniture timber is a simple task. With a great desire and a certain skill, you can get not only exclusive furniture for little money, but also the title of a home master, and the respect of all households.


https://youtu.be/uXb6yr_IXtI
Photo gallery (52 photos)
Properly chosen furniture organically fits into the interior, bringing comfort during work and leisure. Kitchen furniture can be ordered in specialized stores from standard series, but to obtain organicity and comfort, it should be made according to individual sizes. It is possible to order production according to your own sizes in the store, but it is more profitable to make a kitchen with your own hands.
Stages of furniture manufacturing
In the manufacture of furniture, the basis is the developed drawings and diagrams of the kitchen set. It is not difficult to complete the project with your own hands, but accuracy and accuracy will be required. The production of furniture for the kitchen takes place in several stages. For this, the following step-by-step instructions apply:
- Designing the arrangement of furniture elements.
- Calculation of the dimensions of furniture parts.
- Choice of material and fittings.
- Sawing and assembly of structural elements.
- Installation of prefabricated blocks.
- Fasteners for fittings.
kitchen set project
The first thing to start with is to take measurements of the kitchen space. After that, you can schematically draw, even on a simple sheet of paper, the location and type of kitchen items, as well as door and window openings. Realizing your idea, depict the elements of the kitchen set on an approximate scale.
When planning the placement of boxes, the following points are taken into account:

Detailing and sizing
 After a rough sketch of the kitchen is drawn, precise dimensions the length and height of the lines on which the boxes will be located. After measurements, detailing is done. This is an important and responsible moment. Detailing means the decomposition of each cabinet into separate parts with an indication of their dimensions.
For example, detailing cabinets. It consists of a bottom, top, two walls, a back panel and one shelf. Cabinet height 740 mm, width 500 mm, depth 350 mm, material thickness 16 mm. 2 mm thick fiberboard is used as the back wall, the facade thickness is 20 mm. A drawing of each part is carried out, and the dimensions of the width and height are affixed.
For the example under consideration, the height of the walls will be 740−16−16=708 mm, i.e. subtract the bottom and top thicknesses from the total height of the pedestal, since the walls are located between the top and bottom. The width will be 350−2−20=328 mm. The size of each sidewall will be 708 × 328 mm.
The dimensions of the top and bottom are the same, they are equal in width and depth to the dimensions of the pedestal 500 × 350 mm. The rear wall and facade, according to the design, have dimensions of 740 × 500 mm.
The shelf is planned to be removable located between two walls, plus, for the convenience of removal, we remove one millimeter on each side, then its width is 500−16−16−2=466 mm. We make the depth with a gap along the facade of 4 mm, it turns out 350−20−2−4=324 mm. The result is a shelf with dimensions of 466 × 324 mm.
In this way, each drawer, cabinet and other piece of furniture is calculated and depicted on the plan. When developing drawings and diagrams of furniture with your own hands, all mistakes are made due to inattention, so you should be extremely careful, but it is better to recalculate for verification the next day.
 It should be noted that it is possible to design a kitchen using a computer, or rather, special programs. One of the popular and convenient PRO 100. This program will allow you to model in 3D the future view of the kitchen as a whole and help you complete the detailing. After looking at the general view, it will be possible to easily move the lockers and check whether the dimensions fit exactly. Although the PRO 100 allows you to perform an example of cutting, it is better to do this in a specialized program such as Cutting. It will calculate the most economical arrangement of parts on the sheet, helping to minimize waste, taking into account technological tolerances and cut thickness.
The choice of material used
After the drawings are made and the dimensions of the kitchen cabinets are determined, the crucial stage for the selection of material begins. It is selected for each component of the kitchen:
- countertops;
- facade;
- back wall;
- box frames.
The main requirement for a countertop is the ability to withstand moisture and resistance to mechanical damage. The material used is granite, marble, plastic, chipboard, MDF. The most popular is laminated MDF. Recently, manufacturing from a sheet of laminated chipboard (postforming), covered with plastic on top, has become popular. Both the cost of the kitchen and its durability depend on the material of the countertop, as well as the facade.
Facades are the decoration of the entire kitchen, they are solid and framed. Usually, laminated chipboard (LDSP), MDF, plastic, aluminum, glass, wood, acrylic plastic are used for their manufacture. . Each type has advantages and disadvantages. Most often, MDF is chosen. It can be covered with a film and painted. It should be noted that in places of possible heating it is best to use painted MDF. It is not afraid of high temperatures and will not deform like a laminated structure.
 The back wall is made of fiberboard sheets, they are available in different thicknesses, for furniture, thicknesses of 2.5 mm or 3.2 mm are used. In their composition they contain milled and pressed wood chips mixed with antiseptic and binding components. A melamine film is attached to the front side.
To the box frame strength requirements are imposed, since it is the basis for fastening the remaining elements. The most popular are chipboard, MDF, wood. Chipboard is the cheapest option, but also the most impractical. It is sensitive to moisture and prone to rapid degradation. Therefore, the most widely used MDF. It turns out MDF by gluing together wood fibers under the influence of high temperature and pressure.
The kitchen of their tree stands apart. Wooden products are strong, durable, environmentally friendly. Such material is convenient in processing and will freely allow even a novice master to make a kitchen made of wood with his own hands. Hard woods are best used for the production of arrays and slabs, and soft woods for shelves, facades, decor elements. Depending on the type of wood, you can choose the color. A solid wood kitchen is appropriate in country houses, especially if they are made of logs. It is important to note what if kitchen set equipped with a built-in stove, then wood is not suitable for the structure due to fire safety requirements.
Determining the fittings to be installed
 When choosing accessories, financial possibilities are first of all evaluated. All elements of fixtures are divided into two types: mounting and front. Quality parts are expensive, but also last longer. First of all, this applies to hinges and drawer systems.
Loops are better to choose with automatic closers. Use tandemboxes or metaboxes as drawers. You need to choose famous brands such as BLUM, Hettich, Boyard. If it is planned to use drawers with a rising front, gas lifts are installed, which are more practical than mechanical lifts.
In retail outlets, there are pens of various shapes and qualities. The quality of the handle is characterized by the material and type of coating. It can be metal alloys, wood, silumin, etc. When choosing, you should try the product by touch, imagine how convenient it will be to use it.
Sawing and assembly of structural elements
 The material is selected, the project is drawn, it remains to cut. At home, it is difficult to make straight, precise cuts, as this requires coordinate machines with high-quality cutters. It is more convenient to order a cut in production. To do this, you will need to give the material and a list of parts with their dimensions, and the rest will be done by a specialized company. Usually, edge gluing is also ordered in it, both on the elements of the kitchen frames and on the open sides of the countertop. The glued edge will not only give the products a finished look, but also protect the exposed parts from moisture.
The assembly of boxes and other structural elements takes place using a tool . This tool includes:
- square;
- drill;
- set of drills;
- pencil;
- conductor.
In addition to the tool, you will need furniture fasteners: minifix, rafix, dowel, self-tapping screws, etc.
Using a furniture conductor, it is not difficult to assemble a box, install a hinge or a sliding mechanism. You can use a home-made furniture conductor, or you can purchase a professional one. Such devices contain all kinds of hole sizes, made at a standard distance and corresponding to different mounting options. Its use is to install it on the workpiece and carry out drilling work through it. In the case of a homemade version, the conductor is often made in the form of a template.
The assembly of all boxes occurs independently of each other in a convenient place for this. Preliminarily, holes are prepared on the structural elements for the hinges of the facades, and in the case of drawers, closers and the extension mechanisms themselves are installed.
Installation and fastening of furniture
 Installing a kitchen starts with hanging drawers. For this, hooks driven into the wall or a mounting plate are used. The use of the bar is justified by the ease of installation and adjustment of the position. To do this, hinges or brackets are installed in hanging boxes.
The bar is screwed to the wall strictly at a horizontal level at the required height. Thanks to its design, the hinge installed in the boxes is easily put on the rail and allows adjustment of the position in any plane. This method of hanging is easily done alone. All boxes are interconnected with furniture screws, having previously drilled holes.
After the upper cabinets, the lower furniture is placed in its place. It is adjustable in a horizontal plane and a countertop is placed on top of it. Holes are cut in the countertop for built-in appliances and a sink.
The installation and leveling process will facilitate the preliminary preparation of the walls and floor, for this they will need to be leveled, sockets and lighting sources installed in advance.
At the last stage, facades are hung. The hinges are installed in specially prepared places, the handles are fastened and the drawers are installed in the guides. Then the plinth is installed.
The primary reason to make a kitchen set with your own hands is economic. 50 thousand rubles for the kitchen is not quite expensive. By taking on the kitchen set yourself, in the worst case, you can save up to a third of this amount; having time and skill, the cost of a kitchen set can be reduced by 2-5 or more times. And the end result from, perhaps not yet quite skillful, but diligent hands comes out no worse, or even better than the factory one, see fig .:

No less important and directly related to the first is another reason: do-it-yourself kitchen furniture allows you to fit the kitchen into almost any room suitable for this purpose - a cramped, irregularly shaped kitchen area in a small odnushka or open-plan apartment. Standard headsets do not fit there, and ordering individually means paying 2-2.5 times more for the same capacity, ergonomics and functionality.
The material of this publication is intended to tell readers how to get down to business, where to start, how to properly design furniture for the kitchen on their own, place it in an available space, how to make it according to a self-developed project and assemble it into a product. Various subtleties and nuances found in the manufacturing process are also highlighted. For beginners, this information will help to avoid all sorts of difficulties and hitches in work, up to the need to purchase materials to replace irreparably damaged ones.
Stages of work
The set in this particular kitchen is individually designed and produced as follows:
- The installation dimensions of the room are taken, taking into account the requirements of safety and ergonomics. At the same time, the method of hanging the cabinets is selected, because it depends on the condition of the walls;
- The layout scheme of the headset is selected, and based on it, the composition of its draft set is signed - the number of cabinets, drawers, cabinets, bins;
- The overall overall dimensions of the sketch kit fit into the previously removed installation dimensions;
- The overall dimensions of individual modules/sections of the kit are determined; perhaps its composition is being specified. At the same stage, the design is worked out: in the mind, on paper or computer;
- The design scheme (mechanical model) of the headset and materials for its manufacture are selected, according to one’s skill, time availability and financial capabilities;
- Drawn, on paper or with the help of computer programs, assembly drawings of modules and detailing for them (drawings of individual parts);
- Details are cut and assembled into "boxes", modules/sections without doors - facades - glazing, shelves and drawers;
- A countertop is made and applied, equipment is installed - a stove, a sink, a dryer, a microwave, a washing machine, a dishwasher, an induction hob or whatever else you have;
- Shelves, drawers are installed, doors are glassed and hung; hanging cabinets. Did it collapse before your eyes? It seems to be all.
Room and dimensions
The scheme for removing the installation dimensions of the room is given in fig. on right. It needs some explanation:

About hanging cabinets
It is highly desirable, when measuring the room, to determine with the help of a long, checked for evenness rail, the general unevenness of the wall along the length. If it is no more than 3 mm (which is less than the building code of 3 mm / m), then it makes perfect sense to hang kitchen cabinets instead of ordinary hinges on a mounting plate (see the figure on the right):

- Cabinets will forever hang evenly, in a row and in order.
- Any of the cabinets can be removed and hung back without risking knocking down the neighboring ones.
- When overloading any cabinet, it can tear off part of the plank from the wall, and at the same time it will warp and stick out, but a sudden catastrophic collapse will not occur.
Special suspensions are purchased for the bar, a pair per cabinet. Suspensions are included in the groove of the bar. The bar is attached to the wall with 6x (80-90) self-tapping screws in propylene dowels; to a wooden wall - with wood screws 6x (100-120). Fastening points - at the edges and one in each gap between the cabinets. Behind heavily loaded cabinets, you can fasten the bar more often, but with a step of at least 150 mm for a concrete wall and at least 200 mm for brick and wood, otherwise “many holes” will weaken the wall.
Layout
This is a very important stage, which, unfortunately, is paid little attention by both professionals who think in terms of typical layouts, and amateurs, simply out of ignorance. But, by the way, the correct organization of work and the arrangement of the workplace, among the factors conducive to women's health and long-term attractiveness, face the arrangement of personal life and material well-being, and where does a woman spend the lion's share of her free time? If you want “pits after 35” and not notice (and so that others do not notice) - organize the kitchen so that you work there while relaxing.
Technical limitations
In order to properly make a kitchen, it is necessary to comply with the technical requirements for its safety already at the layout stage; ergonomics is the next step. The inadmissibility of blocking access to the gas riser has already been said. In addition, the slab should not be more than 2 m away from it, counting along all the bends of the supply pipe. Further, the intersection of water, sewer and gas pipes is unacceptable. Water supply and sewerage can be laid in parallel, but the gas pipe should not go above, and even more so, under them. Above, below and behind the gas pipe, there should be no wiring either outside or in the wall, including electrical communications. And finally, from any edge of the stove to the nearest combustible or heat-sensitive object (for example, a refrigerator) there must be at least 60 cm. this material is self-extinguishing.magic triangle
Ergonomically justified vertical dimensions of kitchen furniture are given in fig. after the list, for the hostess of average female height (160-170 cm). You need to adjust them down for babies, but a tall woman will be comfortable anyway. This is a favorable circumstance if the ceiling in the kitchen is low. But much more important is the horizontal layout of the kitchen set. In total, in the kitchen, in descending order of frequency of use and psychophysiological loads, 5 working zones stand out:
- cooking (culinary);
- cutting and food-consumables;
- washing;
- food (for storage);
- zone of utensils and additional functions (laundry room, for example).

Of these, over 80% of the wear and tear of the female body from fuss in the kitchen falls on the first 3, so they are distinguished in the so-called. functional triangle: refrigerator-stove-sink. The rules for its formation are as follows: the stove, as the focus of the greatest fatigue, requiring two-handed work, is placed in front of the person working in the kitchen. Refrigerator - to the right of the stove; We hold the handle of the pan with our left hand, and take out the desired product with our right hand. Washing - on the left; it also works with 2 hands, but when the stove is already turned off. The cutting table is optimally located between the refrigerator and the stove, and the sink wing is turned to it on the other hand. The general rule for the layout of a modern kitchen is maximum compactness, because. mobs cook for the tray the cook needs, and we don’t get kicks from him with cuffs on the back of the head. Schemes for organizing kitchens according to the triangle rule are shown in fig.

Left - ideal: linear layout; for left-handed people, a linear kitchen is organized in a mirror image. The person working in the kitchen is at the top of an isosceles triangle. Fatigue is the least. The refrigerator can be put very large. If there is at least 2.5 m of a free wall, then you must first try to arrange the kitchen in a line. Unfortunately, the location of the gas riser in most apartments of a typical layout does not allow you to put a refrigerator to the right of the stove, and the option for left-handed right-handed people is overly tiring and “does not pass” through the water supply and sewerage. In general, a linear kitchen is an option for a private house and an open-plan apartment.
Note to readers: see the red nose on the little man? A scoundrel-lover or an unlucky husband is selected, how would he secretly drink alcohol and steal meat from the soup. Ladle bastard between the ears!
In the center is a layout for a kitchen with a gas riser against a blank wall. The person is already approximately in the middle of the long side of the triangle, which is beveled within the allowable limits (the difference in the lengths of the short sides is 10-15%). Fatigue is almost as low as in a linear kitchen, provided that you reach closer with your right hand to the refrigerator than with your left hand to the sink.
On the right - a common case of a kitchen with a gas riser in the corner by the window. The distortion of the triangle is almost at the limit, but where, according to ergonomics, it would be necessary to put a refrigerator, the only remaining place is for a kitchen table with a soft corner. The most tiring kitchen, the disease of Khrushchev and Brezhnev. The only plus is that the window sill adds working space to the cutting table, which is not bad in small apartments. However, in a one-room apartment or a two-room apartment, you can get out of the situation by combining the kitchen with a common room or living room and visually dividing the zones with a bar counter.
Note: if you make a corner set in a small kitchen with a gas riser by the window, observing the functional triangle, then behind the refrigerator there will be a supply and return to the heating radiator. In this case, these pipes must be wrapped with thermal insulation.
Bar in the apartment
In the modern interior, the bar counter has actually lost the function of the altar of the sinful trinity: the pink elephant, the green snake and the blue devil. Now it more often serves as a kitchen table and very effectively zones the housing, allowing you to simply and conveniently organize the living space in cases where other methods of design solutions would lead to a painful puzzle.
Kitchen examples
Below in fig. drawings of kitchens for typical layouts are given, the designers of which, to one degree or another, fit into the triangle rule. Pos. 1 - U-shaped set for a fairly large kitchen. The refrigerator and sink are arranged according to their layout and wiring, there is enough space for them. Pos. 2 - this corner set in the right or left version will fit into almost any typical kitchen, but at the cost of worsening ergonomics: if the stove is in front of your eyes, then the refrigerator is behind you, and vice versa. Pos. 3 - a linear kitchen mini-set, a very good solution: the refrigerator falls into place in the triangle in both the right and left versions. But pos. 4 is an example of an unsuccessful solution. The functional triangle is formally observed, but the refrigerator is placed close to the stove, and the cutting table is completely off to the side, i.e. the urgent-grocery zone is broken, which is unacceptable in terms of ergonomics.

Software to help
A kitchen set assembled to a sketch by hand will help to translate into working drawings with detailing computer programs for furniture design:
- PRO-100 is a universal program for beginners. You can master it in 2-3 evenings. However, the detailing from the PRO-100 will need to be manually checked for pairing sizes: PRO-100 does not issue warnings about small initial errors (for example, the seam width is set less than 3 mm). You will also have to manually mark up the drawer guides.
- Basis-Designer-Furniture Maker will have to master it "from the bottom" for a month, but the detailing comes out flawless. There are databases for fittings and other small things.
- K3-Furniture is a professional program for professionally trained users. It also gives out a cutting map, i.e. the location of the contours of parts on a sheet of material with minimal waste. A cutting card lover does not need anything: no one in firms selling furniture materials will cut a new sheet for each next client. They will cut what they can from the scraps they have.
- KitchenDraw - English, focused on the inch system of measures.
- Woody is professional and produces amazing 3D presentations and catalog printable files. It is possible for a novice amateur to master it, but why for himself?
Note: now a lot of people ask about the program Dynalog Blum and others for the calculation, selection and marking of fittings. DynalogBlum and its counterparts are each focused on their own brand. If you are not going to copy the branded headset, then it will be easier to pick up and “scatter” the fittings manually.
face headset
Facades for kitchen sets, i.e. doors of cabinets, cabinets and front panels of drawers are offered on the market in the widest range. In the figure, for example, product samples of just one relatively small regional firm:

Modern furniture facades are made of textured MDF or solid wood; the latter are much more expensive. However, MDF facades for a small kitchen set will hardly cost less than 10,000 rubles. If you do not intend to install facades with a milled relief (convex print), but are going to paint them or apply a flat decor (see below), then a budget option for facades for kitchen furniture is possible: from chipboard boards pasted over with self-adhesive. For more on this, see the technical details section below. When designing a kitchen set for purchased facades, their dimensions are taken as a basis, and the rest are tied to them.
Note: furniture facades with openings for glazing (bottom row in the figure) are called shop windows.
Design basis
Kitchen sets are most often made of wood and wood materials: chipboard, chipboard, fiberboard, MDF. MDF is as environmentally friendly as natural wood, and particle boards for kitchen furniture need to be purchased with an E1 or E0 phenol-containing compound expiration class. E1 is best: E0 is too expensive and fragile, and E2 and E3 in the kitchen microclimate strongly "breathe" phenol. Wood is good for its cheapness and manufacturability, but wood is a combustible material, so a gas stove cannot be placed in a wooden kitchen set. If the stove is electric, then the restrictions on wood are reduced or completely eliminated, it depends on the design of the stove.
Types of structures
The most common design scheme of a kitchen set is prefabricated-modular. Each module is a mechanically finished product (pos. 1 in the figure), from which, like from cubes, a set is assembled (pos. 2), and covered with a common tabletop. If the floor in the kitchen is even and stable, then there may not be a common countertop, pos. 3. Dimensional modules for products of this type are used 2: 150 and 200 + 50, i.e. either all dimensions are multiples of 150 mm, or the smallest dimension is 200 mm, and all others are formed by adding 50, 100, 150 mm, etc. to it. Both of these dimensional modules are partially compatible.

The main advantage of the prefabricated-modular design is technological simplicity. Assembling a modular set in the kitchen without errors is available to a beginner who picks up a tool for the first time. It is also important that, if necessary, the headsets are easy to reconfigure, replace or repair the unusable module. Disadvantages - increased consumption of expensive material (where two walls are close to each other, there could be one), and restrictions on its choice: facades from MDF, back walls from fiberboard, the rest is chipboard. The tree cannot be used, because. its shrinkage is much greater than that of chipboard, and the entire headset will lead as it shrinks.
The budget version of the kitchen set is made of wood according to the frame scheme, pos. 4. The option is quite laborious: if a neat and diligent beginner can assemble a modular set in a week, but an experienced carpenter will have to pore over a wooden frame for a month. However, if you use home-made facades (see below), then the money savings in the manufacture of a wooden kitchen set can be striking: the frame itself is made from construction pallets - a pallet. Dismantled used pallets will give excellent, durable, seasoned wood, and will cost pennies compared to commercial wood of the same quality. The disadvantage of a wooden kitchen set is indicated above: for safety reasons, a gas stove cannot be built into it. The advantage is that the strength and service life are much greater than those of a prefabricated-modular set made of laminated chipboard. The latter, until the urgent need for replacement, serve for 15-20 years, and a wooden set, subject to repair, will last for generations from time to time.
From an array of furniture or boards independently cohesive into shields, kitchen sets of a prefabricated panel construction are sometimes made, pos. 5. This is an option for a fairly experienced carpenter who wants to save time and materials: a medium-skilled furniture maker makes a prefabricated panel set for an ordinary city kitchen in 4-8 days. Strength - as in prefabricated modular chipboard; service life - like a wooden frame.
Even less often are kitchen sets of a beam-panel construction, pos. 6. They are very durable, but complex, expensive and labor intensive. Plasterboard kitchen sets on a frame (pos. 7) are quite popular at present, but this is just a trend: the sheathing material is fragile and hygroscopic. Suddenly, there is an accident in the water supply and sewage system, you will have to change the entire headset: moisture-resistant drywall withstands splashes, but not soaking. In addition, although it is convenient to arrange hiding places in a drywall headset, cockroaches with mice and ants will also appreciate the secrecy and inaccessibility of its cavities.
About countertops
For the same reasons, you should not make a kitchen countertop out of drywall. A wooden switchboard is also not very suitable in this case: it is laborious, warps, unhygienic - dirt is stuffed into the cracks. The best options for kitchen furniture countertops are postforming and chipboard. The first one is good because it is equipped with a drip collector, but after cutting its dignity disappears; this is the best option for the kitchen table. And for a headset in the kitchen, you need to order a countertop made of chipboard with a thickness of 20 mm or more; The most usable tabletops are 24 and 36 mm thick. Textures for wood, stone, etc. - the sea to choose from. The coating is heat resistant; most often - melamine. A finished 24-mm countertop for a kitchen set will cost 3-5 thousand rubles, and this is an expense that is not worth saving on.
Note: Unfortunately, a cheap version of a chipboard countertop glued with self-adhesive, as described below, does not work. If a hot pot or a hot frying pan is thrown onto such a countertop, or boiling water is spilled, the coating will not withstand even under 4-5 layers of varnish.
Technical tricks
headset module
The design of the kitchen set module is shown in fig. It is the same for floor and hanging cabinets: in the "basements" of the latter, local lighting fixtures are installed and wiring is laid to them. The width of the crossbars is 100-120 mm. Tie bar of the same width, installed with a rib. Together with the rear cross member, an L-shaped beam is formed, which ensures the proper strength of the structure, regardless of the material of the back skin and its presence.

Floor cabinets are sheathed at the back with fiberboard 4-6 mm thick. Cabinets, behind which any open communications pass, are not sheathed at the back at all. Hanging cabinets are sheathed at the back with laminated chipboard with a basic thickness of 16 mm. Adjacent walls of cabinets are sheathed with chipboard or chipboard 5 mm thick; visible side walls - chipboard or chipboard of the main thickness; the latter is painted or pasted over with a film, see below.
The parts are assembled into a product on furniture Euro-bolts - confirmations, see below. How to mark holes for confirmations is shown in pos. a. On the visible sidewalls, the pitch between the holes, except for the corner ones, can be increased to 300-350 mm. The heads of confirmations are closed with regular plugs to match the main surface.
Note: in the professional production of furniture, the stacked scheme for assembling cabinets and cabinets on confirmations is also widely used, see fig. on the right, however, such furniture does not withstand large overloads and long-term transportation when assembled.

The material of the bottoms of the boxes is plywood 4-5 mm; Chipboard is too fragile for this purpose. Ways of installing the bottoms in the boxes are shown at the bottom left. It will be easier for beginners to put the bottoms on cranial bars from 10x10 to 15x15 mm, pos. b. Fastening - with small nails or self-tapping screws with a pitch of 50-80 mm. The mortise bottom (pos. c) is more economical, but requires milling a groove.
Table top and guides
It will be more convenient and easier to put the tabletop on 6 mm plastic dowels for detachable connections, see fig. Holes for dowels are drilled along the jig (see below). Installation diagram: 4 dowels in the corners; along the long sides with a step of 300-600 mm. The tabletop will not leave the dowels to the side, and if it needs to be removed to repair or eliminate an accident, then it is simply removed and just as easily put back.

Ordinary roller guides for drawers of kitchen furniture are not suitable: they do not withstand heavy loads, and when they are pulled out and pushed in, they give quite a strong push. Loose in boxes from it can crumble, and teaspoons can get tangled in forks.
The best option for guides for kitchen drawers is Kulkov's ball guides, or simply kulkovki, or bags. They walk smoothly, provide full extension and withstand weight up to 12-15 kg on it. For very heavily loaded vegetable bins, special guides have been developed - tandems, but they are expensive. It will be easier to cover the bottom of the cabinet with a bin with 6-8 mm plywood, and put the bin itself on rollers (wheels).
Tool and fasteners
To assemble a kitchen set with your own hands, in addition to measuring and hand tools for wood, you will also need at least a jigsaw and a screwdriver. With a jigsaw, parts of prefabricated-modular furniture made of laminated chipboard are cut, adjusted, windows and grooves are cut into them for washing, for communications, etc. Cutting parts must be ordered from specialized companies, because. it is impossible to perform it at home with a hand tool with due accuracy, as well as to wrap many dozens of fasteners with a screwdriver or wrench.
Also, to assemble the headset, you will need at least 2 ordinary carpentry clamps, pos. 1 in pic; better with elastic sponges. If you are going to work with wood - another pair of tie-down clamps with a wide grip, pos. 2. To assemble parts into a corner, you need an angle clamp with independent clamps, pos. 3. Just do not take a welding angle clamp with a single clamp (pos. 4): it will not be possible to accurately combine furniture parts in it. For marking and drilling holes for dowels, a jig is needed; the simplest and cheapest one will be enough, for holes of 3 diameters 6, 8 and 10 mm, pos. 5.

Holes with a smooth bottom under the door hinges are drilled with a Forstner drill, but its variety for dense viscous materials with a toothed crown and tearing shares (pos. 6) is not suitable. To work with furniture, you need a Forstner drill with a smooth crown and sharp cutters, pos. 7.
Confirmations must be taken furniture, with a blunt tip and a slot for a hexagon, pos. 9. Plumbing confirmations for plastic have a sharp tip and a cross slot. The diameter of the threaded part of the confirmation should be within 1/3-1/4 of the thickness of the thinnest of the parts to be joined, and its full length should be 3.5-4.5 of its thickness. Furniture made of 16 mm laminated chipboard is usually assembled on 5x60 confirmations. The height of the neck of the confirmation together with the head H must be equal to the thickness of the part to be attached (see also pos. 10a). Sometimes the height of the neck is given in the designation by the third digit, i.e., for chipboard 16 mm thick, screws 5x60x16 are needed, or fasteners are selected at the place of purchase according to measurements of the neck height.
Holes for confirmations are drilled with a special drill, pos. 8. The height of its unfolding skirt should be equal to the height of the screw neck (see pos. 9 and 11). In order for the connection with the confirmate to be strong and tight, the hole for the neck of the confirmate is drilled with a diameter slightly smaller than that of the neck: it must sit tightly in the part to be attached, see pos. 10a. If the seller in the store finds it difficult to say which drill is needed for the confirmations you have chosen or offers several different ones, you need to compare its main dimensions by measurement or according to the specification for the drill (pos. 11):
- D1 is the diameter of the screw body without thread.
- D2 is the total diameter of the threaded part of the screw minus (0-1) mm.
- D3 is the diameter of the screw neck minus (0.5-1) mm.
Note: assembly of a wooden headset must be done on dowels, because. the tree dries out, and only parts made of non-drying materials are reliably connected with confirmations.
Hinges and doors
The doors of the headset are hung on ordinary crocodile hinges, pos. 1 in fig. Drilling holes for mounting trays - "pelvis" loops need to be accurate: at least 7 mm of material should remain behind the bottom of the hole, and the bottom should be flat, without skew. Working with a hand drill with a pistol grip and a Forstner bit is difficult to achieve without experience, so it's best to practice on scraps first.

In the hinges, before installation, the adjusting screw (green arrow at pos. 1) is brought to the middle position. Holes under the pelvis are drilled in the doors (pos. 2). Then the clamping screw is tightly clamped (green arrow at pos. 2) and the hinges are placed in the doors, pos 3.
Next, the door with hinges is applied fully open to the side of the cabinet. The gap between the edges of the door and sidewall should be 2-4 mm. you can fix it with a school wooden ruler, etc. Having firmly pressed and leveled the door, they mark the holes inside on the sidewall for fastening the “muzzles” - the loop shoes, unscrew the coupling screw, separate the shoes and attach their soles to the sidewall.
The next step is to put the door in place and align with the adjusting screws. After that, they slam, fix (if there are no magnetic latches) and hang the paired one in the same way, aligning it with the installed one. The doors of the next cabinets in a row are aligned with the first pair, so it is advisable to hang the doors by weight with an assistant, into the cabinets located in their places.
self-adhesive
As already mentioned, the manufacture of a budget-level kitchen set can be made cheaper by ordering its parts (sidewalls, shelves, unpretentious facades) from a simple chipboard and pasting it with self-adhesive. But it is not necessary to glue the film as on the right in the figure: in order for the film to lie flat and hold firmly, the adhesive layer must not be touched by hands, dust should not fall on it, and it should remain as little as possible in the air.
Step-by-step instructions for the correct pasting of chipboard with self-adhesive is as follows:
- the surface of the part is sanded with fine sandpaper (No. 240-260);
- blown with a vacuum cleaner from dust;
- rubbed to smoothness with liquid putty on wood;
- cut the sheet of film together with the protective paper to the dimensions of the part with an overlap along the edges of approx. 5 cm;
- the film is applied to the part with a protective layer down, pos. and in fig;
- picking up the corners with nails, the protective layer is peeled off from the film on one side along the entire length to the width of the overlap, pos. b;
- a sheet of film is leveled and pressed down with a knee, or an assistant does it with his hands (brown arrow in pos. c);
- the protective layer is carefully pulled with your fingers by the corners, turning down, pos. c, until a strip of self-adhesive tape with a width of 3-4 cm sticks to the part;
- the paper is also carefully pulled, pulling it out from under the film. While pulling out, the edge of the paper, which is held with your fingers, must be pulled so that the film lies flat. It is no longer necessary to hold the film in the middle at this step - it has stuck, it will not move out;
- when the film has laid down on the entire plane, the allowances are wrapped on the edges and tucked on the reverse side. The folds in the corners are cut with scissors;
- after half an hour or an hour, the bubbles on the film are pierced with the tip of a thin sewing needle. Within a day, they will subside completely. Suddenly, which one is left - they warm it up with a household hair dryer;
- the glued surface is coated twice with acrylic varnish. The second layer - after complete drying of the first.
Break...and build
And yet, before taking on a new set in the kitchen, take a closer look at the old one: isn’t it worth putting it in order? - fine craftsmanship, but the kitchen is easier. For example, how to restore kitchen cabinets with your own hands at home, see the video:
Video: restoration of kitchen furniture - an alternative to making a new one
It can be added to it, firstly, that the burnt places before puttying are cleaned with sandpaper to clean wood. Secondly, you can remove old paint with a building hair dryer and spatulas, or, a little more expensive, but faster and better, with modern surfactant-based washes (surfactants). Surfactant washes are non-toxic, non-flammable, do not stink and do not damage wood.
Then - finishing. You can simply paint, as on the left in the rice: the base is acrylic or glyptal paint, and the shading is automotive from a spray can. However, this “simply” is deceptive: in order to smoothly bring out blurry stripes, you need a steady hand, a faithful eye and considerable experience.
Having succumbed to the temptation to purchase a ready-made kitchen set, sometimes instead of positive emotions, we experience bitter disappointment. New furniture is not always suitable in size, layout and as a result becomes inconvenient to use. Making a kitchen with your own hands, taking into account the size of the area and individual preferences, will not only save you from such troubles, but, among other things, even help save money.
Having taken up the renovation of the interior, first of all it is necessary to make a project of the future kitchen with a detailed plan of the room entered into the drawings.

It must accurately reflect:
- room height;
- wall width;
- dimensions of window and door openings;
- communications scheme: wiring, gas, water, heating;
- ventilation system.
Making a kitchen with your own hands and drawings
How you plan to arrange kitchen furniture depends on its functionality and comfort in the cooking process. The most common forms according to the method of arranging headsets are:
- linear;
- L-shaped;
- U-shaped;
- island.
In small kitchens, in order to save space, linear and L-shaped forms are more appropriate. In spacious rooms, you can afford U-shaped and island furniture.


Regardless of which shape is more suitable for your room, do not forget to put on the drawings five main areas of the kitchen:
- Working surface.
- Washing.
- Cooktop.
- Food storage area.
- Place to store crockery and cutlery.
A reasonable solution for small areas would be to combine several zones. For example, plan a countertop that will serve as a sink and work surface. The place to store kitchen utensils also goes well with the work area.
When making drawings, try to mark the furniture so as not to violate the classic working triangle, the vertices of which form a sink, stove and refrigerator.
Designing a kitchen in pro100 (video)
Do-it-yourself calculations for the kitchen
We have already agreed that the drawings show communication schemes. Based on this, a place for washing is chosen next to the outlet of the water supply and drainage pipes. The maximum distance from the gas stove to the gas pipe should not exceed more than 2 m. It is undesirable to place the refrigerator close to the hob.
To make furniture yourself means to be able to take into account also such individual parameters as the height of the hostess, whether she is right-handed or left-handed.
Such seemingly trifles determine:
- height of horizontal surfaces;
- on which side of the sink to place the countertop;
- how to fix fittings on furniture;
- where to install sockets;
- how to arrange lights and switches.

All details and elements of the future headset should be carefully calculated and rechecked. Not only each locker is counted separately, but also each drawer and shelf. In the drawings, the cabinets are “disassembled” according to the boards, on which their dimensions are indicated.
After all the parameters and calculations are transferred to the drawings, you can start making templates for your furniture.
Special computer programs will help to make calculations and select the optimal dimensions of individual elements of the headset. With their help, you can design furniture and create a kitchen design for every taste.
Modeling kitchen furniture in 3ds Max (video)
Furniture assembly tools and necessary materials
To make furniture yourself, you need a certain set of tools.
Check if you have:
- drills;
- screwdriver;
- hammer and nails;
- pliers;
- jigsaw;
- hacksaws;
- building level;
- roulettes;
- square;
- mounting knife;
- sandpaper.
For beginners in carpentry, experienced craftsmen are advised to purchase or order ready-made facades for furniture, and already build drawings for furniture for them. If this is your first build, it will take a lot of effort to make neat doors and drawer ends, and the result does not always match the work invested.

So, a set of materials for assembling a kitchen includes:
- doors for cabinets;
- laminated MDF for walls 16 mm thick;
- laminated fiberboard for drawer walls - 5 mm;
- Chipboard for countertop 32 mm thick;
- fittings - door handles, hinges, furniture edges, euro screws, ball guides;
- washing;
- drying;
- grids;
- shelf holders;
- euro ties.
Cutting the material according to the dimensions of the template
If you decide to make furniture yourself from start to finish, the production will begin with cutting MDF sheets according to the drawings. We do it carefully, as the work requires precision. Standard MDF panels have dimensions of 2440x1830, and for an inexperienced owner, cutting them for the first time can be quite difficult. Therefore, it makes sense to order cutting boards at the enterprise or directly in the store.
For example, let's consider how to calculate the template of the details of a standard kitchen cabinet. Conditional product size:
- width - 300 mm;
- height - 800 mm;
- depth - 550 mm.

The doors for the cabinet are made smaller in width and height so that when opened, it does not touch the module standing next to it and does not scratch the floor covering:
- The width of the facade will be 296 mm - 4 mm is enough to ensure the smooth movement of the door.
- The height of the facade will be 700 mm, so the door will be about 100 mm above the floor level.
In addition to the facade, the main details include:
- side walls - 2 pcs.;
- lid.
The back wall is made of fiberboard, so it is not among the main parts.
We subtract the thickness (32 mm) of the side walls, and we get the dimensions of the side walls - 800x550 mm, the bottom and cover - 284x550 mm. In the same way, all other dimensions of the furniture set are calculated.
Cutting materials is an extremely crucial moment. It must be done as accurately as possible, otherwise a few extra millimeters will spoil the entire geometry of the kitchen.
Chipboard cutting rules (video)
Assembly and installation of kitchen furniture
The cut parts must be prepared for assembly, after which you can start twisting the cabinet. Each individual module kit is labeled and placed next to the place where it is planned to be installed. So you will save yourself from the fact that the parts are mixed and mixed up.
The order of assembly of furniture is as follows:
- Sections of parts must first be edged. First, they are sanded with sandpaper. Then the edge tape is applied to the saw cut and glued with a hot iron. The edges are cut with a mounting knife when the edge has cooled. This technique will not only provide furniture with a more attractive appearance, but also keep it from swelling and swelling in conditions of high humidity in the kitchen. Therefore, it is recommended to cut not only the visible parts of the headset, but also those that are hidden from prying eyes.
- The next step is marking and drilling holes for fasteners and shelf supports. Do not rush to work with a drill, otherwise an inexperienced hand can make a through hole.
- The locker is assembled according to the principle of the box. Vertical side walls are attached to the horizontal lower surfaces. Lastly, screw on the lid.
- Roller guides for pull-out drawers are fixed at the building level. They must be located strictly horizontally parallel to each other, otherwise the boxes will not fall into their designated places.
- The legs are mounted on an inverted fully assembled locker.
- Facades are installed last. To do this, lay the box flat on the back wall. The door is placed in the open position. It is more convenient to do it together. The part is fixed at 95 degrees and places for fasteners are marked. Then the facades are hinged to the side walls with self-tapping screws.
- The final touch is the fastening of handles and other fittings. The assembled cabinet is immediately filled with drawers, shelves, nets.

Installation of furniture in the kitchen
Before installing the kitchen with your own hands, all repairs in the room must be completed. The set is installed on flat floors against dry walls:
- Start mounting the headset from the extreme module. The bottom row of cabinets is set according to the building level. The horizontal must be perfectly flat, otherwise there will be difficulties when laying the countertop. The lockers are connected to each other with euro ties.
- The tabletop is fixed with screws to the cabinets. From above, markup is applied with a pencil for a future sink and stove. The holes for them are cut with a jigsaw.
- Having completed the installation of the lower row of furniture, proceed to the installation of the upper one. The standard distance from the countertop or cabinet lid to the lower edge of the upper hanging modules is 650 mm. To this value add the height of the cabinet minus 6-7 mm for the mount. The resulting figure is the mounting height of the mounting rail.
- A universal canopy is attached to the back wall. Finished cabinets are hung on the wall, aligning vertically and horizontally.
- If a hood is planned for your headset, it is attached last.
Kitchen assembly instructions (video)
Conclusion
Even a novice master can successfully make a kitchen with his own hands. The main thing is to make accurate calculations, draw up a detailed drawing and boldly proceed to implement your plans. Made with your own hands, with a soul, such furniture will serve your family faithfully for many years. It’s not for nothing that they say that if you want to do something well, do it yourself!


 in the near future - forecasts and expert opinions")


