It is best to insulate the walls immediately, during the construction of the house. However, there are times when you need to insulate the walls from the inside. As a rule, apartment owners face this when harsh winters are stronger than the builder's insulation. Professionals say that it is not recommended to insulate walls from the inside for several reasons.
- This will "steal" some of the space. The fact is that in addition to the insulation, which in itself is quite voluminous, the place will also be occupied by facing materials, without which it will not be possible to do. You can insulate the walls from the inside on your own, without resorting to the services of professional builders.
- At temperatures below -18 degrees, concrete walls in apartment buildings freeze through, frost contacts with insulation, and this affects the main characteristics of insulation materials.
- At temperatures from 0 degrees to +10 degrees, condensation forms between the insulation and the wall. This can also degrade the quality of the insulation system.
Therefore, when warming, it is necessary to adhere to the two most important rules:
- Be sure to create a vapor barrier. This will protect against the formation of condensate and all the negative consequences associated with it.
- It is necessary to think over the ventilation system. If the ventilation is done poorly, then the moisture that should be removed through it will settle in the corners of the room. Because of this, a whole colony of unwanted and harmful microorganisms can form in the room.
You can insulate the walls from the inside on your own, without resorting to the help of professional builders. However, in order to do this, you need to study a sufficient amount of information in order to avoid errors.

The fact is that for different walls there are different types of insulation. What works well for a concrete wall may not work at all for a brick or wood wall.
Today we're going to look at three types of materials that are suitable for keeping warmth and comfort inside your home. Each of them is good in its own way and has a number of drawbacks.
In everyday life, this type of insulation is often called simply mineral wool. This is a synthetic insulation with a fibrous structure. It is also called stone because it is made from basalt minerals. During the construction of modern buildings, heat and sound insulation is usually carried out using mineral wool. Minvata has a number of advantages that consumers are guided by:
- Mineral wool is cheaper than many other materials, and this is an important factor, especially when carrying out large volumes of work.
- The length, width and thickness of mineral wool can be different, which means that you can choose the option that you need and not adjust to the characteristics of the insulation.
- When working, its structure reduces spraying.
- Mineral wool is packaged in small neat bales, which simplifies its transportation.
- It has a low level of thermal conductivity.
- Relaxes well.
- Not affected by chemicals.
- Does not change shape under pressure.
- Mineral wool - non-combustible material, resistant to temperature effects
- Water repellent.
In the end, mineral wool is very easy to use and therefore perfect for do-it-yourself room insulation.

However, the negative qualities of mineral wool for thermal insulation of the house should also be taken into account. With strong heating, toxic substances are released: phenol-formaldehyde, carcinogenic fractions, etc. It is also not at all useful for the body to inhale particles of mineral wool from the air.
From what is written above, it is clear that working with mineral wool is not safe for your health. Therefore, prepare carefully before proceeding. The room that needs to be insulated must be fenced off from the rest of the rooms with a partition. Try to make sure that drafts do not walk around. Be sure to use a protective respirator, rubber work gloves, goggles. Keep children and animals away. When you're done, clean up immediately and thoroughly, changing all your clothes with clean ones.
Before starting work, you need to choose the material that suits you to achieve your goals. Mineral wool is divided into several types and types.
Types of mineral wool:
- Lungs. Density - 10-90 kg / m3. Used to insulate structures with a frame.
- Heavy. Density over 90 kg/m3. They are used to insulate frames, as they are resistant to heavy loads.
- Technical. This type is of no interest to us, it is used for warming technical equipment.
Types of mineral wool, depending on the materials from which the insulation is made:
- Stelovata
- stone wool
- slag wool
Internal wall insulation with wool is always in the same sequence. With experience, you will get through much faster.

So, let's begin.
The first stage is preparation
It is necessary to clean the surface of the remnants of paint, wallpaper and other materials, remove all protrusions. Then treat the walls against mold. Aligning the walls is not at all necessary, all irregularities can be eliminated during thermal insulation.
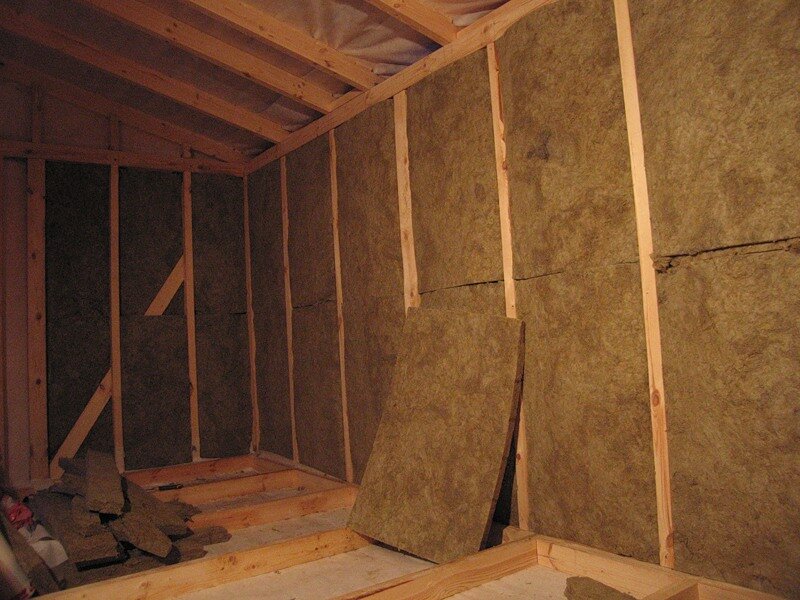
The second stage is the installation of the frame
Assemble the frame itself from metal strips at a distance of 5-10 cm from the wall. The frame may well be wooden, but the tree, as the builders say, "walks" and therefore this option is undesirable. The profile step in the vertical direction is from 60 to 100 cm.
Stage three - vapor barrier
Sheets of foil film with a shiny side are overlapped in the room. It is better to fasten the joints of the film with a special adhesive tape.
Stage four - laying mineral wool
We lay cotton wool between the slats of the finished frame. Lay as tightly and carefully as possible, because the quality of thermal insulation in the room depends on it.

The last stage - facing work
Cover the frame with drywall or plywood. Sand the surface thoroughly.
Ready! In a warm room, you can start finishing work. Create! Nothing will limit your imagination, since such insulation will withstand any materials.
Drywall
Drywall (gypsum plasterboard) is a good choice for room insulation. It itself has an insulating effect, which will be enhanced by the air cushion that forms behind it.
How to insulate a room from the inside with drywall with your own hands?
This operation can be freely carried out without the help of professionals in several stages.
Measure the room and estimate how many sheets of plasterboard you will need in the process of work.
Then clean the walls from the remnants of wallpaper, paint, stucco and other debris. Be sure to carry out the treatment against mold, in no case should such walls be covered with drywall. Putty the walls and let the putty dry completely, only after that you can proceed to the next step.

Build a frame. Of course, you can sculpt drywall directly on the walls, but there will be little sense from such insulation due to the lack of an air cushion between the wall and the plasterboard. It was already mentioned above that the wooden frame is subject to deformation and it is better to give preference to metal. Under suspensions and guide profiles it is necessary to lay a foam tape. This prevents the penetration of cold from the outer wall.
We sew drywall sheets onto the finished frame.
That's all, you can start finishing work. Drywall not only insulates the room, but also improves the microclimate in it.
Penofol
Penofol insulation with a base of polyethylene foam of different densities, covered with a thin layer of polished aluminum foil. Foam thickness varies from 2 to 40 mm, but 4 cm is used only in harsh climates. The thickness of the foil layer is only 20 microns. In fact, penofol is the same thermos. For the first time it began to be used for the manufacture of spacesuits. Later these technologies were applied in construction.
This material has a lot of positive qualities:
1.Environmental friendliness. The same materials are used for food storage. According to some reports, penofol even protects against radiation.
2. This insulation is very thin, so it practically does not hide the living space. And this is a weighty argument in favor of penofol for wall insulation from the inside of the house.
3. Additional vapor barrier is not required, which means that do-it-yourself thermal insulation will be easier to do.
4. When working, the penofol will not crumble and break, it is easily cut and does not require any additional complex tools and overalls.
- It will not be gnawed by rats and mice. This is especially true for private houses, in the thermal insulation of which rodents often gnaw through passages.
- It is easy to transport due to its small thickness.
But, like any insulation, penofol has its drawbacks:
- It is impossible to apply finishing materials on it, because. it is very soft and will simply bend under their weight.
- It is difficult to attach, although there is a type of penofol with a self-adhesive film. It is not worth nailing it, it will worsen its main characteristics.
Therefore, penofol, with all the variety of its advantages, is often used as an additional material that will protect walls from moisture and reflect thermal energy.
How to insulate the walls from the inside with penofol with your own hands?
Check the quality of the electrical wiring where you will insulate the room. The fact is that the aluminum layer of penofol is an excellent conductor, which means that it should not be allowed to come into contact with bare wires.
The frame on which the insulation will be attached should provide 2 cm after and before the penofol. The step between the vertical rails of the frame should not exceed 1 meter.
Penofol is attached to the frame end-to-end (if it is overlapped, it can form condensation) using a furniture stapler. The seams are sealed with aluminum tape.
Insulation will help create an acceptable microclimate in your home, protect it from drafts and dampness. Thermal insulation of the walls allows you to reduce the cost of both heating the room in the winter and cooling it in the summer by a factor of three. After all, the insulation acts as a kind of shield that prevents the movement of air flows, protecting the structure from the effects of external factors. Unfortunately, it is not always possible to insulate the facade of a building. For example, thermal insulation of the end wall of a panel structure should be carried out from the inside.
Benefits of indoor wall insulation
- Relatively low cost.
- Warming is possible at any time of the year.
- It is possible to insulate both the entire structure as a whole, and individual rooms and even walls.
- Soundproofing of the room.
Among the positive aspects, one should also highlight the availability for self-fulfillment: this is within the power of any owner. It is also important to know how to insulate walls and choose the best material for this.
Ways to insulate walls from the inside
For thermal insulation inside the premises, mainly the same materials are used as for insulation outside. The most popular heaters are expanded polystyrene, mineral wool and mixed heat-insulating materials based on asbestos.
Wall insulation from the inside with drywall

Thermal insulation using drywall sheets is a simple and quick way to insulate walls. The minimum distance from the draft wall to the front surface of the plate is three centimeters. The greater this distance, the correspondingly more insulation will fit into the voids of the structure. This method of thermal insulation is suitable only for large rooms, since the wall noticeably thickens during the installation of the insulation structure.
The process of building insulation from the inside begins with the installation of a metal profile structure at a distance of two centimeters from the wall. It is better to mount the frame from a galvanized profile. It is necessary to stick a tape on the sole of the guide profile to isolate the surface from contact with the plaster, thereby protecting the drywall from the cold transmitted through the metal profile. Then, mineral wool is placed in the cavity of the resulting frame (between the rack profiles). The air gap between the wall of the structure and the drywall is already a heater. However, the use of mineral wool or polystyrene greatly increases the heat resistance of the structure.
Due to its structure and elasticity, the material perfectly fills the structure. The next step is the installation of drywall. When insulating rooms with high humidity, you should not save. It is better to purchase moisture resistant drywall. At the final stage, the plasterboard slabs are finished with wallpaper.
Wall insulation from the inside with mineral wool
Thermal insulation using mineral wool is one of the most economical options. The advantages of mineral wool include lightness (which is very important when transporting building materials and insulating old structures) and low thermal conductivity. The effect of "thermos" occurs due to the appearance of an air cushion between the mineral fibers.

Perhaps the only drawback of mineral wool is that it is quite hygroscopic. Therefore, if you decide to insulate the walls from the inside, you will also have to take care of the vapor barrier in order to avoid the accumulation of condensate. In order to prevent moisture absorption through the surface of the insulation, it is recommended, along with the use of the main heat-insulating material, to insulate the walls from the inside with penofol. This material has an outstanding property - it retains up to 97% of heat. A layer of vapor barrier is applied to the frame of metal profiles after the installation of mineral wool.

Penofol - a special, foamed polyethylene with an aluminum coating in the form of a foil, which has vapor barrier and soundproof characteristics. The penofol membrane has small holes that allow moisture microparticles to move in only one direction. Penofol sheets have a small thickness. Thanks to its flexibility, this material is easy to install. It does not require additional maintenance during operation, which is also an indisputable plus.
Insulation of walls from the inside with foam
Thermal insulation using extruded polystyrene is within the power of even beginners who do not have much experience in construction. There is nothing simpler: Penoplex plates, which can be purchased here http://penoplex-spb.ru, are attached with glue to the wall. In this case, the entire surface of the plate is treated with an adhesive composition. Small grooves along the edges of the plate contribute to the reliable fastening of the foam and improve the tightness of the joints. Extruded polystyrene with smooth edges needs additional taping. Styrofoam is both glued and fixed with screws.

When insulating with foam plastic, there is no need for vapor barrier, since the surface of the plate is vapor-tight. A thin layer of plaster applied to the granular (for better adhesion to finishing materials and increased protection against fire hazard) surface of extruded polystyrene will protect the walls from damage and prepare for further painting or wallpapering.
Wall insulation technology from the inside
The process of thermal insulation takes place in several stages. The sequence of operations depends primarily on the selected material. The insulation is either glued to the inner surface of the wall, or attached to a special structure.
The most common is the scheme of wall insulation from the inside, in which the layers of thermal insulation are arranged as follows:
- Interior wall decoration.
- Small ventilation gap.
- Membrane for vapor barrier.
- Insulation.

The whole process of wall insulation can be divided into several stages.
Wall preparation
When carrying out thermal insulation with mineral slabs or with drywall, it is not necessary to level the walls. It is enough to clean the walls from flaky particles of building and finishing materials, remove protrusions that prevent the fixation of heat-insulating materials and carry out fungicidal treatment (protection against excessive activity of room mold). Small irregularities will be masked during thermal insulation and finishing work.
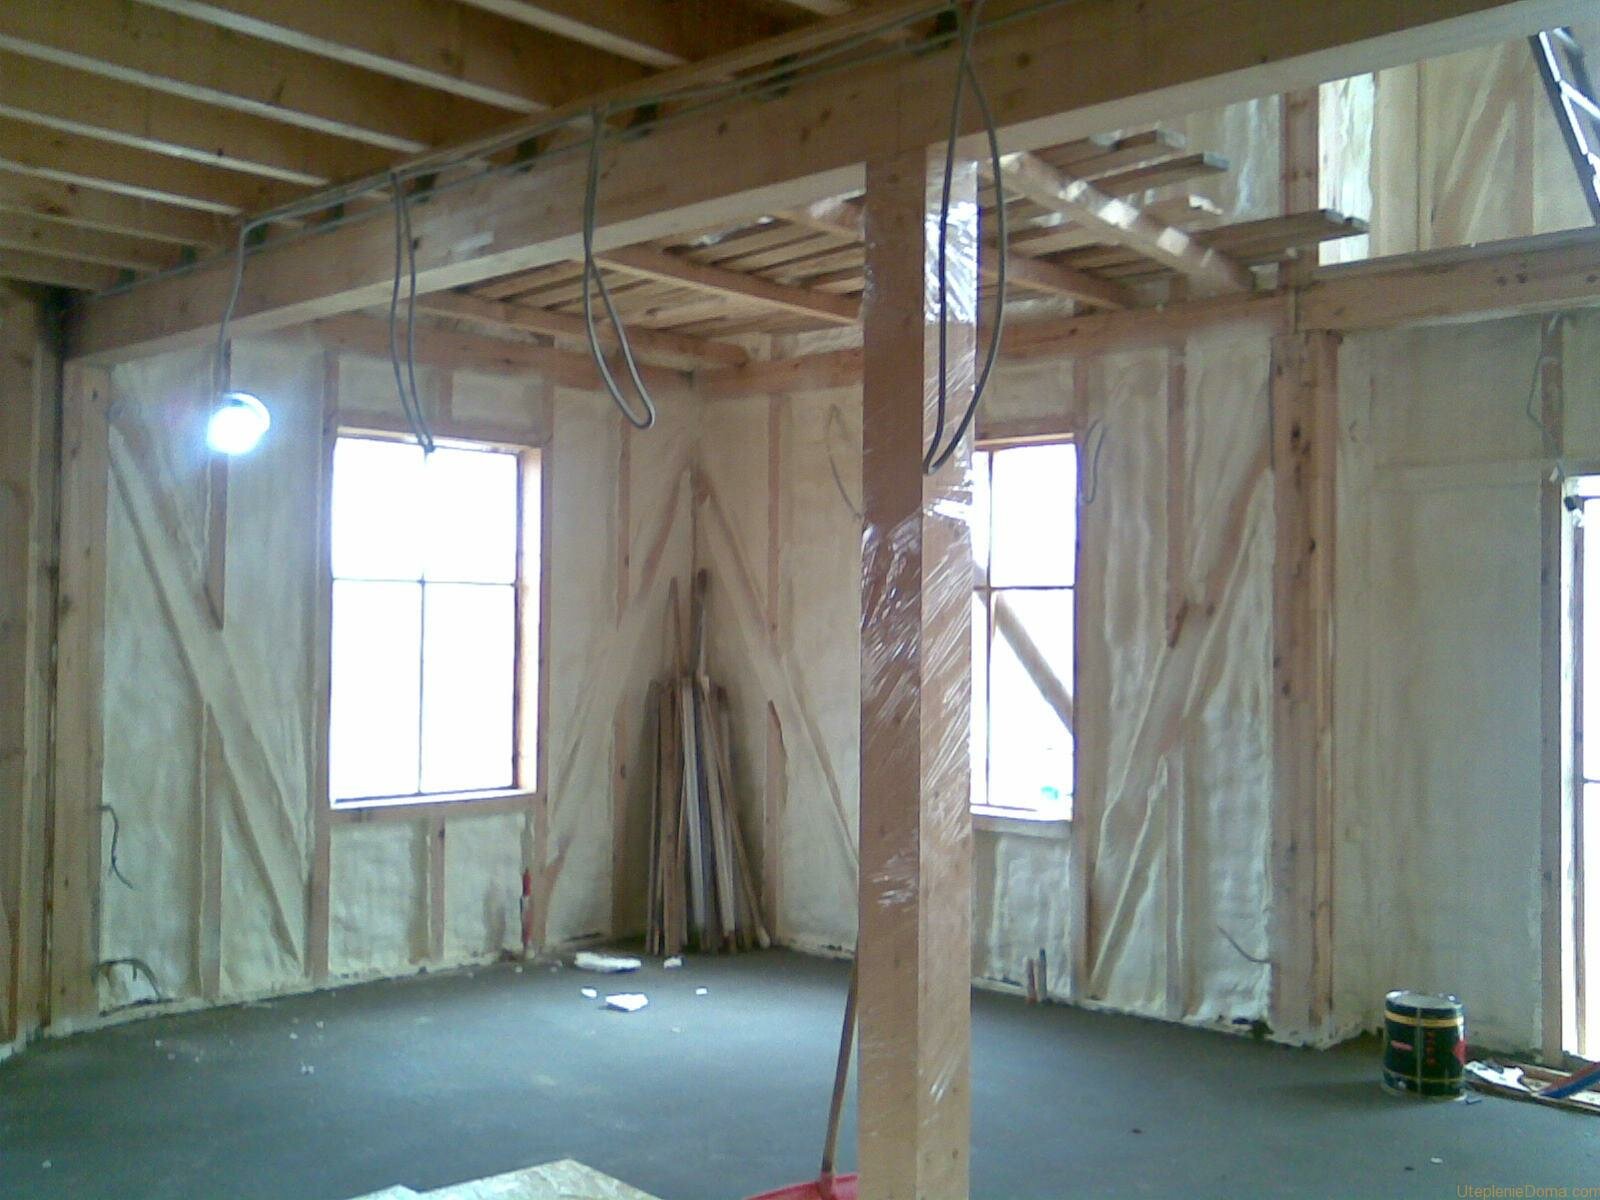
Formation of the frame and installation of insulation
At a short distance from the wall, a frame made of aluminum profiles or wooden beams is mounted (depending on the climate). It should be noted that wood is subject to drying and deformation during sudden changes in temperature. The profile is fixed in a vertical direction. The thickness of the frame must certainly correspond to the thickness of the insulation, and the distance between the bars or profiles is calculated depending on the size of the finishing material (for example, a drywall sheet). When insulating with polystyrene, the frame does not need to be erected.
Laying of thermal insulation materials begins after the completion of the frame assembly. In order to insulate the walls from the inside, one layer of insulation is enough. If there is a need to install a second layer, then, accordingly, an additional frame will need to be installed for it. Often in the area of \u200b\u200bheaters, the installation of insulation is difficult. In this case, a layer of penofol should be laid.
Laying a vapor barrier and finishing
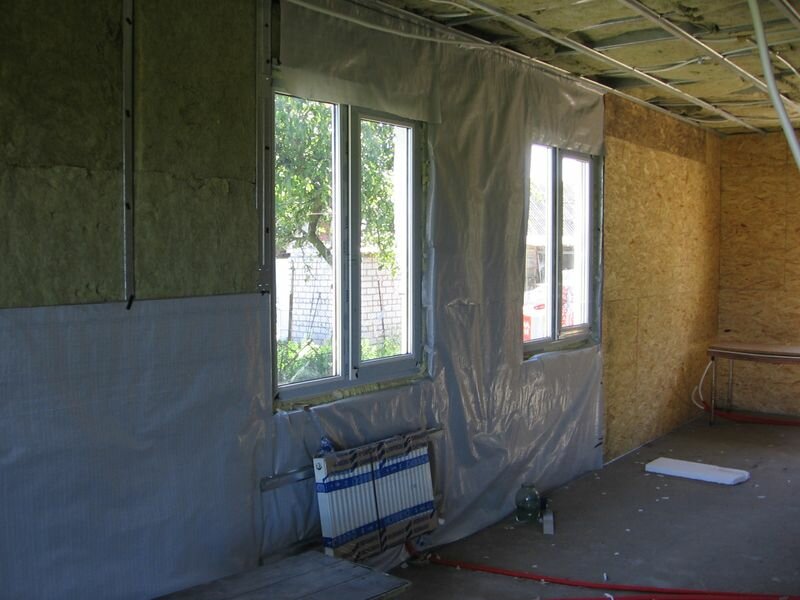
The vapor barrier protects the walls from the concentration of excess moisture in the voids of the thermal insulation material. Foil-coated film is most often used as a vapor barrier. Make sure that the shiny part of the vapor barrier is facing the inner wall of the room. The vapor barrier sheets are overlapped. To improve the effect, the joints are glued with metallic tape.
After thermal insulation is completed, the surface is sheathed with drywall and plastered, and then painted or pasted over with decorative panels or wallpaper. As for the choice of finishing materials, there are no special restrictions.
Other ways to insulate walls

In some cases, the foam is placed in space when laying walls. Also used during the construction phase penoizol, which is poured into hard-to-reach places and cracks.

From liquid materials use cellulose, which is also poured under the slabs and in the gaps between the brickwork. Cellulose insulation has a number of disadvantages: it is flammable and easily exposed to microorganisms and mold. To prevent this, flame retardants and antiseptics must be added to the pulp mass.
One of the simplest, but expensive ways to insulate walls is ceramic insulation. This is a liquid paste that is applied both to the surface of the wall and to hard-to-reach places. To achieve the effect of the wall, you need to cover with 5-6 layers of paste, the consumption of which per 1 square meter is 250 ml. This makes this type of wall insulation, although expensive, but durable.

When carrying out insulation work, unsightly heating or water pipes, additional electrical wiring can be easily hidden in a heat-insulating niche. Therefore, the insulation of the walls from the inside is an excellent reason to both improve the performance of the room and improve the design of the room.
If you have even the slightest opportunity to insulate the walls from the outside - do it. This is the best option, because insulating walls from the inside is a headache. There are only two correct and more or less acceptable options, and then, one takes up a lot of space, and the second requires significant costs during the winter. There is another way suitable for warming balconies and loggias. And for now, that's all. All other options with mounting foam, liquid ceramic thermal insulation, penofol and other materials bring only dampness and mold.
Wall insulation from the inside: what's the problem
Everyone who insulated the outer walls of a house or apartment from the inside - from the room - is faced with the problem of the appearance of fungi, mold and high humidity. These consequences are natural, and appear regardless of the type of insulation used. You can get rid of moisture and fungi only by removing the internal insulation, making a major overhaul of the walls, treating them with antifungal compounds and plastering.
Let's look at the reasons. The so-called dew point is to blame. This is the line where warm and cold air meet, and where, as a result, condensation forms.
The figure on the left shows the situation with the dew point if the wall is not insulated. It is located somewhere in the thickness of the wall, depending on temperature and humidity, it shifts either one way or the other, but it is always far enough from the inner surface. In this case, moisture accumulates in the wall, freezes. In the spring, as it thaws, it evaporates, and evaporates into the atmosphere. In the room, if dampness is observed, then for a short time and at the level of sensations.
In the center, the photo shows a situation where the wall is insulated from the inside. In this case, condensate falls in the insulation, or, if this is not possible (expanded polystyrene is used, for example), at the border of the insulation and the wall. Even if the wall freezes and the condensate turns into ice, it will melt in the spring, the insulation, wall material and finish will get wet. Since there is a large distance to the outer surface facing the street, moisture dries in this case very badly, which “climbs out” in the form of dampness, mold and all the accompanying delights.

And the third option is to insulate the wall from the outside. In this case, the dew point is in the insulation. How to get it out of there is another story (making a ventilated facade or choosing the right vapor permeability of materials), but for our topic it is important to understand that in this case the wall inside the room will definitely be dry and warm.
Summing up, we can say, if possible, make insulation from the outside. Wall insulation from the inside of the premises has to be done only in a few cases:
- if they are not allowed to be insulated from the outside (the building is a historical monument or a ban by local authorities);
- if the wall goes into a joint between two buildings;
- the wall opens into an elevator shaft.
But before you start this work, inspect the floor, ceiling, windows well. Sometimes most of the heat leaves not through the walls, but through these surfaces, and it is easier to insulate them (in the sense, there is less trouble with the dew point).
Proper internal wall insulation in a house or apartment
There are only two ways to insulate the walls in the rooms from the inside and not get a problem in the form of dampness:
- recreating a multi-layer wall (place a half-brick wall with insulation at some distance);
- make the wall heated, and then insulate it.
These options work, but as you can see, they "eat up" a significant amount of space and cost decent money. In each case, it is necessary to consider what kind of insulation and how much is needed, but the wall cake remains the same.
Second wall
At some distance from the main wall, a second wall is installed with a thickness of 10-12 cm. Between the two walls, a layer of insulation is attached to the inner one, which is required for these conditions. At the same time, a ventilation gap of at least 3 cm must remain before the outer wall. In total, this entire structure will be 20-25 cm from the main wall. It will “eat” a very considerable area.

As you can see, in this case, the dew point can be located inside the insulation or on the inner surface of the wall facing the street. To be able to remove the formed moisture, you can make forced ventilation by installing one or two exhaust fans.
Since in this case the insulation will get wet, it is necessary to choose one that is not afraid of moisture. These are polyurethane foam, expanded polystyrene, foamed glass. You can use some types of stone wool, but only those that are not afraid of moisture (there are some).
It is necessary to fix the heat-insulating material simultaneously with the construction of the walls. They laid it out to a certain height, fixed the thermal insulation. It is inconvenient to work, but there is no other way out.
Heating with electricity
The idea of this method is to transfer the dew point inside the wall during internal insulation of a concrete or brick wall. To do this, it must be heated. The easiest way is to attach an electric floor heating mat. At some distance from it, a heater is installed, on top of which there is a finishing layer.

In this case, there are no problems with the removal of moisture, and much less space is required for the installation of the system: from 8 cm (with a ventilation gap of 3 cm and a heater thickness of 5 cm).
With this method, the heat-insulating material can be any. To install it, first a crate is made, then a counter-crate, and a suitable insulation is already attached to it.
Option for warming the balcony from the inside
In the case of a loggia and a balcony, the situation is often quite different. If the authorities do not allow the installation of a wall, they demand that the existing reinforced concrete screen be left, it is cut off from the warm air with careful thermal insulation made of extruded polystyrene foam (EPS).

In this case, it is better to make the insulation redundant than at least slightly insufficient. The total thickness is divided into two layers. They are laid without a gap (preferably with locks), and so that the seams of the first layer overlap the sheet of the second. There should be no through access of warm air to the screen.
Very carefully it is necessary to approach the issue of warming the floor and ceiling of the loggia / balcony, to ensure tightness at their junction with the walls. Also pay attention to how the glazing will be installed: there may also be problem areas: the joint with the screen, walls, the insulation of the part above the frames. All of them must be well finished, excluding the possibility of contact between warm / cold air. In this case, there will be no problems. Even .
One of the ways to reduce heat loss through the building envelope of a house or apartment is to insulate the walls from the inside - not the most popular option, but sometimes the only possible one. It has not much less minuses than pluses, but most problems can be solved by using suitable materials and technologies.
Before starting work and purchasing materials, it is recommended take into account all the nuances of such insulation and be sure to perform a heat engineering calculation. This will allow you to get no less effective result than with the insulation of the building from the outside.
Considering the issue of internal thermal insulation of enclosing structures, it is worth understanding why this option is chosen much less frequently than the exterior finish. Among the disadvantages that wall insulation has from the inside, the following can be distinguished:
- Installation of heaters indoors not only reduces heat loss, but also separates the wall from internal heat, leading to its freezing and a decrease in performance;
- Between building envelopes and thermal insulation moisture accumulates, which leads to dew point shift, the appearance of dampness and mold;
- In a room insulated in this way good ventilation is required.

In addition, when choosing the insulation of the inner part of the walls, the useful area of \u200b\u200bthe premises decreases. At the same time, among the advantages of such a solution, one can name only more favorable cost and relatively simple installation. The device of such thermal insulation is available not only to experienced craftsmen, but also to non-professionals.
When there is no choice
- Location outside the insulated structure of the deformation seam between buildings, elevator shafts or other rooms and objects, not allowing to mount insulating materials;
- The impossibility of violating the appearance of the facade - for example, facing the main street or relating to a building of cultural value(such houses are often photographed, and a change in their appearance will affect the architectural and urban appearance of the city);
- building construction, in the project of which internal insulation is already provided- at the same time, each apartment of a multi-storey building or a room of a private building is insulated.

There are no other reasons for choosing internal insulation. If possible, insulate the premises from the outside, you should use them.
However, if there are reasons for installing a heat-insulating layer from the inside, you should carefully consider the work, taking into account all the nuances - from the choice of materials to the order in which they should be placed.
Brief overview of materials
Considering the materials that are used for internal insulation of housing, it is worth paying attention to several of the most popular options used for both residential (private and multi-apartment) and public buildings:
- Foamed polyethylene(foam phenol), installed so that two gaps remain in the structure - between the interior trim, insulation sheets and the wall. However, a violation of technology leads to a shift in the dew point and moisture ingress into the material. To improve the performance parameters, foam phenol is used together with other heaters.
- Styrofoam(polystyrene) - practically the best thermal insulation of walls from the inside, with minimal weight and low thermal conductivity. The moisture resistance of the material allows you to do without vapor barrier. Among the minuses is the release of harmful substances during combustion.
- polyurethane foam, which also has good thermal insulation properties and simple installation. Provides maximum sealing, and the disadvantages include, as for polystyrene, the release of harmful substances during combustion.
- Spraying- an option in which there are no seams. Suitable not only for internal, but also for external insulation. Considered suitable only as a finish.
- Paint based on ceramic components. It dries quickly (after 12 hours, wallpaper is glued on top of the material), but does not protect against dampness - and therefore from mold and fungus. Applied as an additional layer.

Expensive (and this is practically its only drawback), but effective as insulation material is considered cork. Provides good protection of premises from heat loss, does not require wallpapering or painting, does not reduce the area of rooms. Mineral wool, due to its low heat resistance, is not considered the most suitable option for internal insulation. Therefore, it is rarely used and only in extreme cases. Due to the low resistance of the material to moisture, rooms insulated from the inside are threatened by dampness and, as a result, the appearance of mold and fungus.
Wall insulation technology from the inside
The first stage of work to protect the building envelope is the choice of how to insulate the walls from the inside of the building. The main nuances in this are selection of the right material and correct observance of all stages of the technological process.  Insulation is placed in the warm season, when the humidity is minimal.
Laying work is carried out in several stages. The most popular ways to insulate walls from the inside are - gluing insulation directly to the wall or mounting on a special frame. The layer intended to be thermal insulation is laid last. On top of it, finishing can be performed, thanks to which the room gets a more attractive interior.
Wall preparation
Before insulating the wall from the inside, preparatory work should be carried out. The list of preparation steps usually does not include the alignment of building envelopes - it is considered sufficient to perform an antibacterial treatment to protect against mold. Most of the irregularities and defects will disappear during the installation of thermal insulation.

An important step in preparation base primer. When using polystyrene, the walls are also plastered using solutions that contain water repellents.
Plastering is also performed in the presence of large surface differences (from 10 mm).
After drying, the plaster is also primed (except when the structures are concrete), and the joints are sealed with a moisture-resistant mortar.
frame
The most reliable technology for insulating walls from the inside provides for the construction of a frame. For this, depending on the climate, wooden beams or aluminum profiles fixed on the inside of the enclosing structures in the vertical direction. The thickness of the frame is chosen depending on the selected insulation, and the horizontal distances between its elements are chosen according to the size of the sheets of material.
Frames are not made when insulating building envelopes with polystyrene.

Almost all methods of how to make thermal insulation of walls involve the installation of one layer of thermal insulation material. When installing the second one, it is also recommended to make your own frame for it. If heating radiators interfere with the installation of the selected material, non-penofol is laid behind them.
Finish
Complete interior wall insulation vapor barrier device(not required for foam), protecting the insulation from excess moisture. Vapor barriers often act special films with foil sputtering directed inward. To improve the efficiency of insulation sheets are fixed with an overlap, and the joints are sealed with metallized adhesive tape.

The last stage of the installation of thermal insulation on the frame - gypsum plasterboard surface. Gypsum boards are pasted over with wallpaper or painted. The type of finish rarely affects the thermal performance of building envelopes, except when sprayed insulation is used.
Illustrated instructions for internal insulation step by step
Professionals usually do not need special instructions for installing insulation - they have already tested all the technologies in practice and can work, guided only by their experience. However, if the walls are insulated from the inside with your own hands, it is advisable to have an illustration in front of you, allowing you to simplify the work and not miss a single important step.
One of these illustrated instructions provides fabrication of the frame and laying of mineral wool inside the premises. Although the technique will practically not differ when using other materials. For example, polyethylene foam, for which a frame is required, since the performance characteristics of penofol depend on the gaps between the insulation and the wall.
How to deal with negative consequences in walls insulated from the inside
When deciding whether it is possible to insulate walls from the inside, you should be aware of the availability of measures that allow reduce the risk of negative consequences in the form of excess moisture and the appearance of mold. To do this, the performer of the work is required to follow certain recommendations:
- Reduce the risk of steam getting into the heater, which leads to the appearance of condensation on the walls. To do this, use vapor-tight membranes or, if necessary, save on repairs, ordinary plastic film.
- Choose thermal insulation with a vapor permeability lower than enclosing structures - expanded polystyrene, sprayed polyurethane foam.
- Pay special attention to the junction of the insulation to enclosing structures, including floors, walls and ceilings. Joints must be made in such a way that leave no holes for moisture to get inside. The best option is to run heat-insulating materials on adjacent surfaces with their subsequent gluing.
- Provide extra ventilation, the task of which is to compensate for the vapor barrier device of the walls inside the room and preserve the natural vapor exchange.

The efficiency of the ventilation system should be increased by periodically airing the rooms.
Facing of enclosing structures is carried out using moisture resistant drywall- you can distinguish it from the usual according to the greenish color of the sheets of material. External protection of thermal insulation from steam for summer time, when moisture can not go out of the room to the street, but, on the contrary, penetrate from the outside, is not performed. In summer, the air temperature is high enough to dry the walls, so external vapor barrier for insulation is not used.
Conclusion
Summing up, it is worth noting that internal thermal insulation of walls is an extreme case- an option chosen if it is impossible to isolate the walls from the outside. If it is possible to place a heater on the outer part of the building envelope, this option is chosen. Having opted for internal insulation, the homeowner should be guided in choosing the right material thermotechnical calculations, financial capabilities and the area of insulated rooms.
In most cases (except for the choice of expanded polystyrene or polyurethane foam), all ways to properly insulate a wall require a vapor barrier device that minimizes the negative effects of internal insulation.
There are many negative opinions about whether it is possible to insulate walls from the inside. On the other hand, it is not always possible to sheathe the walls of a private house or apartment with insulation from the outside for various reasons. Therefore, the internal thermal insulation of the premises also has the right to life, the main thing is to correctly perform this insulation with your own hands, which will be discussed in the material presented below.
When it is possible and impossible to do insulation from the inside
All the problems that internal wall insulation can create are largely contrived and often exaggerated by supporters of external thermal insulation. The most common statement is about the dew point that occurs in the wall, which, after the wall is insulated from the inside, moves to its inner surface, as a result of which condensate appears at the insulation / wall boundary, followed by various fungi. Since the process is hidden from view by a heat-insulating layer, the problem is already detected at an advanced stage.
This is not entirely true. In fact, the dew point in the thickness of the wall is constantly moving, because the temperature outside and inside changes even during the day. Therefore, specialists in building thermal physics operate with such a concept as a zone of possible condensation, and not just one point. Within this zone, moisture necessarily condenses, regardless of the method of insulation, the only question is its quantity.
If there is no significant intake of vapor from the outside, then moisture falls out only from the air inside the wall, and this is a meager amount. And since condensation is accompanied by the release of heat, this moisture can quickly evaporate. When a large amount of steam enters the walls from the street or from rooms, dampness can form, which often suffers from cold concrete walls.
Important. If concrete or walls made of other materials are wet, then it is not allowed to insulate the house from the inside until the causes of dampness are clarified and eliminated. Often such reasons are high indoor humidity and lack of supply and exhaust ventilation.

In contrast to negative judgments, we will give a couple of typical examples from practice. The first is the insulation of the pitched roof of a private house, because it is carried out only from the inside. If the heat-insulating "pie" is made correctly, then all the resulting moisture is safely removed from the insulation. The same applies to the frame house, where mineral wool, which is part of the outer wall, acts as thermal insulation.
The reasons why homeowners are forced to insulate the house from the inside are quite good:
- it is technically very difficult to sheathe a wall with insulation from the outside, but it is generally impossible to do it with your own hands. This includes the facades of houses in the city center and apartments of high-rise buildings;
- some enclosing structures border on technical premises, for example, on an elevator shaft;
- since insulation from the inside is much cheaper than the outside, for many this is also an important argument. People do not always have the financial means, but they want to save on heating.
The conclusion from all of the above is this: the internal insulation of a residential or country house has the right to life, but with some reservations. The wall to be insulated must be dry and without fungus initially, and it is necessary to prepare the surface according to the technology.
materials
The choice of materials used to insulate private houses and apartments from the inside is not very wide and consists of the following items:
- mineral wool in slabs with a density of at least 100 kg/m3;
- slab foam plastic with a density of 25 kg/m3;
- extruded polystyrene foam in slabs, also known as polystyrene foam;
- thin insulators with foil based on foamed polyethylene are used as an additional insulation.
Note. There is an opinion that it is possible to insulate building structures with drywall. The latter is indeed able to retain heat, but cannot serve as the main heat-insulating layer. GKL is a finishing material, used in conjunction with heaters.

Non-combustible mineral wool is well suited for internal thermal insulation of any wooden house, both timber and log. Its only serious drawback is the ability to absorb moisture and quite freely pass water vapor through itself. Therefore, mineral wool should be carefully protected from the space of rooms so that moisture from inside the house does not seep into the insulation. At the same time, it is better to take cotton wool in high-density slabs, it does not settle from moisture and is able to give off moisture well.
Advice. It is impossible to purchase mineral wool based on fiberglass (glass wool) for internal thermal insulation, it is harmful to human health.
Whatever they say, the foam plastic also allows a small fraction of the vapor to pass through, so it also needs a vapor barrier. In addition, the material is combustible, so it is better to hide it behind a drywall finish or plaster it. Styrofoam is very popular due to its low cost, therefore it is suitable for a budget option for insulating both wooden and brick walls from the inside.

An excellent insulation in all respects is extruded polystyrene foam, which has the highest thermal insulation performance. Another thing is that it is the most expensive of all materials used for internal insulation, but also the thinnest. And penoplex does not let water vapor through, and therefore does not require any vapor barrier. Better than it is only polyurethane foam, which is sprayed by machine.

Well, foamed foil polyethylene (penofol, isolon) can also be successfully used instead of a vapor barrier film and as additional insulation to the main layer of mineral wool. Only it must be properly laid with gluing the joints, which will be discussed later.
Wall insulation technology from the inside
The first step is to prepare the surface. If we are talking about a brick wall, then it must be plastered and leveled from the inside, after which the surface is treated with a deeply penetrating antifungal primer.

The bottom line is that an air gap does not form between the wall and the insulation layer, from which condensation can fall out at a certain temperature difference. Another thing is a house made of timber or rounded logs, you can’t do without air pockets. If the walls of the timber have only small horizontal slots, then it is unrealistic to make the inner surface of the log house even.

It remains only to carefully caulk all the joints and cracks, and then impregnate the wood with an antiseptic compound. The best option for insulating brick walls is still polystyrene foam or foam plastic with a thickness of 20 to 50 mm, depending on the climate in the region of residence. An adhesive mixture or polyurethane adhesive is first applied to the foam slab, and in a continuous layer, and not just around the perimeter.

Remember what we said earlier about excess air. Then the plate is well glued to the wall, followed by the next one, and so on. It is necessary to ensure that the joints between the plates are minimal, fitting them tightly to each other. After the glue has hardened, the insulation should be fixed with dowels in the form of fungi at the rate of 2-3 pcs. on the styrofoam board, no longer needed.

On this, the warming of the house or cottage from the inside, made by oneself, is completed, you can proceed to the finishing work. Plaster on a reinforcing mesh fits well on penoplex or tiles are glued.

To insulate a wooden house, you will need to install a frame made of timber, whose width is equal to the thickness of the insulation. Thermal insulation technology looks like this:
- the surface of the wall is covered with a diffusion membrane that allows vapor to pass through. A ventilation gap is left under the membrane, as shown in the diagram below;
- the battens of the crate are installed and fixed in such a way that the insulation plates fit between them at a distance;
- mineral wool is laid between the uprights without additional fasteners;
- a vapor barrier film is being installed. Her canvases are laid with overlap and gluing, pressing the counter-lattices with slats;
- drywall sheets and other interior trim are attached to the rails.

Note. Here, the ventilation gap serves to remove vapors that penetrate through the log or timber wall and form in the insulation. For this, special holes are made in the wall.

Particular attention should be paid to sealing the vapor barrier layer. The joints must be well glued with adhesive tape so that moisture from the room cannot penetrate into the insulation. Here, instead of a film, foil foam can be laid, only without overlaps. Aluminum adhesive tape is used for gluing the joints. How to put such heaters correctly is shown in the video:
Conclusion
If the insulation of the walls of the house from the inside is done correctly, then no moisture and fungi with mold will appear under the insulation. It is important when installing the "pie" in a wooden house to make as few holes as possible in the vapor barrier, for which it is pressed against the ends of the bars with even rails. By the way, any of the listed materials is suitable for warming houses made of timber, since according to the technology, ventilation is provided for moisture weathering.


 chancre look like?")
")


