Despite the rapid development of satellite and cable television, the reception of terrestrial television broadcasts still remains relevant, for example, for places of seasonal residence. It is not at all necessary to buy a finished product for this purpose; a home UHF antenna can be assembled with your own hands. Before moving on to considering the designs, we will briefly explain why this particular range of the television signal was chosen.
Why DMV?
There are two good reasons to choose designs of this type:
- The thing is that most channels are broadcast in this range, since the design of repeaters is simplified, and this makes it possible to install a larger number of unattended low-power transmitters and thereby expand the coverage area.
- This range is selected for digital broadcasting.
Indoor TV antenna “Rhombus”
This simple, but at the same time, reliable design was one of the most common in the heyday of on-air television broadcasting.
Rice. 1. The simplest homemade Z-antenna, known under the names: “Rhombus”, “Square” and “People’s Zigzag”As can be seen from the sketch (B Fig. 1), the device is a simplified version of the classic zigzag (Z-design). To increase sensitivity, it is recommended to equip it with capacitive inserts (“1” and “2”), as well as a reflector (“A” in Fig. 1). If the signal level is quite acceptable, this is not necessary.
The material you can use is aluminum, copper, and brass tubes or strips 10-15 mm wide. If you plan to install the structure outdoors, it is better to abandon aluminum, since it is susceptible to corrosion. Capacitive inserts are made of foil, tin or metal mesh. After installation, they are soldered along the circuit.
The cable is laid as shown in the figure, namely: it did not have sharp bends and did not leave the side insert.
UHF antenna with amplifier
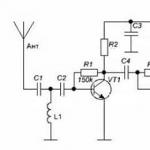
In places where a powerful relay tower is not located in relative proximity, you can raise the signal level to an acceptable value using an amplifier. Below is a schematic diagram of a device that can be used with almost any antenna.
 Rice. 2. Antenna amplifier circuit for the UHF range
 List of elements:
- Resistors: R1 – 150 kOhm; R2 – 1 kOhm; R3 – 680 Ohm; R4 – 75 kOhm.
- Capacitors: C1 – 3.3 pF; C2 – 15 pF; C3 – 6800 pF; C4, C5, C6 – 100 pF.
- Transistors: VT1, VT2 – GT311D (can be replaced with: KT3101, KT3115 and KT3132).
Inductance: L1 - is a frameless coil with a diameter of 4 mm, wound with copper wire Ø 0.8 mm (2.5 turns must be made); L2 and L3 are high-frequency chokes 25 µH and 100 µH, respectively.
If the circuit is assembled correctly, we will get an amplifier with the following characteristics:
- bandwidth from 470 to 790 MHz;
- gain and noise factors – 30 and 3 dB, respectively;
- the value of the output and input resistance of the device corresponds to the RG6 cable – 75 Ohm;
- the device consumes about 12-14 mA.
Let's pay attention to the method of power supply; it is carried out directly through the cable.
This amplifier can work with the simplest designs made from improvised means.
Indoor antenna made from beer cans
Despite the unusual design, it is quite functional, since it is a classic dipole, especially since the dimensions of a standard can are perfectly suitable for the arms of a decimeter range vibrator. If the device is installed in a room, then in this case it is not even necessary to coordinate with the cable, provided that it is not longer than two meters.

Designations:
- A - two cans with a volume of 500 mg (if you take tin and not aluminum, you can solder the cable instead of using self-tapping screws).
- B – places where the cable shielding is attached.
- C – central vein.
- D – place of attachment of the central core
- E – cable coming from the TV.
The arms of this exotic dipole must be mounted on a holder made of any insulating material. As such, you can use improvised things, for example, a plastic clothes hanger, a mop bar or a piece of wooden beam of appropriate size. The distance between the shoulders is from 1 to 8 cm (selected empirically).
The main advantages of the design are fast production (10 - 20 minutes) and quite acceptable picture quality, provided there is sufficient signal power.
Making an antenna from copper wire
There is a design that is much simpler than the previous version, which only requires a piece of copper wire. We are talking about a narrow band loop antenna. This solution has undoubted advantages, since in addition to its main purpose, the device plays the role of a selective filter that reduces interference, which allows you to confidently receive a signal.
 Fig.4. A simple UHF loop antenna for receiving digital TV
 For this design, you need to calculate the length of the loop; to do this, you need to find out the frequency of the “digit” for your region. For example, in St. Petersburg it is broadcast on 586 and 666 MHz. The calculation formula will be as follows: L R = 300/f, where L R is the length of the loop (the result is presented in meters), and f is the average frequency range, for St. Petersburg this value will be 626 (the sum of 586 and 666 divided by 2). Now we calculate L R, 300/626 = 0.48, which means the length of the loop should be 48 centimeters.
If you take a thick RG-6 cable with braided foil, it can be used instead of copper wire to make a loop.
Now let's tell you how the structure is assembled:
- A piece of copper wire (or RG6 cable) with a length equal to L R is measured and cut.
- A loop of suitable diameter is folded, after which a cable leading to the receiver is soldered to its ends. If RG6 is used instead of copper wire, then the insulation from its ends is first removed, approximately 1-1.5 cm (the central core does not need to be cleaned, it is not involved in the process).
- The loop is installed on the stand.
- The F connector (plug) is screwed onto the cable to the receiver.
Note that despite the simplicity of the design, it is most effective for receiving “digits”, provided that the calculations are carried out correctly.
Do-it-yourself MV and UHF indoor antenna
If, in addition to UHF, there is a desire to receive MF, you can assemble a simple multiwave oven, its drawing with dimensions is presented below.

To amplify the signal, this design uses a ready-made SWA 9 unit; if you have problems purchasing it, you can use a home-made device, the diagram of which was shown above (see Fig. 2).
It is important to maintain the angle between the petals; going beyond the specified range significantly affects the quality of the “picture”.
Despite the fact that such a device is much simpler than a log-periodic design with a wave channel, it nevertheless shows good results if the signal is of sufficient power.
DIY figure eight antenna for digital TV
Let's consider another common design option for receiving “digits”. It is based on the classic scheme for the UHF range, which, because of its shape, is called “Figure Eight” or “Zigzag”.
 Rice. 6. Sketch and implementation of the digital eight
 Design dimensions:
- outer sides of the diamond (A) – 140 mm;
- internal sides (B) – 130 mm;
- distance to the reflector (C) – from 110 to 130 mm;
- width (D) – 300 mm;
- the pitch between the rods (E) is from 8 to 25 mm.
The cable connection location is at points 1 and 2. The material requirements are the same as for the “Rhombus” design, which was described at the beginning of the article.
Homemade antenna for DBT T2
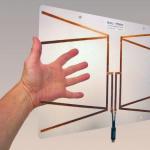
Actually, all of the examples listed above are capable of receiving DBT T2, but for variety we will present a sketch of another design, popularly called “Butterfly”.

The material can be used as plates made of copper, brass, aluminum or duralumin. If the structure is planned to be installed outdoors, then the last two options are not suitable.
Bottom line: which option to choose?
Oddly enough, the simplest option is the most effective, so the “loop” is best suited for receiving a “digit” (Fig. 4). But, if you need to receive other channels in the UHF range, then it is better to stop at “Zigzag” (Fig. 6).
The antenna for the TV should be directed towards the nearest active repeater, in order to select the desired position, you should rotate the structure until the signal strength is satisfactory.
If, despite the presence of an amplifier and reflector, the quality of the “picture” leaves much to be desired, you can try installing the structure on a mast.

In this case, it is necessary to install lightning protection, but this is a topic for another article.
Sometimes a television antenna breaks down at the most inopportune moment, or it is simply not at hand. For example, during a trip to the country. In this case, the question arises of how to make an antenna for a TV with your own hands from what you have at hand.
Using a homemade transmitter, you can watch a limited number of channels. And the reception may be of lower quality than that of a purchased device. Still, knowing how to make an antenna yourself from available materials can come in handy. An antenna can be either simple or complex. The device will be able to receive almost all types of broadcasts.
Antenna types
Before you start making a TV antenna with your own hands, it is worth understanding the types and technical characteristics of television receivers.
Depending on the installation location, indoor and outdoor television receivers are distinguished. Indoor devices are effective only in areas with good signal reception. They are not suitable for country TVs. For rural areas and areas remote from the television repeater, outdoor television receivers are used.
Based on the type of signal amplifier, television receivers are either active or passive. Passive-type structures receive and amplify impulses due to their own geometry. They do not require power supply and do not introduce their own interference and noise into the signal they receive. Making a passive antenna yourself is the easiest way.
Active devices are equipped with a signal amplifier, which is powered from the mains. An active amplifier itself creates interference and distortion in the area of reliable reception if a device that is too powerful or of poor quality is selected.
Broadcasting is carried out on meter or decimeter waves. To receive only meter or only decimeter broadcast bands, band television receivers are best suited. For example, for the transmission of digital terrestrial television DVB-T2 in our country, only the decimeter range is used.
A log-periodic, or all-wave, television antenna can receive waves in both the meter and decimeter ranges. This is a broadband design with 10 vibrators. The log-periodic device in terms of gain corresponds to a 3-4 element all-wave antenna.
Operating frequencies are limited by the largest and smallest vibrator in the receiver. It fits well with the feeder. Its gain does not change, so connecting to the feeder does not require balancing and matching devices.
A cable with a resistance of 75 Ohms enters the lower tube, exits at the end (which is directed towards the television center) and is connected by a braid to the end of the lower tube, and by a core to the end of the upper tube.
Externally and according to the principle of operation, a log-periodic television antenna consists of several channel-wave devices connected together. Moreover, each of them has its own vibrator, reflector and director. When a signal arrives, vibrators closest in size to half its wavelength are excited. Such television antennas are used to receive both digital and analogue broadcasts.

The wave channel type receiver has the simplest design, which can be quickly assembled from simple and affordable materials. It receives an analogue television signal near a television tower and a digital one outside large populated areas, where there is little interference.
We use beer cans
A do-it-yourself dacha antenna made from beer cans is the simplest and most affordable passive type design. It can be done quickly and without basic skills. At the same time, it copes well with receiving UHF broadcasts.
To assemble an antenna from beer cans you will need:
- cable of sufficient length;
- aluminum cans (for the simplest design, 2 are enough);
- 2 bolts or self-tapping screws;
- plug (F -- connector) for connecting the cable to the TV;
- electrical tape or tape;
- a base made of wood or plastic for attaching cans (you can use wooden coat hangers).
The antenna circuit is simple:
- Each can is attached with electrical tape or tape to the base pin at a distance of 7 cm from each other.
- The cable is stripped on one side. They are spread out and attached to the rings of the cans or to screwed-in screws. It can also be soldered. A plug is attached to the free end.
This simplest design is suitable for installation both indoors and outdoors. When used externally, the jars are covered with a large plastic container with the neck and bottom cut off. The cable is pulled through a hole made on the side, which can be sealed using boiling water. The finished receiver is connected and configured through automatic channel search.
You can also make an analogue of a satellite dish with your own hands. For this purpose, use a simple umbrella. You will also need:
- aluminium foil;
- copper cable;
- 1 tin can;
- amplifier and power supply for it.

DIY TV antenna made from beer cans
Operating procedure:
- Measure the umbrella segments between the spokes and cut out elements corresponding to these dimensions from foil. They are sewn to the dome of the umbrella, covering its entire interior.
- A TV signal receiver is installed at the focal point of the metal grille. The amplifier will be a core from which 4 cm of braiding has previously been removed, and a cable screen that protects against interference.
- An oval is cut out of an aluminum can. A hole is made in the center of it, through which a bare wire is passed and a contact is soldered. To protect against oxidation and corrosion, the joint is covered with plasticine.
- The amplifier is powered through a cable.
- The receiver is attached to the handle of the umbrella with tape so that it does not touch the metal. This will protect against interference and distortion. The junction must be sealed with plasticine.
- The power supply is placed next to the TV, and the antenna is turned towards the repeater.
- Channels are established by driving the dish until the best signal is obtained.
This antenna works best if the tower is located no further than 35 km from it.
We use wire
Another simple design is a homemade wire antenna. To make it, you can use copper or brass wire. These materials are resistant to oxidation.
The wire must be stripped of insulation from the ends. One of them is connected to the TV, and the other to the radiator of the heating system. The pipe is led to the roof - it will work as a signal amplifier. Such an antenna will be able to receive no more than 5 signals. The wire can be stretched onto the balcony and secured to a clothesline.
You can make a TV antenna from wire in another way. It will require:
- 2 pieces of copper wire 3-4 mm wide and 1.8 m long;
- a plate of plywood or metal measuring 15 by 15 cm;
- amplifier (you can use old decimeter amplifiers);
- electric drill;
- TV cable;
- iron pipe or fittings for making a mast;
- bolts.
This copper wire antenna is assembled as follows:
- They make catchers by bending the wire in the shape of 2 diamonds with sides of 45 cm. This is the optimal frame length for such a device.
- The resulting diamonds are fixed on the base. To do this, holes are drilled at the fastening points, flattening the wire, and screws are screwed in.
- If a metal plate is used as a base, then a welding machine can be used to attach the catcher.
- We fix the amplifier in the center and connect the cable to it.
The easiest way to use a mast here is to use a metal pipe, which can simply be dug into the ground or attached to any suitable support. The antenna is fixed to the top of the mast, and the cable is pulled through it. The entire structure is painted to protect against corrosion.
Another popular TV receiver made from copper wire that you can make yourself is a small-sized antenna with an unusual “butterfly” shape. For external use, such a device is made of wire 2-4 mm thick, for internal use - 2 mm or thinner.
A frame is made to receive TV channels. Frame length -- 500 mm, width -- 200 mm. It is twisted so that 2 identical triangles are obtained, which are separated using wire cutters and soldered to the cable, leaving a 14 mm distance between the vertices. A plug is attached to the other end of the cable. The structure is taped with adhesive tape or electrical tape to a material with dielectric properties - wood, hard rubber, plastic.

Home digital HDTV device
A powerful antenna for a TV, capable of receiving a signal at 490 MHz, is made from a transformer, which is better to purchase, since it will not be easy to make it yourself. You will also need:
- cardboard;
- scotch:
- foil;
- stapler;
- glue.
To make a television receiver, a diagram is used according to which all the parts are cut out of cardboard. The elements are covered with foil, bent and trimmed. It is best to first find a template and diagram through a search engine and print it out on a printer or copy it from a printed publication.
First you need to make a reflector about 35 cm long and cover it on one side with foil. In the middle, 2 rectangles of the same size are cut to attach the catcher.
The antenna is assembled from the prepared parts. Departing 35 mm from the reflector, butterfly-shaped elements are glued to the plate. They can be attached using a stapler. In the middle of each such element, a hole is made for the cable, to which a transformer is connected and a plug is attached.
Option for apartment
You can make an antenna for indoor use using any of the methods presented above.
Another simple option at home is made as follows.
A simple DIY frame indoor antenna is made from copper wire or cable with foil in the winding. The device not only receives television channels, but also serves as a selective filter against interference.
To calculate the size of the loop, you need to know the wave frequency for a given region. The length of the loop will be equal to the product of the coefficient (300 units) and the average frequency range.
Cut off the required amount of wire or cable, and if necessary, clean the edges. Make a loop out of it and solder the TV cable leading to the receiver. A plug is connected to it.
The structure can be hung or installed on a stand. This simple device, with accurate calculations, is most effective for digital television.
A reliable device for the home is a diamond-shaped antenna. It is the simplest representative of zigzag television receivers. To improve reception, it is equipped with capacitive inserts and a reflector.
The device is assembled from plates or tubes 1-1.5 cm wide made of brass, copper or aluminum. To make capacitive inserts, foil, tin or metal mesh is used, which is soldered around the perimeter. The cable is laid from the center and along one side, avoiding sharp bends. It should not leave the frame.

Despite the rapid development of the Internet, television is a key source of important information for each of us. To display a high-quality image on the screen, a powerful antenna is required. You can buy it or make it yourself and save a lot of money. How to make an antenna with your own hands for a TV, what is required for this - we will analyze in detail in this article.
We use beer cans
Today there are many schemes available that can help you build a good home antenna. The construction from beer cans is assembled very quickly, and all the necessary materials are at hand. Of course, such an antenna does not guarantee a super-stable signal, but for a dacha or house in the village it is a working solution.
What is required for assembly:
- aluminum cans for any drink, but of the same volume;
- antenna wire, length is determined individually;
- plugs;
- insulation or tape;
- wooden or plastic strip for the base.
If all these elements are there, it’s time to figure out how to quickly make an antenna for a TV:

All that remains is to experiment with the location of the antenna and the distance between the banks. 7.5 cm between the edges of the cans is considered optimal. Although in certain situations the distance may be reduced or increased.
Zigzag antenna
How to make a homemade antenna for a TV was invented by K.P. Kharchenko back in 1961. But at that time, few people were interested in the zigzag shape. However, with the advent of digital television, the situation has changed, since the shaped antenna demonstrates excellent signal reception.
To make it you need:
- copper cable 5 mm thick;
- a piece of antenna wire;
- soldering iron and solder;
- connectors;
- a piece of plywood for the base.
 First of all, we make the frame correctly. We measure a piece of wire 109 cm. We bend it so that we get two parallel rhombuses, the length of one wall should be 13.5 cm. After all the manipulations, 1 cm of cable should remain in the central part. It will be used for final fixation of the structure.
In the central part of the product, the corners of the diamonds should not be in contact. The antenna cord will be attached to them. The central core is soldered to the upper corner, and the screen is attached to the lower corner. The gap between the corners is 2 cm.
We attach the resulting structure to the base and install it on a hill to ensure a stable signal.
Coaxial cable
Many people are interested in how to make an antenna for a TV from a coaxial cable. This indoor structure is created from 75-ohm coaxial wire. This method requires correctly calculating the cable length for effective signal reception. To do this, we find out the broadcast frequency and divide it in megahertz by 7500. We round the final value to an even figure. The optimal antenna length for your region can be found on the Internet.
 Coaxial cable antenna
Having determined the length of the wire, all you have to do is follow the following instructions on how to make an outdoor antenna for a TV:
- on one side of the end we prepare the cable and install a connector for connecting to a TV or digital set-top box;
- We measure 2 cm from the installed connector and make a mark - from it you will need to measure the required antenna length;
- remove excess with pliers;
- remove the top layer of insulation and braid;
- bend the stripped part at 90 degrees;
- We search for channels on TV.
This method is the simplest, but the conditions for the length of the antenna must be met. The design demonstrates high efficiency, but provided that there are no serious obstacles.
Antenna amplifier
In some localities, even knowing how to make your own indoor antenna for a TV, you cannot achieve a stable signal. The problem is solved by installing an amplifier. But this device has a complex design: without the appropriate skills and knowledge, it will not be possible to assemble it.
There are two ways to solve the problem:
- go to the store and purchase a ready-made version;
- use a regular magnet.
The magnet is fixed as close as possible to the antenna; it is first wrapped several times with the antenna wire. Although it’s better to get a full-fledged amplifier. 
To understand how to make an antenna for a TV in the country, you need to consider certain points:
- We use a good cable. The signal level depends on the quality of the wire. Ideally - a version with a resistance of 75 Ohms and made in a silicone braid.
- We reduce the number of connections to a minimum. We recommend using a single cable for the antenna and amplifier.
- We use soldering. The signal is sensitive to any interference and instantly deteriorates if there are design flaws. If all contacts are soldered, the product will last a long time and be reliable, and the signal will be stable.
In conclusion
The article presents only the simplest methods for quickly assembling an antenna at home. Homemade designs provide a stable signal and are often not inferior to purchased models. The main thing is to follow the instructions during the assembly process and select high-quality materials.
Despite the rapid development of the Internet, television remains the main source of information for the majority of the population. But in order for your TV to have a high-quality picture, you need a good antenna. It is not at all necessary to buy a television antenna in a store, because you can make it yourself and save a lot of money.
You can find out how to make high-quality antennas for various broadcast bands and what materials to use by reading our article.
There are many types and forms of television antennas, the main ones are listed below:

- Antennas for receiving a “wave channel”.

- Antennas receiving a “traveling wave”.

- Loop antennas.

- Zigzag antennas.

- Log-periodic antennas.
 Array antennas
 - Array antennas.
Antennas for digital television reception
The whole world, including our country, has switched from analogue to digital broadcasting. Therefore, when making an antenna with your own hands or buying it in a store, you need to know which antenna is best suited for receiving DVB-T2 format:

- Indoor antenna- suitable for receiving a signal in DVB-T2 format only at a distance of up to 10 kilometers from the repeater. In principle, at this distance, even an ordinary bare wire inserted into the antenna connector of the TV and directed in the desired direction can receive the signal, but for a more stable and stable signal, it is better to use an indoor antenna.

- Crow antenna- capable of receiving a digital signal at a distance of up to 30 kilometers. This type of antenna is installed outside the home and does not require a clear focus on the repeater. But in cases where the distance from the signal source is more than 30 kilometers or there are interference generators nearby, it is advisable to point the antenna at the TV tower.

- Antenna type DIPOL 19/21-69- receives a signal at a distance of up to 50 kilometers. Requires installation at a height of 8-10 meters and a clear direction to the signal source. In conjunction with an amplifier, it is capable of receiving a digital signal at a distance of up to 80-100 kilometers. The excellent characteristics of this antenna make it one of the best options for receiving a signal in the DVB-T2 format at a remote distance from the repeater.
If you live not far from a TV tower, then you can easily make a simple antenna for receiving a signal in DVB-T2 format with your own hands:
- Measure 15 centimeters of the antenna cable from the connector.
- Remove 13 centimeters of outer insulation and braid from the cut edge, leaving only the copper rod.
- Referring to the TV picture, point the rod in the desired direction.
The antenna is ready! It should be noted that such a primitive antenna is not capable of providing a high-quality and stable signal at a distance from the TV tower and in places with sources of interference.
DIY antennas
Let's look at several options for television antennas that you can make yourself from scrap materials:
Beer can antenna
An antenna from beer cans can be made in literally half an hour, using the materials you have on hand. Of course, such an antenna will not provide a super-stable signal, but for temporary use in a country house or in a rented apartment it is quite suitable.
 Beer can antenna
 To make an antenna you will need:
- Two aluminum cans of beer or other drink.
- Five meters of television cable.
- Plug.
- Two screws.
- A wooden or plastic base on which the jars will be attached (many people use a wooden hanger or mop).
- Knife, pliers, screwdriver, insulating tape.
After making sure that you have all the above items in stock, do the following:
- Strip one end of the cable and attach the plug to it.
- Take the other end of the cable and remove 10 centimeters of insulation from it.
- Unravel the braid and twist it into a cord.
- Remove the plastic layer from the insulating rod of the cable to a distance of one centimeter.
- Take the jars and screw the screws into them in the center of the bottom or lid.
- Attach a rod to one can and a braided cable cord to the other, screwing them onto screws.
- Attach the jars to the base using electrical tape.
- Attach the cable to the base.
- Insert the plug into the TV.
- Moving around the room, determine the location of the best signal reception and attach the antenna there.
There are other variations of this antenna, with four and even eight banks, but no obvious effect of the number of banks on the signal quality has been identified.
You can also learn how to make an antenna from beer cans from the video:
Kharchenko zigzag antenna
The antenna received its name in 1961, after the name of its inventor Kharchenko K.P., who proposed using zigzag-shaped antennas to receive television broadcasts. This antenna is very well suited for receiving digital signals.
 Antenna Kharchenko
 To make a zigzag antenna you will need:
- Copper wire with a diameter of 3-5 mm.
- TV cable 3-5 meters.
- Solder.
- Soldering iron.
- Plug.
- Insulating tape.
- A piece of plastic or plywood for the base.
- Fastening bolts.
First you need to make an antenna frame. To do this, take the wire and cut off a piece of 109 centimeters. Next, we bend the wire so that we get a frame of two parallel rhombuses, each side of the rhombus should be 13.5 centimeters, make loops from the remaining centimeter to fasten the wire. Using a soldering iron and solder, connect the ends of the wire and close the frame.
Take the cable and strip its end so that you can solder the rod and cable shield to the frame. Next, solder the rod and cable shield in the center of the frame. Please note that the screen and the rod should not touch.
Place the frame on the base. The distance between the corners of the frame at the junction with the cable should be two centimeters. Make the size of the base approximately 10 by 10 centimeters.
Strip the other end of the cable and install the plug.
If necessary, attach the antenna base to a stand for further installation on the roof.
You can watch more detailed instructions for making the Kharchenko antenna in the video:
Coaxial cable antenna
To make the antenna you will need a 75 ohm coaxial cable with a standard connector. To calculate the cable length required for the antenna, you need to find out the digital broadcasting frequency and divide it in megahertz by 7500, and round the resulting amount.
 Cable antenna
 Once you have the cable length, do the following:
- Strip the cable on one side and insert it into the antenna connector.
- Step back two centimeters from the edge of the connector and make a mark from which you will measure the length of the antenna.
- Having measured the desired length, bite off the excess with pliers.
- In the area of the mark, remove the insulation and braiding of the cable, leaving only the inner insulation.
- Bend the cleaned part at an angle of 90 degrees.
- Set up your TV with a new antenna.
You can visually consolidate the information by watching the video:
Satellite antenna
It’s worth mentioning right away that to receive a satellite signal you need a tuner and a special set-top box. Therefore, if you do not have this equipment, then creating a satellite dish with your own hands will not be possible, since you yourself can only make a parabolic reflector:

- Plexiglas parabola- produced by heating. The plexiglass is placed on a blank that follows the shape of a parabolic reflector and placed in a chamber with a high temperature. After the plexiglass softens, it takes the form of a blank. After the plexiglass has cooled, it is pulled out of the mold and covered with foil. The disadvantage of such production of a homemade parabola is that the costs of its production exceed the market value of a factory reflector.
- Sheet metal reflector- made from a sheet of galvanized iron, meter by meter in size. The leaf is given a round shape and cuts are made from the edge to the center in the shape of the petals. After this, the sheet is placed on the curved reflector template and the “petals” are fastened with spot welding or rivets.
- Mesh reflector- made from frame and mesh. First, a template is made, the parameters of which are calculated using the formula. Radial parabolas are made from copper wire using a template. The wire cross-section is selected based on the antenna diameter. For example, for an antenna with a diameter of 1.5 meters, use a wire with a diameter of 4-5 mm. It is also necessary to make circular belts. The diameter of the belts changes in increments of 10-30 cm. After making the frame, it is covered with fine copper mesh.
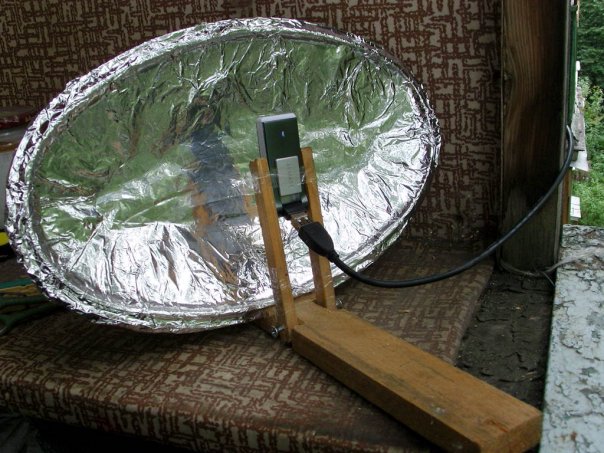
All of the methods listed above can be considered seriously only out of sporting interest, since making a parabolic reflector by hand is a very labor-intensive and expensive process. In addition, it is very difficult to accurately calculate the parameters of a satellite dish at home. Therefore, we advise you not to be original and buy a complete satellite dish.
Antenna amplifier
If the place where you live has a weak television signal and a conventional antenna cannot provide a high-quality picture on your TV, then an antenna amplifier can help in this situation. You can make it yourself if you have a little knowledge of radio electronics and know how to solder. 
Amplifiers should be installed as close to the antenna as possible. It is better to power the antenna amplifier via a coaxial cable through a decoupler.
 Isolation power circuit
 The decoupler is installed at the bottom of the TV and is supplied with 12 volt power from the adapter. Two-stage amplifiers consume a current of no more than 50 milliamps; for this reason, the power of the power supply should not exceed 10 watts.
All connections of the antenna amplifier on the mast must be made by soldering, since the installation of mechanical connections will lead to their corrosion and rupture during further operation in an aggressive external environment.
There are times when you have to receive and amplify a weak signal in the presence of powerful signals from other sources. In this case, both weak and strong signals arrive at the amplifier input. This leads to blocking the operation of the amplifier or switching it to a non-linear mode, mixing both signals, which is expressed in the overlay of the image from one channel to another. Reducing the amplifier supply voltage will help correct the situation.
Please note that UHF amplifiers are greatly influenced by signals in the meter range. To weaken the impact of meter signals, a high-pass filter is placed in front of the UHF amplifier, which blocks meter waves and transmits only signals in the decimeter range.
Below is a diagram of a VHF antenna amplifier:
 VHF antenna amplifier circuit
 - The gain is 25 dB. at a voltage of 12.6 volts.
- Current consumption is no more than 20 milliamps.
- The back-to-back connection of diodes D1 and D2 protects the transistor from failure due to a lightning strike.
- The cascades have a common emitter.
- Capacitor C6 provides correction for the constant response of the amplifier in the high frequency region.
- To stabilize the transistor mode, the amplifier is covered by negative feedback from the emitter of the second transistor to the base of the first.
- To avoid self-excitation of the amplifier, an isolation filter R4 C1 is used.
We also suggest that you familiarize yourself with the circuit of the decimeter amplifier:
 UHF amplifier circuit
 - Antenna amplifier of the UHF range 470-790 megahertz.
- Gain 30 dB. at a voltage of 12 volts.
- Current consumption is 12 milliamps.
- The cascades have a common emitter and microwave transistors with a low intrinsic noise level.
- Resistors R1 and R3 provide temperature compensation for the transistor mode.
- The amplifier is powered via a coaxial cable.
You can see the operating principle of the antenna amplifier in the video:
Now, having familiarized yourself with the diagrams and armed with a soldering iron, you can safely begin making an antenna amplifier.
We hope that our article about television antennas was useful to you!
In summer cottages, a television signal can rarely be received without amplification: it is too far from the repeater, the terrain is usually non-uniform, and trees get in the way. For normal “picture” quality, antennas are needed. Anyone who knows at least a little how to handle a soldering iron can make an antenna for their dacha with their own hands. Outside the city, aesthetics are not given so much importance; the main thing is quality of reception, simple design, low cost and reliability. You can experiment and do it yourself.
Simple TV antenna
If the repeater is located within 30 km from your dacha, you can make the simplest receiving part in design. These are two identical tubes connected to each other by a cable. The cable output is fed to the corresponding TV input.
The design of an antenna for a TV in the country: it’s very easy to do it yourself (to enlarge the size of the picture, click on it with the left mouse button)
What is needed to make this TV antenna?
First of all, you need to find out what frequency the nearest TV tower is broadcasting on. The length of the “whiskers” depends on the frequency. The broadcast band is in the range of 50-230 MHz. It is divided into 12 channels. Each requires its own length of tubes. A list of terrestrial television channels, their frequencies and parameters of a television antenna for self-production is given in the table.
| Channel number | Channel frequency | Vibrator length - from one end to the other end of the tubes, cm | Cable length for matching device, L1/L2 cm |
|---|---|---|---|
| 1 | 50 MHz | 271-276 cm | 286 cm / 95 cm |
| 2 | 59.25 MHz | 229-234 cm | 242 cm / 80 cm |
| 3 | 77.25 MHz | 177-179 cm | 187 cm / 62 cm |
| 4 | 85.25 MHz | 162-163 cm | 170 cm / 57 cm |
| 5 | 93.25 MHz | 147-150 cm | 166 cm / 52 cm |
| 6 | 175.25 MHz | 85 cm | 84 cm / 28 cm |
| 7 | 183.25 MHz | 80 cm | 80 cm / 27 cm |
| 8 | 191.25 MHz | 77 cm | 77 cm / 26 cm |
| 9 | 199.25 MHz | 75 cm | 74 cm / 25 cm |
| 10 | 207.25 MHz | 71 cm | 71 cm / 24 cm |
| 11 | 215.25 MHz | 69 cm | 68 cm / 23 cm |
| 12 | 223.25 MHz | 66 cm | 66 cm / 22 cm |
So, in order to make a TV antenna with your own hands, you need the following materials:

It would be nice to have a soldering iron, flux for soldering copper and solder on hand: it is advisable to solder all connections of the central conductors: the image quality will be better and the antenna will work longer. The soldering areas then need to be protected from oxidation: it is best to fill it with a layer of silicone, or you can use epoxy resin, etc. As a last resort, seal it with electrical tape, but this is very unreliable.
Even a child can make this homemade antenna for a TV, even at home. You need to cut the tube to the length that corresponds to the broadcast frequency of a nearby repeater, then saw it exactly in half.
Assembly order
The resulting tubes are flattened on one side. With these ends they are attached to a holder - a piece of getinax or textolite 4-6 mm thick (see picture). The tubes are placed at a distance of 6-7 cm from each other, their far ends should be at the distance indicated in the table. They are secured to the holder with clamps; they must hold firmly.
The installed vibrator is fixed to the mast. Now you need to connect the two “whiskers” through a matching device. This is a cable loop with a resistance of 75 Ohms (type RK-1, 3, 4). Its parameters are indicated in the far right column of the table, and how it is done is on the right side of the photo.
The middle cores of the cable are screwed (soldered) to the flattened ends of the tubes, and their braid is connected with a piece of the same conductor. Getting the wire is simple: cut a piece from the cable slightly larger than the required size and remove all the sheaths. Clean the ends and screw them to the cable conductors (it’s better to solder them).
Then the central conductors from two pieces of the matching loop and the cable that goes to the TV are connected. Their braid is also connected with copper wire.
Last step: the loop in the middle is attached to the rod, and the cable going down is screwed to it. The barbell is raised to the required height and “adjusted” there. To set up, you need two people: one turns the antenna, the second watches TV and evaluates the picture quality. Having determined where the signal is best received from, the home-made antenna is fixed in this position. To avoid having to struggle with “tuning” for a long time, take a look at where your neighbors’ receivers (over-the-air antennas) are pointing. The simplest antenna for a summer residence is made with your own hands. Set and “catch” the direction by turning it along its axis.
Watch the video on how to cut a coaxial cable.
;
Loop from a pipe
This do-it-yourself antenna for a summer residence is a little more difficult to manufacture: you need a pipe bender, but the reception radius is larger - up to 40 km. The starting materials are almost the same: metal tube, cable and rod.
The bend radius of the pipe is not important. It is necessary that the pipe has the required length, and the distance between the ends is 65-70 mm. Both “wings” should be the same length, and the ends should be symmetrical about the center.

Homemade antenna for a TV: a TV signal receiver with a reception radius of up to 40 km is made from a piece of pipe and cable (to increase the size of the picture, click on it with the left mouse button)
The length of the pipe and cable is indicated in the table. Find out what frequency the repeater closest to you is broadcasting on, select the appropriate line. Saw off a pipe of the required size (diameter is preferably 12-18 mm, the parameters of the matching loop are given for them).
| Channel number | Channel frequency | Vibrator length - from one end to the other, cm | Cable length for matching device, cm |
|---|---|---|---|
| 1 | 50 MHz | 276 cm | 190 cm |
| 2 | 59.25 MHz | 234 cm | 160 cm |
| 3 | 77.25 MHz | 178 cm | 125 cm |
| 4 | 85.25 MHz | 163 cm | 113 cm |
| 5 | 93.25 MHz | 151 cm | 104 cm |
| 6 | 175.25 MHz | 81 cm | 56 cm |
| 7 | 183.25 MHz | 77 cm | 53 cm |
| 8 | 191.25 MHz | 74 cm | 51 cm |
| 9 | 199.25 MHz | 71 cm | 49 cm |
| 10 | 207.25 MHz | 69 cm | 47 cm |
| 11 | 215.25 MHz | 66 cm | 45 cm |
| 12 | 223.25 MHz | 66 cm | 44 cm |
Assembly
The tube of the required length is bent, making it absolutely symmetrical relative to the center. One edge is flattened and welded/sealed. Fill with sand and seal the other side. If there is no welding, you can plug the ends, just attach the plugs to good glue or silicone.
The resulting vibrator is mounted on a mast (rod). The central conductors of the matching loop and the cable that goes to the TV are screwed to the ends of the pipe, and then soldered. The next step is to connect a piece of copper wire without insulation to the braided cables. The assembly is complete - you can start “setting up”.
If you don’t want to do it yourself, read how to choose an antenna for your dacha here.
Beer can antenna
Even though it doesn't look serious, the image becomes much better. Tested many times. Try it!
Outdoor antenna made from beer cans

We collect it like this:
- We drill a hole (5-6 mm in diameter) in the bottom of the jar strictly in the center.
- We pull the cable through this hole and take it out through the hole in the cover.
- We fix this can on the left on the holder so that the cable is directed to the middle.
- We pull the cable out of the can by about 5-6 cm, remove the insulation by about 3 cm, and disassemble the braid.
- We trim the braid, its length should be about 1.5 cm.
- We distribute it over the surface of the can and solder it.
- The central conductor sticking out 3 cm needs to be soldered to the bottom of the second can.
- The distance between the two banks must be made as small as possible and fixed in some way. One option is duct tape or duct tape.
- That's it, the homemade UHF antenna is ready.
Terminate the second end of the cable with a suitable plug and plug it into the required socket on the TV. This design, by the way, can be used to receive digital television. If your TV supports this signal format (DVB T2) or has a special set-top box for your old TV, you can receive a signal from the nearest repeater. You just need to find out where it is and point your television antenna there, made with your own hands from tin cans.

Simple homemade antennas can be made from tin cans (beer or beverage cans). Despite the frivolity of the “components,” it works very well and is very easy to manufacture
The same design can be adapted to receive VHF channels. Instead of 0.5 liter jars, use 1 liter jars. Will receive MV band.
Another option: if you don’t have a soldering iron, or you don’t know how to solder, you can do it easier. Tie two cans at a distance of several centimeters to the holder. Strip the end of the cable by 4-5 centimeters (carefully remove the insulation). You separate the braid, twist it into a bundle, and make a ring out of it, into which you insert a self-tapping screw. Make a second ring from the central conductor and thread a second screw through it. Now at the bottom of one can you clean out (with sandpaper) a spot to which you screw the screws.
In fact, for better contact, soldering is needed: it is better to tin and solder the braid ring, as well as the point of contact with the metal of the can. But it also works well with self-tapping screws, however, the contact periodically oxidizes and needs to be cleaned. When it starts snowing you will know why...
You may be wondering how to make a barbecue from a cylinder or barrel, you can read about it here.
DIY digital TV antenna
The antenna design is frame. For this version of the receiving device you will need a cross made of wooden boards and a television cable. You will also need electrical tape and a few nails. All.
We have already said that to receive a digital signal you only need a decimeter terrestrial antenna and a corresponding decoder. It can be built into televisions (new generation) or made as a separate device. If the TV has the function of receiving a signal in the DVB T2 code, connect the antenna output directly to the TV. If your TV does not have a decoder, you will need to purchase a digital set-top box and connect the antenna output to it, and connect it to the TV.
How to decide on a channel and calculate the perimeter of the frames
Russia has adopted a program according to which towers are constantly being built. By the end of 2019, the entire territory should be covered by repeaters. On the official website http://xn--p1aadc.xn--p1ai/when/ find the tower closest to you. The broadcast frequency and channel number are indicated there. The perimeter of the antenna frame depends on the channel number.

This is what a map of the location of digital television towers looks like
For example, channel 37 broadcasts at a frequency of 602 MHz. The wavelength is calculated as follows: 300 / 602 = 50 cm. This will be the perimeter of the frame. Let's calculate the other channel in the same way. Let it be channel 22. Frequency 482 MHz, wavelength 300 / 482 = 62 cm.
Since this antenna consists of two frames, the length of the conductor should be equal to twice the wavelength, plus 5 cm for the connection:
- for channel 37 we take 105 cm of copper wire (50 cm * 2 + 5 cm = 105 cm);
- for channel 22 you need 129 cm (62 cm * 2 + 5 cm = 129 cm).
Maybe you are more interested in working with wood? How to make a birdhouse is written here and about making a doghouse - in this article.
Assembly
It is best to use copper wire from the cable that will then go to the receiver. That is, you take the cable and remove the sheath and braid from it, freeing the central conductor of the required length. Be careful not to damage it.
- for channel 37: 50 cm / 4 = 12.5 cm;
- for channel 22: 62 cm / 4 = 15.5 cm.
The distance from one nail to another must correspond to these parameters. Laying copper wire begins on the right, from the middle, moving down and further to all points. Only in the place where the frames come close to each other, do not short-circuit the conductors. They should be at some distance (2-4 cm).

Homemade antenna for digital television
When the entire perimeter is laid, the braid from a cable several centimeters long is twisted into a bundle and soldered (wound if soldering is not possible) to the opposite edge of the frame. Next, the cable is laid as shown in the figure, wrapping it with electrical tape (more often, but the laying route cannot be changed). The cable then goes to the decoder (separate or built-in). The do-it-yourself antenna for receiving digital television is ready.
How to make an antenna for digital television with your own hands - another design - is shown in the video.
