Lighting is the most important component of the interior. The coziness and comfort level of our home depends on the lighting. The play of light and shadow allows you to beat the winning moments of the interior and divert attention from bad moments. And also - lamps, floor lamps, chandeliers and lamps create the atmosphere that we call "home". Unique lamps will help to make a dwelling only “your own”, personal, individual, and the best way is to make a lampshade with your own hands. Homemade plafonds and lampshades are the thing that will make your home stand out from the rest.
A few words about security
In the manufacture of lamps, floor lamps and chandeliers in industrial conditions, the minimum distance from the "body" of the lamp to the materials is preliminarily calculated. This distance depends on the power and thermal radiation of the lamp and on the type (combustibility) of the material from which the ceiling / lampshade is made. At home, hardly anyone will bother with such calculations. And in order not to create a dangerous situation, it is worth adhering to certain rules.
And in general, having made a lampshade and installing it, in the first few days, pay attention to whether the ceiling heats up. Heating is any increase in temperature above ambient. If the lampshade feels “warm”, change the light bulb to a less powerful one. Check again. So until the homemade lampshade warms up.
Where to get a frame
If you want to remake an old lamp, floor lamp, sconces in which the old lampshade has become unusable, you can simply use the existing base by peeling off the old material. Before starting work, inspect the frame well, if there is rust or a damaged coating somewhere, maybe it’s worth stripping everything off and painting it again? At the same time, the color can be changed. If there are no old frames, you can buy an inexpensive lamp (in a store or at a flea market) and do the same operations with it. Good lampshades can, by the way, be made from waste baskets. They are wire, there are plastic. The main thing is to find a suitable shape and size. Then make a hole in the bottom for the cartridge. Further - it's up to decoration / plating, and here there are a lot of options.

If this method is also not available, you can make a lampshade without a frame (there are some) or make a frame yourself. The material for making a frame for a lampshade with your own hands is: wire, wood (wooden or bamboo sticks, specially cut elements), plastic bottles.
How to make a frame for a homemade wire lampshade
The wire for the lamp frame needs aluminum or steel. Aluminum is easy to work with, but wrinkle easily. This is not very important when the lampshade is already in use, but this fact must be taken into account during operation: you can ruin the shape. On the other hand, such plasticity allows easy and simple changes in the shape during operation. So that's a good option. Aluminum wire can be "mined" from electrical cables. You will have to remove the protective shell and you can use it.
Steel wire is more elastic, so it retains its shape well. It can be found in the construction market. It's harder to work with her. It is desirable that there were strong male hands nearby.

In addition to the wire, you will need powerful wire cutters and pliers to work. The frame of the lampshade usually consists of two rings and racks connecting them. The shape of the future lampshade depends on the size of the rings and the shape of the racks. Questions may arise regarding the number of racks and how they are attached. The number of posts depends on the size of the rings and how "round" you want the lampshade to be. The more posts, the more “smoothly” the fabric will lie. So it's up to you to choose, but the optimal distance between the racks in the lower circle is about 5-6 cm.

Techniques for creating a frame for a wire lampshade
Methods for attaching the stack to the lampshade rings depend on the thickness and type of wire, as well as the tools you have. The easiest is to make a small hook at the end, then clamp it tightly. And so that the ring does not slide left and right, pre-treat the wire at the attachment point with sandpaper with a large grain. This is an option for thick aluminum wire. If the wire is steel, and with a diameter of 1.2-2 mm or more, the best way is. Thinner wire can be bent and wrapped around the ring or also made a hook.
If you make hooks, wind the wire, the appearance is far from being as ideal as that of factory frames. But this imperfection will be covered by the lampshade itself. If she still worries you, find a ribbon of a suitable color (usually matched to the color of the lampshade) and carefully wrap the resulting frame. It will get much better. The tape can be smeared with PVA glue and, wet, tightly, turn by turn, wrap the frame around.
wire mesh
If you can find a fine wire mesh, you can quickly make an almost perfect cylindrical shade for a floor lamp, table lamp, night lamp, candle shade, etc. All you need is to cut off a piece of mesh of the desired length and width, roll it into a ring and fasten the wires by wrapping them around the racks.

To prevent the mesh from straightening when cutting off a piece, cut so that long free ends remain on both sides. They will fasten the ceiling of a cylindrical shape. And the imperfection of the upper and lower rings can be masked with a tape of the desired color.
From a five-liter plastic bottle
An interesting shape lampshade can be obtained from a large plastic bottle. There are bottles of 5-6 liters and even 10. Here they can be used. From the container we cut off the top or the bottom - depending on what you like best. In the cut off part we make a ring for the cartridge. If the top is cut off, a neck can be used for some cartridges. For those with a larger diameter, it will have to be cut off.

Then we cut out the excess plastic, form the rims and racks of the ceiling. In order not to be mistaken, you can first draw all the lines with a marker. Cutting will be easier. Everything is elementary. Then we just decorate. And yes, it is necessary to cut out the plastic, otherwise the warm air will have nowhere to go.
We make lampshades on the frame
There are enough options on how to make a lampshade cover:

From tapes
The easiest and fastest way to transform an old lampshade for a floor lamp or table lamp is to use ribbons. You need a frame or lampshade in the form of a cylinder. It can be "naked" or covered with fabric. If you use a "bare" frame, the light will break through the cracks, which will create interesting lighting effects, but the lighting will not be uniform. Reading in this light is inconvenient - this is an interior solution. If you need even lighting, cover the frame with fabric first. It can be the same color as the ribbon, a couple of tones darker or lighter, it can be contrasting. Everything depends on your desire. And remember that the darker the fabric, the less light the lampshade lets through.
We take a tape 1-2.5 cm wide. We fix it from the wrong side of the lampshade with PVA glue, additionally fixing it with a pin. If you took a wire frame without fabric, we attach it to the upper or lower rim (you can sew it on with your hands, you can use glue). Then we begin to wrap the entire frame, from top to bottom, placing the turns of the tape close to each other, but without overlap.

Having finished the circle, we unfold the tape 90 °. We fix it in this position (with a needle and thread or PVA glue, glue from a gun, temporarily fixing it with a pin, pressing it with a clothespin). Then we skip the tape under the first tape, pull it out, lay it on top of the second one, then pull it down again, pull it up through one tape. So, gradually, we create an interlacing, filling the entire lampshade.
Alternatively, you can skip two vertical tapes. But then you need to make sure that each next row moves one crossbar. Then you get a different type of weave. Such a lampshade is ideal for floor lamps, since it will direct the light downwards, scattering through the walls will be small.

In this version, the ribbons can be the same, they can be of the same color, but of a different texture, they can differ by a couple of tones or be contrasting. In a circle, the tapes can be started all the way, or you can - after a certain distance. If you find a wide tape and apply it with an overlap, then horizontal ones will not be needed at all. And if you use a braided or twisted cord (in the lower photo on the right), we get a completely different lampshade in appearance. So only this technique of finishing the lampshade gives a lot of options.
Let's briefly present the ideas. There are many options for how you can design standard frames for lampshades in a non-standard way. The first method has already been voiced: you can knit a lampshade cover on knitting needles or crochet. Several options in the photo.

Not everyone knows how to knit. It is easier to work with beads, especially if you glue them. You can decorate an old fabric with beads, sequins, beads of various shapes and sizes. You can make such a “new-old” lampshade with your own hands in a couple of hours. You select the decorations that match the color, coat the fabric with PVA glue, stick the decorations. To complete the look, you can assemble pendants from beads and beads that are attached to the lower rim, but this is already painstaking work. Although the effect is interesting.

You can sew a new lampshade out of fabric. But it is not necessary to make it an updated copy of the old one. Fantasy must be turned on! If the lamp or floor lamp is in the girls' room, a new cover for the lampshade can be made in the form of a skirt. The style of the skirt is up to you. Interesting look in the fold. With and without ruffles.

In the boy's room, you can use an old geographical map. They are on thick paper. If the paper is not thick enough, first you need to stick the card on cardboard, and then glue the lampshade from such a blank.

Original shades are obtained if the finished frame is braided with threads or ropes. Ropes can be natural. In this case, they are gray, brown beige. You can find thin synthetic colored cords. Of these, more "fun" in color products will turn out. The situation is even simpler with knitting threads. They are thin, thick, textured, with a smoothly changing color. In general, there are a lot of options.
We take the frame and braid it according to a certain pattern. You can start with racks. Braid each rack with a pigtail (the length of the threads should be 3 times the height of the rack). When this work is finished, we begin to stretch the threads / ropes between the racks. They will need to be passed through pigtails, so it is more convenient to do this with threads with a needle, and the ropes can be pushed through like that.

The second option is to first entangle the entire frame horizontally, and then braid the racks. A pigtail will no longer work here, you just need to fix the turns on the rack with oblique stitches with a certain slope. This version is somewhat simpler in execution, but the “pigtails” look more decorative.
Homemade ceiling lamps without a frame
Many materials are rigid enough to hold their shape on their own, yet malleable enough to be made into something interesting. There are a lot of such homemade lampshades. And almost all of them are worth your attention. We give here only a part, the other part will go in the photo section (see below).
From knitted lace doilies
Many people have crocheted napkins and they lie in the “stash”, because it’s a pity to throw it away and they don’t know how to use it. There is a very interesting idea - to make a lampshade for a hanging chandelier out of them. In addition to napkins, you will need a large balloon or an inflatable ball, glue for heavy wallpaper (vinyl, silkscreen, etc.), a brush.

We soak the glue according to the instructions, wait until it swells. Inflate a balloon or take a ball, hang it up. When the glue is ready, lay out a napkin on some clean surface, coat it with glue, put it on a ball.

It is necessary to lay out with such a condition that in the center there will be a hole for the cartridge. Glue the napkins one by one. They need to be laid out so that the edges overlap slightly. When all the napkins are laid, once again coat them with glue and leave to dry. When the glue is dry, blow off the ball or ball (the ball can be pierced if you don't mind) and take it out through the hole. That's all, the lace lampshade is ready.

In some cases, there are problems with how to hang the finished lampshade on the cartridge. The problem is solved simply - take a transparent plastic bottle, cut off its neck, if necessary, expand the hole to the desired size (so that it fits tightly on the cartridge), then cut off the plastic so that you get a ring 5-7 cm wide. Lubricate this ring with PVA glue , and glue it to the lampshade from the inside of the ball.
Round plafonds made of threads
Almost the same technology can be used to make round and semicircular stylish shades. Choose the thread of the right color. Their composition is absolutely unimportant - the color, thickness and texture are important. They can be shaggy, smooth, twisted, thinner and thicker. It depends on the appearance. It is most convenient to work with cotton threads of medium thickness. They absorb glue well and then, after drying, keep their shape perfectly.

You will also need a ball or ball. This will be the base of the lampshade, which sets the shape. Choose the size of the base as you wish. The threads will need to be glued, for this you need PVA glue. It is poured into a container, diluted with water in a ratio of 1: 1.
You can use other glue. It is important that it becomes transparent after drying. These are WB-29 from TYTAN Professional and D2 joinery adhesive. If you use any of these types of glue, read the instructions.
On the ball or ball, draw a circle, which will be slightly smaller in size than the lamp socket. On the opposite side, draw a larger circle - this will be the lower edge of the ceiling. Now everything is ready, we can start.

We coat the threads with glue and wind them around the ball in a chaotic manner. It is more convenient to do this if the glue is poured into a container - you can lower the entire skein there, and just pull the thread slowly. With glue in a tube, everything is not so comfortable: you have to coat sections up to a meter long, wind them up, and coat them again. Time goes much longer. This is if you do not use PVA. But on the other hand, the products turn out to be more rigid and do not sag, do not change shape over time, as can happen with filament lampshades on PVA.
When winding threads around the ball, we carefully go around the drawn circles. If you accidentally climbed into the "forbidden territory", we simply move the threads, forming an even (more or less even) edge. When the threads run out or you decide that there is enough density, the process can be stopped. We fill the edge of the thread between others. All. Then we coat the ball with wound threads again with glue (PVA can be watered) and leave to dry (at least 2 days). To prevent the ball from rolling, we find a bowl or pan and use it as a stand.

The last stage is to blow off the ball or ball. If the ball has a nipple, press it with a thin wire, releasing air. Take out the dropped ball. That's all, you can thread the lamp inside and test the lampshade.
The technology is the same, but the appearance is very different…
According to the technology described above, it is possible to make not only round shades. Rectangular, triangular, trapezoidal. Choose a base that is easy to remove, wrap threads soaked in glue, braid, even sticks, newspaper tubes, etc. After drying, remove the base and, behold, you have made a lampshade with your own hands. A couple of examples in the photo below.


You can also use chopsticks... Just wrap the ball with cling film too and use not PVA glue, but transparent carpentry

It's a paste-like polymer clay in a tube that's been applied to a milk carton, then dried and the bag removed...
Creative homemade shades for lamps, floor lamps and chandeliers
You just wonder what people don’t make beautiful and unusual things from. Plafond from a cup, grater, bottle, beer or glass can, metal parts and beer can rings ... It seems that everything can be used ...


Lampshade from an old sieve ... stylish


Candlesticks turn into lamps ... without lampshades


You can’t tell in life, but these shades are made of hooks that open metal cans for drinks and canned food ... if they are painted, it will be even more interesting


Don't know what to do with grandma's crystal? Make plafonds out of it ...
It is not always possible to find an offer of lamps in stores that meets our needs. Often the old lamp takes on a rather unsightly appearance, and it is a pity to throw it away. Why not try to design your own lighting and make your own lampshade for a table lamp?
Where to start, where to find inspiration? What materials are needed? You will find answers to these questions and some interesting master classes in this article.
DIY paper lampshade for a table lamp
Lamps with a paper lampshade do not belong to products that are made exclusively by craftsmen. Similar lamp covers are sold in many stores that sell lighting fixtures and home furnishings. Their price, as a rule, differs significantly from the cost of production. For this reason, many people decide to purchase cardboard, paper, and make them themselves. How to make a lampshade for a paper lamp with your own hands?
Paper selection
A paper lampshade can take many forms and be used in interiors of various styles. What paper to buy?
- For manufacturing, it is necessary to purchase sufficiently high-quality and suitable paper, since the durability of the product directly depends on this.
- Paper cannot be as thin as regular paper, as this will cause the product to break down quickly.
- It must pass light.
The best option would be a rice paper cap. This material, despite its small thickness, is very durable. Rice paper is sold in sheets of various sizes. For example, a sheet with a color pattern might be 50 x 70 cm.
Rice paper
Rice paper can be glued onto an old light fixture to give it a new look. You can also remove the old material and wrap the new metal frame. Sometimes the paper is additionally decorated with special stamps. This allows you to add additional decor for plain paper.

White paper lampshades are not only a tribute to the Far East, they are perfect for Scandinavian-style interiors. Almost everywhere where muted colors and natural materials dominate, you can safely use such solutions.
From wallpaper
Another interesting idea that does not require almost any financial outlay is a wallpaper lampshade for a floor lamp or a table lamp. The most popular option is accordion-folded paper. For this purpose, wallpaper left over from a recent renovation will come in handy; such an element of the interior will go well with the walls. If there is no wallpaper, you can always buy a roll from the leftovers; large stores usually offer favorable discounts for such products. From the wallpaper you can make a lampshade for a table lamp using the existing frame, or for pendant lamps.

What will be required:
- a piece of wallpaper;
- ruler;
- a pen;
- hole puncher;
- lace.
How to make a lampshade from wallpaper - master class

This is a simple solution that even a child can handle.

Do-it-yourself plafond from the grid
In a modern industrial-style apartment, as well as in the garden, a lamp made of metal mesh and wire will show itself perfectly.

The mesh can be formed into any shape you like and the ends can be connected, for example, with thin wire.

Then, using a wire, the mesh is attached to the top of the cable with a light bulb.

The shape of the lampshade is usually reduced to a ball or an ellipse, but any option can be made, for example, a parallelepiped. To obtain this form, it is necessary to use a frame made of durable wire or thick cardboard. The lampshade can be complemented with artificial flowers, intertwined with colored laces. As a result, the grid loses its harsh minimalist character and the product can be used in an interior of a different style.
From lace
Lamps with lace lampshades will add lightness and elegance to the interior. Depending on the type of lace, they allow you to get diffused or bright light. This lamp is suitable for:
- living rooms,
- bedrooms
- children's rooms.
The main material needed for the manufacture of the case is lace. However, due to the relatively high price, lace can be replaced, for example:
- unused lace doilies;
- a piece of lace fabric;
- leftovers from tulle curtains for windows.
Lace needs to be cut, giving them the shape of circles, squares or stripes. The most time-consuming process is gluing individual elements with glue. You can use regular wallpaper glue.


A lampshade for a chandelier looks very romantic, made of lace, created by oneself with the help of a hook and a thin thread. Such a product will decorate the room of needlewomen, and will be a great demonstration of the skill of a needlewoman.


From beads
In this case, beads are used instead of paper and fabric. The glamorous lampshade obtained from beads lets in a lot of light. Its implementation is simple and the end result is definitely amazing.
You will need:
- lampshade frame,
- fishing line,
- beads.

Work order
- Attach the end of the fishing line to the frame.
- String beads or beads, making knots so that the balls do not move.
- Then attach the other end to the frame and place the beaded lines about 3cm apart.
Making a lampshade out of thread and beads can be a bit more labor intensive than making paper or lace crafts, but the unique and impressive decorative effect more than compensates for this.

Thus, there are many interesting ways to make a lampshade with your own hands. Using the above recommendations, you can refuse to buy an expensive, non-original lamp and replenish the interior with a unique decor item of your own production.
Master class for making a lampshade at home - video
Taking on the arrangement of the interior space, it is important to think through every little thing. After all, we all subconsciously strive for comfort and it is the smallest details that can create a special atmosphere, convey the general idea, mood and character of the room. Professional designers say, and the interiors clearly prove that the right choice of a chandelier can not only decorate the interior of a room, but also make life brighter and more fun. Beautiful chandelier shades with an original design give a special grace and gloss to the lamps. About how to make them with your own hands and what materials it is better to use for this, you can find in this article. A detailed, step-by-step master class, as well as a visual photo, will be a great help to you in this exciting process.
Material selection
In the manufacture of a chandelier, it is difficult to single out any one material that would meet all the requirements. Each of them has its own individual characteristics and features. For example, paper, which is the most simple and affordable material, lends itself well to transformation.
Lamps made of glass fragments and strips of metal have a dazzling brilliance and a beautiful appearance. Wood and fabric add warmth and comfort to the interior. Lace lampshades are distinguished by their special beauty, captivating everyone at first sight.
In a word, you can make a chandelier with your own hands from anything, the main thing is to be smart in time and turn on your imagination.


A paper napkin chandelier is a bold enough but justified experiment.
We will describe in detail in this article how in an ordinary object you can see its creative potential for creating an exclusive decor element.
Step-by-step instructions, with a description of each action, will help you make incredibly beautiful and unique lamps from improvised means that will be a great addition to your favorite interior.
What you need to pay attention to before making a chandelier
Many are interested in how to properly make a chandelier in, and other rooms. After all, I want this element of the interior to be not only beautiful, but also functional.
On the one hand, a chandelier is a lighting fixture that can provide the proper level of lighting in an apartment. After all, a lot depends on the choice of light in the room, including the safety of the eyes. On the other hand, I want the ceiling structure to complement the interior design, creating a special atmosphere of warmth and comfort.
When making a chandelier, the first thing to consider is the height of the ceiling. For example, a chandelier with a bar mount is suitable for low ones. So, the ceiling will look visually higher. If the ceilings are high - 3 m and above, then it is better to make your choice in favor of a pendant lamp with a hook mount.


Lamp selection
For any room you need to individually approach the intensity of its lighting.
For a small bathroom, 80-100 watts will be required.
Kitchens need a lamp power of at least 120-150 watts.
The living room and the hall cannot do without light bulbs in the range of 150-300 watts.
The number and power of lamps is calculated based on established standards - 20 watts are required per 1 m². electricity. It is also necessary to take into account the parameters of the room, its dimensions and reflective properties.

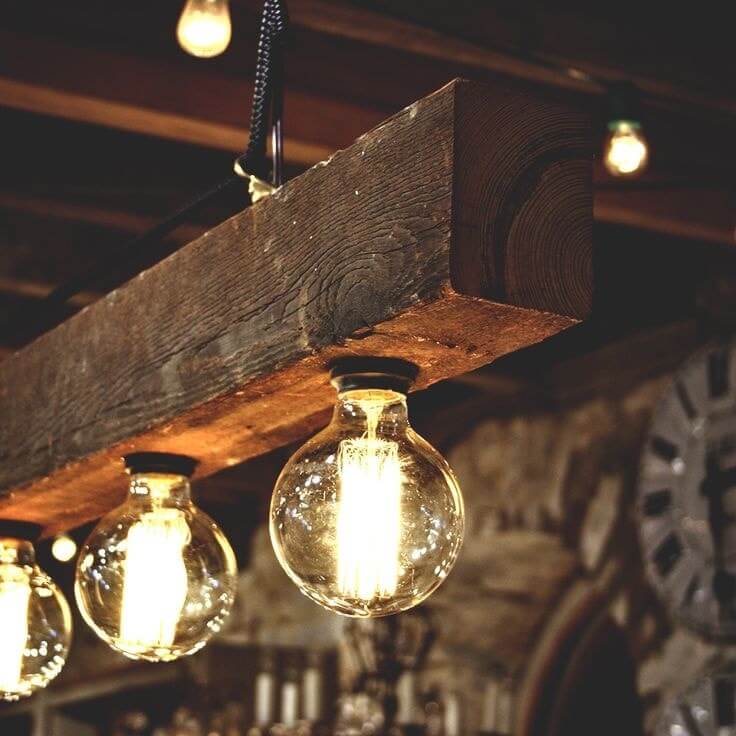
Edison designer lamps - look beautiful and unusual
Plafond design
The appearance, decor and design of the ceiling occupies an important place in the design of the chandelier. It is selected for the interior of the room, depending on the style. Crystal for classics, metal and glass for, wood will fit perfectly into country or chalet style, fabric and silk will perfectly suit Provence style.
To illuminate a room on several levels, you can additionally make wall sconces or floor lamps.


Step-by-step master class on making
To make a beautiful ceiling decoration, it is not necessary to start everything from scratch. Take a look around, you probably have something in your house that you have not used for a long time. And who knows, maybe it will become the main subject in the manufacture of the original lamp. Moreover, there are more than enough ideas and inspiration for creativity on the Internet.
Important! It is best to start searching for the necessary things from the kitchen or balcony. It is there that we store all sorts of rubbish that was once so necessary for us and which, as often happens, is so difficult to part with later.
Spectacular chandelier from mugs
No matter how strange it may sound, it is from dishes and other kitchen utensils that the most unusual and interesting models of lamps are obtained. For example, tea mugs are an ideal material for making a spectacular lamp.
For work we need:
- Mugs
- Saucers
- Drill
- Porcelain drill with special hole

Mastering quickly and easily
- At the bottom of the mug, with a drill, we make a small hole for the wire, fasten the electric chuck and bring the wire out. It is desirable to seal the hole with a gypsum mixture.
- Next, the mug must be glued to the saucer, where there should also be a hole, insert a light bulb and hang the newly made lamp in the right place.
As you can see, original and fashionable design can be obtained from completely ordinary items.


Fascinating yarn chandelier
Since this is a fairly simple product, for its manufacture we need a minimum of things, namely:
- Wire with a section of 4-5 mm.
- wire cutters
- Fine thread
- colorful yarn
Manufacturing instructions:
- A ring is made of wire, the diameter of which will correspond to the future size of our chandelier. To get a perfectly even circle, it can be wound on some object that has a cylindrical shape.
- We bite off the excess wire with wire cutters, leaving 2-3 cm in reserve on each side. We tie the ends with a thin thread.
- It remains to decorate our chandelier beautifully and brightly. To do this, we cut the threads of yarn in such a way that the length of each segment is twice the height of the ceiling.
- Alternately, on a knot, we tie the resulting threads until we hang the whole ring with them. From the same yarn, we make a hook mount.
You can use such a lampshade both in the form of a chandelier and as a decorative element that adorns the interior of the room.


By combining the skills of macrame and papier-mâché, you can get a stylish chandelier for the bedroom
Important! To make such a lamp, instead of woolen yarn, you can use any other thread. The main thing is that it harmoniously fits your interior.
Unusual teapot lamp
You will learn how to make a chandelier from an ordinary teapot yourself from this master class. Here's what we need for this man-made masterpiece:
- Kettle
- The wire
- Electrochuck
- metal chain
Step by step guide to making
- First of all, the bottom of the teapot is cut out. This is done in such a way that the resulting cutting edge is not sharp, otherwise you can get hurt on it.
- Next, an electric cartridge is fixed to the lid of the kettle, the wire of which is led out through a small hole drilled at the top.
- A chain is attached to the handle of the kettle, through the links of which a wire is threaded. The lamp is ready.


Breathe new life into bottles
Glass bottles, especially if they have beautiful shapes, can be used to make a wonderful chandelier. Required material:
- thin rope
- Flammable liquid (alcohol or gasoline)
- Glass bottles (preferably colored)
- Edison lamps (having a beautiful spiral)
- Wire and electric socket
Do it yourself
- We wind the rope on the bottom of the bottle, after wetting it in a flammable liquid. Then we set fire to it and let it break, and we begin to slowly rotate the bottle around its axis until the rope burns to the end. After that, we lower the bottle into a container with cold water, wrap it with a towel and, with a little effort, break off the bottom.
- So that the cut edge is not sharp, it must be sanded. To do this, it will be enough to twist the bottle in sand or small gravel for a couple of minutes.
- It remains to properly mount the electric cartridge, stick the wire through the neck, screw in the light bulb. From the remaining bottles, the rest of the shades are made in a similar way.
This chandelier will perfectly fit into the interior made in any, especially if you hang it over the bar counter.


Can decor
No less beautiful are lamps made from cans. They are made in the same way as from bottles. The only difference is that the bottom of the jar does not need to be cut off, as clear glass is usually used for shades.
We need:
- Beautiful thick-walled jars (preferably with a relief pattern)
- Hammer and nails
- Wire, electric chuck
- Paint can
- Edison lamp
How to do it right
- To begin with, using a nail and a hammer, holes are stuffed in a circle in the lid, after which the inside is gently squeezed out. The diameter of the circle must match the diameter of the socket in the chuck.
- We insert the cartridge into the cover, mount the wire.
- Next, paint the lid along with the cartridge in the color we have chosen. Metallic paint with a golden tint will look best.
- It remains to screw the light bulb, close the lid and install the lamp in its place.


We all know what a globe is, but not everyone knows what amazing things can be done from it. For example - a nice lampshade for a chandelier that will perfectly fit into the interior of a children's room.
Here is everything we need:
- the globe
- Bulb
- Electric chuck with holding element
Step by step master class
- Usually the design of the globe is not solid, so in order for us to get the desired element, we need to divide it into equal two parts (hemispheres).
- Next, at the top of the hemisphere, you need to make a hole for the cartridge. For this, it is best to use a drill with a crown.
- The electric chuck is put into place and securely fixed by the retaining element. Congratulations, your chandelier is ready!


Suspended antler structure
Making a unique lighting device from deer antlers is quite simple, the main thing is to have the necessary material at hand.
Such designs are famous for their special sophisticated look and are best suited for rooms with high. Such chandeliers are used in many interiors, but they look especially attractive in country, chalet or rustic style.
As a rule, the shades of such chandeliers have various shapes, and only natural material is used for their manufacture.
We will need:
- Antler
- Rope
- Copper wire
- Electric chuck and wire
- Bulb
Make a chandelier like this
- Observing the precautionary rules, according to the diagram, we connect the wire to the electric cartridge.
- Next, the wire must be beautifully wrapped with a decorative rope. For better fixation, you can use a universal transparent glue.
- With the help of copper wire, horns are attached to the lower part of the resulting rope, placing them 2 cm above the cartridge.
- We repeat a similar procedure with the rest of the shades, then combining them into a single composition.


Ideas for making beautiful lamps (photo, video)

We hope that the useful tips and photos presented in the article will help you not only make beautiful ceiling lamps for chandeliers with your own hands, but also save the family budget.
As you know, a floor lamp is a lamp standing on the floor and supporting the lampshade with a rod. The word "floor lamp" came to us from the French language, which means "torch" in translation. Of all the variety of lighting fixtures, floor lamps, without a doubt, are the most homely, cozy and comfortable. Soft, diffused light quietly flows from under the lampshade and pleasantly illuminates the space.
Since the time when grandmother's floor lamp with a shelf on a leg, the lampshade of which was decorated with fringe, was a family heirloom, passing from generation to generation, the calming light of a floor lamp has been associated with peace and home comfort. After some oblivion, floor lamps are experiencing a period of rebirth. Now they can be seen again in almost every home. Bright, sometimes even blinding light, like loud sounds, can not only tire, but also irritate, so twilight is sometimes simply necessary. A floor lamp in this sense is a miracle, how good it is and is quite capable of bringing peace of mind and peace of mind to life.

Room lighting is practically the main aspect in the interior. By combining light with shadow, we somehow create a mood in the house. Central lighting, for all its attractiveness and economy - once and for all to illuminate the entire room, does not create comfort and some, hmm ... sincerity is a completely different matter, lamps with subdued light, all kinds of sconces, table lamps and, of course, floor lamps. The latter, well, just the same aristocracy among the lamps.
Of course, the main function of a floor lamp is to provide a certain level of illumination of a room or part of it, but their usefulness does not end there. Whatever it is, it will be remembered not for dinner, the designer would say that the floor lamp helps to “zone” the space. Obviously, the area in which the floor lamp is located is intended for relaxation - with a book, in an easy chair and with a cat on your lap. In addition to the obvious functions, there is also an underlying functionality - decoration. You can choose an option for any style of interior. There are models that will successfully fit into the interior and will not distract attention to themselves; in contrast to them, there are many floor lamps that can become a sort of highlight of the interior of a living room or bedroom, and even a pantry. It all depends on what effect we expect from the presence of a floor lamp in the room.

If we talk about the advantages of floor lamps compared to wall or table lamps, then they have a number of obvious advantages:
to install a floor lamp, there is no need to drill holes in the wall (as is the case with wall lamps - sconces);
the floor lamp is mobile, we can move it to any place, turn it in any direction, as long as there is somewhere to put a socket nearby;
depending on the height of the floor lamp, it is able to visually increase the height of the room.
Floor lamps with a lampshade, this is the most classic version of a floor lamp, consisting of a stand, a high tripod and a lampshade fixed on its peak. It is the lampshade that is responsible for the technical characteristics of the device, the level of dispersion and background illumination. Well, the main contribution to the attractiveness of the lamp as a whole, as a rule, is behind it, behind the lampshade.
A lot of materials are traditionally used as a material for the manufacture of a lampshade - fabric, fiberglass, glass, paper, ceramics, metal and plastic, well, all sorts of designers with homemade ones not deprived of imagination, sometimes they will use such that at least take out the saints.
Having decided to make a small table lamp, we were faced with the task of making a lampshade. It was decided to make it rag, for this a wire frame was needed. Since it was available, I used it.
What was used in the work.
Tools.
A set of small metalwork tools, a mallet, scissors for metal. Good cutters. 65W soldering iron with heat regulator, accessories. Definitely a circle. Jewelry jigsaw with accessories. Small brush for flux, sandpaper. For varnishing - dishes, brush.
Materials.
Galvanized steel wire with a diameter of 2mm. Solder POS-40, flux - "soldering acid" (zinc chloride). A small piece of galvanized steel. LMB, rags.
Lampshades of this kind at the factory are traditionally made by contact welding, here, in the absence of such, soldering is used.

The wire was first used galvanized steel. The previous frame and similar work was made of brass, for easy soldering. But the cost of a brass wire that went to one frame was approximately equal to the cost of a whole bay of galvanized steel, from which more than a dozen such gizmos can be made. Practice has shown that the assembly is no less convenient, soldered, galvanized steel, with the selection of the appropriate flux is good. "Soldering acid" was used - zinc chloride. And the usual tin-lead POS-40.

First of all, we form "parallels" - rings. The wire was sold in the form of a small bay, and the cut pieces strove to curl up into a ring anyway, it was only necessary to correct them a little. To fix the "parallels" in their places, small carnations are hammered into the wooden template, they do not allow the rings to slip.

Rings-“parallels” are formed and soldered, we proceed to the “meridians”. It is convenient to measure the length with a string, I bit off the wire a little with a margin. Directly on the template "meridian" was molded. On the arcuate part, the workpiece had to be straightened a little, reducing its radius; in the lower part, the workpiece was straightened almost completely. Marks were made with a pencil on a wooden blank, the wire of the "parallels" in these places was cleaned with a medium-sized sandpaper and tinned with zinc chloride. Then the places of soldering at the blanks of the "meridians" were cleaned and tinned, and there was no need to mark them - two ends and a middle-bend. "Meridian" was applied in the right place, the middle was pressed with the left hand in a rag glove, flux was applied and soldering was done. Then the ends of the "meridian" were soldered, it was even easier, the workpiece was molded so that the middle almost reached its place. After soldering it, the ends were pressed tightly against their "parallels".

For simplicity, the workpiece was marked "visually", by eye, that is. Four "meredians" are soldered, two each, opposite each other. The angle of 90 degrees is well defined by the eye, further, the “meridians” are soldered into the middle of the empty sections, where the marking task is also very simple - to divide the segment in half.

Several times there were such difficulties - a new soldering, next to the old one. No “stepped soldering” with different solders, just “old” soldering was organized with an additional heat sink in the form of pliers sponges. There was not enough heat to melt the solder and everything that was needed remained in place.

Well, the whole disc is evenly covered with “meridians”, but, something is a little rare. I wanted the finished rag lampshade to not have a blatant “facetedness”. It was decided to add "meridians" in the intervals.


Well, this is more like a hemisphere. Let's leave it. Small carnations are pulled out and the frame is carefully removed from the blank.

Now you should take care of mounting it on the lamp. Socket in a lamp with a small E14 base, with a thread on the outside and a large carbolite nut on it. With this nut, the lampshade is clamped onto the lamp.

The platform for the nut was cut with a favorite tool - a jewelry jigsaw with a large nail file. From galvanized "roofing" steel 0.5 mm. A square blank is cut out with metal scissors, diagonals are drawn, at the intersection, the blank is slightly punched. The leg of the compass is installed confidently, without slipping, in this hole.

Paradoxically, straight wires turned out to be not so easy to get - I had to work pretty hard with a mallet on a wooden stump. It was decided to make fasteners at four points, so as not to measure the angles with a protractor (usually, they are made in three - they save wire and it is somewhat easier to get to the light bulb).
So, having figured out how the chandelier should be arranged correctly, we take up its main lighting and at the same time decorative elements: a lampshade and a ceiling. Reflectors are technologically simpler; their manufacture and fastening to the supporting structure of the chandelier does not cause difficulties.
The Internet is full of pictures with really very beautiful homemade lamps. However, considering them Ask yourself: how do you replace a light bulb? The answer is not always found in the primary sources. Methods for fastening lighting elements in lamps that allow replacing the lamp without using a tool will be discussed in the next article, but the technological methods described later in this article are designed to ensure that the lampshade in this case either moves up or is removed down, or you can simply climb into it hand.
materials
In order of increasing complexity (and durability), do-it-yourself lampshades and ceiling lamps at home can be made from paper, plastics, threads, ready-made tubes of various kinds, twine or yarn, framed with a fabric cover and stained glass. The last 2 are quite complex, but with a skillful approach to work on lighting and decorative qualities, they can surpass expensive purchased ones.
It is easiest to make a paper lampshade: from materials other than paper, you will need threads and PVA glue, and from a tool - a sewing needle, scissors and, possibly, a sharp mounting knife. However, paper lampshades are fragile and therefore suitable mainly for chandeliers. But a damaged paper lampshade is easy to replace with a new one.
You can make a lamp out of paper a little stronger in various ways. The simplest is to collect a balloon-ball from paper strips, gluing them at the poles and among themselves, pos. 1 in fig. However, the design in this case is uniform: sufficient strength of the product is ensured only and only by its spherical shape.
Elements of paper lampshades
Another way is to strengthen the paper itself. It will require some additional material: copper enameled winding wire with a diameter of 0.25-0.4 mm or threads. In the first case, the lampshade will fit without additional hardening for a floor lamp, and in the second, for overhead decorative elements, you will need a solid supporting base, for example. from a plastic bottle. The paper for the lampshade is strengthened with wire as follows:
- On a sheet with a density of 90-140 g/sq. see deduce the contours of the details.
- With a finely sharpened pencil, or a mechanical one with a 0.6 mm rod, the stiffness grid lines are drawn. If the lampshade will be glued together from several solid or slightly cut sheets, the grid lines should form a seamless pattern.
- Apply a thin layer of PVA glue with a brush.
- When the glue dries to a tack, the veins are applied along the grid - stiffeners - from the wire.
- Lubricate the same PVA sheet with a density of 35-60 g / sq. cm, impose on the first and gently smooth with your fingers.
- A day later, the details are cut out with scissors, glued together and painted. In this way, even imitations of the wings of rare species of butterflies, pos. 2; in this case, Maak's swallowtail.
When using threads, both sheets are taken with a density of up to 60 g / sq. see Then, as said, you will need a carrier base, but it is possible to imitate even the texture of rose petals, pos. 3.
Note: a paper lampshade, durable "almost like a real one" can be made from papier-mâché. The technology, rather laborious, is described below, see lampshades for the kitchen.
Plastics
It is elementary to make a lampshade for a chandelier from disposable plastic cups fastened with a stapler, see fig. Its lighting qualities are very good, but the view is frankly utilitarian. Therefore, it makes sense to use such lampshades in rooms with rather high requirements for the quality of lighting, but not in front rooms. The radiation pattern (DN) of the glass lampshade forms a cardioid.
Lampshade made of plastic glasses

Lampshade made of plastic spoons
A fan-shaped DN with a wide opening, very soft light in the central spot and uniform illumination in the side zone, makes it possible to achieve a lamp with a cone lampshade (or pineapple?) from bitten plastic spoons based on a PET bottle with a cut bottom, see fig. Effective softening of light is achieved by the fact that the spoons work as translucent bowl-shaped reflectors. They are glued to the bottle and glued together with silicone glue, mounting or glue gun. Cyanoacrylate glue is also suitable, but it must be taken thick. Cheap "superglue" is very fluid, the streaks will spread everywhere and spoil the glossy surfaces of the spoons.
From bottles alone, you can also make good lampshades. For example, a sphere from their bottoms fastened with a stapler, like stopar cups (see the figure for a mini-master class) will give a cardioid pattern; however, in comparison with the "ustakanenny" noticeably distorted. But in the country or in the back rooms, a chandelier made of bottoms is quite useful.

Bottle bottom lampshade

Lampshade-hedgehog from plastic bottles
Romantic soft light, somewhat spotty, but within acceptable limits, will give a ceiling-ball from bottle "hedgehogs"; however, they are more like blooming sea anemones - sea anemones, see photo on the right. It is not difficult to make the “hedgehogs” themselves: the bottoms are cut off from the bottles, the side walls are cut to the scar before narrowing into the neck, the strips are wrapped around the neck, glued with droplets of glue and fixed with threads or tape for reliability. However, to assemble the "hedgehogs" into a ceiling, you will need a transparent spherical base. It is obtained similarly to a lampshade made of threads (see below), only the threads are taken from white nylon or propylene no thicker than the 20th number, and instead of PVA - a colorless water-based acrylic varnish.
A very uniform illumination allows you to achieve, and very decorative, a lampshade made of leaves cut from bottles, see fig. It is assembled on a temporary spherical mandrel, see below.

Lampshade made from homemade plastic leaves
The step-by-step master class in this case is also simple, but it requires patience, accuracy, some additional tool and, possibly, material:
- We are preparing a soldering iron with a bronze nickel-plated tip (for dry soldering) at 40 W or with a conventional copper tip at 25 W;
- If the sting is copper, you will also need a Teflon (fluoroplastic) tape 0.06 mm wide 60-80 mm;
- Cut out the leaves from the bottle. From the point of view of lighting technology, pale green or light brown are better suited;
- With a soldering iron tip (copper - through the film), we slightly melt the edges of the leaves, otherwise they will look unnatural;
- With the tip of the sting (copper also through the film), we “draw” the veins;
- With the plane of the sting between the veins, with light touches, we slightly melt the surface so that, like real leaves, it is not quite smooth;
- Again, with the tip of the sting deeper, but without piercing, we bring out the central vein. It is convenient to do this on a soft heat-resistant lining (coarse calico or felt will go in several layers);
- We put a thread in the central vein and melt it by “winding” the side roller onto the hollow;
- Complex leaves, if required, we form by tying the threads of the leaves;
- Having spread the leaves on the film (now any), we impregnate the threads with acrylic varnish from the pipette. After it dries, the foliage is ready for assembly.
The procedure for making Christmas decorations and lamps from threads is described many times in Runet. For example - video:
Video: do-it-yourself twine / thread lampshade
Here it can only be noted that, firstly, it will take at least 100 m of thread for a medium-sized lampshade. Secondly, it makes no sense to use inflatable balls as mandrels: after 10-20 turns, under the pressure of stretched threads, the ball protrudes where it is not necessary, and the result is something unspeakable. Thirdly, it is also not necessary to pre-soak the threads in flour paste: the product will turn out to be fragile and not moisture resistant.
As a mandrel in the manufacture of a lampshade from threads, it is best to use a tightly inflated chamber from a sports ball or a durable silicone beach ball inflated from a pump through a nipple. The mandrel is lubricated several times with petroleum jelly (lanolin), carefully rubbing it with your hands. It won't hurt the ball in any way; on the contrary, it will prolong its life.

Device for making a lampshade from threads
Further, the thread is wound on the mandrel, continuously pulling through the simplest device, see fig. This mini-impregnating bath, so that it does not accidentally crawl, tip over and douse something with glue, is fixed on the table with adhesive tape; Convenient double sided. The glass is first pierced with a needle and thread, then poured with PVA or acrylic varnish and wound, tightening as necessary. Usually the thread goes through the bath itself, because. glue until it dries is a good lubricant.
When winding, do not forget to leave a window for entering the cable and cartridge - the strength of the cut thread ball drops sharply! A day after its completion, air is released from the mandrel and pulled out through the same window. It, “pro-vaselined”, sticks to the threads very rarely and fragilely: you can tear it off by slightly pulling or pressing it with your finger, and the product remains intact.
Note: jute, sisal or propylene twine can be used instead of thread, but there is a better use for it in a lampshade, see below.
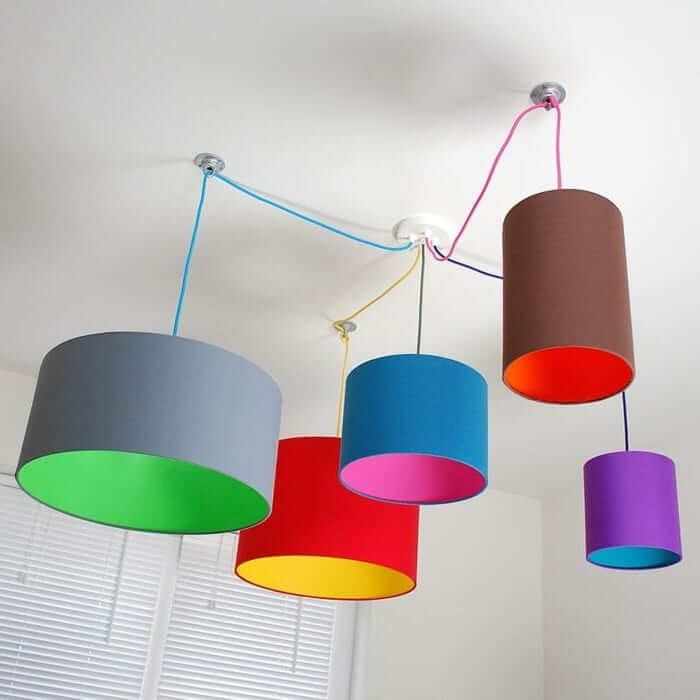
And where is it all?
Plafonds-balls, see fig., Suitable for the nursery, because. form an even soft light. The one on the left is made from paper cupcake wrappers on a thread ball base. Threads - propylene or thin nylon colorless; binder - acrylic varnish. White in the coil, after impregnation with varnish, such threads become almost transparent. Lampshade-ball of cups (on the right) is not so interesting, because the dishes are all the same, but it is more difficult to tear it apart.

Lampshades for children's chandeliers
In the hallway, a hemispherical lampshade from the same cups is more suitable, see fig. on right. With a low lamp power (more precisely, its luminous flux), it will give a bright spot below and acceptable illumination of the rest of the room, so you can use low-heating incandescent lamps of 15-30 watts. The fact is that the resource of economy lamps and LEDs is sharply reduced with frequent on / off. And a low-power incandescent lamp, especially in the hallway, where the light is constantly off, will not significantly increase the cost of electricity.

Chandelier lampshade in the hallway
A special case is the kitchen. The requirements for lighting in it are set out in a previous article. But the lampshade in the kitchen quickly gets dirty, and the soot eats in hard. Recall: bright light contributes to the condensation and bituminization of vapors of organic compounds. This is the sedimentation of soot; the lampshade is illuminated most brightly.
The simplest way out is a disposable paper lampshade. "Bump", as in pos. 1 fig. below, will give just the character of lighting needed in the kitchen, but you will have to do it again quite often. It is better to mold a papier-mâché lampshade on a suitable mandrel, pos. 2. After varnishing with acrylic varnish, it can be gently washed with a cloth with dishwashing detergent, and painted with a blacksmith's patina, it will look like handmade forged and certainly not like some old newspapers.

Lampshades for kitchen lamps
But the lampshade on pos. 3 - juice straws glued to the bottle - an example of an unsuccessful solution. Such a lampshade will give an ideal light for the kitchen (straws work partially as light guides), but it gets dirty quickly, you can’t clean it properly, and the product is laborious. Plastic reflectors for local lighting kitchen lamps are best made from reusable plastic dishes, pos. 4, it is quite durable, inexpensive and easy to clean. Cups with handles and saucers, of course, are a matter of design decision, but bowls without a pattern are what you need.
How to make papier-mâché?
Papier-mâché material is useful for many purposes, so let's recall the technology of its preparation and use:
- Old newspapers, or better, the cheapest unglued writing paper, are torn into shreds about the size of a thumbnail. You will need a lot of paper!
- Scraps to the top fill a suitable dish; say, a liter glass jar.
- In boiling water, dilute 1/3-1/5 by volume of PVA.
- While the solution has not cooled down, fill it with paper pulp.
- Stir until the paper completely spreads into fibers.
- After cooling, papier-mâché is poured into consumable dishes or immediately put into action. You can store paper paste for up to 6 months. in the refrigerator in a tightly sealed container.
- Prepare the next batch in the same way.
- If the paper paste immediately goes to work, you can add the next one to the pasted area of the mandrel, while the previous one is still wet and wrinkled with your fingers. If you finish it dry, the product, having dried, may fall apart into “cakes”.
- The workpiece is ready for varnishing, painting, etc. after a week of drying at a temperature of at least 22 degrees. The air temperature around the workpiece must be the same on all sides! It is impossible to dry on a battery, convector, under direct sunlight or an infrared emitter!
tubules
Lampshades and plafonds made of pieces of tubes are most often made for night lamps and lamps in the bedroom: due to the round section, they always have a significant refraction of light, which can be very intimate and romantic, but in most cases it is undesirable for permanent and working lighting. Lampshades made of translucent tubes also give a rather spotty light, see fig.; if you use pieces of a thin transparent PVC hose, then the play of light will turn out to be very beautiful, but you don’t need to look at it for a long time, and even more so read or sew in such light.

Tube lampshade
Paper and other fibrous materials do not refract light much, but the tubes made of them are fragile in themselves. For example, it is better to make a lampshade from newspaper tubes on a frame, see below: just because they wrinkle easily, thin paper tubes are an excellent material for weaving. As for the lighting properties, paper, especially pure paper, is excellent.
Lampshade on the frame
Now let's get down to the lampshades, which are suitable for anywhere, incl. and for a table lamp, which can be pushed to the floor with an elbow. In addition, we will set the condition that the lampshade trim can be washed, cleaned, changed at will. Therefore, we do not touch glass or solid hard plastic lampshades; Also, you can't make them at home. That is, let's deal with lampshades on a frame with soft lining.
About lampshade fabrics
The decorative light cover of the lampshade is preferably sewn from fabric with fleecy threads, i.e. natural. Due to diffraction on smooth synthetic filaments, the light penetrating through such a lampshade may turn out to be hard. It is not difficult to choose a fabric for a lampshade by eye: through the sample, turning it smoothly, they look at some compact bright light source; preferably LED, because it gives the most coherent, i.e. orderly, light. The selection criterion is simple: the less moiré fringes observed from different angles of view, the better the fabric.
About lampshade restoration
The frame of the lampshade is quite laborious and technologically complicated, so first you need to look around at the farm: is there a lampshade from an old lamp lying around somewhere. Straightening it, repairing and updating the lampshade with a new cover will be easier than making a frame from scratch.

Homemade tool for measuring large diameters
The discovered "basket" may turn out to be a very fanciful shape, and to build patterns (see below), you will need to accurately measure its diameters in several places. In this case, a home-made caliper from 3 wooden slats and a pair of drawing squares will help out. Of course, he will not give the accuracy of the factory gauge, but achievable (+/-1 mm) is enough for cutting and sewing work. An idea of the possibilities of such a tool is given in Fig.
The measurement procedure is 2-stage: on the sponges in the places where they touch the object, marks are made with a pencil, and then the size is taken between the marks with a tape measure. In order for the movable sponge to slide more smoothly, and, accordingly, to measure more accurately, a fluoroplastic film must be placed under the rubber bands holding it. To measure small diameters, the sponges are turned over with squares outward.
Building a pattern
Now we remove the necessary diameters: the lower and upper hoops (D1 and D11 in pos. 1 in the figure), the largest and smallest on the belts (D2, D6, D10), in the places of inflections, i.e. where the curvature of the generatrix changes sign (D4, D8) and at breaks (D5). Others we take more or less evenly between the mandatory ones.

Building a lampshade pattern
The diameters of the pattern of 6 wedges will be, taking into account the tightening of the fabric, equal to half of the measured diameters (pos. 2). If the wedges of the finished sleeve are supposed to be more or less, proportionally change the proportion of the diameter in the corresponding cross section of the pattern. But it's too early to cut and sew.
There, at pos. 2 shows that the stitching allowance is geometrically not completely similar to the template. In knot I (inward kink), this is not so bad: you can sew on a backsleeve and tighten the seam with a cord. If the decor of the lampshade involves ruffles, frills, scallops, etc., then perhaps this is how it should be: small folds will fall into place, and the cord will not be visible in the break of the contour.
However, on the contour shelf (node II), whatever one may say, it is not possible to give an allowance so that the seam does not “leave”. In higher geometry, it is proved why, but we don’t need to climb into this jungle: we will simply cut the paper template along “capricious” diameters at breaks and shelves (pos. 3).
Cover tailoring
Now, how to sew a lampshade according to our patterns? First, separate parts of the sleeve are sewn; in this case bottom, middle and top. Then, to the widest belt (bottom), the largest adjacent part in width (here - the middle) is sewn. Then, in the same way, 2 parts following the width are sewn together, etc. The bottom line is that the shortest transverse seam (we have Seam 2) is sewn last. In this sample, after sewing the bottom with the middle, the top is sewn to them. The tailoring of the cover is completed by trimming the excess allowances, except for the lower and upper collars. The edges must be hemmed.
Frame cover
The next stage is the landing of the cover on the frame. Here the machine can be sent to the closet: the work is exclusively manual. Step by step, the covering of the frame of the lampshade with a cover is carried out as follows:
- The cover is turned inside out (that it was sewn from the inside, probably, and so it is clear) and put on the frame;
- Wrap inward and stitch the top lapel;
- Tighten and trim the fabric to the first fold (here - D8). If there was no hoop in the original sample, it must be placed in advance, see below;
- The fabric is basted to the ribs of the frame from top to bottom alternately, and to the hoop at the inflection;
- Repeat paragraphs. 3 and 4 to the next bend (now D5), and so on to the bottom hoop;
- Wrap and stitch the bottom lapel.
How the simplest lampshade frame of a table lamp or floor lamp is arranged can be seen in pos. 1 fig. Hanging for a chandelier is different in that the ring will be at the top, the extensions from it will go to the upper hoop, and then additional holes are needed in the ring for attaching the suspension.

Lampshade frame device
The ring is cut out of a well-soldered and sufficiently strong sheet metal (bronze, brass, galvanized steel 0.4-2 mm thick) or durable plastic from 1 mm. A computer disk is suitable, under the E10 cartridge it will only need to drill holes for extensions and fasteners. The main dimensions of the ring for the E27 cartridge with fastening with union shaped nuts (pos. 3) are given in pos. 2. But it is unacceptable to make a ring for fastening in the gap between the body and the chuck collar with a skirt (pos. 4)! Such cartridges are fastened only with a threaded fitting in the cover!
How stretch marks are attached to the ring is shown in pos. 5: their blanks are not completely bent with a hook, inserted into the mounting holes and gently squeezed with pliers. Then, if the ring is metal, solder (see below). If plastic - fix with drops of superglue or silicone.
solder assembly
Frame parts are made of plastic steel wire with a diameter of 1.5-2 mm or bicycle spokes. The latter are much stronger, do not rust and do not require painting, but they must be bent carefully and they are soldered worse. To solder the frame you will need:
- Soldering iron of at least 65 W (preferably 100-150 W).
- 6% orthophosphoric acid solution. Sold, for soldering, in radio shops and construction. Orthophosphoric acid is also available as food additive E338 in the form of needle-like colorless hygroscopic crystals.
- Flux paste (gel for soldering), always with borax.
- Thin, 0.15-0.35 mm bare copper wire. You can take the veins from the electrical wire.
- Solder POS-30 or POS-40. They are refractory (which is why you need a powerful soldering iron), but much stronger than POS-61 and other fusible ones.
Note: phosphoric acid of medium strength, highly toxic and / or caustic fumes does not exude. But still, when working with it, you need to take precautions - wear goggles and gloves (household latex will do).
The key procedures for assembling the frame on soldering are shown in fig.

Soldering of steel parts
The phased brazed steel frame is assembled as follows:
- The ends of the linear blanks are kept for 3-4 minutes in acid (pos. 1), and then rinsed in water (pos. 2). Water needs at least 1 liter, and after 4-5 washes it must be changed.
- If the soldering is in the middle or the part is bent, soak a clean white rag in acid and wrap the place of soldering with it. They hold for about half a minute, then rinse the rags in acid, wrap the place of soldering with it again, and so on until the total time the acid acts on the metal reaches the same 3-4 minutes. After acid treatment, the part in this case is washed under running water for 1-2 minutes.
- Without touching the treated areas with bare fingers, the frame is completely assembled without soldering: the butt joints are tight, but not tight, i.e. with intervals between turns of 1.5-2 mm, wrapped with copper wire, pos. 3 and 4, and apply 2-3 drops of flux paste to each joint. Places of rations at the crosshairs of parts are wrapped with 2-3 turns of copper wire crosswise and fluxed with 1-2 drops.
- Semi-dry, i.e. without a hanging drop of solder, the rations are heated with a soldering iron tip until the flux spreads through all the cracks, pos. 5. It is not necessary to heat the flux to a boil and the appearance of vapors is not necessary. Also, the final result will be better if you heat the flux with a separate soldering iron with a dry bronze nickel-plated tip.
- They collect a drop of solder, apply it to the place of soldering (pos. 6) and heat it until it flows everywhere, as before the flux. The excess solder hanging below is carefully removed with a soldering iron tip. It is impossible to apply unmelted solder in the form of a flexible wire, and refractory solders are produced mainly in rods.
Fabric or twine?
Propylene packaging twine and paper tubes have good lighting properties. If the lampshade is made of woven twine or newspaper tubes, it will give an even soft light, and complex cutting and sewing work will disappear. But in the frame for a wicker lampshade, firstly, there must be at least 10-12 ribs evenly spaced around the circumference.
Note: if the frame is of a simple shape, then only 3-4 ribs can be load-bearing (steel) in it. Let the rest be at least made of straw, they are glued to the upper and lower hoops.
Secondly, to get the rims at the top and bottom, respectively. the training is either doubled in height, with a gap of 2-3 cm, or strips of thin metal or hard plastic of the same width are attached to them. Headbands are needed for decorative reasons: a solid one is wrapped with twine or a tube, and if the headband is double, weaving can be started with a figure eight. The entire side surface is braided like a basket.
Stained glass lampshade
Stained glass lampshades form the luminous flux mainly by refraction, so they are more suitable for the living room.

stained glass lampshades and plafonds
Fragments of stained glass are made of rhinestones, faceted or cabochons. A stained-glass lampshade is assembled on a heat-resistant mandrel (for example, a steel bucket) using the Tiffany technique. But compared to a stained-glass window for a window or door, here, since the connections of the elements are not continuous, but point-like, there are significant differences:
- Solder is used only durable refractory, the same as for the lampshade frame, as well as flux with borax.
- The framing of rhinestones before soldering is made only from a special copper foil - folia - 3-15 mm wide, depending on the width of the crystal rim.
- The protective film is removed from the foil immediately before applying it to the crystal; do not touch the outer (soldered) surface of the foil with bare hands!
- Also, you can not postpone the soldering of rhinestones wrapped in foil for tomorrow: copper will have time to oxidize, and the joints will turn out to be fragile.
- Upon completion of the soldering and thorough washing of the flux residues (with a rag with alcohol; then with distilled water), the soldering is coppered by applying a thick blue solution of copper sulphate with a brush.
- The remains of vitriol are washed off under running water. You can’t rub with a brush or even with cotton wool, because. the copper film on the solder is very thin.
A small surprise - about New Year's chandeliers and lampshades
New Year is coming soon, it's time to make Christmas decorations and holiday decorations. And a Christmas chandelier. Chandelier? Yes. Remember how the festive mood falls if the overhead light is turned on in the room with the Christmas tree. For some, no, but New Year's lighting should correspond to the spirit of the holiday. Let's postpone lighting engineering until serious days, nothing from the festive light will happen to us in a few evenings. Cause, it's time, but it's also an hour of fun.

Christmas chandeliers
Usually a New Year's chandelier is a Christmas wreath attached to the chandelier in the living room with light bulbs woven into it. But even an experienced electrician would not need to engage in electrical work at height in the pre-holiday turmoil. And what if the tree is in the nursery, where is the paper chandelier? Then you can at least buy inexpensive plastic blanks for Christmas balls, a garland with colorless light bulbs, stick them into balls, and hang such a pile (on the left in the figure) where it is more convenient.
If the design of the “everyday” chandelier is suitable, you can screw candle lamps into it and decorate it with the same balls or, for example, painted cones, right there. Or you can try a little and make a New Year's jasmine chandelier with your own hands, as in the video below. New Year is New Year, whatever you say.


