The basement is a semi-basement, which is partly located underground, with the upper part on the surface. It is often created to save space or to take into account certain irregularities in the landscape, which saves a lot of building material and time. That is why the question of how to make a basement is of great interest to modern masters.
First of all, it must be said that all work must be carried out in strict accordance with a pre-developed project (). Professionals are involved in its manufacture, since even the smallest mistake at this stage can lead to a reduction in the life of the building and even to its destruction. At the same time, the project involves the use of certain types of material, which should not be deviated from.

Ground works and foundation
- To begin with, the installation instructions involve the manufacture of a pit. It can be dug by hand or using special equipment.
- The dimensions of such a pit are determined by the parameters of the future structure, but at the same time it is necessary to make it wider by 0.5 meters on each side. This is necessary for organization and bedding.
- At the next stage, sand is poured onto the floor of the pit, which is mixed with crushed stone and carefully compacted. The thickness of such a layer is usually about 10-15 cm. After that, the surface is spilled with water and further leveled.

- After that, they create a formwork with their own hands to fill the floor of the future room, which at the same time will serve as the fifth for the foundation itself. It is worth noting that the base for such a design should be tape, but it can be created both from concrete and from stone or other durable material.
- Then, waterproofing in the form of a polyethylene film or roofing felt is laid on the bottom of the formwork. It will not allow moisture to get inside the room from below.
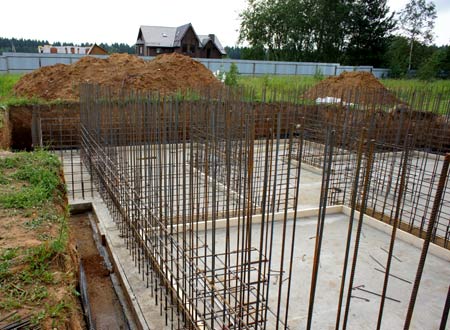
- Next, metal reinforcement is installed, which is laid in the form of a lattice and concrete is poured. After that, you need to wait until it completely solidifies.

Foundation
- For the manufacture of the base, which will serve as the walls of the floor, it is best to use blocks of aerated concrete. Usually the price of this material is quite high, but given that it has high strength, ease of installation and low thermal conductivity, then such costs can be considered quite justified.
- Lay such a foundation in strict accordance with the project. Moreover, if there is a need to deviate from it, then the changes made should be shown to a specialist for approval before their implementation.

- During installation, it is necessary to make reinforcement every two rows, installing steel wire in the solution.
- It is worth noting that the manual, which tells about how to properly waterproof the basement floor, strongly recommends keeping the space between the erected wall and the edge of the pit at 0.5 meters free. It will be needed to drain water from the structure.
- If during work it is necessary to create window openings, then they are made using concrete beams, which can be made independently, right at the installation site.

- It should also be said that the use of a water level and a plumb line will help to avoid bumps and distortions. At the same time, it is worth using these tools after the construction of each row, since the slightest inaccuracy at the beginning of work can cause a large defect at its end.
- After the foundation has been erected, the manual, which tells how to properly make the basement, recommends letting it settle for a week, and only after that it will be possible to install floor slabs.
Advice! It must be remembered that aerated concrete blocks do not tolerate high humidity, since their porous structure is almost through. That is why professional craftsmen use plastic wrap when working to close the structure in case of rain.

Warming and waterproofing
- First of all, construction documentation, detailing how to waterproof the basement floor, involves the installation of a heater. At the same time, she advises using expanded polystyrene panels, since they retain heat well and tolerate subsequent processing well.
- The selected material is mounted using a special fastener characteristic of its type.
- Next, a layer of waterproofing is applied to the insulation. As it is usually used special mastic or bitumen. At the same time, they try to get a uniform and uniform layer.

- At the next stage, the space between the edge of the pit and the finished base is covered with gravel. This is necessary to create a kind of drainage that will remove moisture from the base, preventing it from lingering.
- Some customers, having learned how much it costs to make a basement floor, are at first afraid of the high cost, but when compared with the main structure, it becomes clear that it is much more economical.
However, the costs of manufacturing the base themselves are too high, although some designers include such structures with insulation in their drawings even without organizing a dwelling of this type.
In order to make a basement floor with your own hands, you do not need any global skills and knowledge. You need common sense, correct calculations and the help of 1 or 2 friends to help you with loading, unloading building materials and with heavy concrete work or FBS blocks.
To begin with, it would be worthwhile to understand why a basement floor is needed in a house, and why fence a garden because of such a seemingly unnecessary area under the house.
Why do you need a basement in the house
Take paper and pencil, let's see the pros and cons of the basement floor, which will be, as it were, "not a basement" and, at the same time, not the first floor.
- Firstly, in the basement you can place all the technical premises of the house. This is a boiler room, laundry, workshop, sauna, bathhouse, storerooms, fuel storage (pellets, firewood). That is, all technical and utility rooms can be placed in the basement, and the first floor can be made completely residential.
- Secondly, the basement floor can be made well insulated and it will allow you to have a very comfortable temperature on the first floor of the house. At the same time, the base itself can not be heated so much, keep the temperature there at 16-18 degrees Celsius.
At the same time, if the temperature in the basement is + 16C, then it is much easier to maintain a temperature of + 22C on the 1st floor, and the floors will not be cold at all in the winter.
Correct layout of the basement
To begin with, you will need to mark the basement floor, which will be located above the basement or have its own slab in the form of a base.

All utility rooms can be "hidden" in the basement.
The marking of the basement floor implies the following set of actions:
- Preparation of a basement floor plan with a specification of all the premises that will be located in it. Particular attention is paid to the boiler room and the basement of a residential building.
- Calculations for the bearing capacity of the basement and walls of the basement, which will have to bear the loads from the walls and structures of the building above. Sometimes it is useful to lay down a 10-20 percent margin of safety if there is no final confidence in the qualifications of workers from the southern republics or in material purchased on the local market.
- Marking the basement floor on the ground - on the building area or on the existing foundation for the building. It is worthwhile to tell you right away that combining a paper plan and real markings on the ground is within the power of either an attentive and accurate developer or an experienced foreman of builders. It is not worth entrusting the marking of the basement to some poorly educated Tajik or Uzbek who arrived only yesterday from his village or village. Then you will grab your head.
- Removal of the contours of load-bearing walls and partitions in nature - on this, the marking of the basement floor is considered complete. Then you can proceed to the actual construction work.
Several possible versions of the plinth give a certain freedom in the choice of building materials and wall construction technology.
Possible foundation with basement
It remains only to decide which foundation to combine with the basement, for each specific case and specific soil.
Build on clay, on heaving soils, it is worth considering how to make a pile foundation with a basement.
With such a foundation, it will be possible to calmly wait out the winter period and not worry about possible ground movements under the house.
The bases of the piles are below the freezing level and do not allow heaving soil to lift one or two corners of the house. And correctly executed piles according to TISE technology, either screw or bored, are able to withstand lateral heaving forces that can push piles with a large footprint out of the ground.
Build on peat, swampy soil, soft soils, water-saturated sand, a slab foundation with a basement is suitable for you.
With this decision, the basement of your house will resemble the hull of a ship, on which the first floor and attic will rise, like the superstructure of a ship.
The plate will not allow the basement to sag unevenly on soft ground, it will distribute the weight of the entire house over the entire building area.
And, finally, for good sandy and sandy loamy soils, for rocky foundations, for stable soils, MZFL is quite suitable - a shallow foundation with a basement in the form of a tape, which will serve as the basis for the walls of the basement and.
These are the main 3 types of foundation that are used when it is required to make an exploitable basement of the house, which will be insulated and heated in the winter.

The optimal width of the foundation for the plinth
Let's calculate a little what the optimal width of the foundation for the base can be. To do this, you should immediately make a reservation on what technology you will build the walls of your house.
For a frame house, which will have an operated warm basement floor, the optimal width of the foundation for the basement will be:
- For a pile foundation, the width of the grillage on piles is from 30 to 45 cm. At the same time, it is possible to make the thickness of the insulated frame walls from 15 to 30 cm, which is appropriate.
The rest goes to the interior decoration, which cannot hang in the air. Exterior finish, facade and ventilation gap may well “hang in the air”. - For a slab, the width of the foundation for the plinth will be equal to the width of the masonry walls of the plinth or the width of the FBS blocks from which the plinth will be built.
If you use a simple slab or make UWB, then their stiffeners will just be equal to the width of the basement walls. - When using MZFL and the floor of the basement floor of the "insulated screed on the ground" type, the optimal width of the foundation will be equal to the width of the basement wall. Such a margin, as when using a grillage on a pile foundation, in this case is not required.
For a house made of blocks, you need to choose the width of the foundation for the basement at the rate of "the width of the block wall plus the decor plus 5 cm."

That is, if you lay a house made of gas silicate or a gas block in 1 block (40 cm), make an external brick lining in half a brick (12 cm), then the width of the foundation for the basement will be 57 cm.
As for a brick house or a house on a concrete frame, now almost no one builds the first in a pure brick design, and for the second, the width of the foundation will be equal to the dimensions of the vertical piles of the reinforced concrete frame.
Ground floor from FBS - we put blocks
One of the simplest options, which most of our developers choose, is the basement of FBS (foundation blocks) for a house of any materials. Whether you are building a frame house or, or want to make a small one-story wooden house, you will like the FBS construction format itself.
On the prepared foundation, according to the markings made (we wrote about this above), put FBS blocks from the factory. One day of work of the crane and a team of 2-3 people, and the basement of the FBS is ready.
No other method melts such a “high-speed line” of an entire floor as the construction of a basement floor from foundation blocks.
If the same crane lays hollow-core floor slabs on the basement floor from FBS, then the very next day you can start laying the walls of the first floor of a brick or block house or erecting the frame of your frame.

The FBS basement is the fastest way to build a basement for a house.
Why is the marking of the basement mentioned again? Because, in the case when you make a basement from FBS, all markings must not only be made for the placement of premises, but also the dimensions of the carriers must correspond to the commercial dimensions of the foundation blocks produced by the reinforced concrete structures in your territory.
For nothing slows down the construction as much as the mismatch of the foundation and markings with the dimensions of the FBS brought to the construction site.
Ground floor of KBB and brick
If you are going to build a basement from CBB (expanded concrete blocks), then here are a couple of tips for you:
- First, never use hollow claydite-concrete blocks for the base. The basement of KBB with slotted or cylindrical recesses will, of course, come out a little cheaper than the basement of solid KBB, but will lose almost 50 percent in strength and bearing capacity. Not worth the small savings of such sacrifices.
- Secondly, despite the fact that KBB are quite durable blocks, you should not make a base only from them. Part of the load-bearing walls (corners and the central partition) should be made of FBS.
CBB does not absorb water well, but still many times better than reinforced concrete. Protection against - the most expensive place in this version of the base.


The basement floor made of bricks, if you are going to make the basement of a house using this technology, will be similar in terms of masonry and requirements to an expanded clay concrete base.
The same conditions - solid brick and triple protection of the brick basement from groundwater.
To protect a block or brick basement from water flowing down the wall of the house during rain, it is best to use good waterproofing in a soft or hard insulated blind area that surrounds the house at zero.

Every person who decides to build a country house dreams of raising several floors, building a garage and other useful areas. And you can solve this problem by building a basement tier in the house. Its cost will be expensive, but still it will be less than raising ground floors. The height of the zero tier can be chosen at the request of the developer.
What is the basement
The area below ground level is called the basement. Why not a basement, you say. There is a slight difference here, which distinguishes the floor from the basement. If the height of the walls is 180 cm - this is the basement. All sizes below this value are considered a basement.
What is it for
Building a house with a basement tier will cost much less than a floor above the ground - this time. Secondly, the room in the house will look perfect, as all bulky items and a heated boiler will be an eyesore. Thirdly, here you can put a pool, sauna, gym, garage, billiard room. Fourthly, your preservation for the winter can be stored here.

Ground floor construction
For the construction of the zero tier, they are mainly used. For it, monolithic concrete slabs or prefabricated blocks are used (). The latter have several varieties, so you should push when choosing FBS from the size of the wall material.
Let's say you decide to build a brick house, then the width of the blocks should be taken 0.6 m, wooden - 0.3 meters. Basically, the width of these blocks is never entirely used in the construction of a cottage, and it is able to withstand a load of 10 floors.
Stages
- Digging a pit.
- Processing the bottom of the pit.
- Base plate reinforcement.
- Pouring concrete.
- Waterproofing.
- Formwork for walls.
- Reinforcement of the tape base.
- External wall waterproofing.

Technology
Before starting to dig a pit, we free the construction area from debris. We determine the type of soil, the threshold of soil freezing, the level of groundwater. And only when the data is known to us, we proceed to digging a pit.
If, according to the results of the analysis, it is known that the soil is clayey, we do the work in the following order:
We prepare trenches and lay a three-layer pillow, where the first layer is sand, then a layer of rubble and the third layer is again sand. We choose the thickness of the layers from 0.1 to 0.25 m. We carefully compact all this. We lay FB pillows on top, for reliable support of the future base. Now we are installing conventional blocks.
In the presence of sandy soil:
- We dig a trench for the base without a pillow. The soil with its characteristics allows you to do this. Here, the prepared bottom is rammed immediately with a vibrating plate. Next, we install the formwork where we will pour the concrete. The thickness of the concrete layer will be enough to take 0.1 m. We are waiting for complete drying and laying the blocks.
- We start laying FBS plates from the corner. When laying the first row, we use a cement mixture, the thickness of which we take is 10-15 mm. Don't forget to do the dressing at all corners of the building. We isolate horizontal seams with waterproofing material. How many rows there will be, so many waterproofing seams.
Construction price
To determine the total cost of building a zero tier, several factors must be taken into account. For example, the region where you live. Indeed, in different places, prices can be different. Using an example, we will talk about a house in which a ground floor has already been built. Size 10.5 x 8.1 meters. Wall material -. PC plates cover the monolithic belt. Waterproofing pasting, (5 cm). Change house 2.5 x 5 m.
If we consider them in percentage terms, we can get the following data:
- Materials - 63.81%.
- Tools - 3%.
- Work - 14, 26%.
- Equipment rental - 6.6%.
- Material delivery - 6.55%.
- Change house 5.28%.
It took about 1,000,000 rubles for everything.
Material costs
Here, for example, the size of the basement floor is taken 10x10 m:
- The use of corrugated reinforcement, which has a cross section of 0.14 cm, went 5700 meters at 36 rubles. Total 205,200 rubles.
- Concrete - 266,500 rubles.
- Formwork 10 cubic meters - 62,000.
- Waterproofing () - 60,000.
- Nails, sand - 42,000.
Total: 635,700 rubles.
Tool costs
You will need the following tools:
- Master OK;
- pick;
- shovel;
- roulette;
- plumb;
- a hammer;
- simple pencil.
And all this will cost a total of 30,000 rubles.
The cost of the work
The cost of the work will depend on the decision to build yourself or recruit workers.
If you take workers, then for a 10x10 basement, the workers will pay about 142,800 rubles.

Cost of additional works (waterproofing, insulation)
Waterproofing can be made with various materials, the price will depend on it. If waterproofing is done with bitumen, it will cost 60,000 rubles, with an area of 120 square meters. m. You can also do it with roofing material and the price will already be different.
After a layer of waterproofing, insulation should be done. If we take prices in Moscow, then here the cost of insulation is approximately 1250 rubles / m. Delivery of goods 400 rubles. (within the Moscow Ring Road). Self-export will cost you only the purchase of goods. For example, polystyrene - 1250 rubles. per cubic meter, polystyrene foam 1500 rubles, basalt wool 500.
An example of calculating the cost of building a basement floor
Let's calculate the basement floor with an area of 10 x 10 m:
We choose a strip foundation with a width of 0.3 m, a depth of 2.4 m, a height above ground level of 0.6 m.
A sample of one cubic meter of land costs 100 rubles. Consequently, 360 cubic meters cost 360,000 rubles.
Prepare the bottom of the pit, level and form the bedding, it is estimated at 50,000 rubles.
Make a two-layer reinforcement of the base - 55000.
Pouring concrete slabs, 21 cubic meters - 21000.
Waterproofing layer of the base with bitumen - 120 sq. m. - 12,000 rubles.
Formwork for the tape floor - 144,000 rubles.
Base reinforcement - 90,000 and filling it with 74 cubic meters - 7400 rubles.
Laying the outer waterproofing layer (roll materials were used) - 66,000 rubles.
In this example, the total amount of the zero floor turned out to be 715,400 rubles.
Conclusion
In this article, we examined various cost options for building a ground floor.
And we can say that on average you need to have one million rubles.
Because, during the construction process, unaccounted costs may arise, and it will also be important whether you build yourself or hire labor. Any deviation is reflected in the budget.
Advantages and disadvantages of building a basement
Pros:
- Increasing the space of the house.
- Reduces building heat loss.
- It takes on part of the load of the structure.
- room temperature stability.
Minuses:
- Additional costs for extra space.
- With an unheated option, there is the possibility of dampness.
- Not used as living quarters.
- High construction costs (1,000,000 rubles).
- The possibility of flooding, in the event that the technology is violated.

- Foundation blocks are the best option for building a basement. They need to be fixed with cement mortar.
- Large windows are considered the best option, then the ground floor will be well lit.
- Ventilation openings should be made flush with the ground and covered with a net. In cold weather, you can use a thick fabric.
- The height of the last row should be done at a distance of one meter from the ground.
- To connect the blocks, you must use an additional concrete belt.
- When the house is built, thoughts involuntarily creep up whether it was possible to save money. And here are some opinions of developers who have already built a house. That when recruiting workers, it is also necessary to choose professional drivers. Because the same work is done in different ways. One does two days and the other a month. For example, a sand car was unloaded with shovels all day because of the unprofessionalism of the driver. And to look for workers, it is better on the recommendation.
- Do not rush to buy consumables and tools according to the motto "suddenly come in handy." Consider every purchase rationally.
- Savings can be significant if you correctly calculate the thickness of reinforcement, ceilings, walls.
- Do not go along with the builders, defend your point of view if you think you are right.
- Should I buy expensive or cheap goods? Sometimes a cheap product is much better than an expensive one. Read reviews, it helps.
The ground floor is a room in a building buried below ground level. It is used for arranging household premises, a garage and other purposes, such as a swimming pool, sauna. In some cases, building a basement is a cost-effective solution, especially if the terrain of the site is characterized by the presence of slopes. Due to the basement, the useful area of the entire building increases, so the basement in a private house is the right and thoughtful solution for any developer.
Ground floor: features and benefits
The underground level can serve as the foundation of the entire structure and living quarters. Features of construction in compliance with the requirements for strength, bearing capacity, dimensional space. The regulations show that the ceiling height cannot be less than 2.5 meters, however, sometimes the parameter is limited by the presence of a high occurrence of the ground aquifer, as a result of which it is allowed to build a basement floor above ground level. For example, if the level of the aquifer is only 1.5 m from the soil boundary, digging a foundation pit for a building is not recommended, in this case, backfilling the above-ground part of the basement with soil and artificially deepening the ground floor should be enough.
Advice! With proper construction, the basement can become not just a basement, but quite a living space with the proper level of comfort.
The basement is used for the following purposes:
- Storerooms;
- Garage;
- Premises for economic use (laundry, ironing, drying, furnace);
- Wine Vault;
- Living room;
- Game rooms;
- Pools;
- Bedrooms;
- Gym;
- Kitchen;
- Cinema.
There are no restrictions for private houses in using the ground floor, it all depends on the preferences of the owner, financial capabilities and practical application.
Plinth types

According to its design, the basement of the house differs in the following types:
- bulging. It is used in the case of too thin wall panels and for arranging rooms below ground level.
- Recessed. It is considered the most popular and has a practical application: drains from the facade prevent the formation of increased moisture in the house.
- Lined with wall panels. Experts sometimes do not consider it possible to use this option, since the very effect of the presence of the basement floor is lost, however, if the option of thorough waterproofing of the walls does not scare, the basement built in this way will fully meet all the requirements of comfort and practicality.
To make a plinth, it is necessary to take into account the thickness and material of the wall panels, as well as the strength characteristics of the soil, which are influenced not only by aquifers, but also by the climatic features of the region.
Construction calculations

Determining the work on the construction of the ground floor, it is necessary to perform the following actions:
- Complete the design of the basement, taking into account the determination of the purpose of the premises;
- Calculate the load on the foundation and walls of the ground floor.
Advice! To be sure of the strength of the supporting base, it is recommended to add another 30% strength plus. In this case, the building will definitely withstand all the loads.
- Mark the construction site taking into account the basement.
- Outline the contours of wall panels and load-bearing partitions.
The last stages are difficult for an unprepared master to work independently, so it is best to seek help from a professional. The specialist will tell you exactly what size and format to equip the proposed basement floor so that it meets all the needs of the developer.
Foundation types

Sometimes the arrangement of the cellar is impossible due to the fact that the soil has a low bearing capacity. Therefore, it is worth knowing the types of foundations suitable for the basement:
- Pile base. Suitable for all types of soil except heavy. The operation of the ground floor is not difficult due to the special specifics of the structure of the entire building.
- slab foundation possible on weak soils with high water saturation. It is also possible to build a base in this case, but it will resemble a cube closed on all sides, on which the entire mass of the structure will lie.
- Strip foundation suitable for all types of soil, the construction of the base here also does not present any problems.
As for the width of the foundation, it depends on the characteristics of the wall panels of the house. Let's say this is a frame house with a basement floor, the dimensions are as follows:
- The pile base is 300-500 mm, while the thickness of the wall panels can be equal to the foundation. The construction does not have to be supplemented with ventilation holes, since the technology already implies these features.
- The slab base recommends the width of the foundation equal to the width of the walls of the basement.
- A shallow strip foundation is built along a width equal to the walls of the zero floor, but only if the zero level is not supplemented with a concrete screed.
As for waterproofing, it is recommended to perform at least 2 layers. In this case, coatings matter: it is necessary to cover all vertical and horizontal elements of the structure, as well as joints adjacent to the ground. For waterproofing, roofing material, roofing felt, mastics on bituminous bases are used.
Stages of building a basement

Step-by-step instructions will tell you how to make a basement, and photo and video materials will give answers to all questions. It’s worth starting with processes, the implementation of which is mandatory, regardless of the foundation and type of structure:
- Foundation laying;
- Filling works;
- Waterproofing, insulation;
- Facing;
- Installation of floors, ceilings.
So, how to build a ground floor or cellar in your own house.
Foundation laying, pouring

- Mark the site, dig a pit at least 500-600 mm deeper than the underground part of the bearing base;
- Perform backfilling of gravel, sand with a thickness of 100 mm or more;
- Tamp the bedding, spill it with water and then the base is poured with concrete mix (M100 grade). Filling thickness not less than 5 cm;
- After the mixture has dried, waterproofing is laid (in 2 layers), a concrete floor slab is poured;
- An external formwork is being constructed, for which shields or boards are used;
- Be sure to make a reinforcing frame inserted inside the formwork;
- In places where wall panels are erected, a reinforcing bar is installed;
- Filling is carried out with concrete grade M250, M300 and higher;
- Plate thickness from 200 mm;
- Tamping is carried out around the entire perimeter of the fill;
- The drying process lasts 4-5 weeks;
- At the same time, it is possible to start the construction of formwork for wall panels and reinforce the walls longitudinally with reinforcement bars, which are tied up with the previously set bars in a vertical position;
- Be sure to provide openings for doors;
- Communications are then mounted in pre-laid metal pipes;
- The walls are poured both in layers and at the same time. When pouring in layers, each layer is compacted, while the next layer can be poured immediately, without waiting for the previous one to dry.
Important! The whole structure gains strength only after 28-30 days!
Waterproofing, insulation works

To see how to make the basement of the house warm and protected, watch the video. For waterproofing, adhesive-type compositions are used, but waterproofing should be done with penetrating materials that do not violate steam exchange processes and increase the strength of the structure.
In this case, the foundation frame should also be isolated, for example, with polystyrene foam plates, the fastening of which is carried out with a conventional adhesive solution. All that remains is to fill in the soil around the entire perimeter of the building and you will get a warm ground floor. Backfilling is carried out either with soil or sand, if the soil masses are large and hard.
Wall cladding, floor and ceiling installation

As for facing works, they are carried out with materials chosen by the developer. Natural stone, styrofoam-based slabs perform well, or you can choose siding. Interior decoration is also simple, depending on the purpose of the premises. Do not forget about communications, heating and additional thermal insulation of wall panels. Material for interior decoration is preferable with good moisture resistant qualities.
To begin with, the floors should be insulated with a sand cushion, then a roofing material should be laid, a reinforced grate on it, followed by pouring concrete mixture (M400 grade). Insulation with a “warm floor” system is allowed, on top of which a concrete screed is already mounted.
Overlappings are made depending on the chosen technology:
- Monolithic reinforced concrete slab;
- Prefabricated monolithic slab;
- Lumber cover.
For heavy slab elements, it is necessary to build a formwork, then fix the structural posts in 100 cm increments, make a reinforcing belt and install it, then pour a 200 mm thick concrete slab. Be sure to wait for the overlap to dry, and then proceed to the next stages of work.
Block plinth construction

The construction of houses with a basement ground floor can be made from any material, so you should take into account different technologies for arranging the basement. For example, a concrete block is suitable. Possessing strength, non-susceptibility to decay, the material copes well with loads and at the same time the cost of the project is significantly reduced in price.
Blocks are placed around the entire perimeter of the building, the connection is made by means of a cement mixture. It is only necessary not to forget that the wiring of communications will require gaps that are previously left between the blocks. But as for ventilation, the holes are equipped no lower than 150 mm from the ground level and it is better to cover them so that debris does not get in.
Important! If a basement floor is being built above ground level from FBS blocks, then openings for windows are needed.
A foam concrete block is also suitable, and the principle of operation is exactly the same as with FBS blocks, concrete. A thin layer of mortar is laid on the foundation, then the installation of the first row, the cubes are wetted and the next row is laid. Be sure to align all rows vertically and horizontally. It is not bad to waterproof each row, and in several layers.
Construction of a basement in a finished house

Even if you have a house that has been in operation for a long time without a basement, no one has canceled the opportunity to build a basement. To do this, you will have to perform many processes, but you get an excellent home cellar. The work is pretty simple:
- The site is marked for digging, taking into account the boundaries of the foundation;
- The soil is removed to the level of the desired depth;
- Wall panels of the future basement from blocks are being equipped;
- Reinforced concrete floor is poured;
- Works on laying ventilation, waterproofing, insulation are being carried out.
The last step is finishing the basement. However, when digging a pit for a basement or basement, you need to consider:
- The height of the ground aquifer;
- Bearing capacity of the soil;
- Service life and strength of the foundation;
- Weight load on the foundation of the house.
As a rule, work is carried out only after numerous checks and requires experience, so it is better to entrust the arrangement of the basement in an already finished house to professionals.
When laying the project of a house with a zero floor, it is necessary to select materials for the construction of the basement. Of course, if this is a house made of foam blocks, it is easier to deal with the basement floor, the same elements will do. For a brick house, where the foundation is required to be strong and reliable, concrete pouring is better suited, which will strengthen the frame of the entire structure.
A considerable number of people still do not understand the special need for the construction of a basement floor, while others, in turn, simply cannot imagine how this reliable and functional home can do without this room. Despite the fact that the basement cannot be attributed either to or to a full-fledged first floor, it increasingly takes its place at. So why is it so popular?
It looks like a finished basement at home
By building a basement, you get the following benefits:
- Tangible space savings on your land, which is essential when the area is not too large;
- Possibility to equip in this room or a number of other services (sauna, billiard room, etc.);
- Ideal for terrain with complex multi-level terrain;
- The possibility of using the roof as a terrace;
- Enlargement of the architecture of the whole house.
The disadvantages of the basement floor include high financial costs and the complexity of construction work.
During the construction of the base, as a rule, materials with a porous structure are used to get rid of excess moisture. Otherwise, once inside the structure, the water quickly freezes with the onset of frost, which over time will destroy the basement surface, and, accordingly, the structure in general.
 Existing types of plinth
 To cope with this danger, the base is covered with paints and varnishes. This not only prevents the destruction of the plinth from atmospheric influences, but also makes it attractive in appearance.
When choosing the appropriate paintwork, it is important to take into account the degree of its vapor permeability.
The paint that covers the base must serve as a reliable moisture-proof film: thanks to this, water will not get into the substrate. At the same time, it will pass water vapor, which serves to further eliminate excess moisture. Also, when buying a paintwork, it is important that it is light and weather resistant, and also meets fire safety requirements. For at least three years, the coating must remain visually attractive.
Before painting the plinth, a strengthening primer must be applied to its surface.

This will provide good adhesion and increase the strength of the surface. When painting, it is desirable to use only water-soluble alkali-resistant paints with an acrylic resin base, which fully meet all the requirements regarding the processing of plinths.
If the structure of the surface to be coated is porous, it will also be necessary to apply a special water-based acrylic impregnation.
As a result, the mineral base will effectively repel water.
The ground floor is not only a beautiful appearance of the building, but also an extension of its functionality. The basement can become a utility space, a bathhouse can also be placed here, it can be turned into. The light pits provided for the basement windows are a kind of additional rooms that serve to keep the heat well.
 Pit installation scheme
 Usually the basement of a private house does not involve the arrangement of premises for housing. However, if the ceilings are high enough, they can arrange a billiard room and a sauna here. If the level of the room in the basement is at the lowest point of the relief, it would be advisable to equip a garage here. Thanks to this, you will get maximum free space and save on work on arranging the entrance to the garage.
When rooms are designed, options for their lighting are thoroughly thought out. In addition, proper design will save energy. If non-technical rooms will be located in the basement, it should be borne in mind that windows that let in sunlight will be an excellent addition to electric lighting.

The relevant standards stipulate that the height of the ceilings in such rooms should not be less than 2.5 meters. Due to this, the building will acquire a more pleasant appearance, and thermal insulation will improve several times.
There are several ways to build a basement under the house:

How is the construction site ready for work?
Laying the foundation with the simultaneous construction of the basement requires a thorough soil analysis at the construction site, as well as determining the location of groundwater. If they are found at a depth of one and a half meters, then the base should be built no higher than one meter.
With a high-quality leveling of the site for construction, it may be necessary to apply an additional layer of ground coating. If groundwater is located near the surface of the earth, a preliminary drainage of the land will be required. Drainage systems designed for this purpose will help to easily cope with this task. Their use will allow you to lay more deeply yourself.
 The scheme of the drainage system during the construction of the basement
 How to prepare a pit at a construction site
All work begins with the appropriate marking of the construction site, after which, guided by the project of the house, the foundation pit is dug with the help of an excavator. If construction work is carried out in the spring, then there is a possibility of water accumulating in the pit, which in the future will have to be disposed of with a pump. Another way is to wait until it soaks into the soil naturally.
Once the required depth has been reached, the bottom of the excavation is carefully leveled, and the alignment of the corners requires special attention. When the pit is dug, its marking is carried out on the basis. Trenches for load-bearing walls must be dug to a depth of at least 30 centimeters. When the trench is ready, crushed stone is poured to the bottom of it, then reinforcement is laid, and only then concrete is poured. It takes approximately three weeks for the concrete mortar to dry completely.

How to arrange waterproofing
The waterproofing device provides reliable protection of the foundation from moisture. It consists in pouring a concrete blind area around the perimeter of the proposed building, while the foundation itself is protected from the outside with a rolled waterproofing material. In most cases, hydroisol is used for this - a fairly effective material that has a very reasonable price.
The efficiency of this system can be improved, for which specialists offer an additional drainage system with external waterproofing. To do this, you need to step back half a meter from the base and dig a hole into which clay, crushed stone and concrete mortar are then laid. This should be done with the utmost care, because reliable waterproofing is a guarantee of durability and reliability of the whole house as a whole.
 This is how the basement waterproofing is installed
 How to make a basement from foam blocks
- one of the most common materials chosen for the construction of a "residential basement". It allows you to carry out high-quality engineering networks and makes it possible to leave room for windows. It is better to use special equipment to work with it: manually carrying out work will require considerable time. When using foam blocks in favor of a prefabricated foundation or a strip foundation, the choice is most often made.
If a basement floor is supposed to be in the house, then the foundation is poured with a thickness of half a meter or more. To increase the strength of the walls, masonry is made with bandaging of the seams. For bonding, a cement-sand composition is used. It is necessary to lay the blocks as evenly as possible, otherwise, over time, difficulties will arise with finishing work.

It is also worth noting the size of the windows and making them as large as possible: more street light will penetrate into the basement floor.
It is necessary to leave ventilation holes, for which holes are left between the blocks at ground level.
Holes for ventilation are left between the blocks at the same level with the ground. They should be well covered with nets, and then garbage will not get inside the room.
The foundation of the basement should be about a meter above ground level. The blocks are connected to each other by means of the so-called leveling belt. And now, finally, the floors of the first floor can be laid.
Most often, when arranging the belt, reinforced concrete is used, but brickwork can also be dispensed with. The first option, when reinforcement poured with concrete is laid on the plank formwork, is considered more reliable.
 Formwork installation example
 This results in a solid semi-underground structure. It also serves as a reliable basis for the subsequent construction of the floor.
How to build a monolithic basement
The basement floor, which is built from monolithic concrete, has several advantages at once: it has good moisture resistance, high strength, and short construction times. In addition, there is the possibility of arranging a room for almost any purpose, including a garage or a pool.
Properly arranged waterproofing allows you to build a basement to install a basement, even if the soil environment is wet. However, for this, the foundation walls must have the most rigid adhesion to the floor slabs of the basement.
Construction technology:
- First, the site is marked for the upcoming construction work, after which a foundation pit is dug for future development. The pit is dug to a depth that is about half a meter below that where the underground part of the foundation will be located.
 This will allow in the future to lay a waterproofing sand and gravel cushion. When choosing soil with an excavator, uneven foundation penetration should be minimized, for which it is recommended to manually remove the last soil layer. Areas that are too deep should not be backfilled, as this may lead to further deformation of the floor slabs.
 - Then comes the turn of the arrangement of the drainage system. If there is a quicksand, a drainage device should be provided to avoid stagnant water. For this, a 10-centimeter backfill is made: gravel and sand. These layers must be carefully rolled. To maximize the compaction of the sand, it is also poured several times with water.
- Concrete grade M50-M100 is poured onto the leveled pillow. The concrete layer should be five centimeters: the base is leveled in order to lay the floor slab, while waterproofing functions are performed.
 An example of a waterproofing pad for a basement floor
 Rolled waterproofing (for example, roofing felt) is laid immediately after the concrete has hardened. Waterproofing must be laid in two layers and fastened in a flowing way or using bituminous mastic.
- After preparing the base, the external formwork is built. First, the floor slab is poured, it will be the support, the foundation walls will “grow” from it. For the manufacture of formwork are wooden panels or boards. To connect them together, self-tapping screws and bars are used. To increase the strength of the base, the plates are reinforced. This is done in two directions - longitudinal and transverse - the reinforcing bar must be embossed, with a diameter of 10 centimeters or more (the exact dimensions are determined during preliminary calculations). For laying reinforcement, special guides are used, they are fastened with a wire.
 In order for the walls to be rigidly and securely connected to the floor slab, reinforcing bars are used (mounted vertically).
 - After the formwork is installed and when the reinforcement is fixed, the foundation slab is poured with M250-M300 concrete (its thickness is at least 20 centimeters). And it is recommended to do it right away. If desired, concrete can be poured in small parts, but the slab will become less durable, seams with increased tensile stress may appear. It is desirable that concrete joints in such cases be located along the wall that is longer. After pouring concrete, the surface must be leveled and left for about a month until fully cured. At this time, formwork for the basement and foundation walls is being built.
- Wall formwork is built in the same way. Non-removable polypropylene shields are used during its construction, and this will simultaneously solve the issue of insulation. The reinforcement is laid in a direction longitudinal with respect to the walls.
 Scheme of laying reinforcement for pouring
 Reliability is attached to the binding of horizontal rods and vertical ones that are already fixed. With a three-meter depth of the foundation, the fortress is attached with two strapping belts, which are made both in the upper and lower parts.
- In the process of arranging the formwork, door and window openings are laid where it was previously provided for by the project of the house. There is a laying of special metal pipes - sleeves.
- Concrete is poured either immediately or in separate layers. The rule is this: a new layer must be poured even before the moment when the previous layer begins to set. Otherwise, you will have to wait another three days: if the concrete does not gain the required strength, it may collapse under the pressure of the layers covering it. Then you can lay the floors.
- From the outside, the waterproofing of the basement floor is carried out by gluing or coating. From the inside, it is best to use penetrating waterproofing: concrete becomes noticeably stronger and vapor exchange is not disturbed.
 Scheme of penetrating waterproofing of the basement
 The insulation of the basement from the outside is carried out with polystyrene foam plates, which are fastened with glue intended for this. To fix parts that protrude above the ground (optional), dowels specially designed for foam plastic are used.
- To fill the underground part, the soil that was formed when the pit was dug is used. The presence of solid particles in the soil is unacceptable, because they can damage the thermal and waterproofing, and are covered with coarse sand.
- For finishing the basement, the materials that decorate the walls of the building are suitable.
How to properly waterproof the basement and choose the right material
Why is basement waterproofing necessary?
During the construction process, for some reason, many people assign almost the last place to waterproofing work, believing that reliable protection from moisture can be done after the house with the basement is completely built. Of course, waterproofing can be done from the inside, but still the best option is to protect the walls from the outside.
External waterproofing will allow:

Most often they resort to the use of such types of waterproofing: penetrating, pasting, roll and coating.
Penetrating waterproofing
Penetrating waterproofing allows you to most thoroughly protect "underground housing" from high humidity. It is laid to a depth of about 90 centimeters in the thickness of concrete, fills small cracks, so that moisture has nowhere to seep. Once in the concrete, the insulation material that has penetrated there immediately forms a chemical reaction with its constituent elements, and as a result, solid crystals are formed. They fill the pores in the concrete, and there is nowhere for moisture to penetrate.
Benefits of penetrating waterproofing

How to make a penetrating basement waterproofing
The working surface is preliminarily cleaned of dust and debris. Then dry powder is stirred in water until homogeneous. Before laying the first layer of waterproofing, the surface of concrete structures is moistened. The next layer is poured after the first is absorbed. After such treatment, the structure should be moistened for several more days.
The insulation should only be applied to the slab after wetting, otherwise the material will not be able to penetrate to the required depth.

When it comes to waterproofing old buildings, it is required to clean and moisten the plates as carefully as possible. In this case, the penetration of waterproofing into concrete will be extremely deep. To apply a penetrating insulating layer, a brush with synthetic bristles or a mortar pump designed for this purpose are used. Moisture isolation work is carried out when it is warm outside.
Polymers, bitumen and synthetic materials - this is what roll pasting materials are made from for waterproofing the basement.
Absolutely all plinth structures must be carefully pasted over with roll insulation, while several layers of material are used for the outer walls. If the groundwater level is too high, up to five layers of waterproofing can be laid.
 An example of installation of pasting waterproofing
 The process of installing a waterproofing structure:
- The walls of the basement are pasted over with layers of waterproofing from the outside, while the sheets of material must overlap.
- So that the waterproofing material is not damaged, this is an installed block of reinforced concrete or a half-brick wall (located about a centimeter from the surface).
- The resulting space is filled with bituminous mastic.
- The protection of the waterproofing structure is an iron mesh, it is plastered from the outside.
The disadvantages of this kind of basement waterproofing: complex installation, the need for auxiliary protection of the material from defects, the possibility of pasting at an outdoor temperature of at least +10 degrees.
Coating waterproofing
This kind of waterproofing needs not only external, but also internal walls of the basement.

It carefully seals the slightest flaws in the working surface, which significantly increases the resistance of the walls to moisture.
External protection of the wall with mastic will prevent moisture from seeping into the room. Coating waterproofing is represented by such materials:
- Bituminous mastics;
- Polymer-bitumen mastics;
- Cement-polymer waterproofing.
The most cost-effective will be the use of bitumen-based mastic as insulation. True, it will last no more than five years, after which it becomes unusable, and moisture can penetrate into the basement. Therefore, periodically you will have to resort to repeated waterproofing of the room.
Cement-polymer and polymer-bitumen mastics, among other things, are significantly resistant to sudden changes in temperature. But these materials are afraid of mechanical damage: careful protection is required.


